I made one of my own that is mostly the same as CapnScurvy's original, but I changed a few things to my own personal preference:
- I drew it in PowerPoint and exported to .pdf, so it is all vector art instead of raster, resulting in the sharpest, most crisp-looking print possible.
- I changed up some colors to make it easier to see certain things
- I added another layer which is just a laminated line, making it easier to get bearings from one wheel to the next
- I angled all the numbers to be read from the outside of the ring vice the inside, minimizing the amount of upside-down reading
Here are a couple pictures of it. If anyone is interested, I can upload the .pdf, or even the original .ppt in case you want to customize it even further.
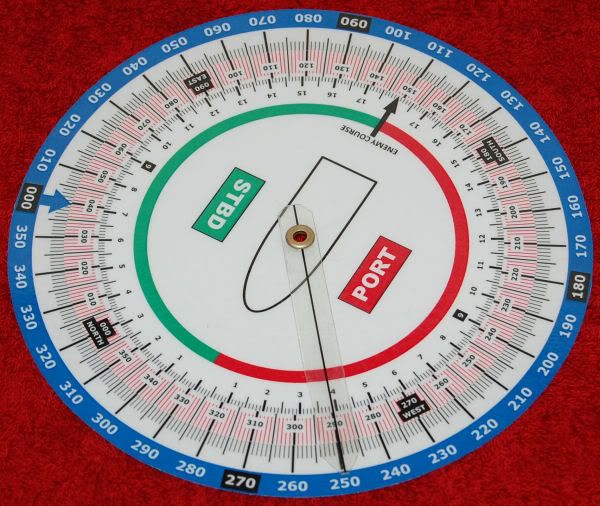
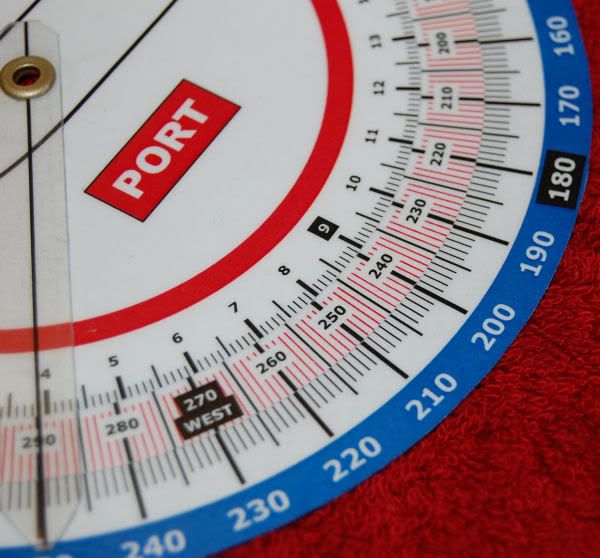
Some notes on how I constructed it:
- The 3 circles are plain paper printed on a color laser printer then laminated.
- The line (top layer) is just a line drawn on a label-maker, then laminated for rigidity. You could also print a line on transparency paper, then laminate that.
- I used an eyelet to hold it all together. You can get eyelets and eyelet tools at most craft stores (usually near clothing buttons, or scrapbooking stuff.) I got mine at Wal Mart: $7 for the tool and about 50 eyelets.
- Punching the holes was tricky. I used a needle to punch out the circumference I needed based on the size of the eyelet. I think they make eyelet punches, but they didn't have them when I bought the eyelets.
A big thanks to CapnScurvy for making the original one! Hopefully this one gets the seal of approval from him.