
|
|
SUBSIM: The Web's #1 resource for all submarine & naval simulations since 1997
|
SUBSIM: The Web's #1 resource for all submarine & naval simulations since 1997 |
 04-25-14, 11:31 AM
|
#11 |
|
Growing Old Disgracefully

 Join Date: Dec 2012
Location: Hythe - Southampton
Posts: 9,609
Downloads: 1133
Uploads: 0


|
Last updated 16th April 2015
These Tutorials will show you how to do the following. Tutorial 1. How to Take A Snapshot. Tutorial 2. How to Disable the Generic File Patches. Tutorial 3. How to Restore a Snapshot. The Snapshot Folder comes in the Generic File Patcher (GFP) Download. The Snapshot Folder is used to store taken Snapshots usually when changes have been made to the GFP and the decision is to have a new Snapshot record stored. It is not essential to use this Snapshot Folder in its current position. A Folder of any name and placed wherever you want to keep can be made. Tutorial 1 Take Snapshot 1. Open the GFP so you can see all 9 Patchers. 2. There is no need to open any of the 9 Patchers with this Tutorial. 3. Go to the File Tab and Click on it. (Picture 1) 4. Select Take snapshot (Picture 1) Picture 1 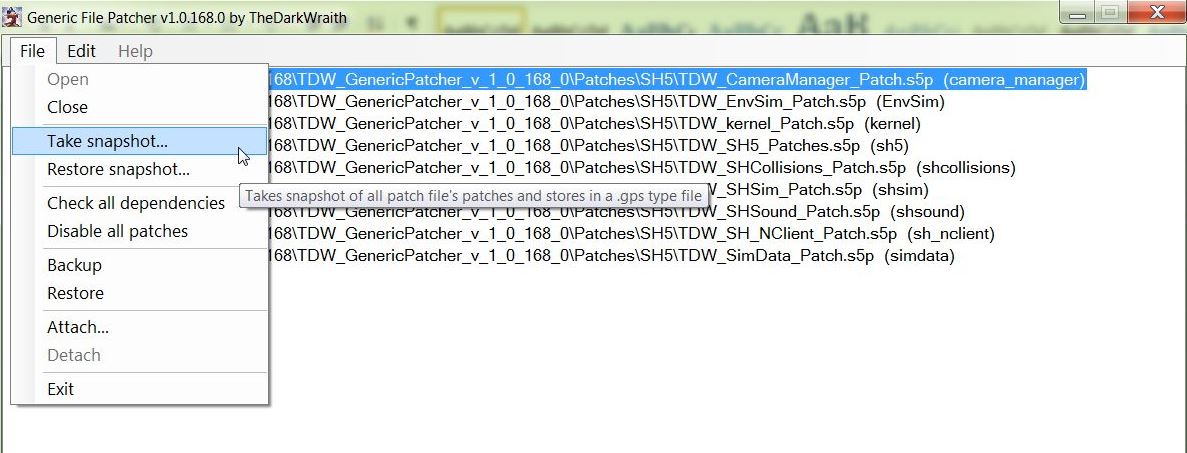 5. Find the Snapshot Folder if it does not automatically show it. 6. File Name is where you enter a description of your Saved Snapshot. (Picture 2) 7. Enter a File Name (Picture 2) Picture 2 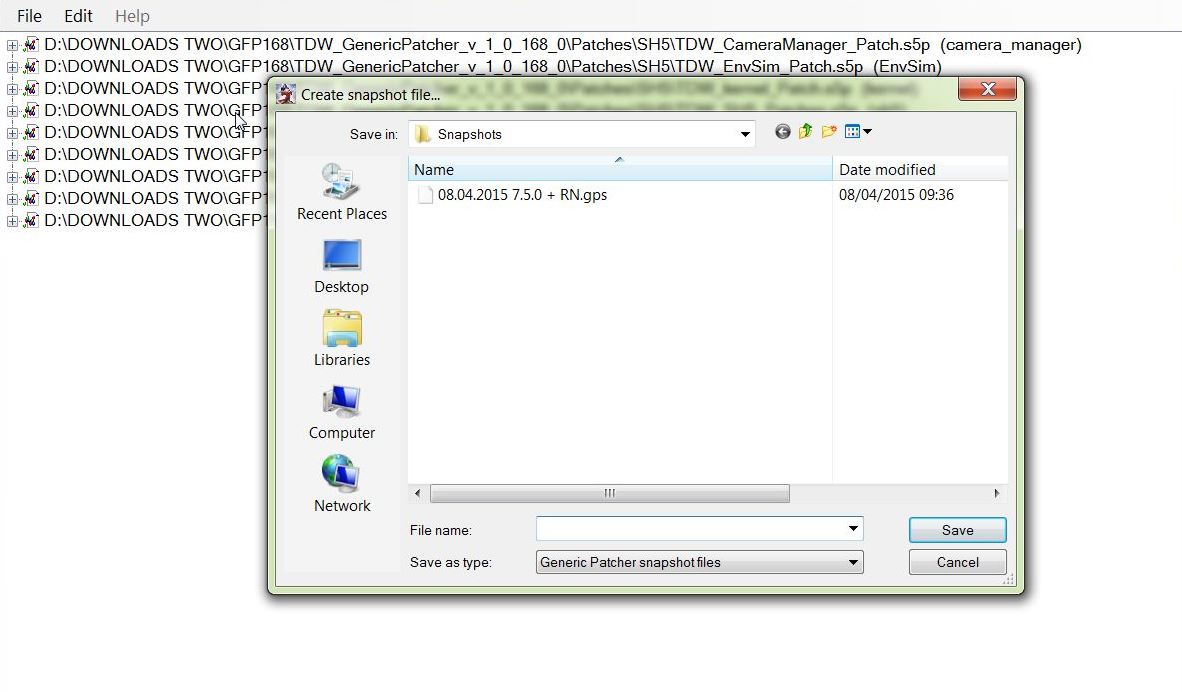 8. For this Tutorial I have used the File Name 16.04.2015 7.5.0. + RN (Picture 3) 9. I have used extra information that reminds me that I am using NewUI 7-5-0 version and Real Navigation. (Picture 3) 10. Enter the File Name and Press Save. (Picture 3) Picture 3  11. The Saved gps File is confirmed. (Picture 4) 12. Press Ok to complete. (Picture 4) Picture 4 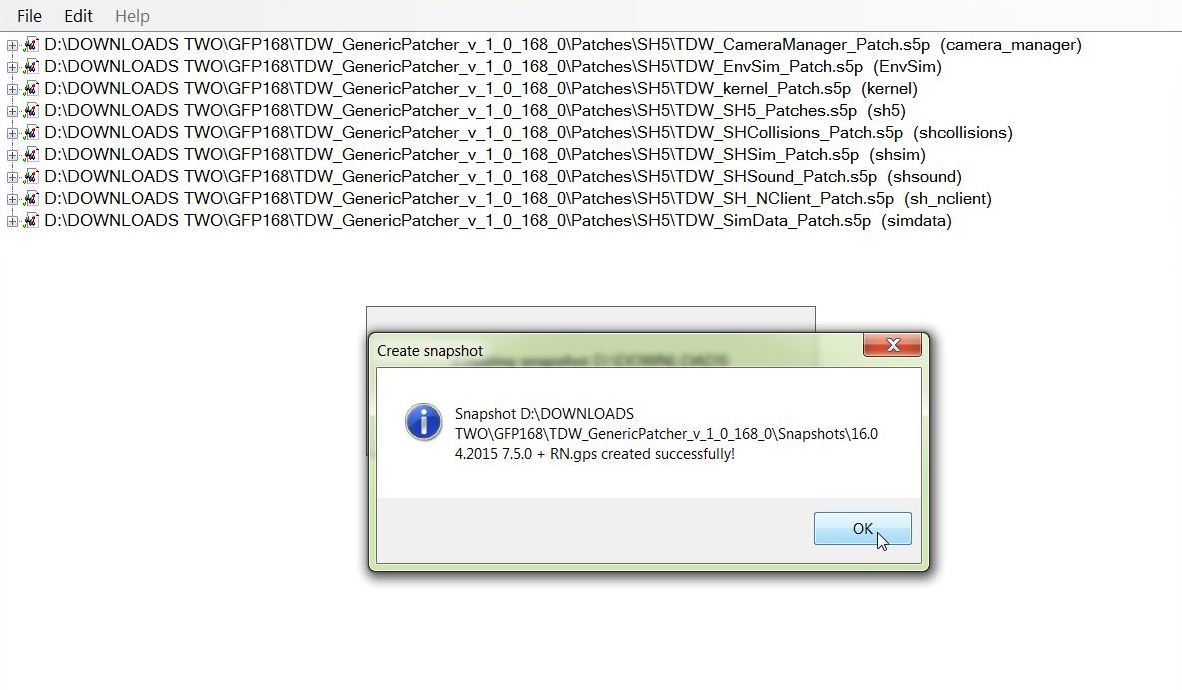 13. Tutorial Completed. Tutorial 2 Disabling Generic File Patches 1. Open the GFP so you can see all 9 Patchers. 2. There is no need to open any of the 9 Patchers with this Tutorial. 3. Go to the File Tab and click on it. (Picture 1) 4. Select Disable all patches (Picture 1) Picture 1 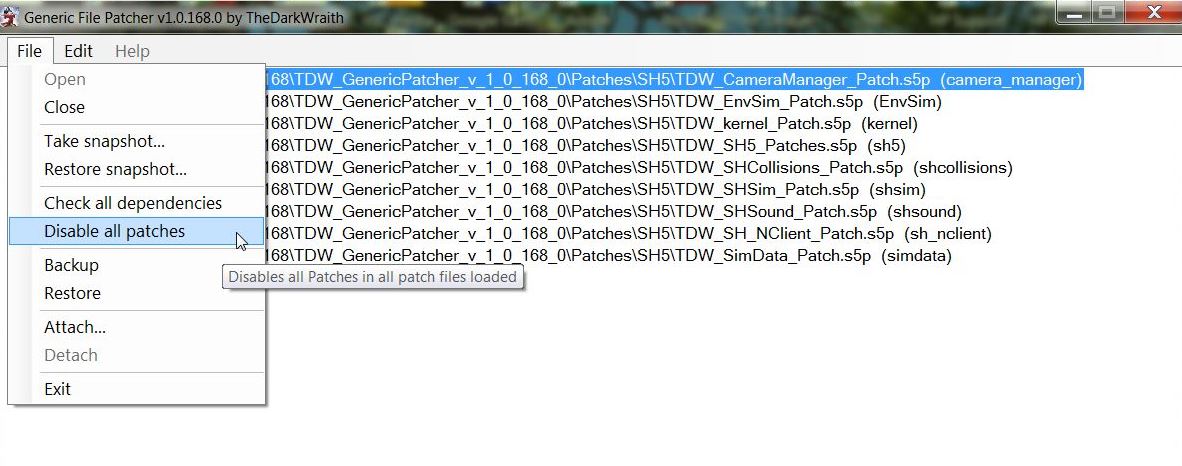 5. The GFP is shown in the process of Disabling Patches (Picture 2) Picture 2 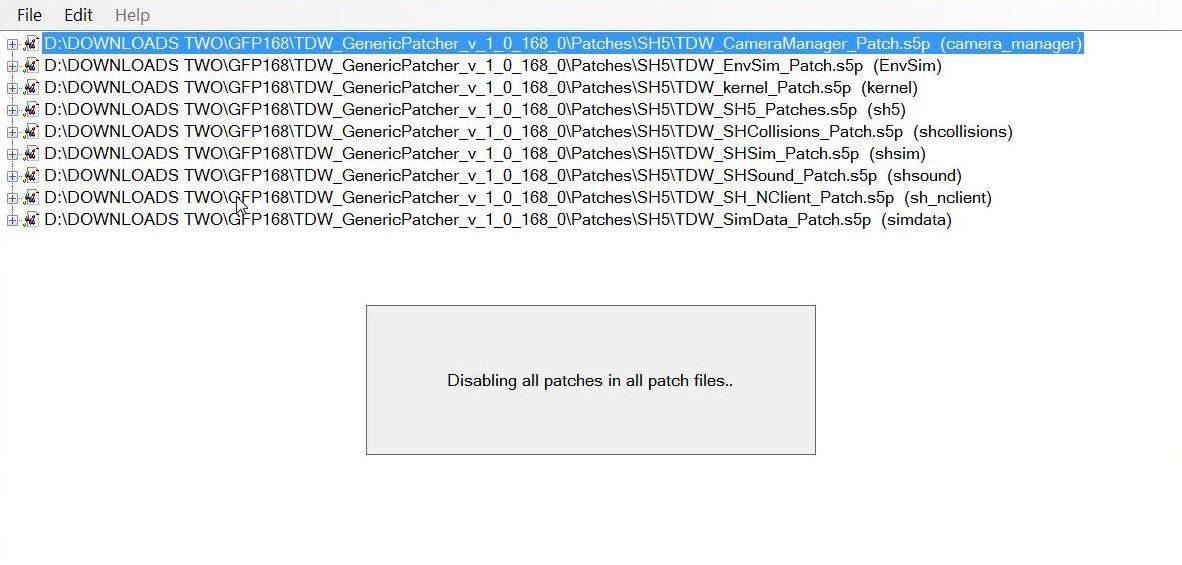 6. When all the Patches have Disabled you will see this confirmation. (Picture 3) 7. Press OK to complete. (Picture 3) Picture 3 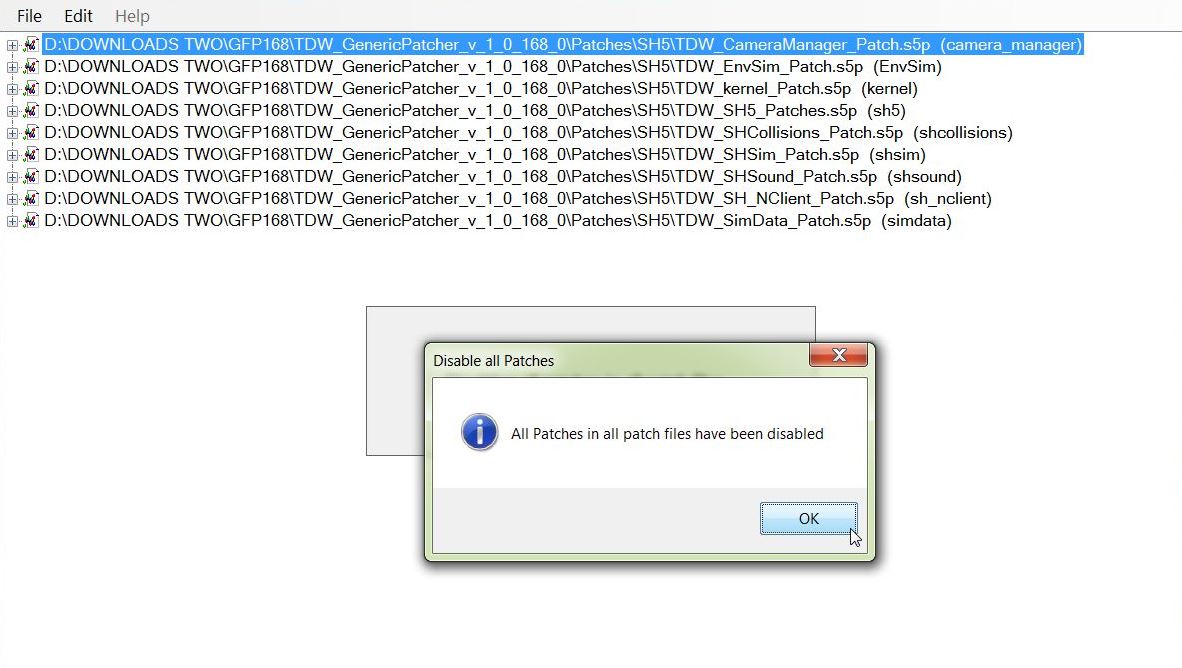 8. Tutorial Completed Tutorial 3 Restoring a Snapshot 1. Open the GFP so you can see all 9 Patchers. 2. There is no need to open any of the 9 Patchers with this Tutorial. 3. Go to the File Tab and click on it. (Picture 1) 4. Select Restore snapshot (Picture 1) Picture 1 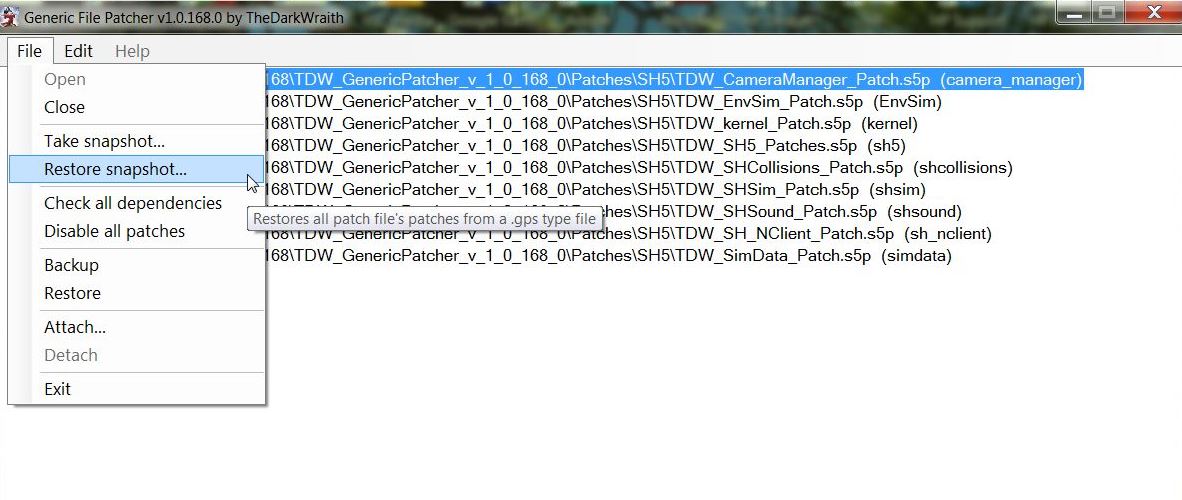 5. Find the Snapshot Folder if it does not automatically show it. 6. Double Click with the Mouse on the Snapshot you want to Restore. (Picture 2) 7. Or Press Open (Picture 2) Picture 2 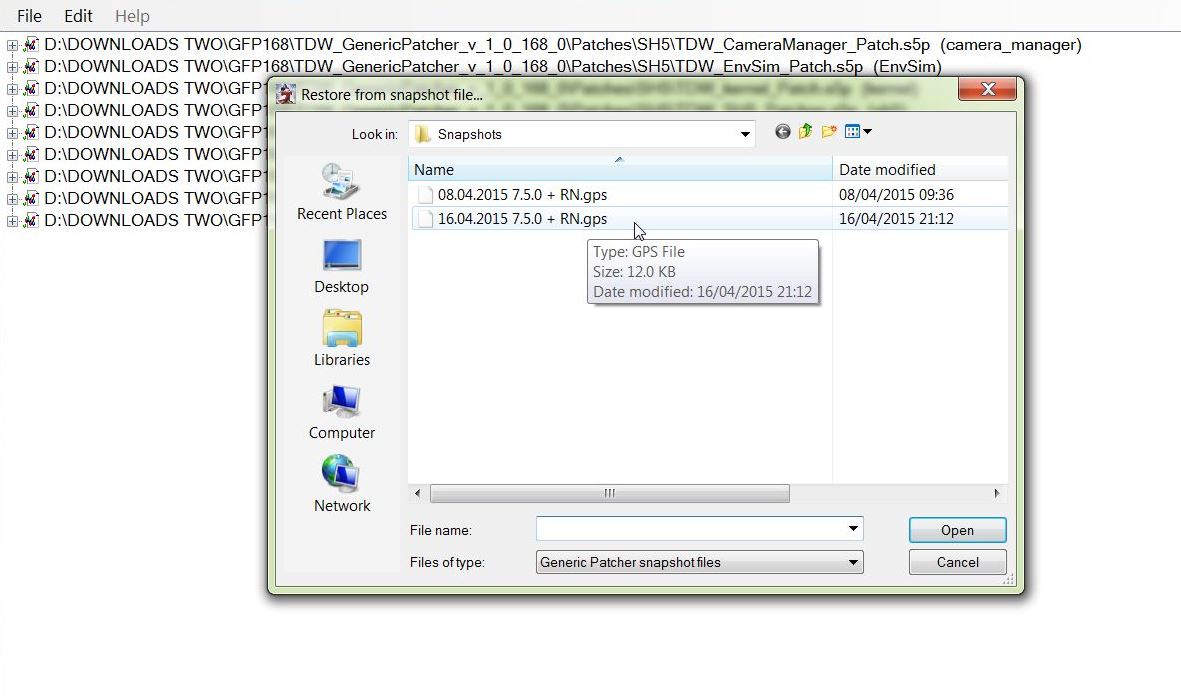 8. The GFP is shown in the process of Restoring all of the Patches (Picture 3) Picture 3 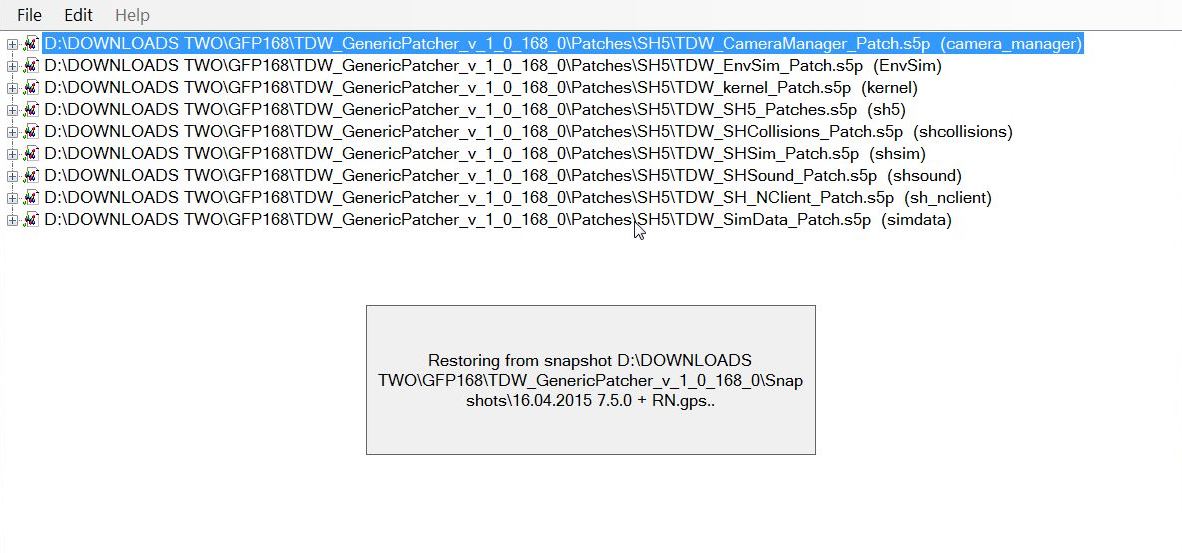 9. When all the Patches have Restored you will see this confirmation. (Picture 4) 10. Press OK to complete. (Picture 4) Picture 4 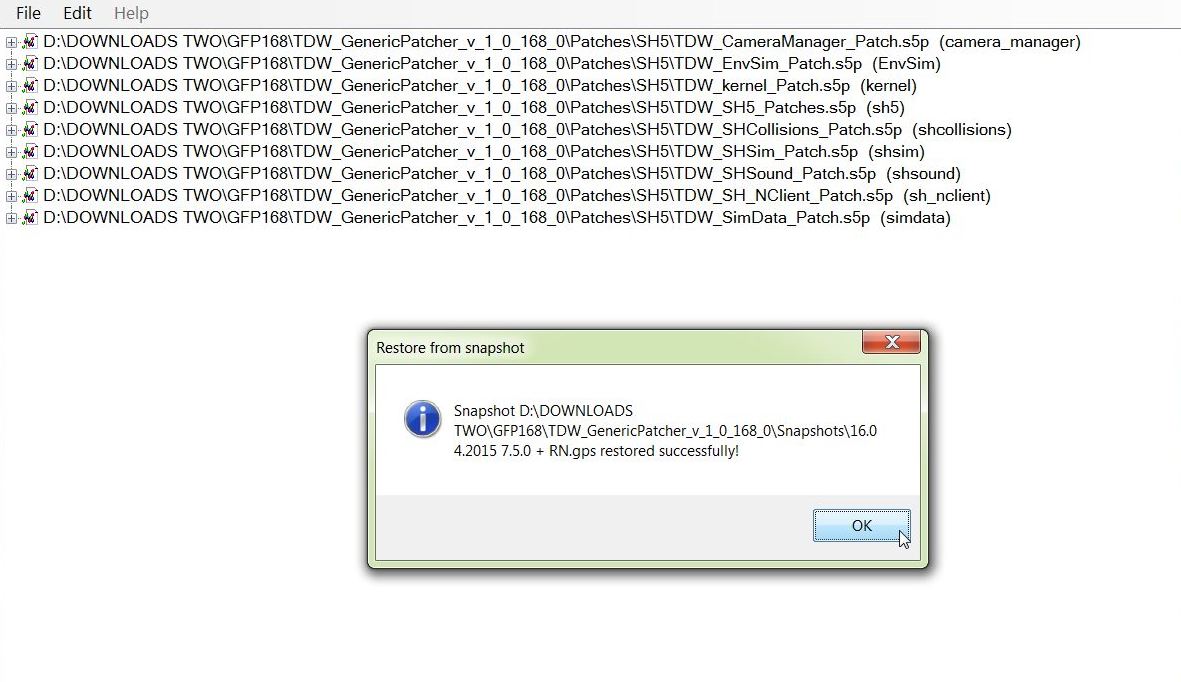 11. Tutorial Completed. Other Generic File Patcher Posts Post # 2 Installing TDW's Generic File Patcher Post #3 How To Make Changes In TDW's Generic File Patcher And Run Administrator Post #39 TDW Generic File Patcher Replacing My Old One With A New One! Post #41 TDW's Generic File Patcher Changing The Map Colours Post #56 TDWs Generic File Patcher Illustrated Settings You Can Use in Yours Courtesy acknowledgement to TheDarkWraith
__________________
LSH3-2015 <> TUTORIALS <> ALL YOU NEED TO KNOW <> ALL IN ONE PLACE SH4 <> TUTORIALS <> HOW TO DO IT <> INFORMATION <> DOWNLOAD LINKS SH5 <> TUTORIALS <> HOW TO DO IT <> INFORMATION <> DOWNLOAD LINKS Always Here To Help A Fellow 'Subber' | Need An Answer to A Question Just Send Me A PM Last edited by THEBERBSTER; 10-04-19 at 04:21 PM. Reason: Replaced missing pictures |

|

|
|
|


 Threaded Mode