
|
|
SUBSIM: The Web's #1 resource for all submarine & naval simulations since 1997
|
SUBSIM: The Web's #1 resource for all submarine & naval simulations since 1997 |
 05-29-16, 10:12 AM
|
#1 |
|
Growing Old Disgracefully

 Join Date: Dec 2012
Location: Hythe - Southampton
Posts: 9,609
Downloads: 1133
Uploads: 0


|
__________________
LSH3-2015 <> TUTORIALS <> ALL YOU NEED TO KNOW <> ALL IN ONE PLACE SH4 <> TUTORIALS <> HOW TO DO IT <> INFORMATION <> DOWNLOAD LINKS SH5 <> TUTORIALS <> HOW TO DO IT <> INFORMATION <> DOWNLOAD LINKS Always Here To Help A Fellow 'Subber' | Need An Answer to A Question Just Send Me A PM Last edited by THEBERBSTER; 02-27-23 at 09:11 PM. |

|

|
|
05-29-16, 10:12 AM
|
#2 |
|
Growing Old Disgracefully
Join Date: Dec 2012
Location: Hythe - Southampton
Posts: 9,609
Downloads: 1133
Uploads: 0
|
Installing Or Re-installing SH3 Correctly > OS Compatibility Modes > SH3.exe As An Administrator
Picture 1 > Where to install. You can install SH3 on any drive on your system > A:B:C: For this tutorial I am using > Drive D: Make a new folder on the drive you are going to install the game. The name you use cannot contain spaces. No > Silent Hunter 3 Yes > SilentHunter3 For this Tutorial I have made a folder called > SHIII  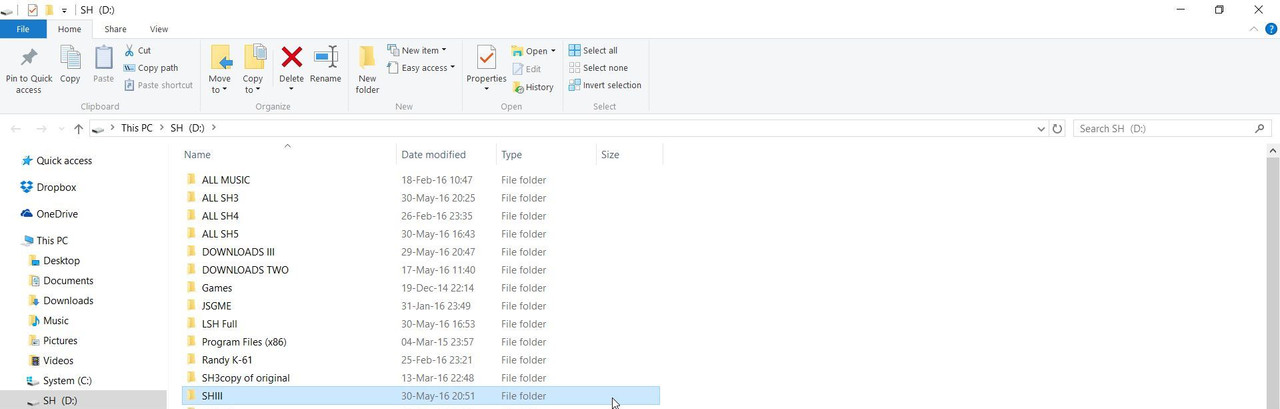 Picture 2 > Shows installing from a dvd. 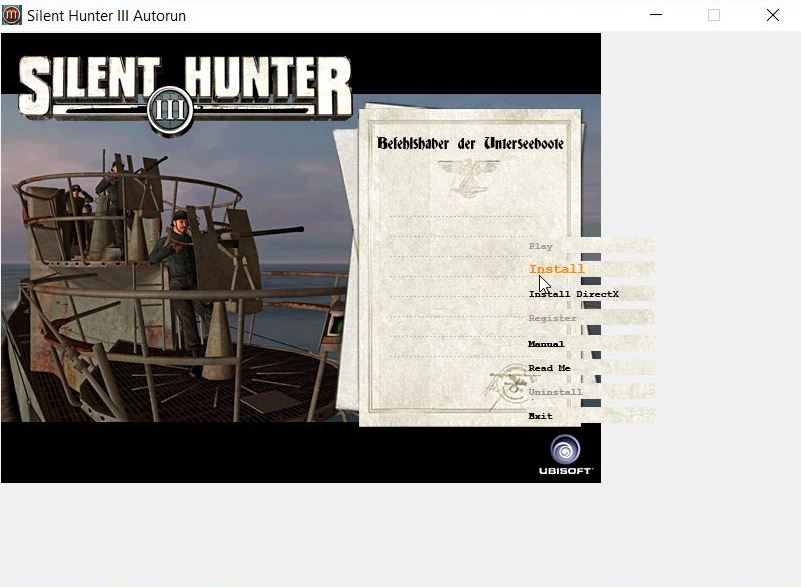 Picture 3 > Where Not To Install SH3. You can see the default installation is C:\Program Files (x86) Do not install in the default > Program Files (x86) folder.  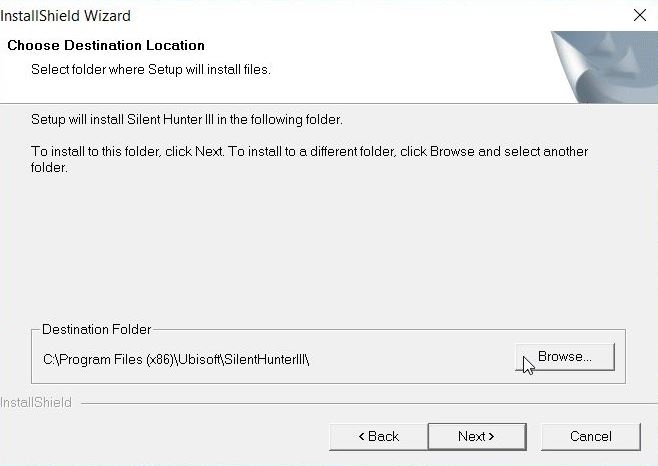 Picture 4 > Locating your > New Game Folder. The Tutorial > New Game Folder > SHIII Use the Browse Button to locate your > New Game Folder > SHIII on the D: drive. Press Ok to confirm.  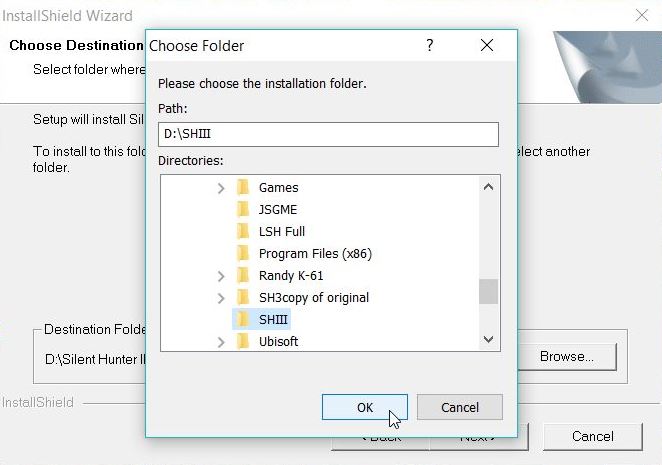 Picture 5 > This should show D:\SHIII as the installation path. This picture has been taken from a different game installation. Apologies for any confusion.  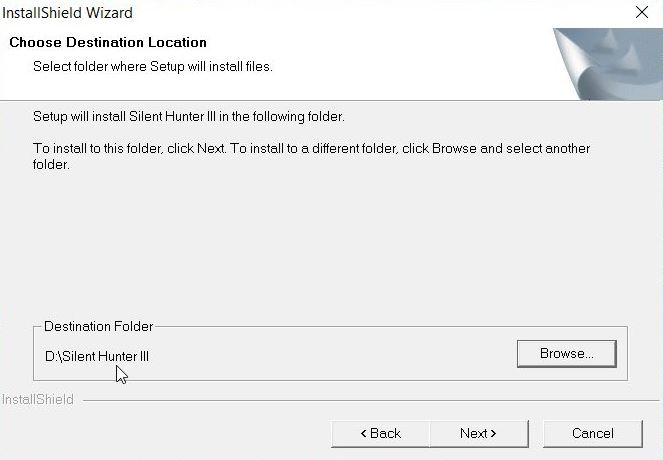 Picture 6 > You do not need to register your game.  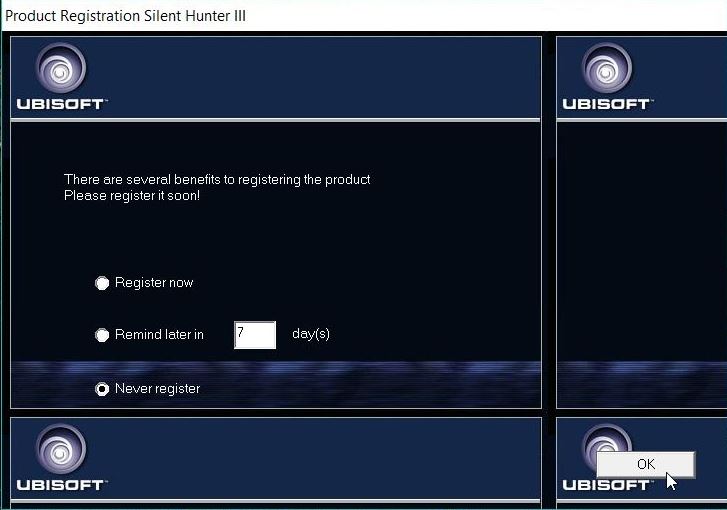 Picture 7 > Click finish to complete the installation.  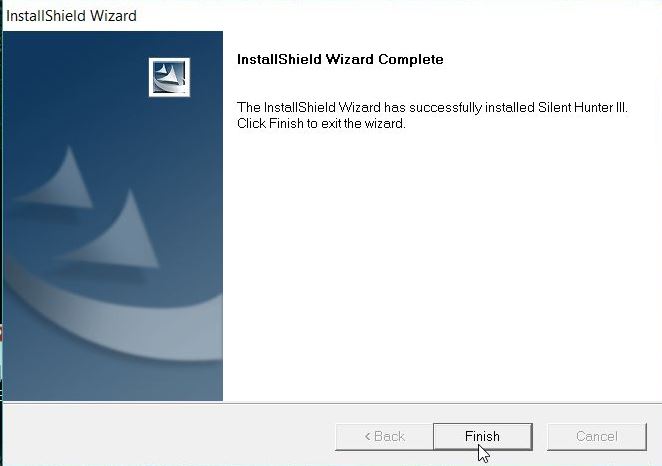 Picture 8 > Shows the SH3.exe is using the latest game version v1.4.0.1 > v1.4b  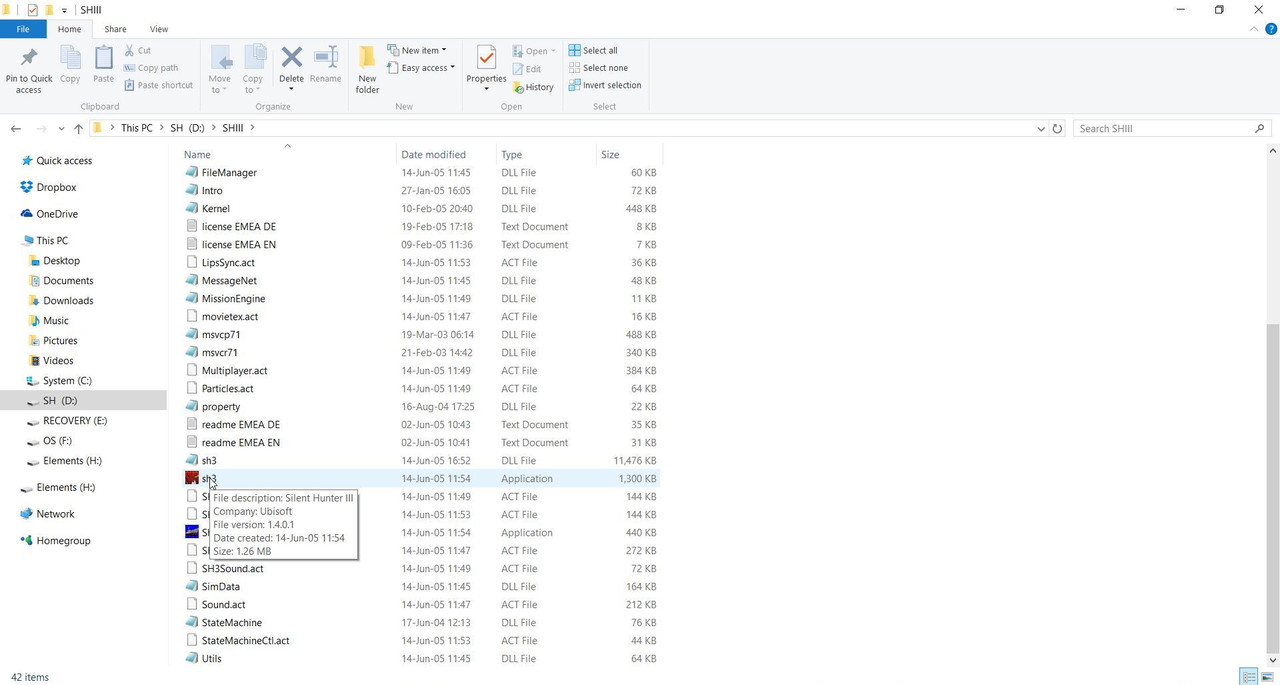 Picture 9 > Right click with the mouse on the > SH3.exe and > Select Properties.  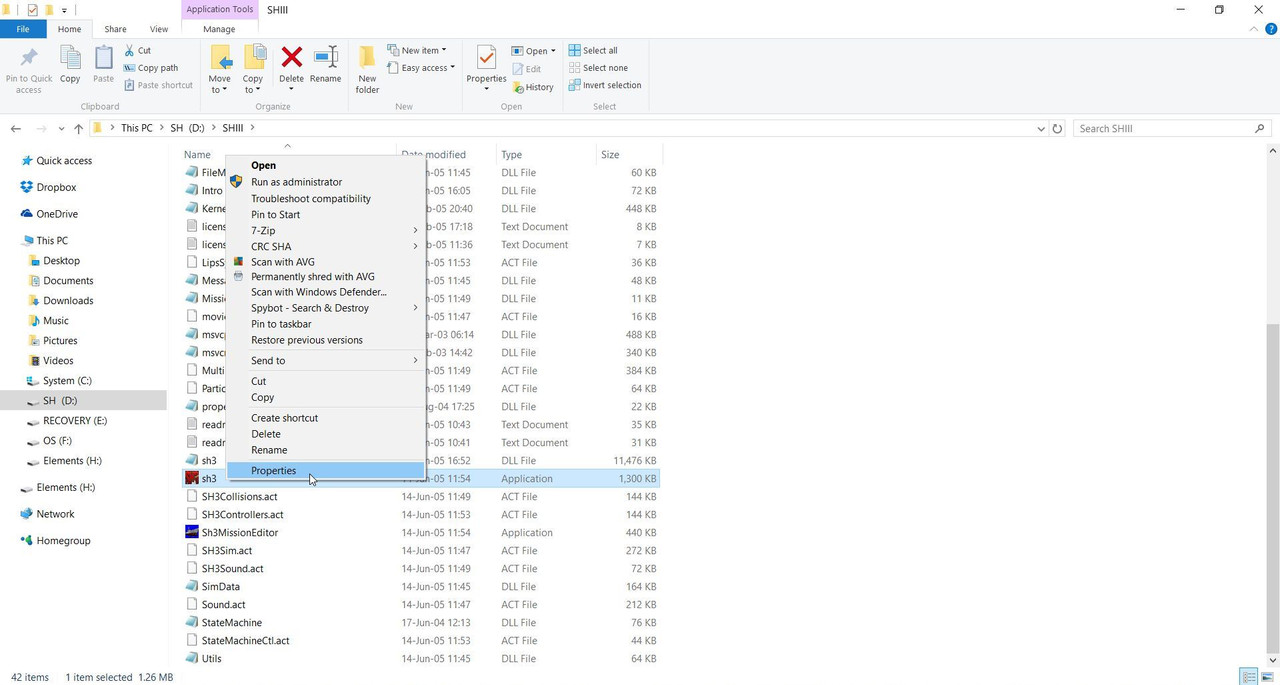 Picture 10 > How to Run As Administrator. Select the > Compatibility Tab Tick the box > Run this game as an Administrator.   Picture 11 > How to change the Compatibility Mode. Tick the box > Run this program in Compatibility Mode for OS10 select OS7. OS8.1 only if needed try OS7. OS7 only if needed XP. You will know if a compatibility mode is needed if your game crashes at any time during the loading process.  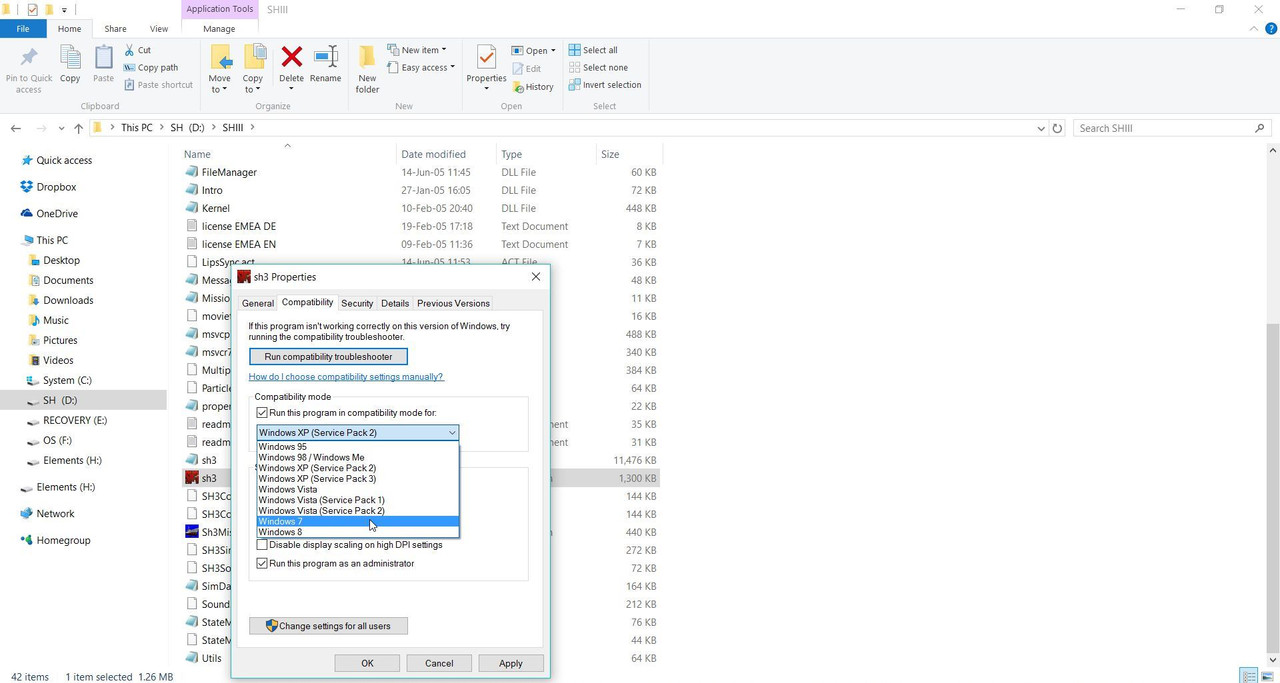
__________________
LSH3-2015 <> TUTORIALS <> ALL YOU NEED TO KNOW <> ALL IN ONE PLACE SH4 <> TUTORIALS <> HOW TO DO IT <> INFORMATION <> DOWNLOAD LINKS SH5 <> TUTORIALS <> HOW TO DO IT <> INFORMATION <> DOWNLOAD LINKS Always Here To Help A Fellow 'Subber' | Need An Answer to A Question Just Send Me A PM Last edited by THEBERBSTER; 08-19-18 at 06:58 AM. Reason: Replaced missing pictures |
|
|
|
|
05-29-16, 10:13 AM
|
#3 |
|
Growing Old Disgracefully
Join Date: Dec 2012
Location: Hythe - Southampton
Posts: 9,609
Downloads: 1133
Uploads: 0
|
LSH3-2020 Installation Instructions & Download Link
These instructions are available as a download in pdf form from the download page see limk. Picture 1  Picture 2  Picture 3  Picture 4 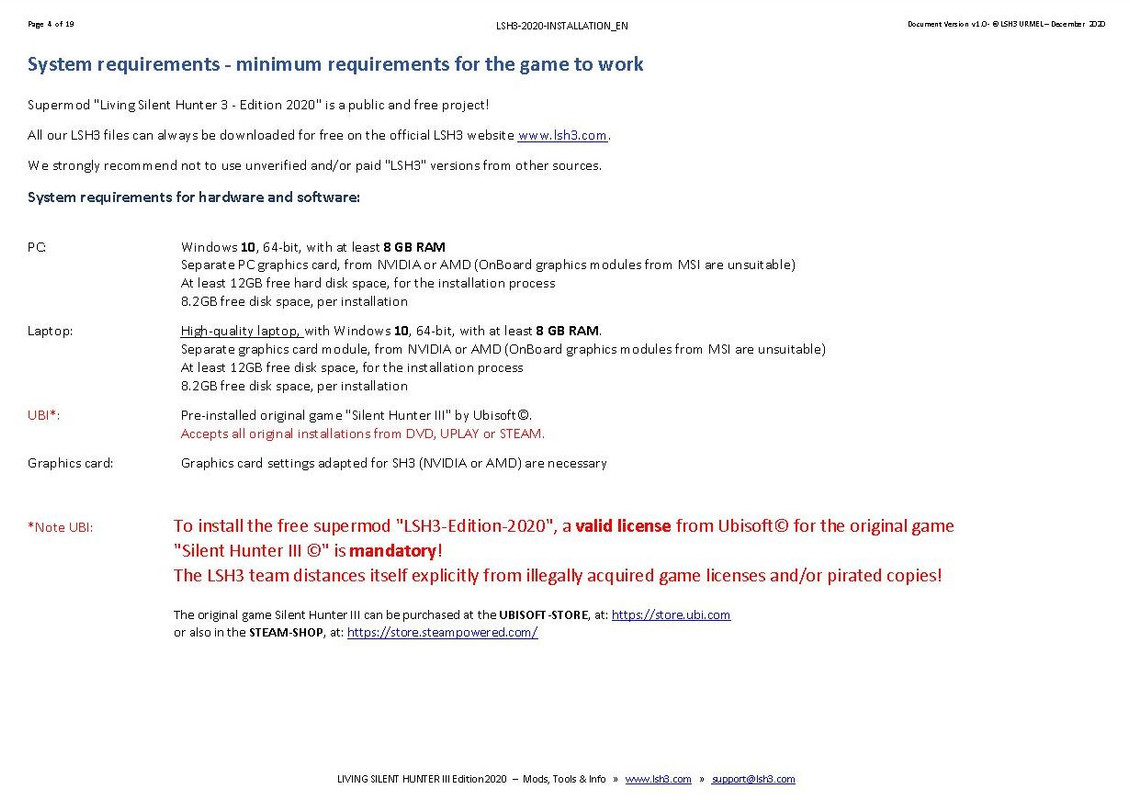 Picture 5 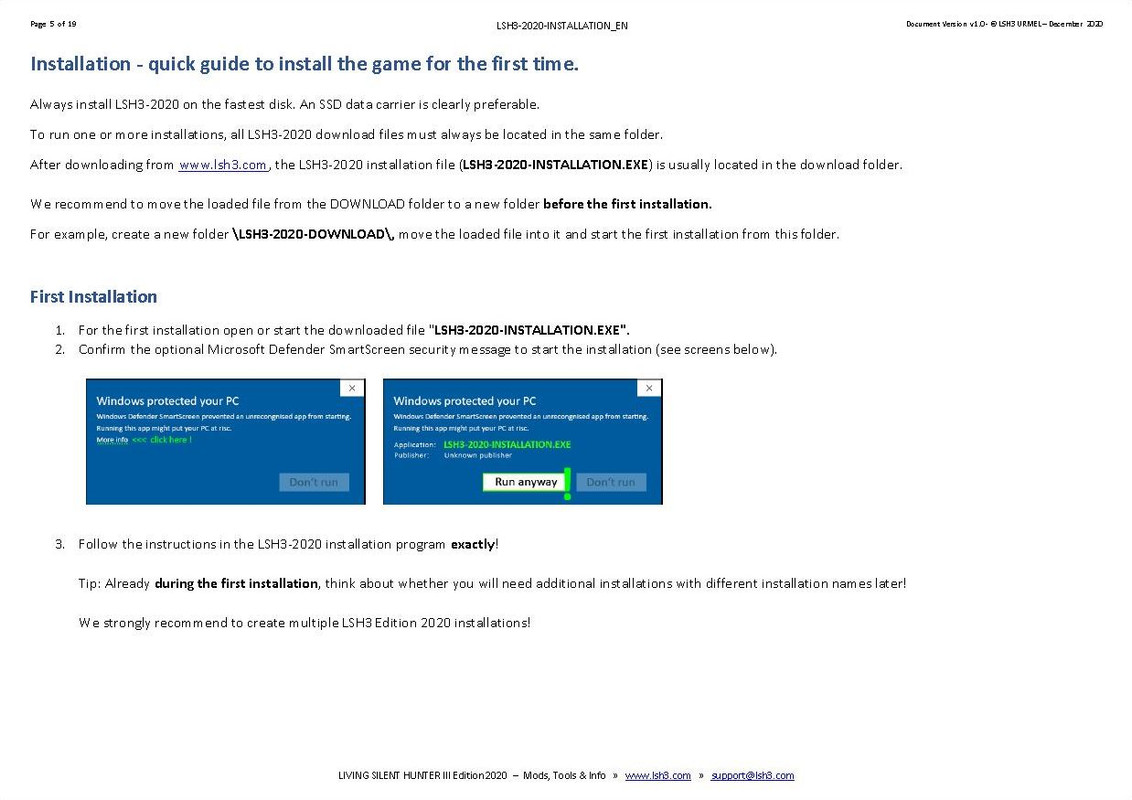 Picture 6 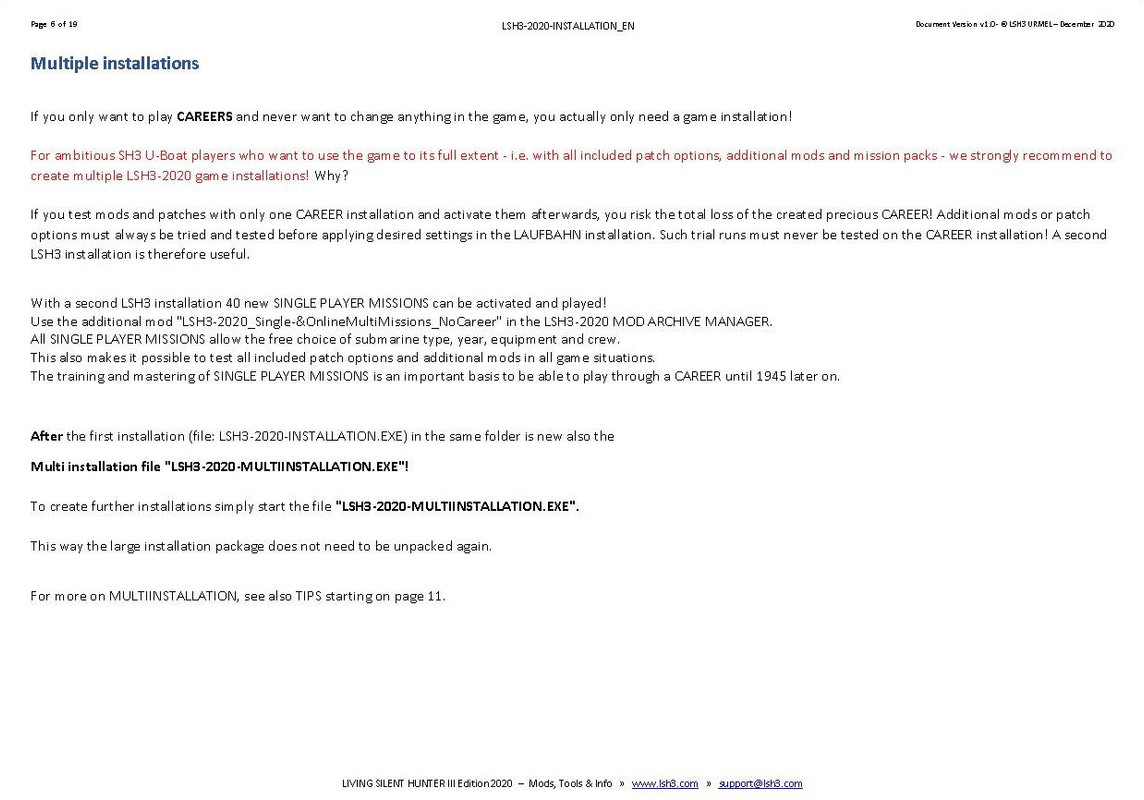 Picture 7 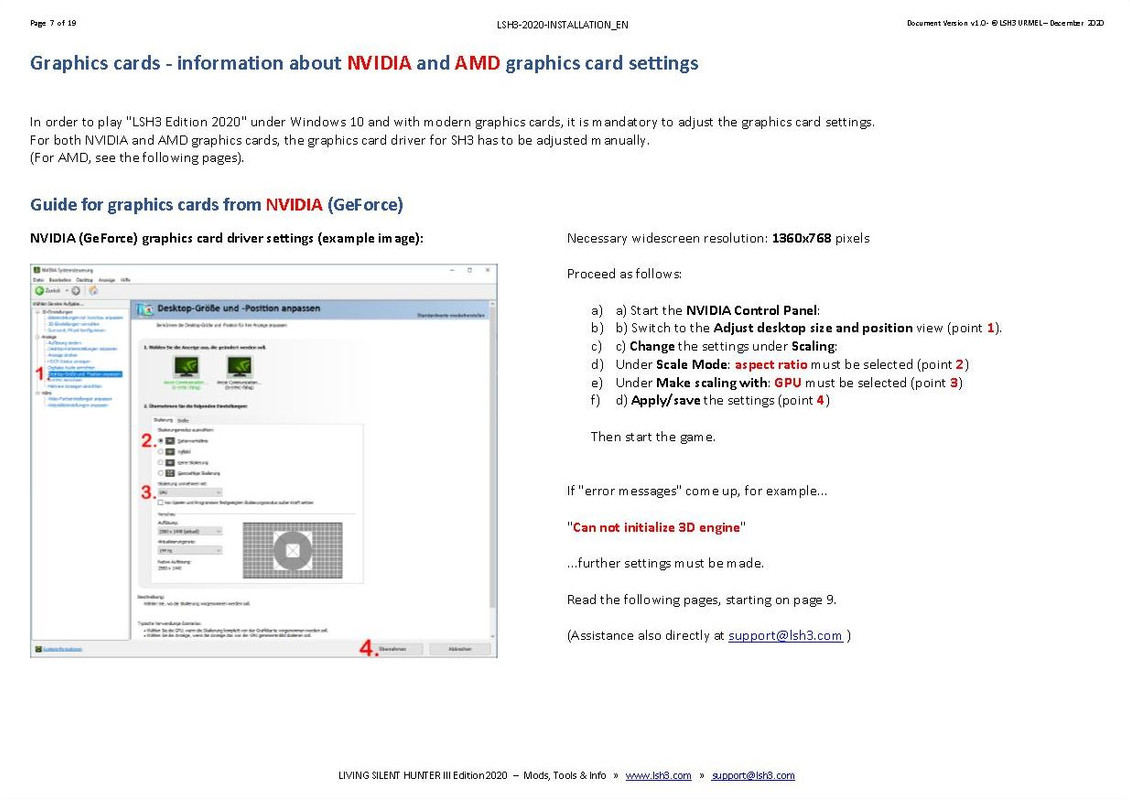 Picture 8  Picture 9 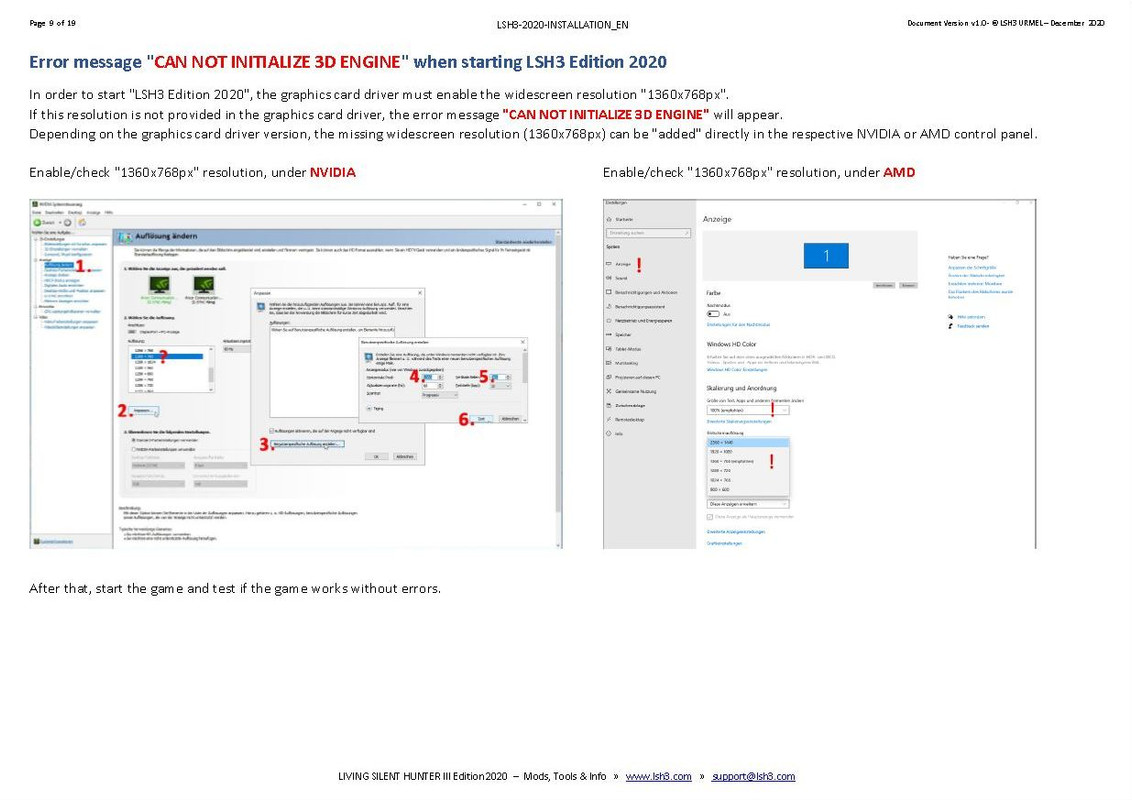 Picture 10  Picture 11  Picture 12  Picture 13  Picture 14  Picture 15  Picture 16  Picture 17  Picture 18  Picture 19  Download from > lsh3.com 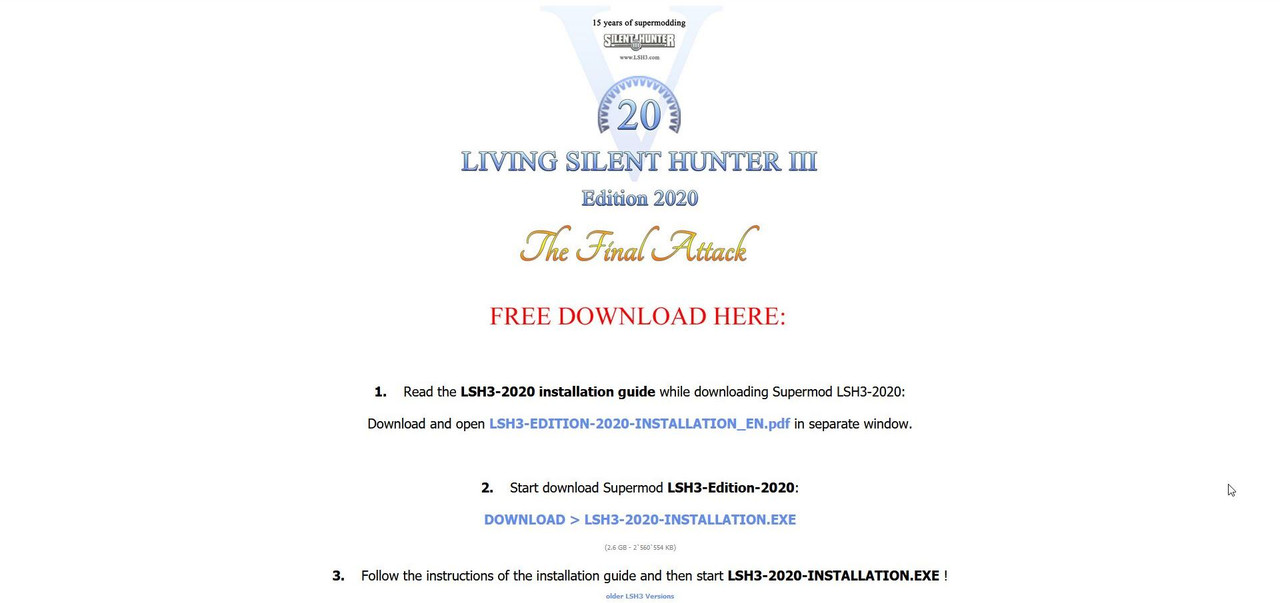
__________________
LSH3-2015 <> TUTORIALS <> ALL YOU NEED TO KNOW <> ALL IN ONE PLACE SH4 <> TUTORIALS <> HOW TO DO IT <> INFORMATION <> DOWNLOAD LINKS SH5 <> TUTORIALS <> HOW TO DO IT <> INFORMATION <> DOWNLOAD LINKS Always Here To Help A Fellow 'Subber' | Need An Answer to A Question Just Send Me A PM Last edited by THEBERBSTER; 12-24-20 at 01:05 PM. |
|
|
|
|
05-29-16, 10:14 AM
|
#4 |
|
Growing Old Disgracefully
Join Date: Dec 2012
Location: Hythe - Southampton
Posts: 9,609
Downloads: 1133
Uploads: 0
|
The New LSH3-2020 Installer
This tutorial shows you the LSH3-2020 installer in picture form how to install the game. For practical purposes the game has been downloaded into a folder called LSH3-2020 Picture 1 > Downloaded into folder LSH3-2020 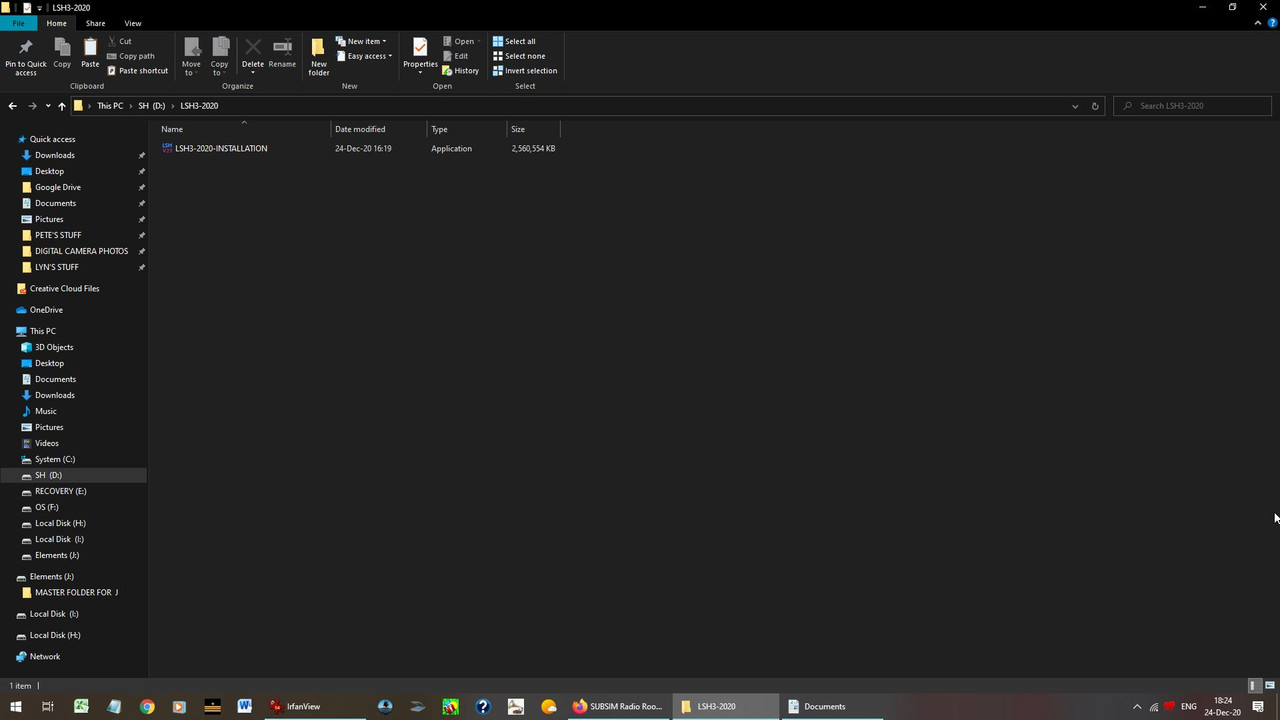 Picture 2 > Warning 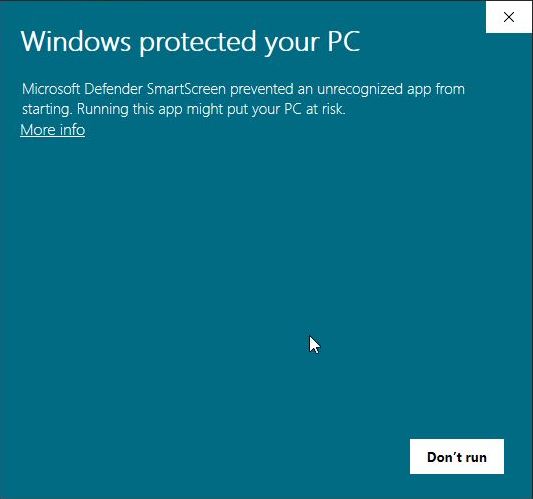 Picture 3 > Click on "More info" 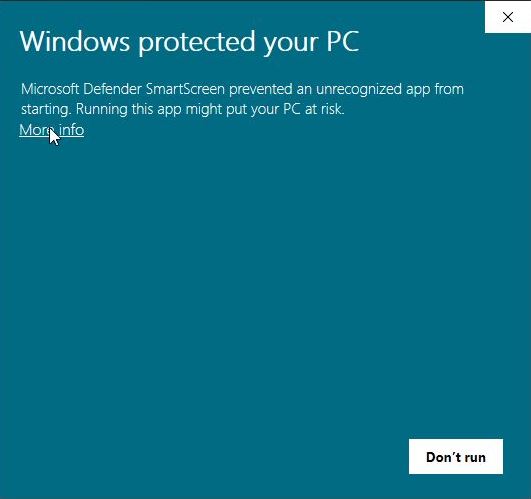 Picture 4 > Click on "Run Anyway" 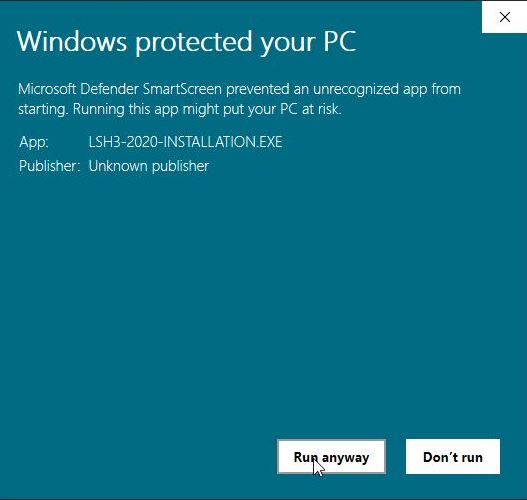 Picture 5 > Click on required "Language" 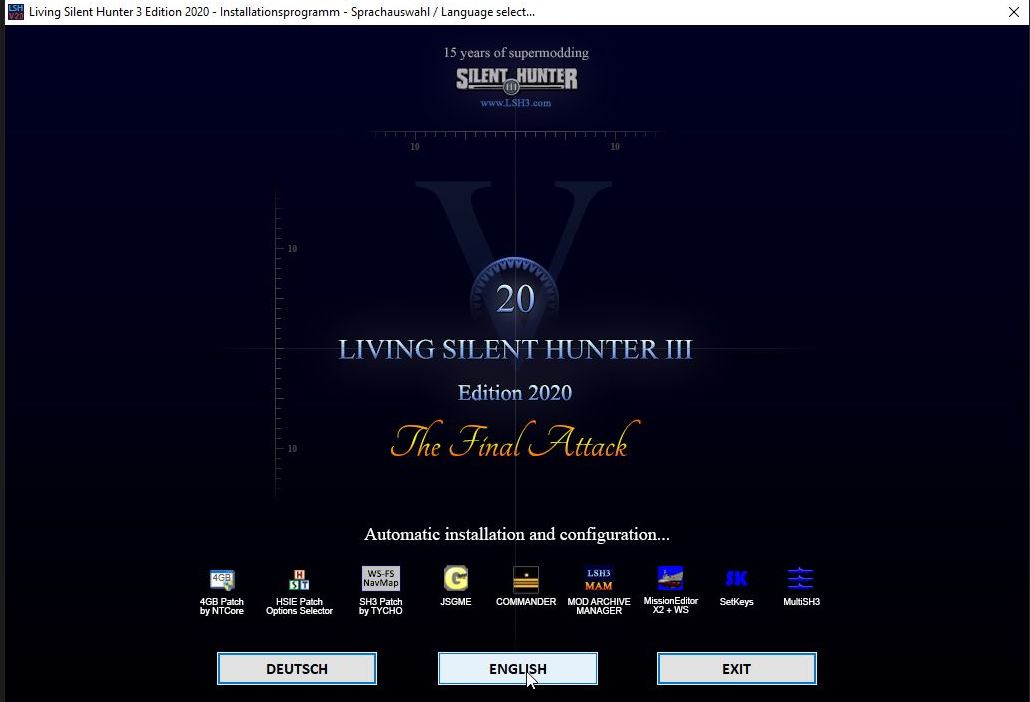 Picture 6 > Start the installation 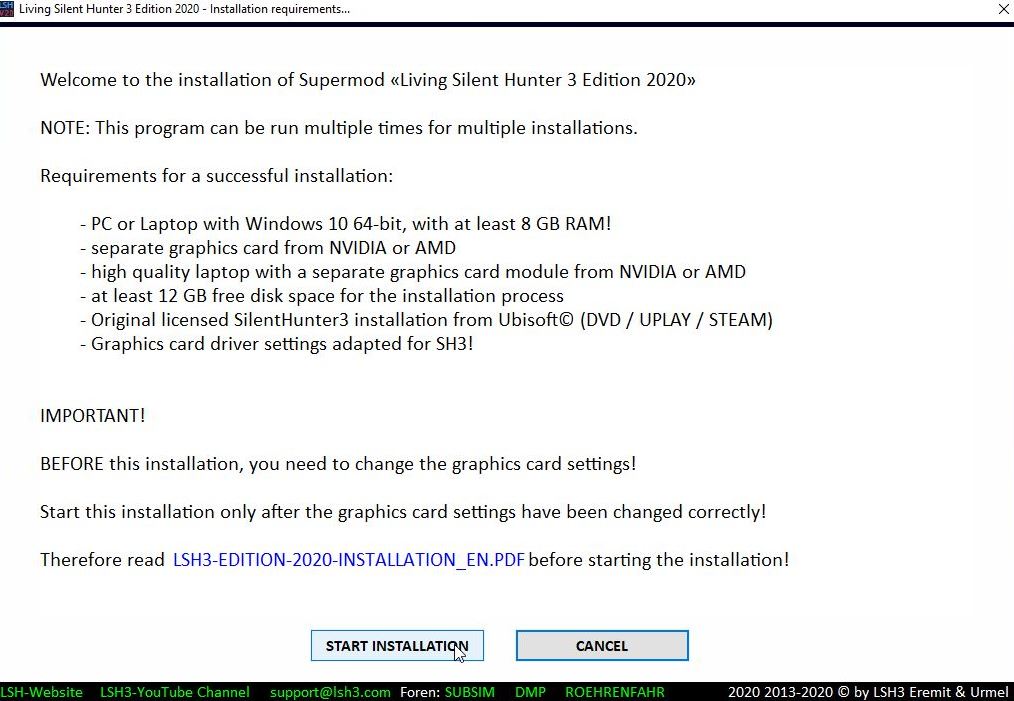 Picture 7 > Select the installation folder path and click "OK" 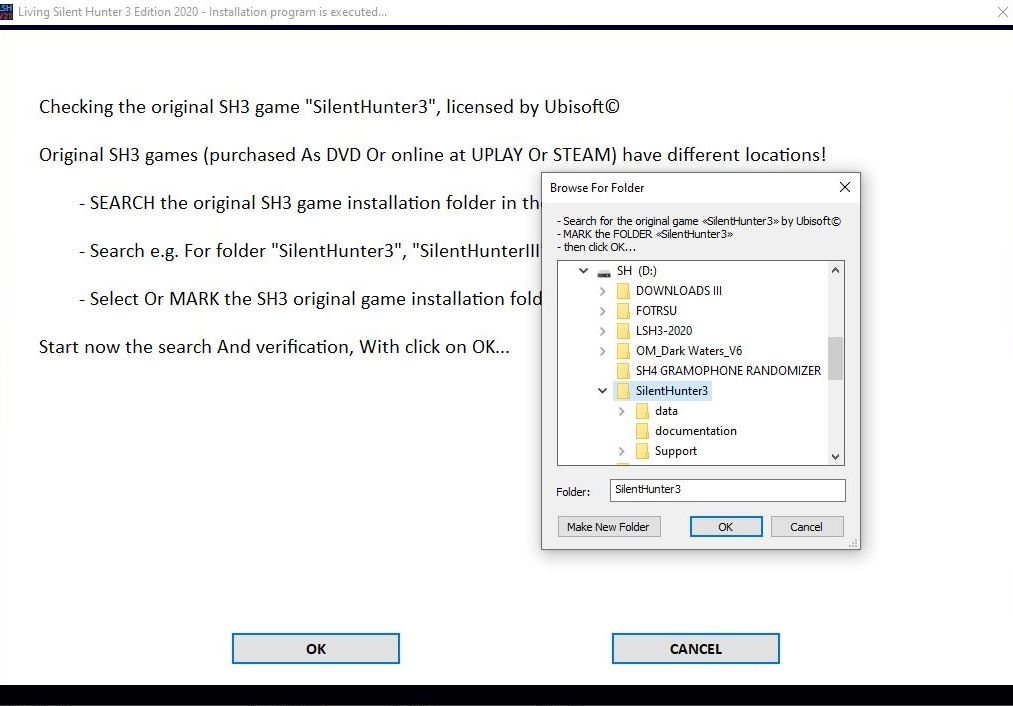 Picture 8 > Click "OK"  Picture 9 > Make a new folder as instructed  Picture 10 > Click on the path of the new folder 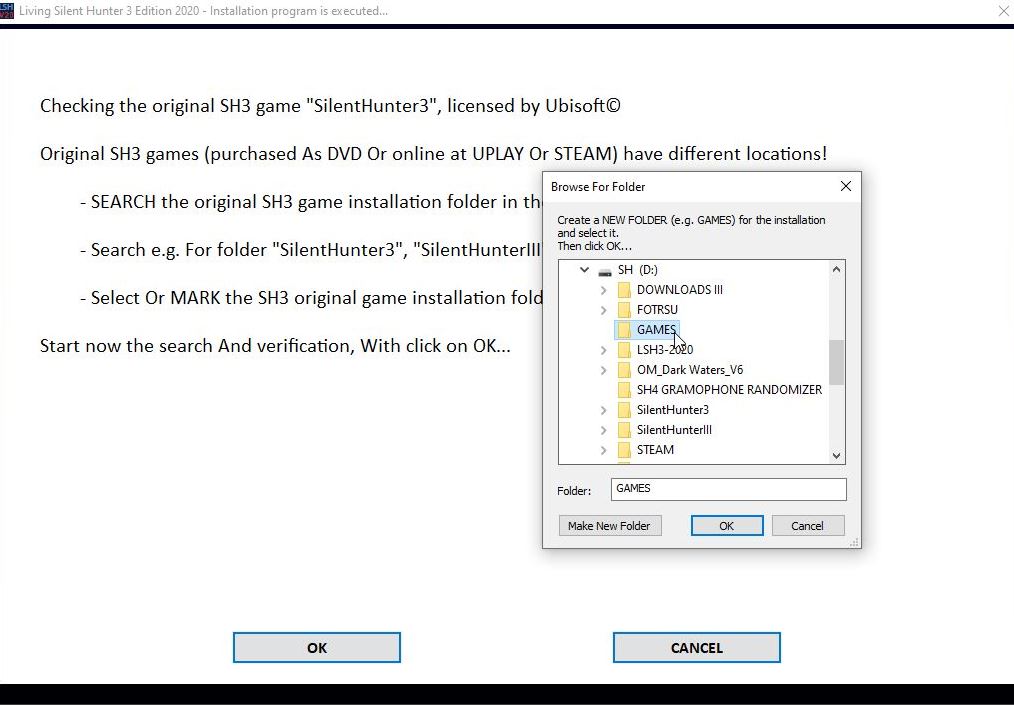 Picture 11 > Click "OK" 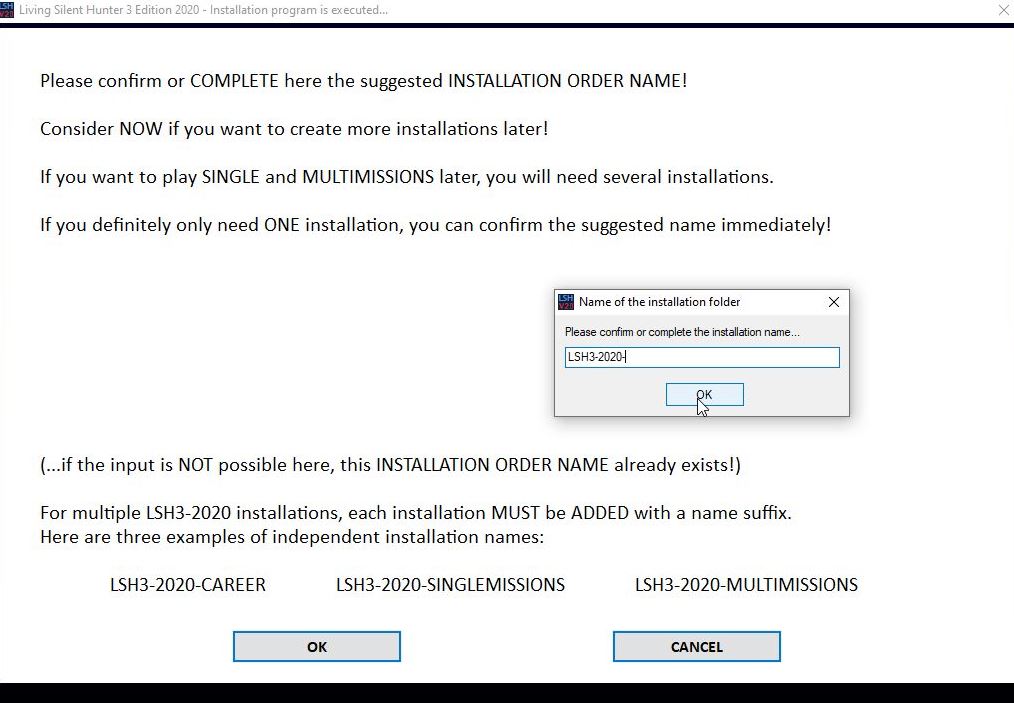 Picture 12 > Click on "Install Now" 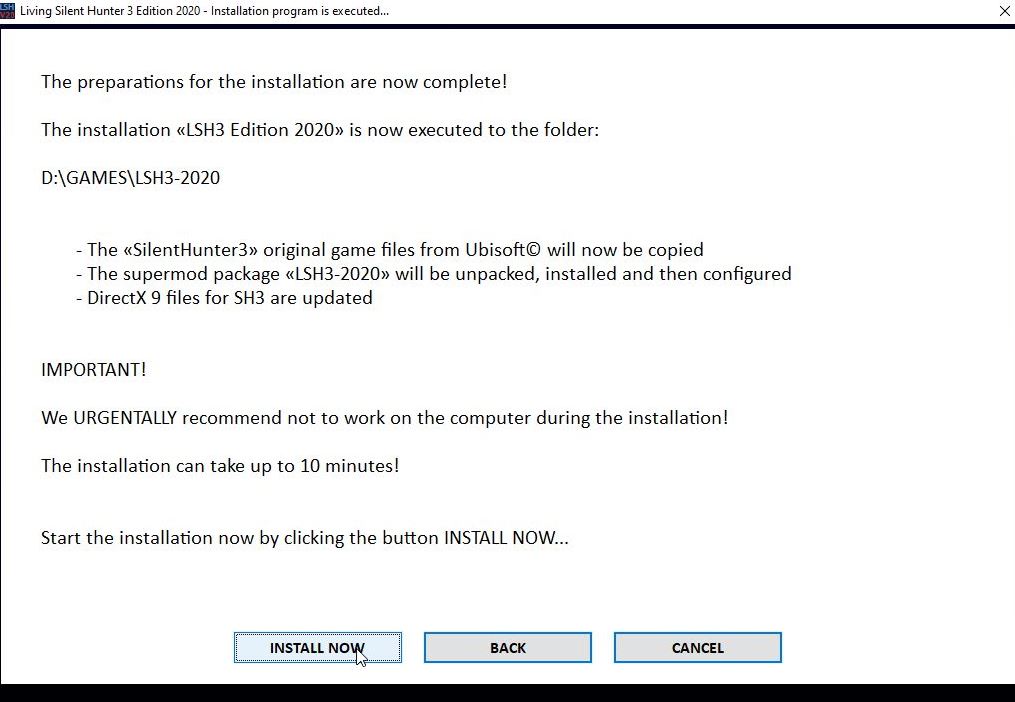 Picture 13 > Shows the game being installed 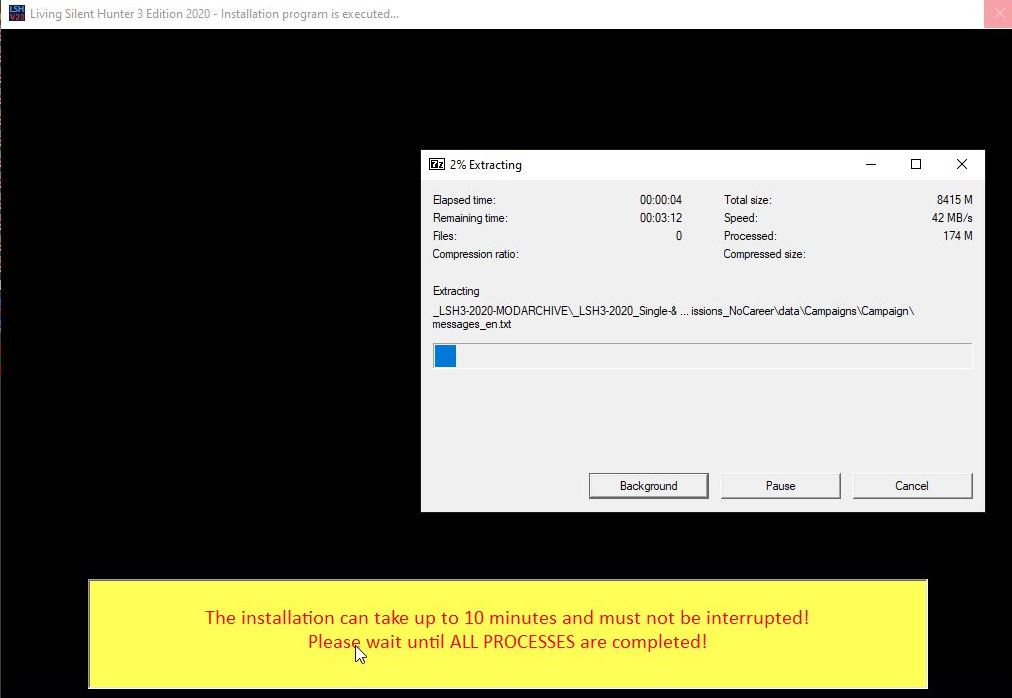 Picture 14 > Game is being automatically configured. At this point my anti-virus quarantined the game as Malware and I had to reboot my system then open the anti-virus and allow what was actually a false posititve. I also needed to go to the game folder and delete the folder LSH3-2020 and restart the installation. 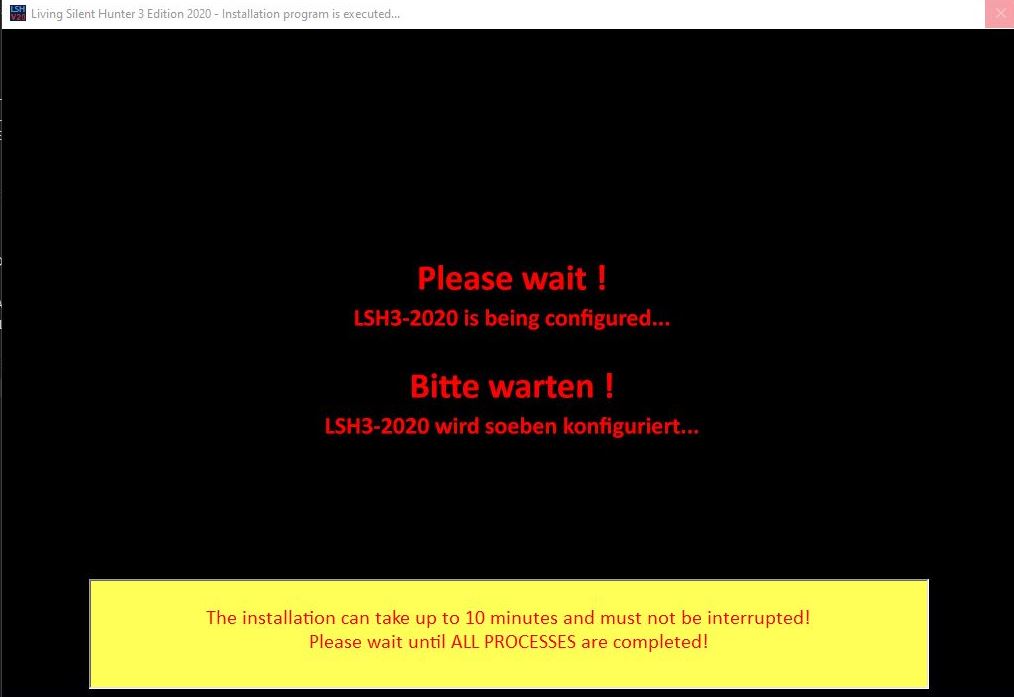 Picture 15 > Recommended save game folder name V20 Click OK to accept or change and then "Next" 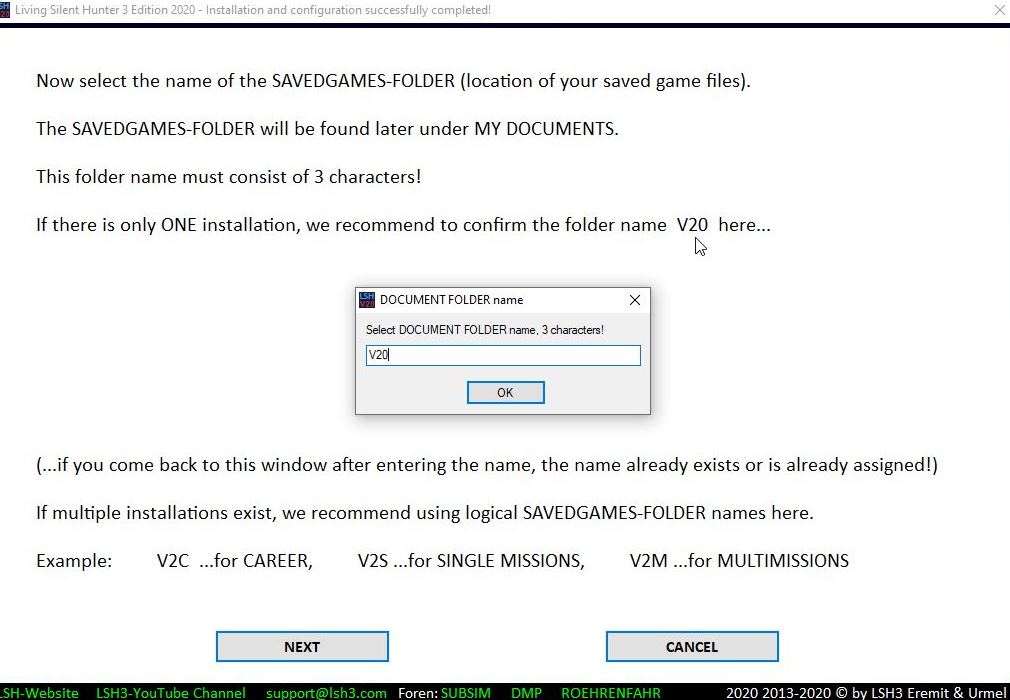 Picture 16 > Showing the current status 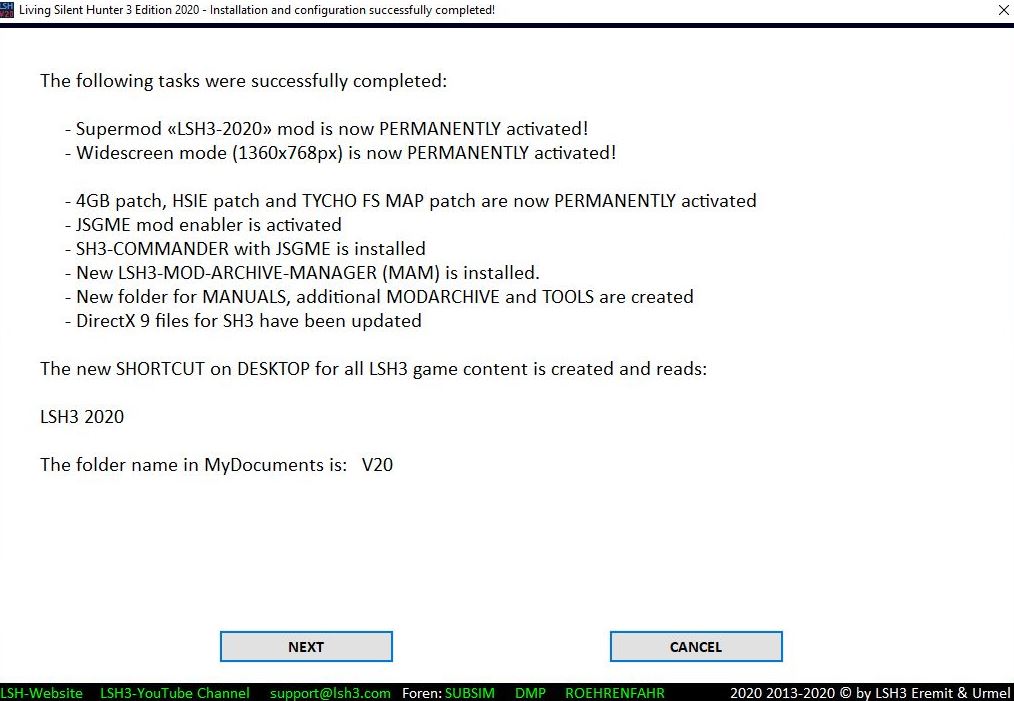 Picture 17 > Graphic card setup warning 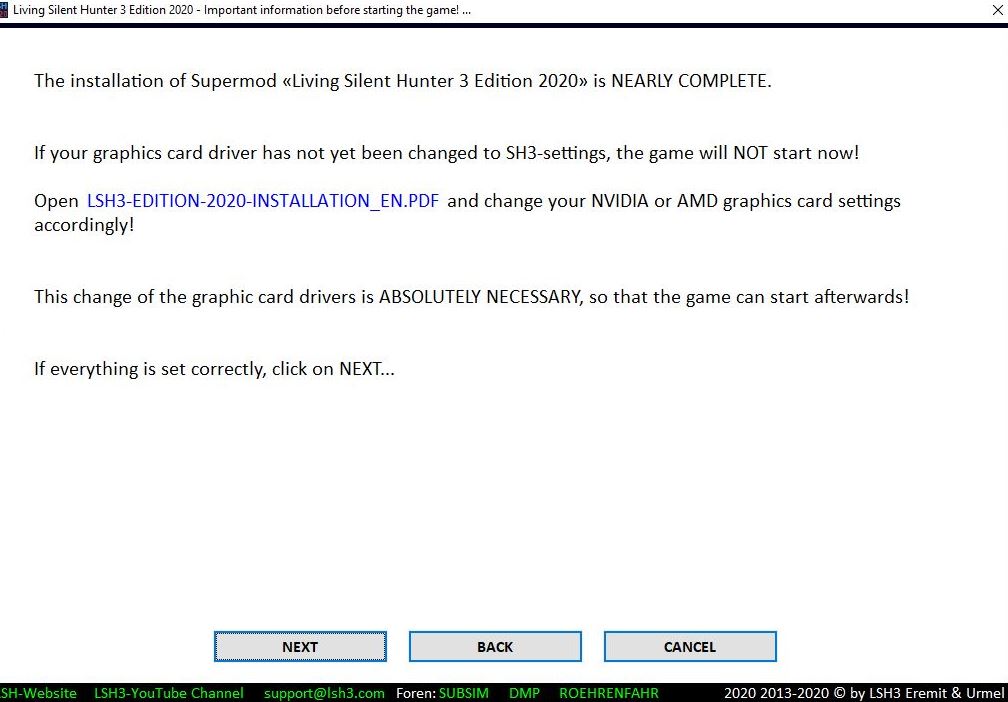 Picture 18 > Game start notification 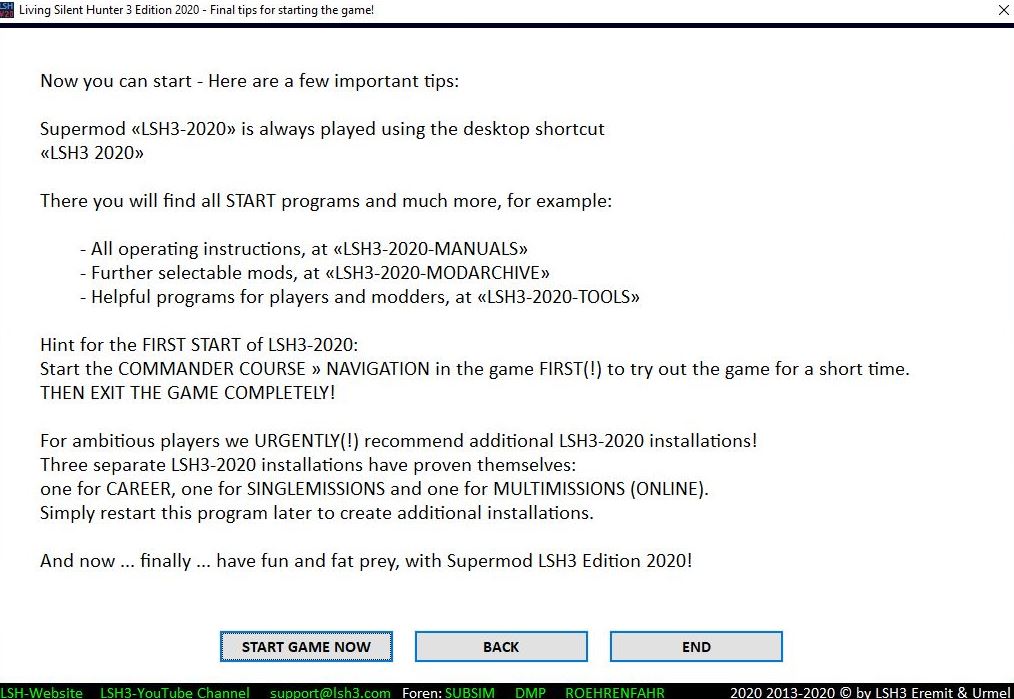 Picture 19 > Shows the game loading  Picture 20 > Game loads to the "Main Menu"  Picture 21 > The game loads a short cut folder LSH3-2020 on the desk top Contents of folder 
__________________
LSH3-2015 <> TUTORIALS <> ALL YOU NEED TO KNOW <> ALL IN ONE PLACE SH4 <> TUTORIALS <> HOW TO DO IT <> INFORMATION <> DOWNLOAD LINKS SH5 <> TUTORIALS <> HOW TO DO IT <> INFORMATION <> DOWNLOAD LINKS Always Here To Help A Fellow 'Subber' | Need An Answer to A Question Just Send Me A PM Last edited by THEBERBSTER; 12-24-20 at 03:59 PM. |
|
|
|
|
05-29-16, 10:14 AM
|
#5 |
|
Growing Old Disgracefully
Join Date: Dec 2012
Location: Hythe - Southampton
Posts: 9,609
Downloads: 1133
Uploads: 0
|
Running SH3 Commander and Other Applications As Administrator's
This Tutorial will show you how to run your > Applications in Administrator mode. Picture 1 > Go to the _LSH3-2020 folder and open the LSH3-2020 COMMANDER folder  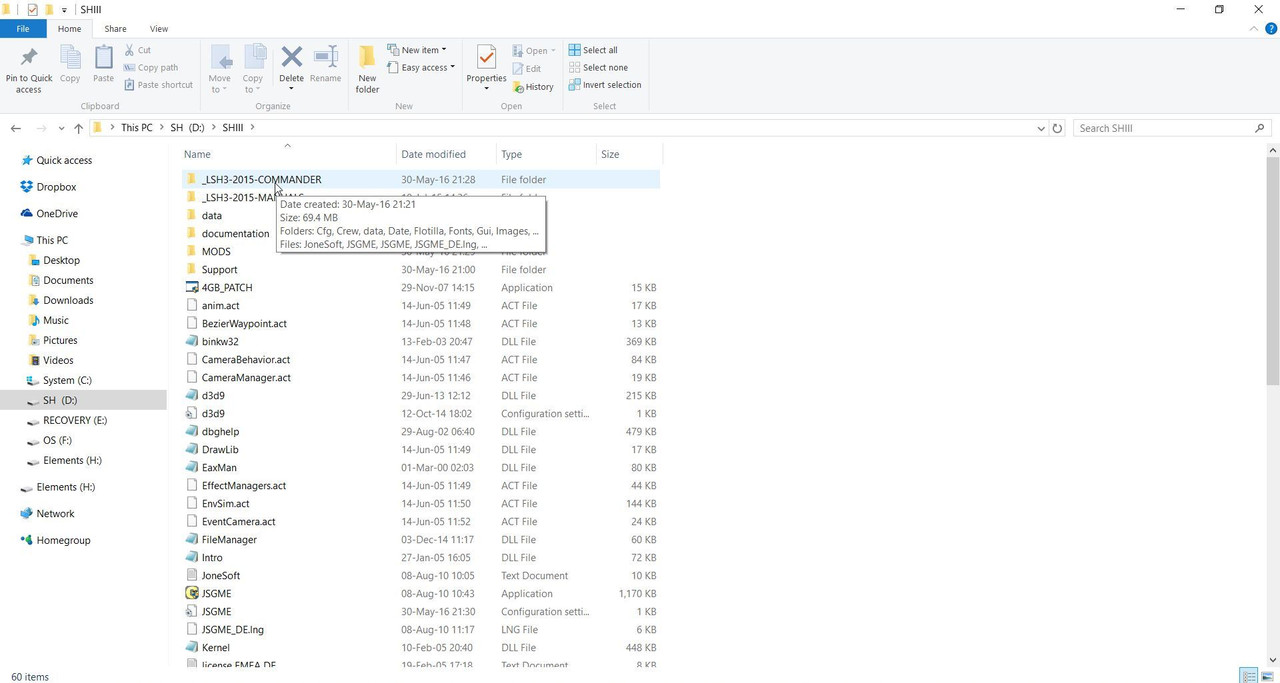 Picture 2 > Right click with your mouse on > SH3Cmdr Application. Select > Properties  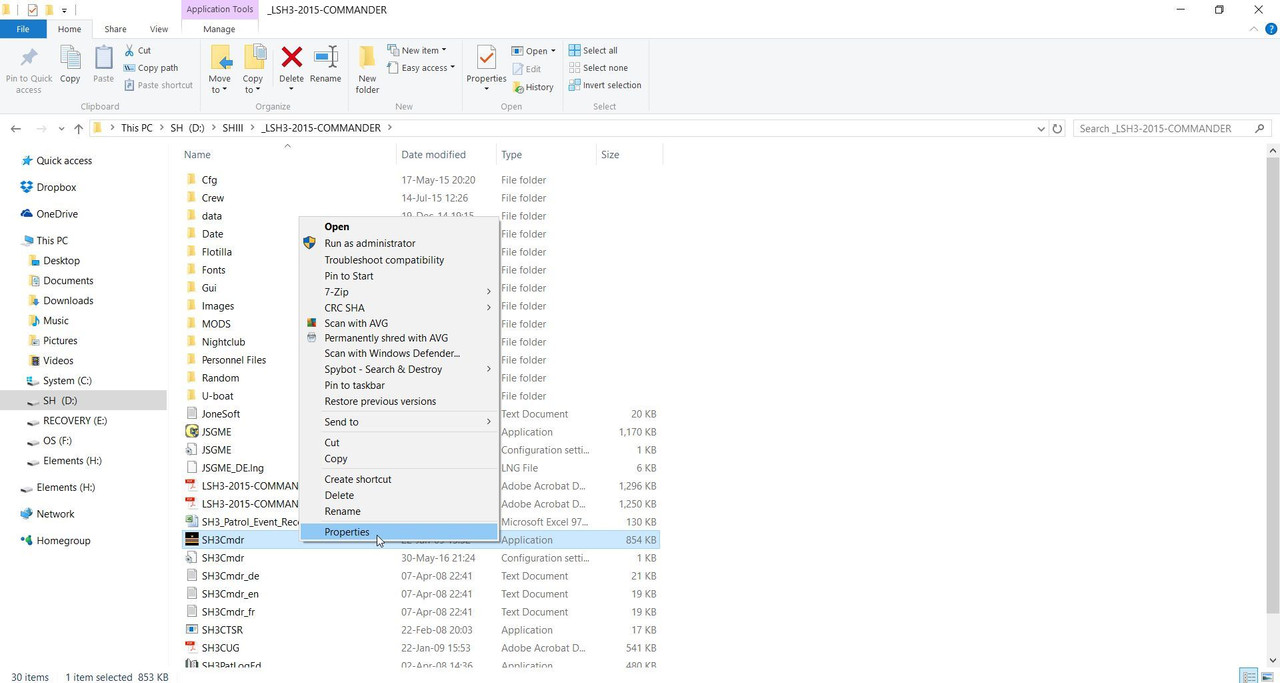 Picture 3 > Tick the box > Run this program as an Administrator. Click > Apply. Click > OK.  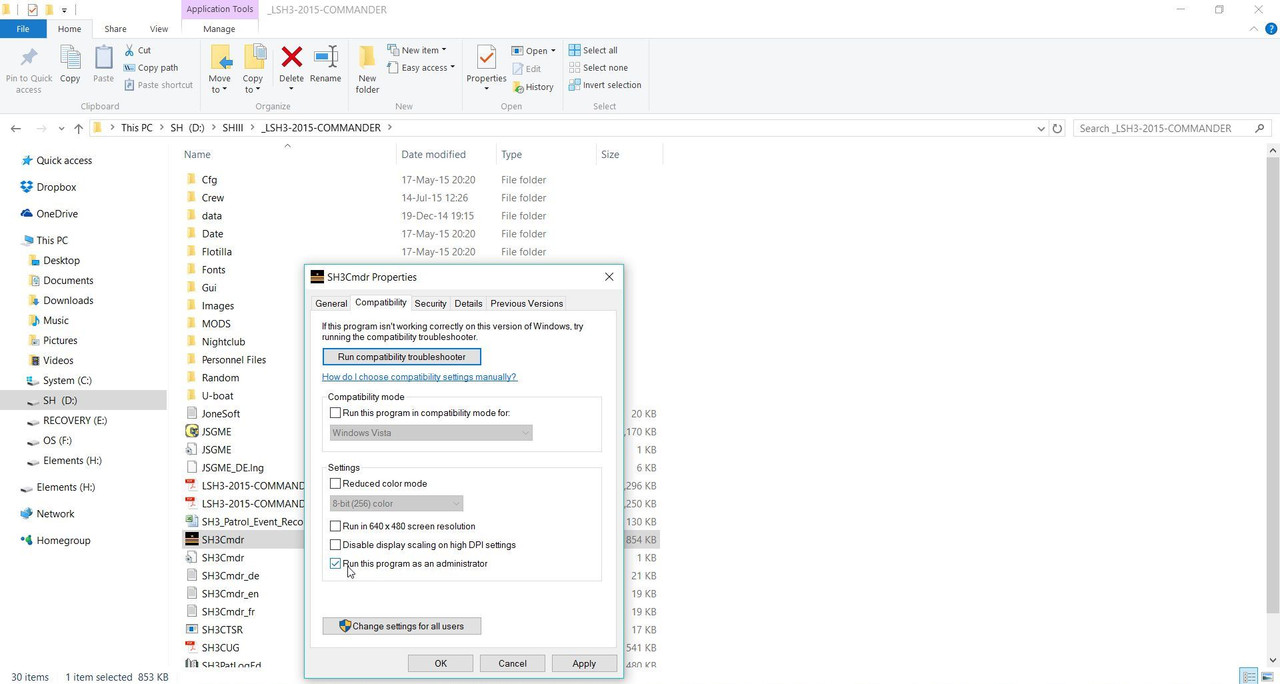 Picture 4 > Right click with your mouse on the > SH3Cmdr Application. Select > Pin to Taskbar. LSH3-2015 can be started from here unless you have loading problems.  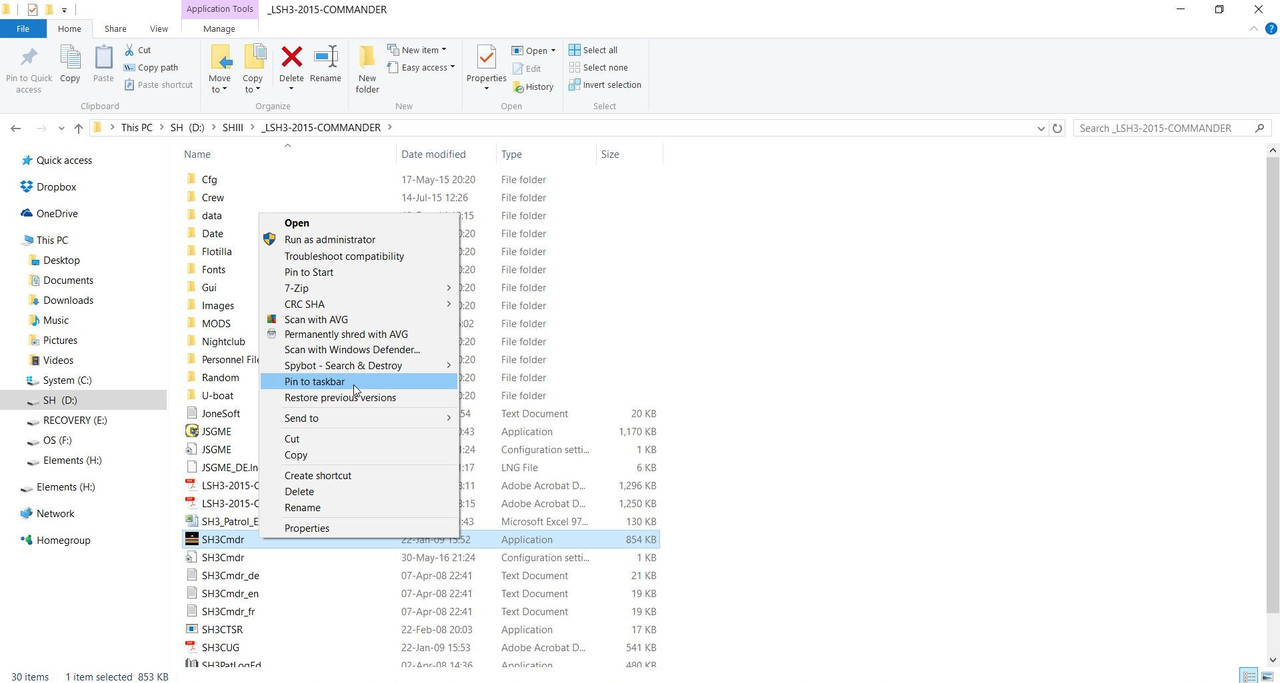 Picture 5 > Right click with your mouse on the > JSGME Application. Select > Properties  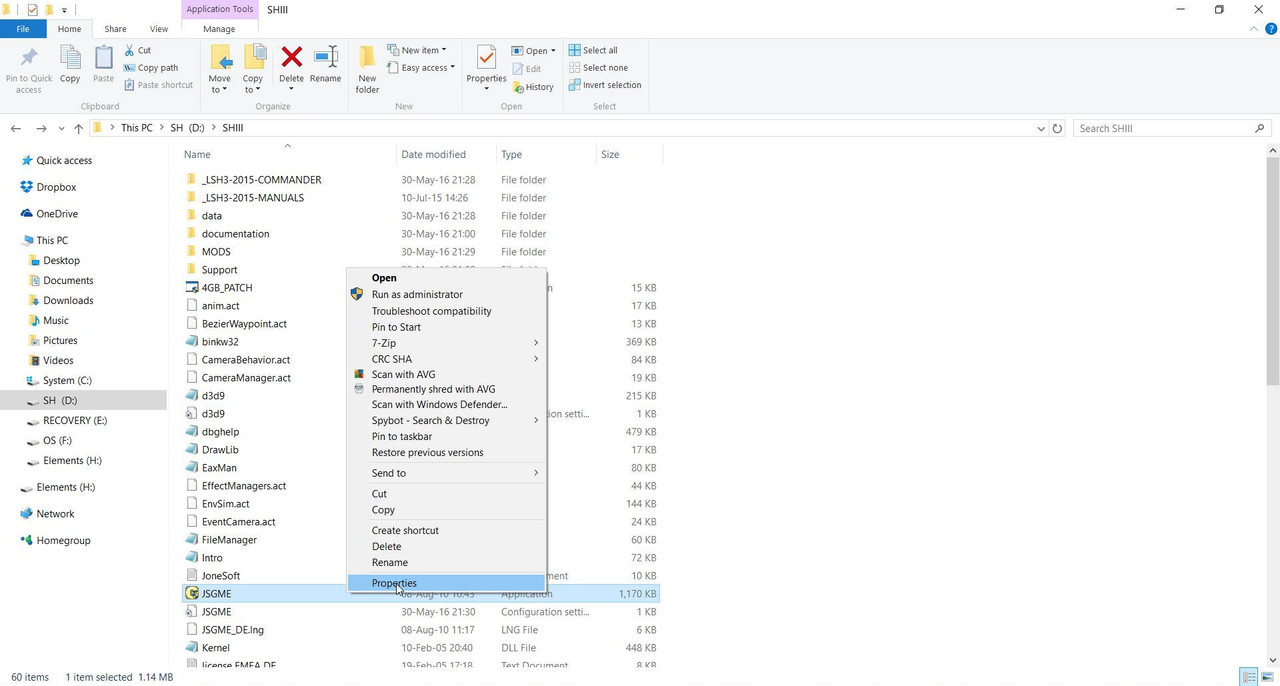 Picture 6 > Tick the box > Run this program as an Administrator. Click > Apply. Click > OK.  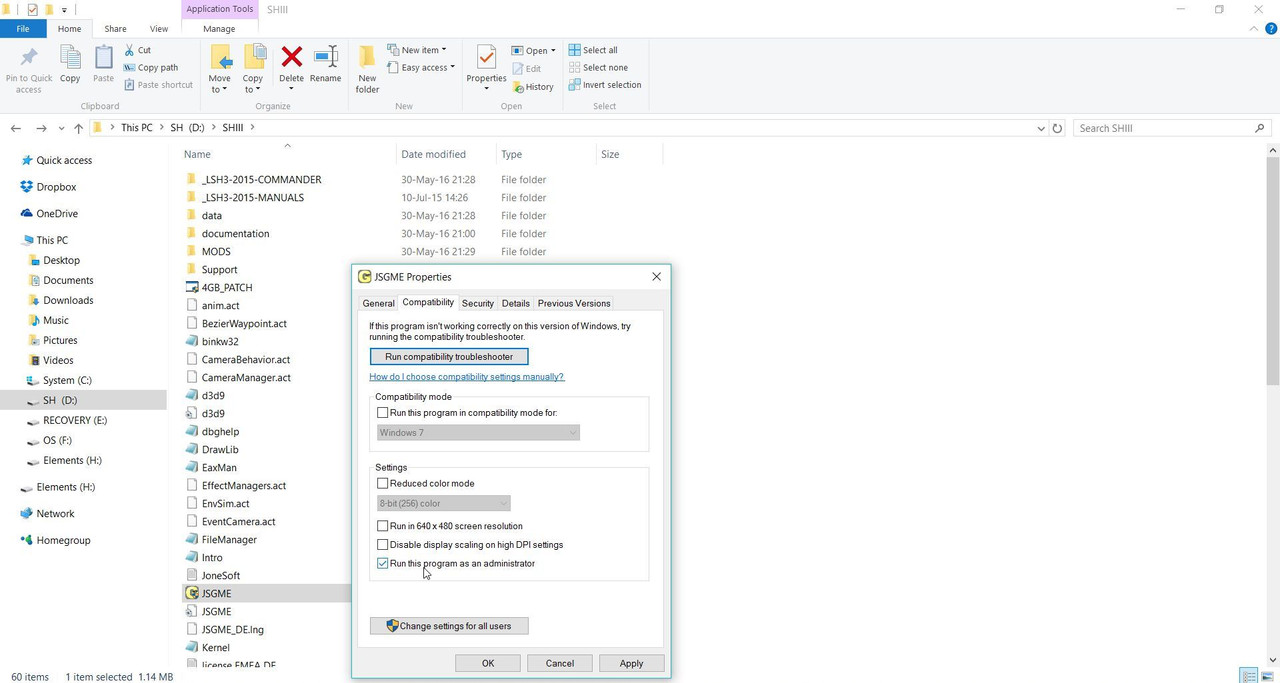 Reminder from Tutorial Post #3 to run your SH3.exe as an administrator if you have not already done so. Now go to the next Tutorial.
__________________
LSH3-2015 <> TUTORIALS <> ALL YOU NEED TO KNOW <> ALL IN ONE PLACE SH4 <> TUTORIALS <> HOW TO DO IT <> INFORMATION <> DOWNLOAD LINKS SH5 <> TUTORIALS <> HOW TO DO IT <> INFORMATION <> DOWNLOAD LINKS Always Here To Help A Fellow 'Subber' | Need An Answer to A Question Just Send Me A PM Last edited by THEBERBSTER; 12-24-20 at 04:17 PM. Reason: Revised title |
|
|
|
|
05-29-16, 10:15 AM
|
#6 |
|
Growing Old Disgracefully
Join Date: Dec 2012
Location: Hythe - Southampton
Posts: 9,609
Downloads: 1133
Uploads: 0
|
Changing Nvidia and AMD Radeon GPU Settings.
Check that your GPU is using the latest drivers!! Important Note regarding latest drivers. If you are running Windows 10 Creator version 1703 and after a Windows update now have a black screen when start your game you will need to roll back to an earlier driver version. See my tutorial how to do this. NVIDIA Picture 1 > Adjust the > Desktop Size and Position. Change the GPU Scaling Mode to > Aspect Ratio. Go to the > Control Panel to do this. Select > Nvidia Control Panel  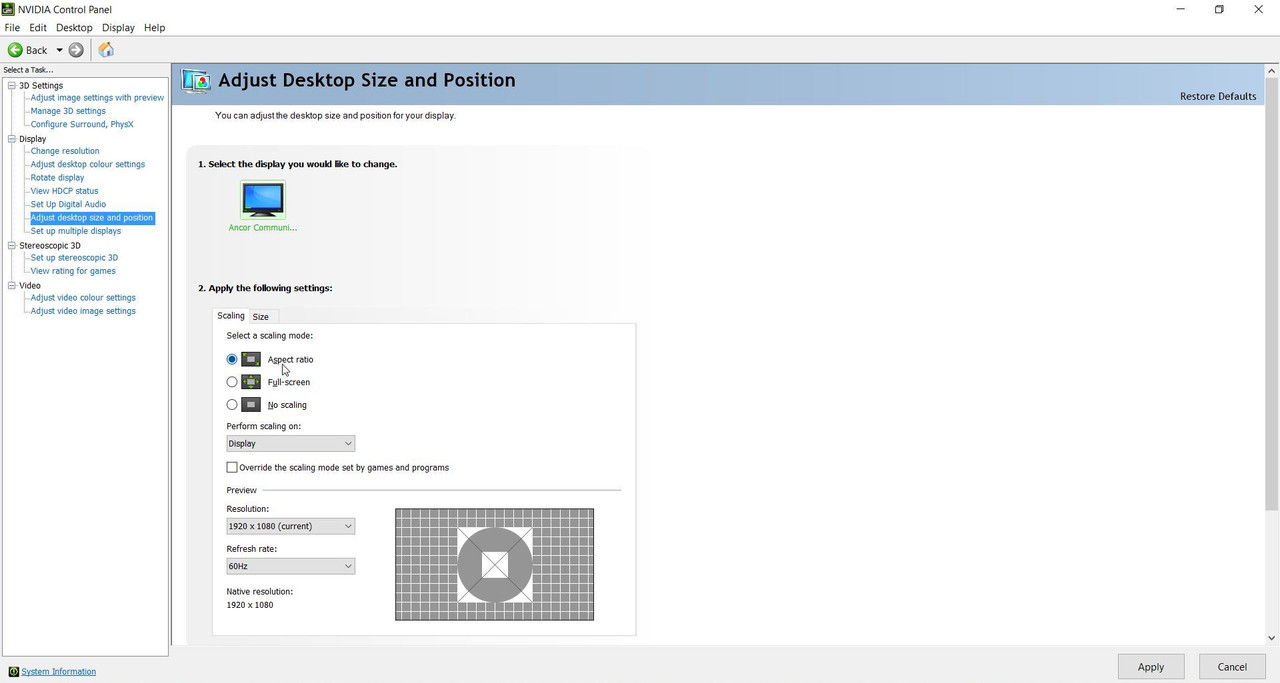 Picture 2 > Adjust the > Desktop Size and Position. Change the GPU Scaling Mode to perform on > GPU   Apply and Save to complete the process. AMD Radeon Picture 3 > Nvidia > AMD-RADEON Settings  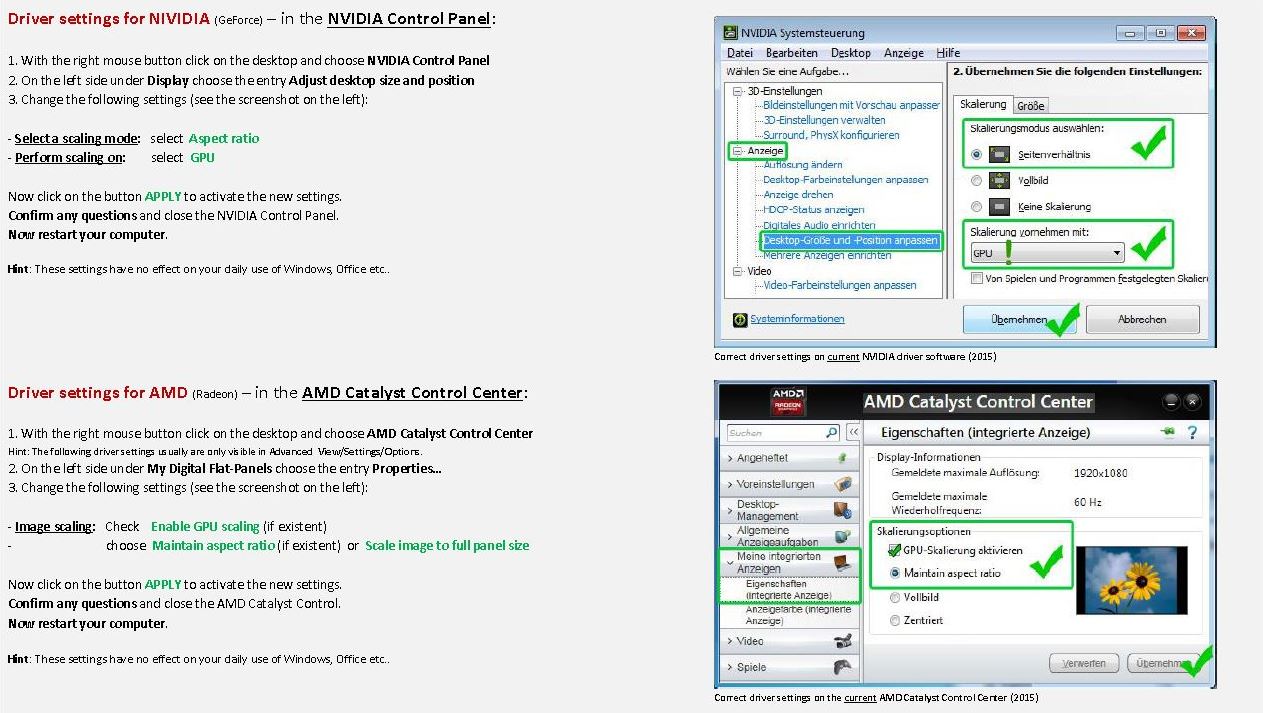 Now go to the next Tutorial.
__________________
LSH3-2015 <> TUTORIALS <> ALL YOU NEED TO KNOW <> ALL IN ONE PLACE SH4 <> TUTORIALS <> HOW TO DO IT <> INFORMATION <> DOWNLOAD LINKS SH5 <> TUTORIALS <> HOW TO DO IT <> INFORMATION <> DOWNLOAD LINKS Always Here To Help A Fellow 'Subber' | Need An Answer to A Question Just Send Me A PM Last edited by THEBERBSTER; 05-04-18 at 03:47 PM. Reason: Replaced missing pictures |
|
|
|
|
05-29-16, 10:15 AM
|
#7 |
|
Growing Old Disgracefully
Join Date: Dec 2012
Location: Hythe - Southampton
Posts: 9,609
Downloads: 1133
Uploads: 0
|
spare
__________________
LSH3-2015 <> TUTORIALS <> ALL YOU NEED TO KNOW <> ALL IN ONE PLACE SH4 <> TUTORIALS <> HOW TO DO IT <> INFORMATION <> DOWNLOAD LINKS SH5 <> TUTORIALS <> HOW TO DO IT <> INFORMATION <> DOWNLOAD LINKS Always Here To Help A Fellow 'Subber' | Need An Answer to A Question Just Send Me A PM Last edited by THEBERBSTER; 12-24-20 at 04:21 PM. |
|
|
|
|
05-29-16, 10:16 AM
|
#8 |
|
Growing Old Disgracefully
Join Date: Dec 2012
Location: Hythe - Southampton
Posts: 9,609
Downloads: 1133
Uploads: 0
|
Why You Must Now Start The Naval Academy By Using The SH3.exe
Very Important. The Naval Academy provides essential data to LSH3 as it installs and sets up the V15 Saved Games folder. Picture 1 > Start the SH3.exe  Picture 2 > LSH3 loads to the Main Menu. 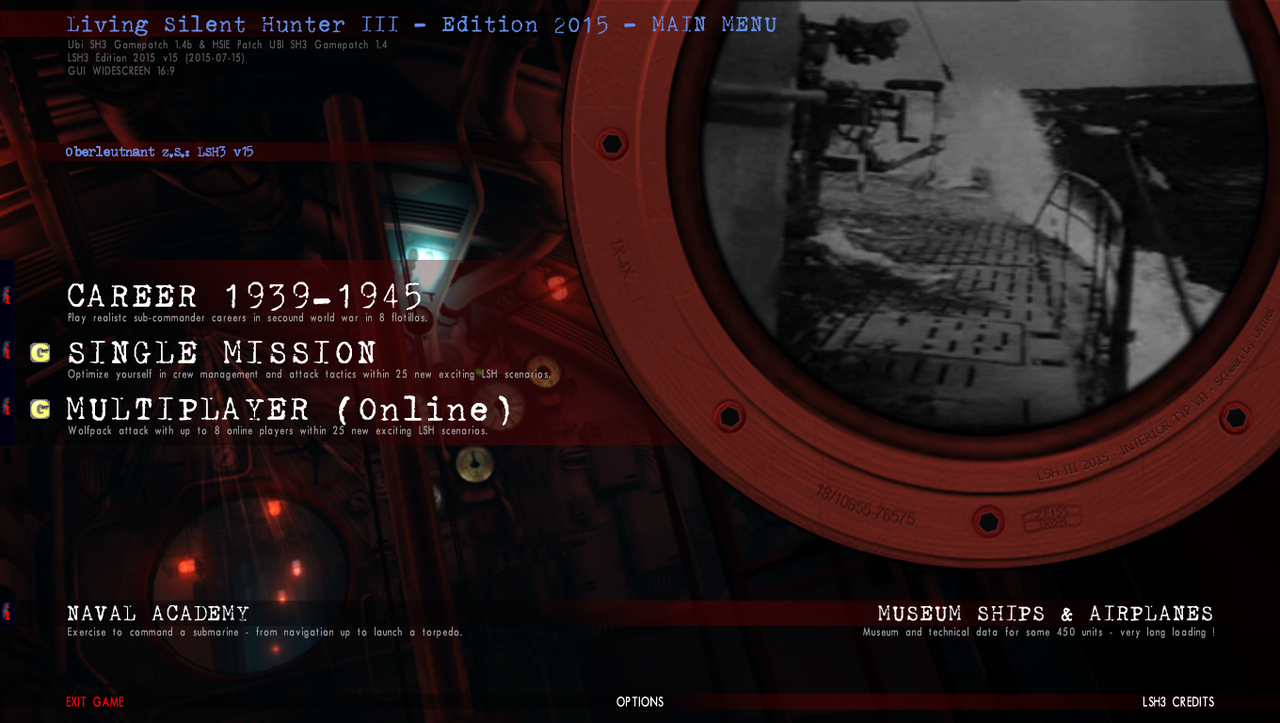 Picture 3 > You can use Options to make changes to your style of game play.  Picture 4 > Shows the default Options.  Picture 5 > Shows you the > German Crew Language has been changed from the default English. 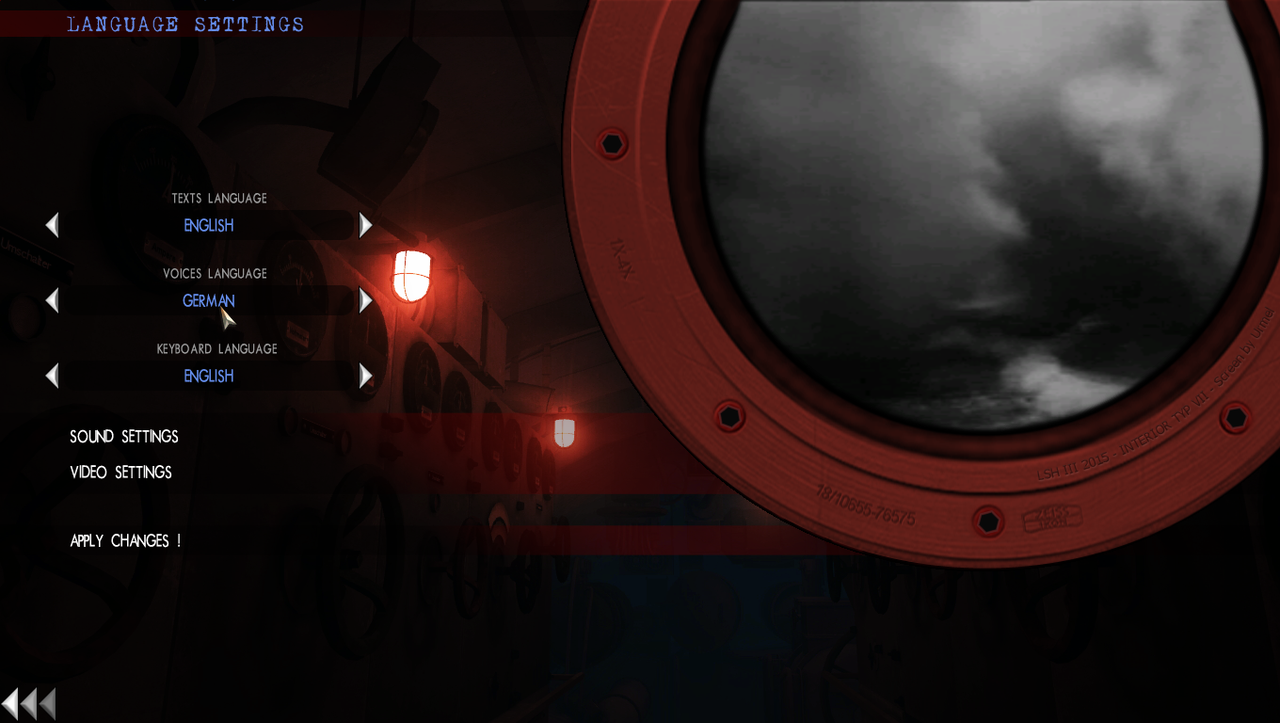 Picture 6 > Click on > Apply Changes to save the settings.  Picture 7 > Confirm the changes > Yes.  Picture 8 > Select the > Naval Academy. 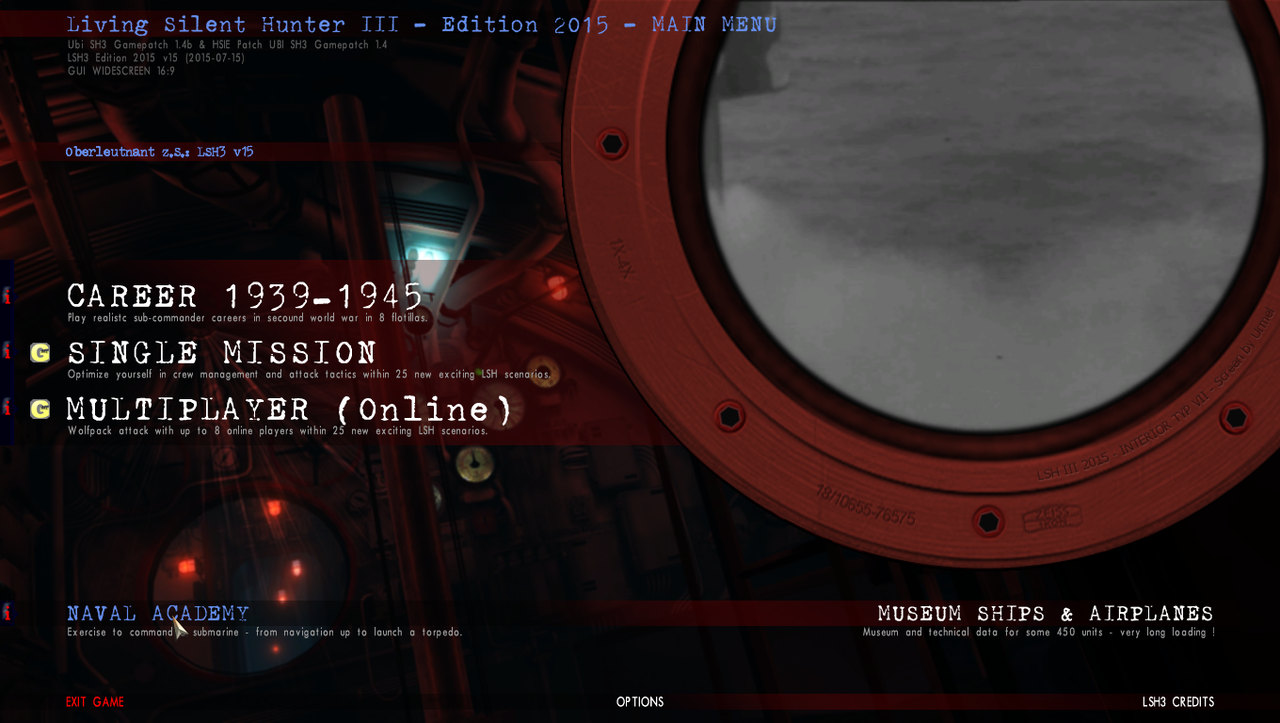 Picture 9 > Select a Tutorial > Navigation (recommended) 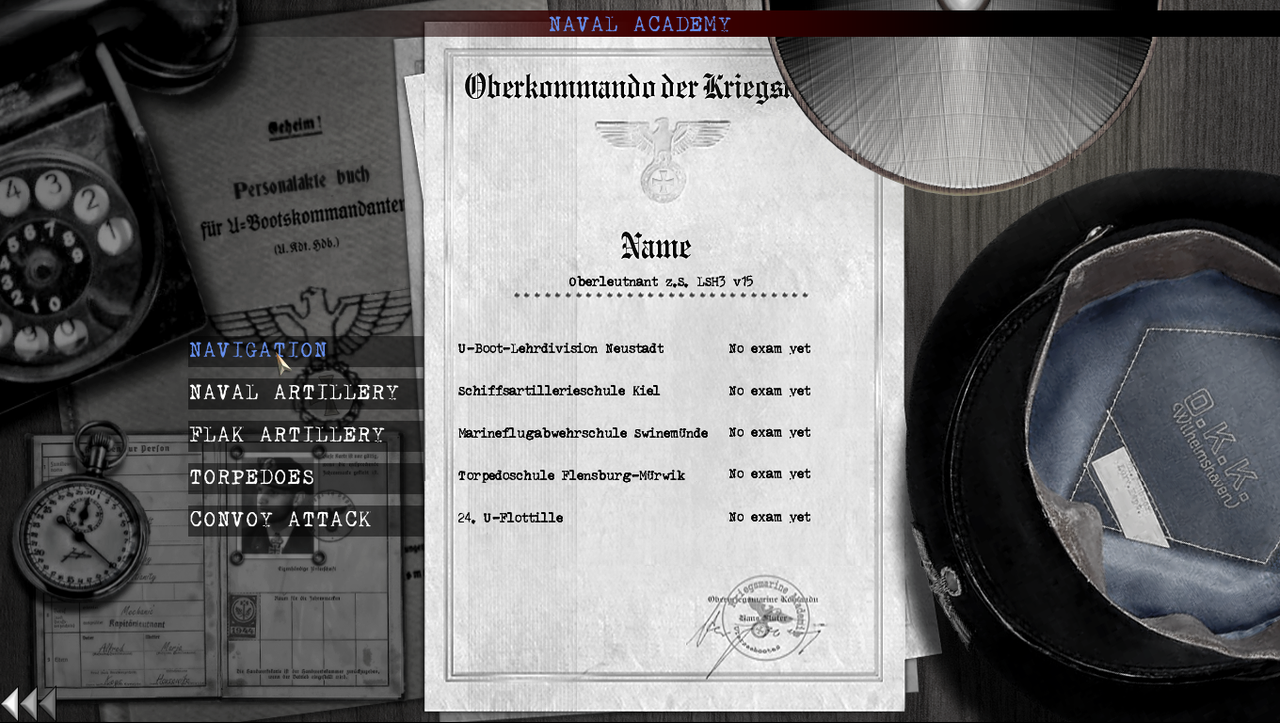 Picture 10 > Click on > Start. If you would like to get used to the game play then you can continue. Taking an exam will earn you additional > 1000 Renown. Total Renown will be 2000. 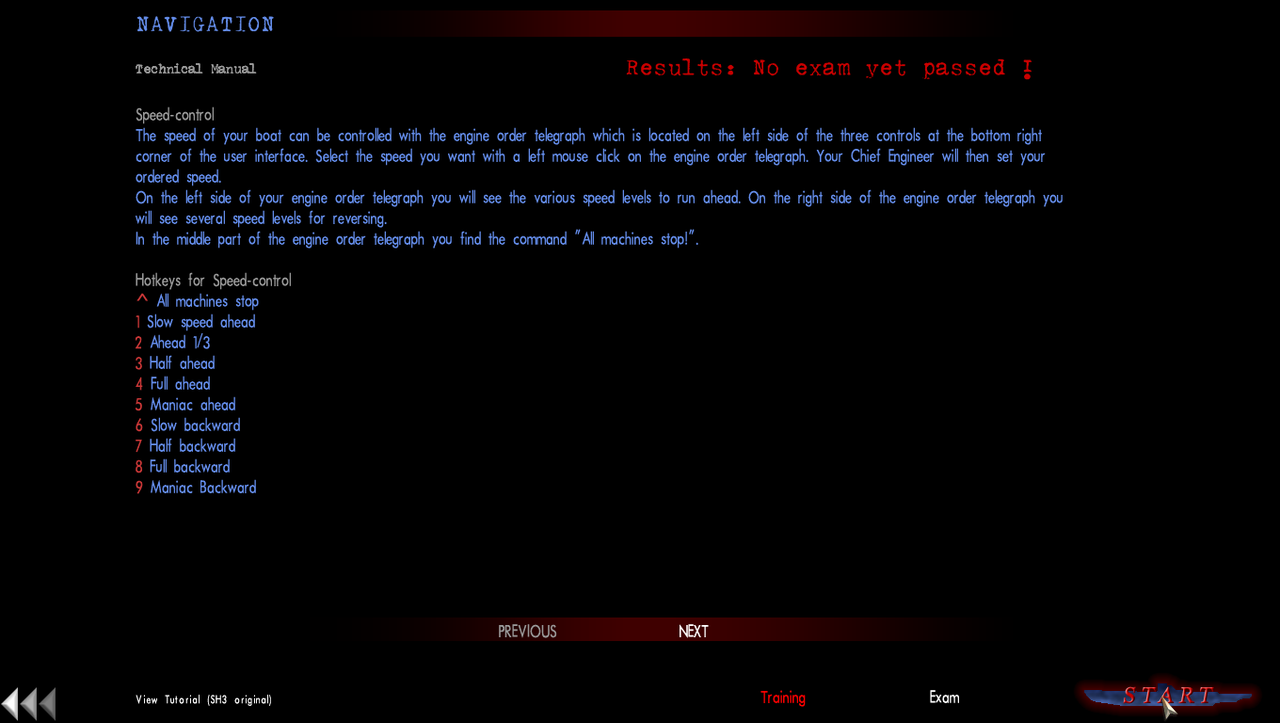 Picture 11 > Quit the Tutorial. Press the Esc Key. You will get the prompt to > Abandon Mission. Click on > Yes. 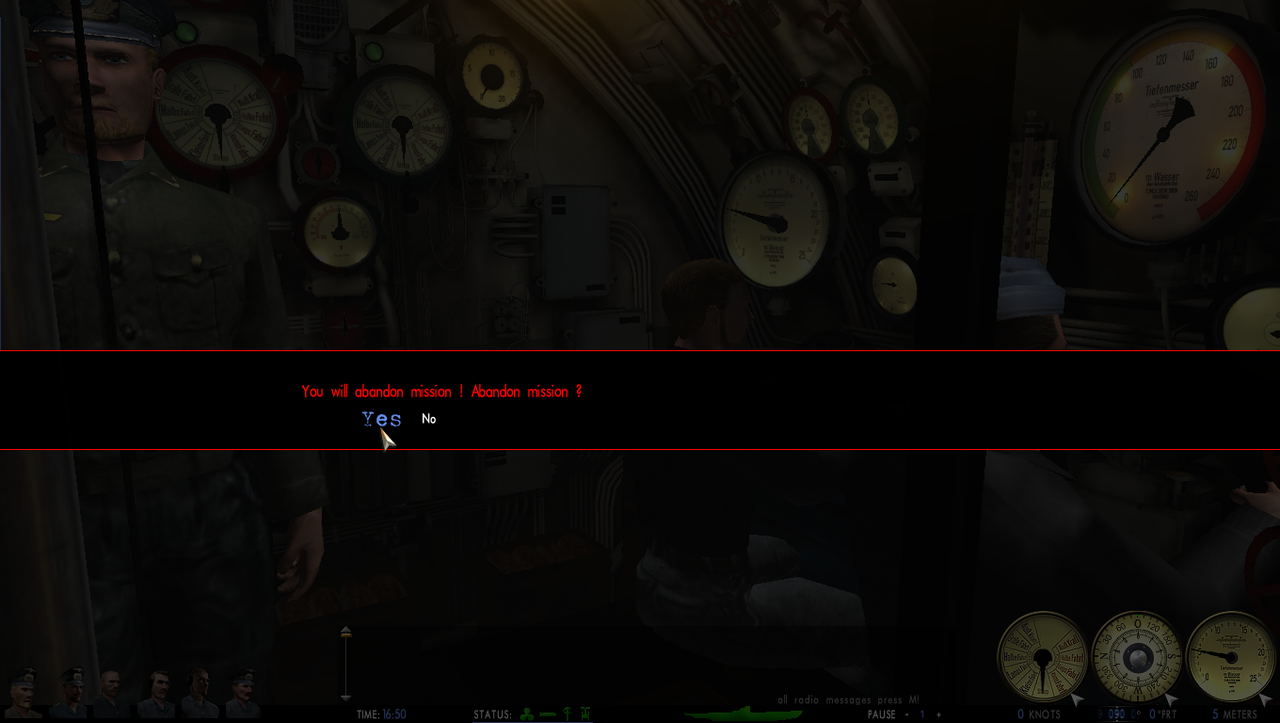 Picture 12 > Click on > Return to Base. 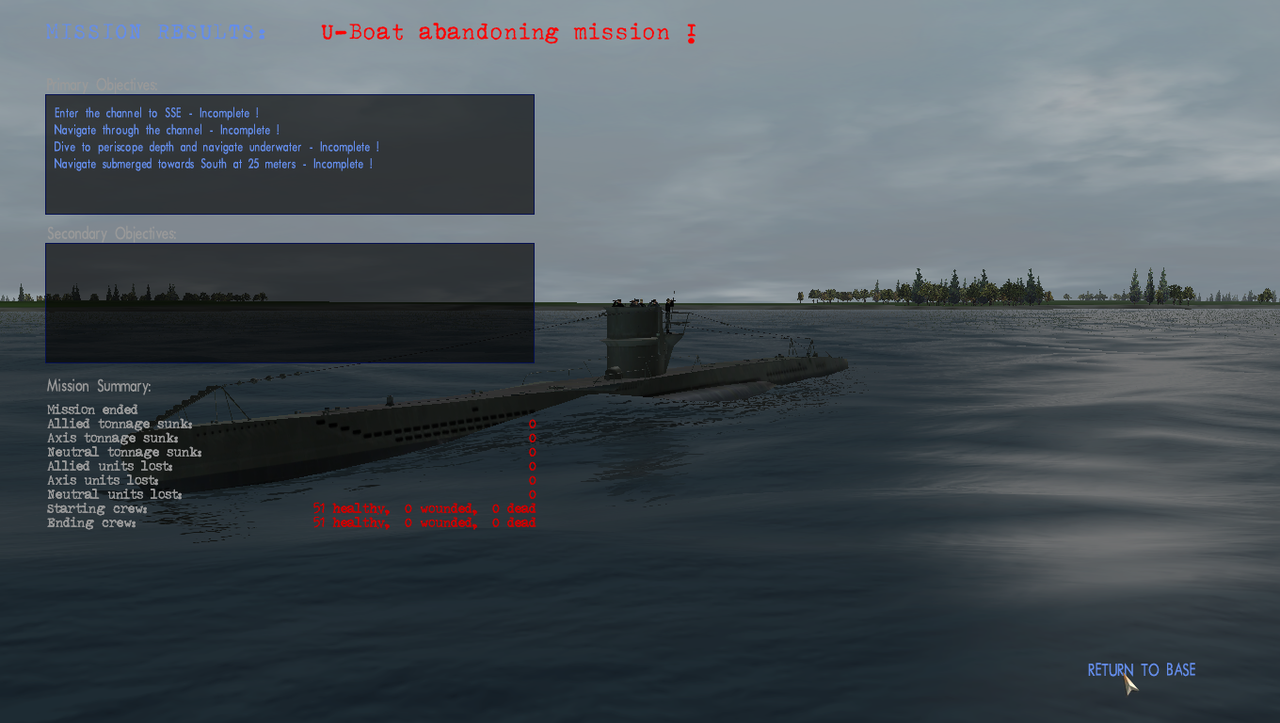 Picture 13 > Click on > Back. You do not need to take any exams unless you want to. You will just receive the > Default 1000 Renown  Picture 14 > Click on > Back.  Picture 15 > Click on > Exit Game. 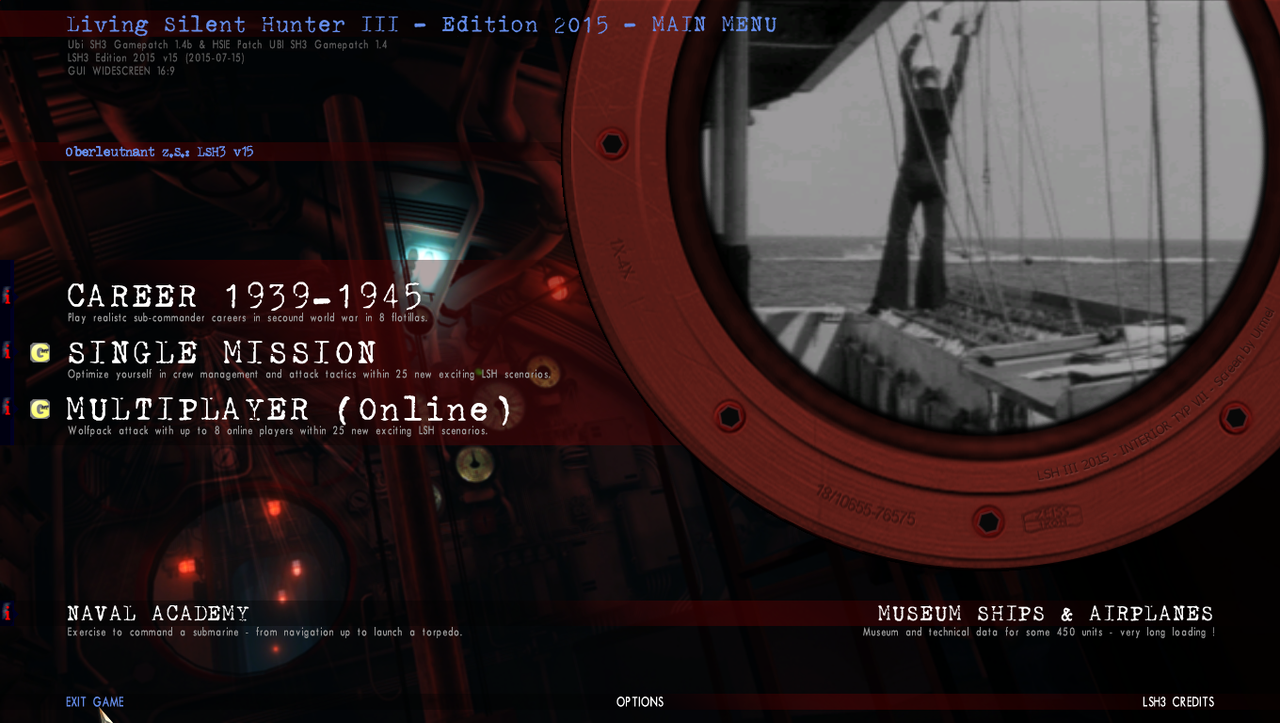 Picture 16 > Confirm that you want to > Quit Game > Yes. 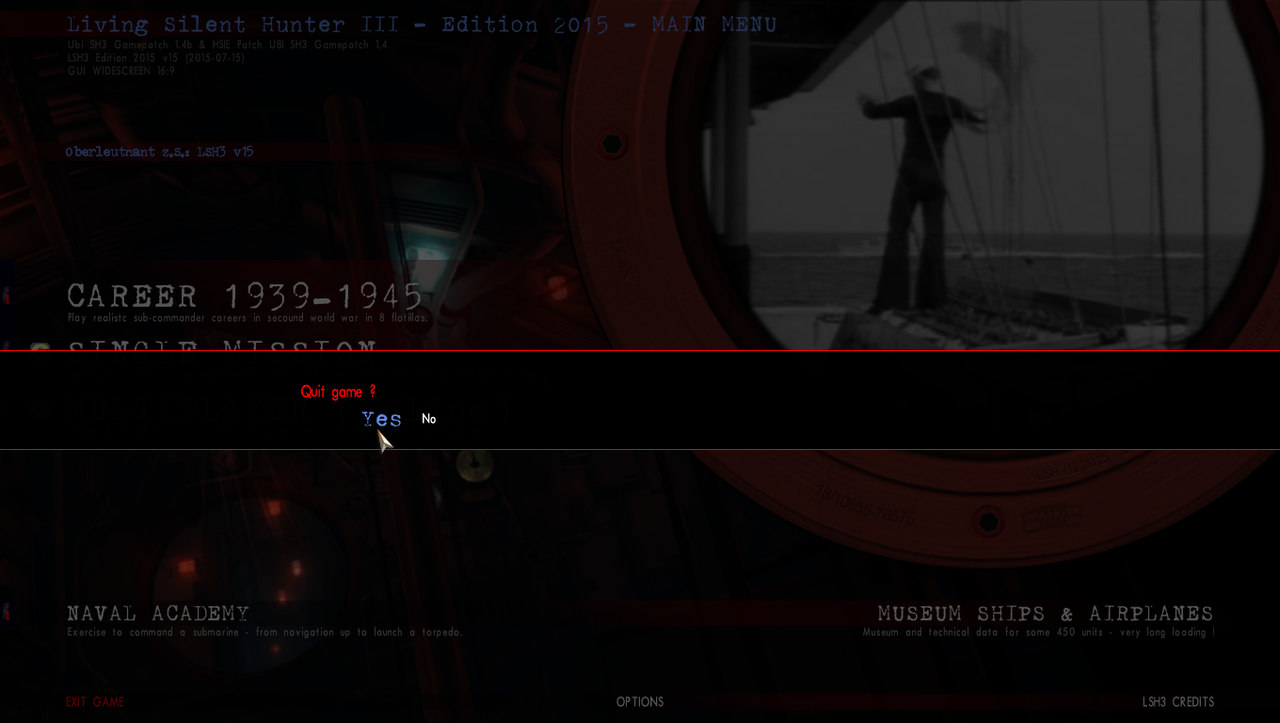 Picture 17 > Documents folder > Before Naval Academy.  Picture 18 > Documents folder > After Naval Academy. 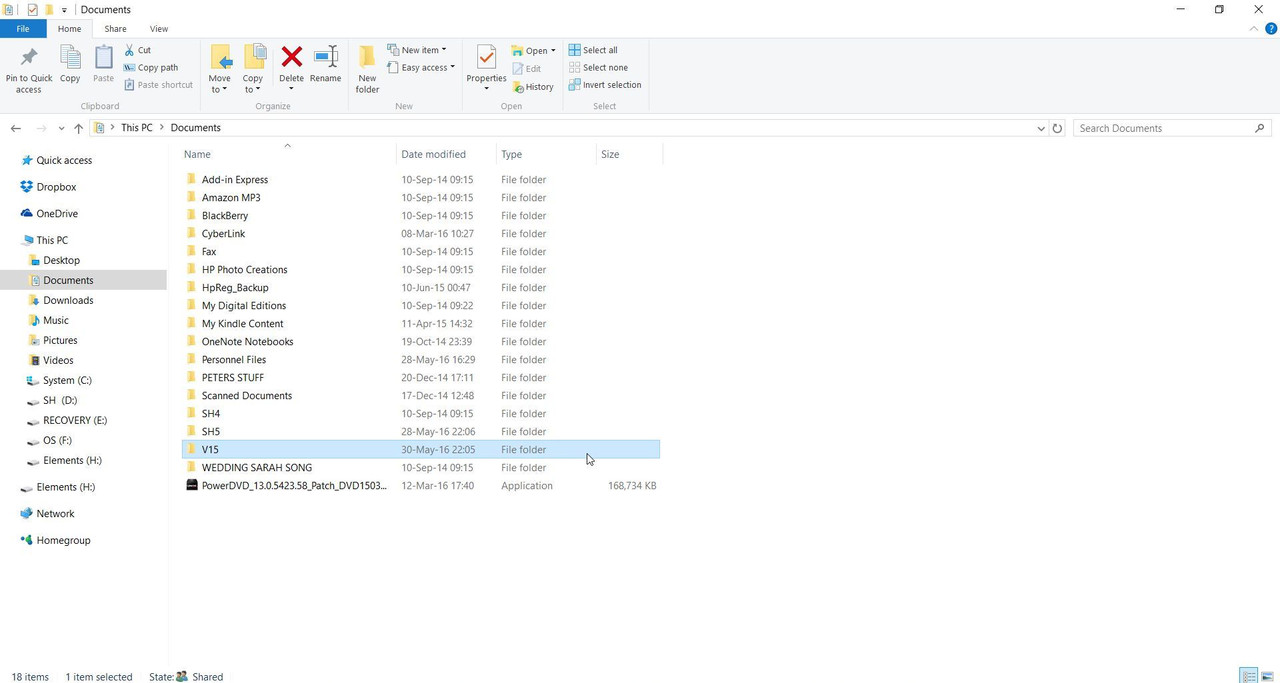 Note. Completing an exam in the Naval Academy will increase your renown from 1000 to 2000 points. Now go to the next Tutorial.
__________________
LSH3-2015 <> TUTORIALS <> ALL YOU NEED TO KNOW <> ALL IN ONE PLACE SH4 <> TUTORIALS <> HOW TO DO IT <> INFORMATION <> DOWNLOAD LINKS SH5 <> TUTORIALS <> HOW TO DO IT <> INFORMATION <> DOWNLOAD LINKS Always Here To Help A Fellow 'Subber' | Need An Answer to A Question Just Send Me A PM Last edited by THEBERBSTER; 05-04-18 at 04:17 PM. Reason: Replaced missing pictures |
|
|
|
|
05-29-16, 10:20 AM
|
#9 |
|
Growing Old Disgracefully
Join Date: Dec 2012
Location: Hythe - Southampton
Posts: 9,609
Downloads: 1133
Uploads: 0
|
Adding Mods And Making Changes to the HSIE.
Making changes to the HSIE (Optional) > Pictures 1 to 5. Adding Some Mods In JSGME > Picture 6. If you wish to make changes to the > HSIE then must be done with the mod/patch disabled. To understand what each mod does look in the HSIE manual. All these patches increase the difficulty levels to your game. Picture 1 > Go to the > Mods folder.   Picture 2 > Open the > HSIE.  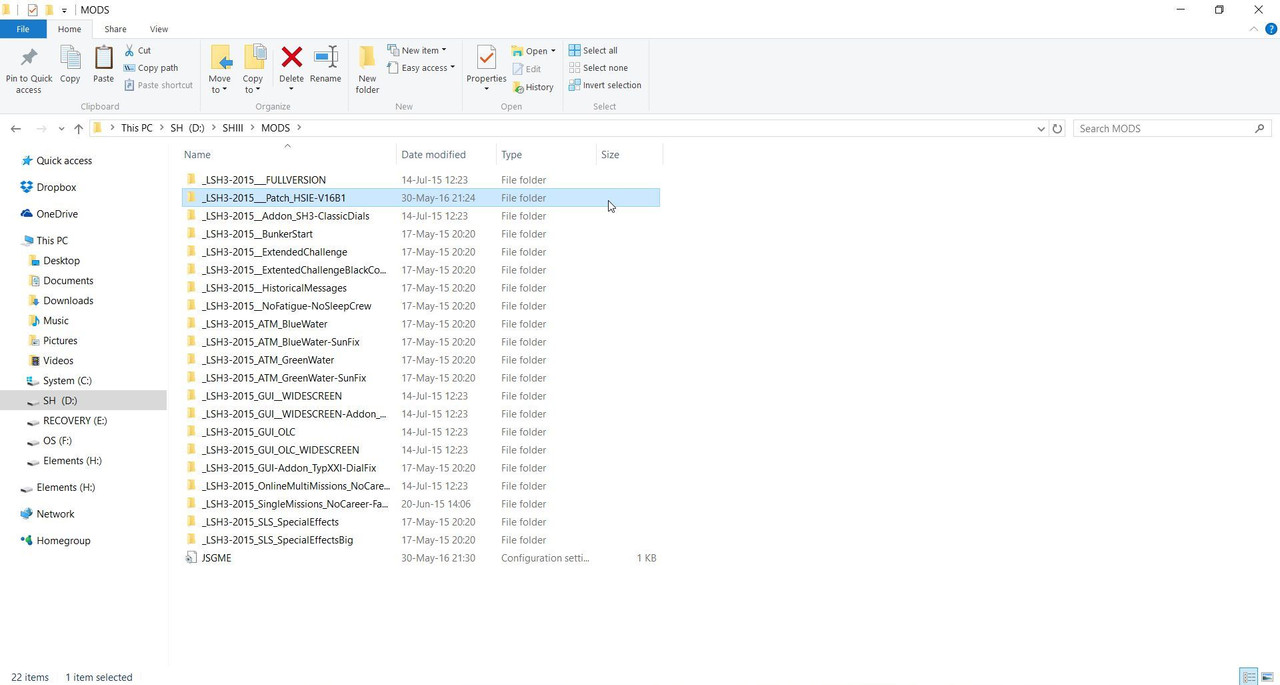 Picture 3 > Open the > HSIEOptionsSelector.  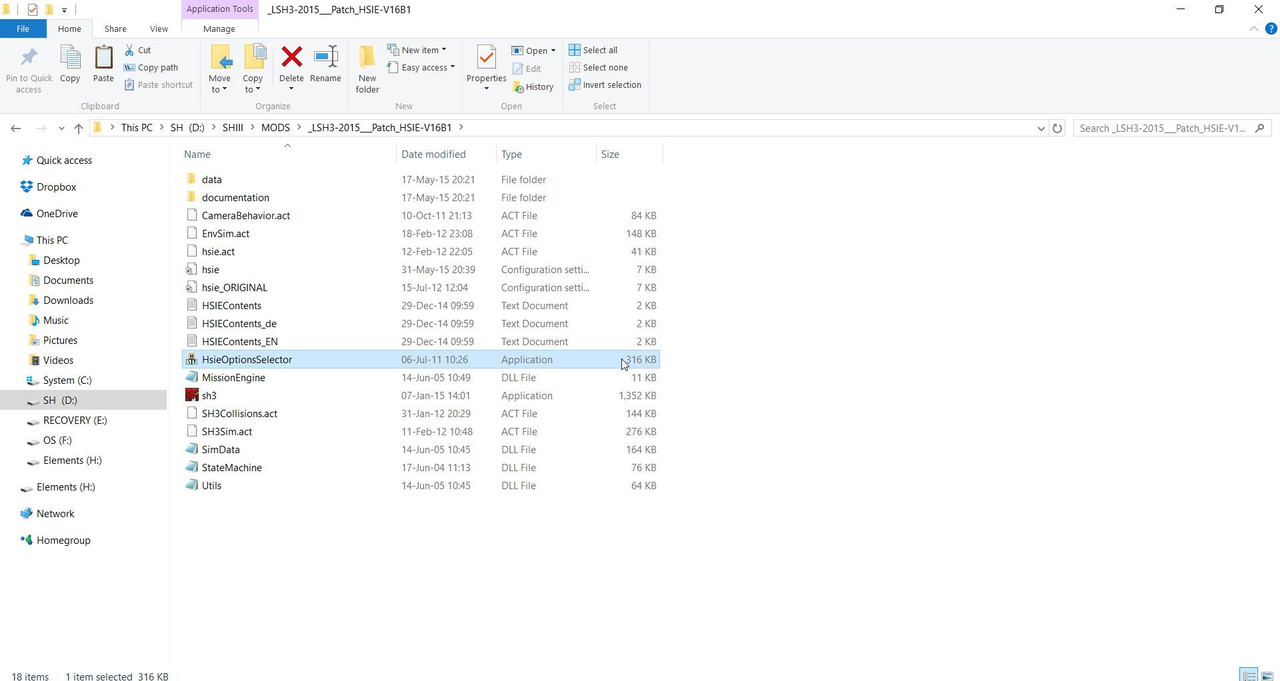 Picture 4 > You will see the default > LSH3 Settings and the > 4Gbyte setting enabled.  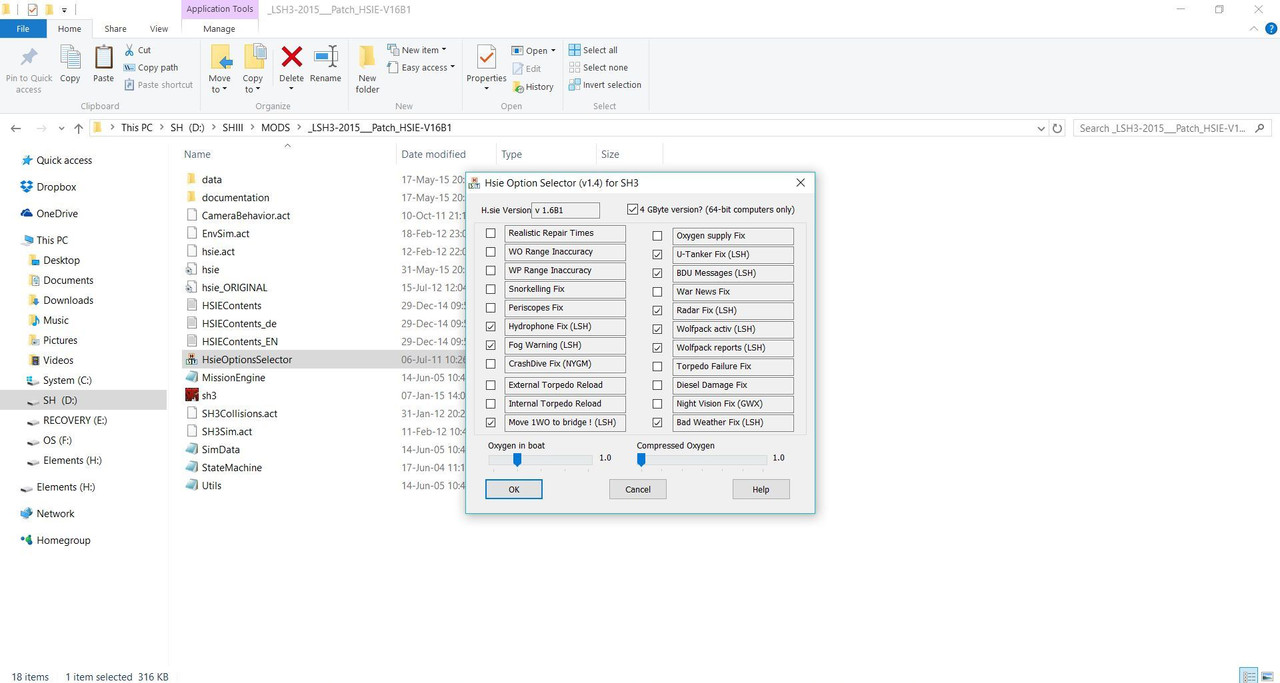 Picture 5 > Tick the boxes for the patches you want to enable. Clicking > OK in the > HSIE will show you that your changes have been added to the SH3.exe. Click > Ok to accept.   Picture 6 > Shows a working set of mods enabled.   Now go to the next Tutorial.
__________________
LSH3-2015 <> TUTORIALS <> ALL YOU NEED TO KNOW <> ALL IN ONE PLACE SH4 <> TUTORIALS <> HOW TO DO IT <> INFORMATION <> DOWNLOAD LINKS SH5 <> TUTORIALS <> HOW TO DO IT <> INFORMATION <> DOWNLOAD LINKS Always Here To Help A Fellow 'Subber' | Need An Answer to A Question Just Send Me A PM Last edited by THEBERBSTER; 05-04-18 at 04:25 PM. Reason: Replaced missing pictures |
|
|
|
|
05-29-16, 10:21 AM
|
#10 |
|
Growing Old Disgracefully
Join Date: Dec 2012
Location: Hythe - Southampton
Posts: 9,609
Downloads: 1133
Uploads: 0
|
SH3Commander > Making Changes > New Career > Launching LSH3.
Picture 1 > Start your game from SH3Commander from the > Main Game folder (Tutorial SHIII) or from the > Taskbar. 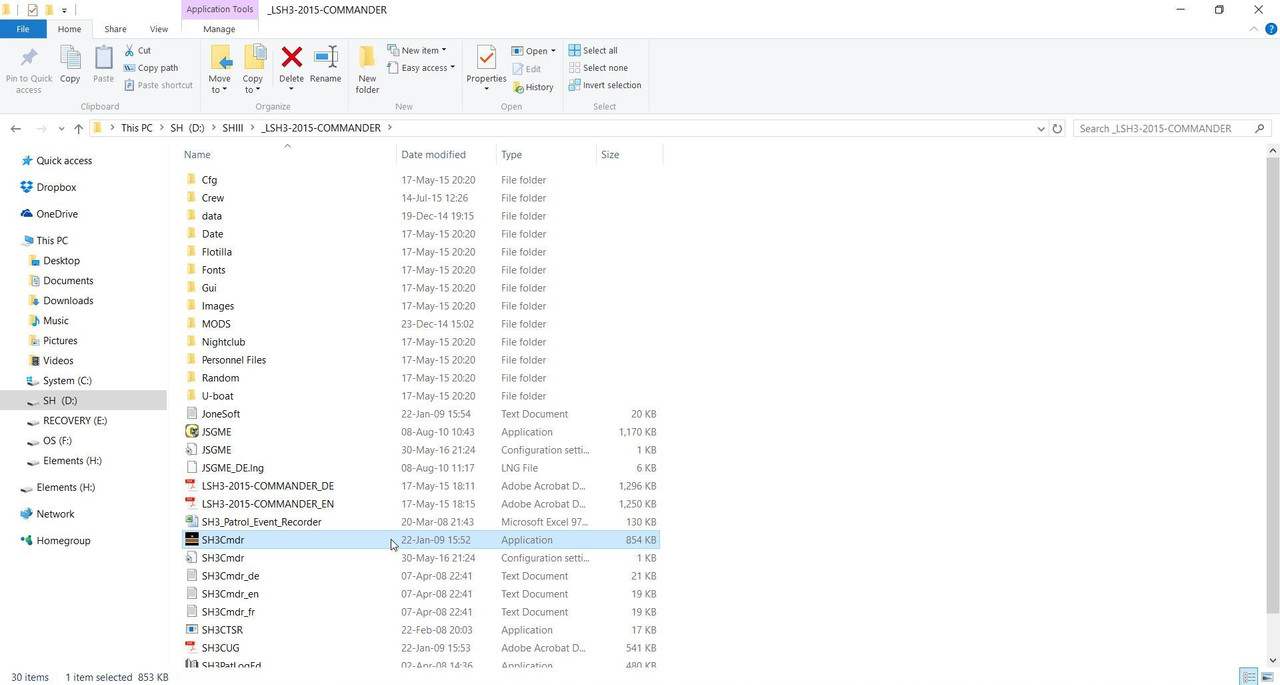 Picture 2 > Shows the Main Menu. You will notice that the > Flotilla automatically defaults to the Testing flotilla > Eprobungstelle The default U-Boat is the > Type IIA.  Picture 3 > Shows the 2 types of U-boats available from the > Drop down box. 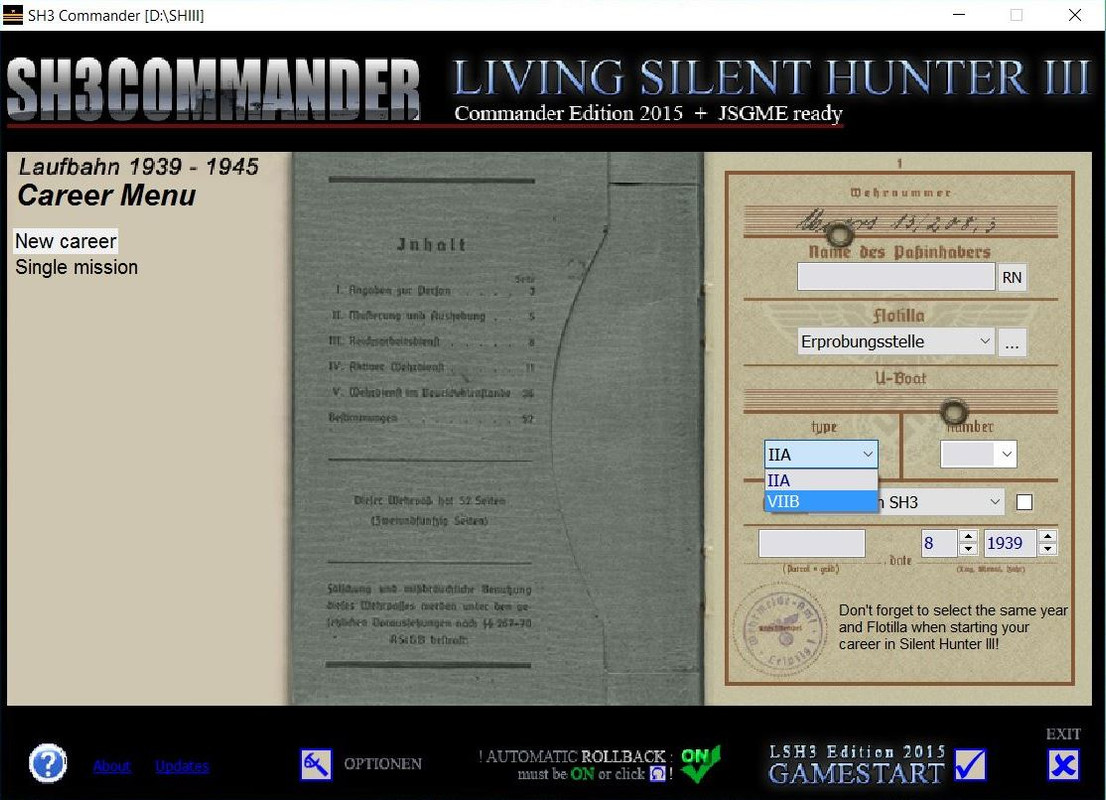 Click on > Optionen to open the > Options Menu. Picture 4 > Shows the > General Settings screen.  Picture 5 > Shows the > Career Options screen. Changes can be made now by > Ticking the box/es. Click on > Apply. Click on > Ok. Simulate a Realistic Career Length > Optional on Test Missions. Simulate Realistic Crew Transfers > Optional on Test Missions. 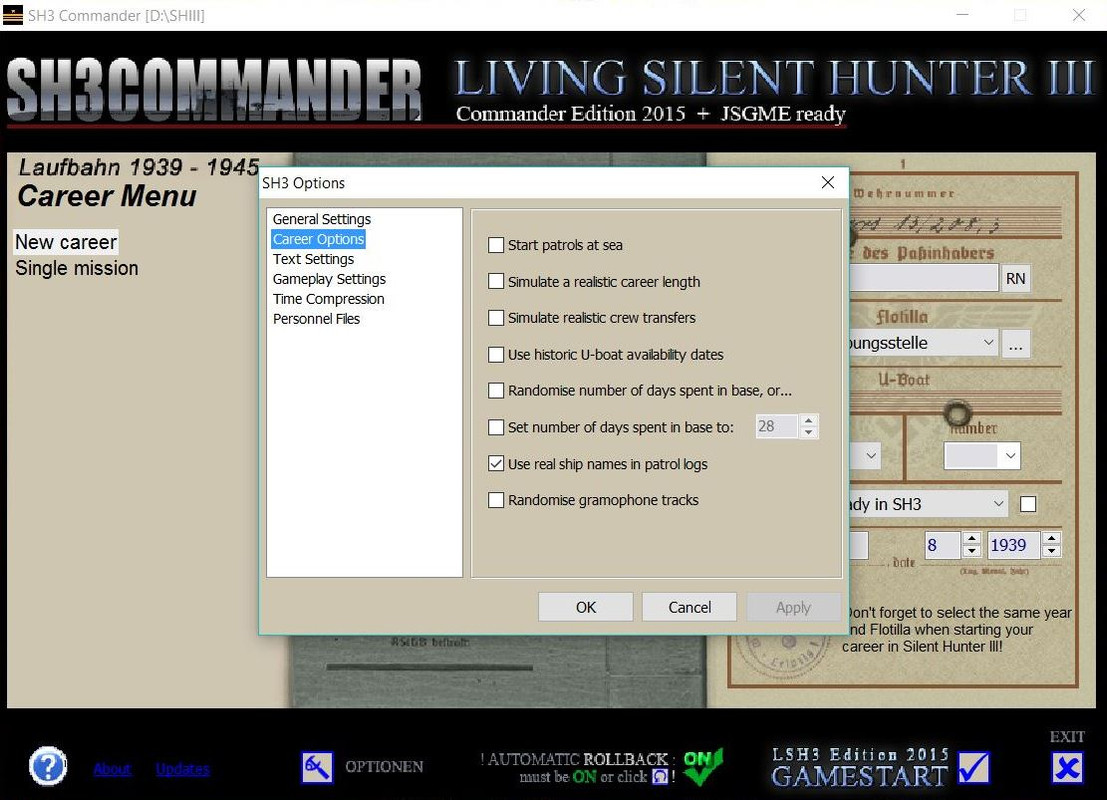 Picture 6 > Shows the > Career Options I am going to play with. 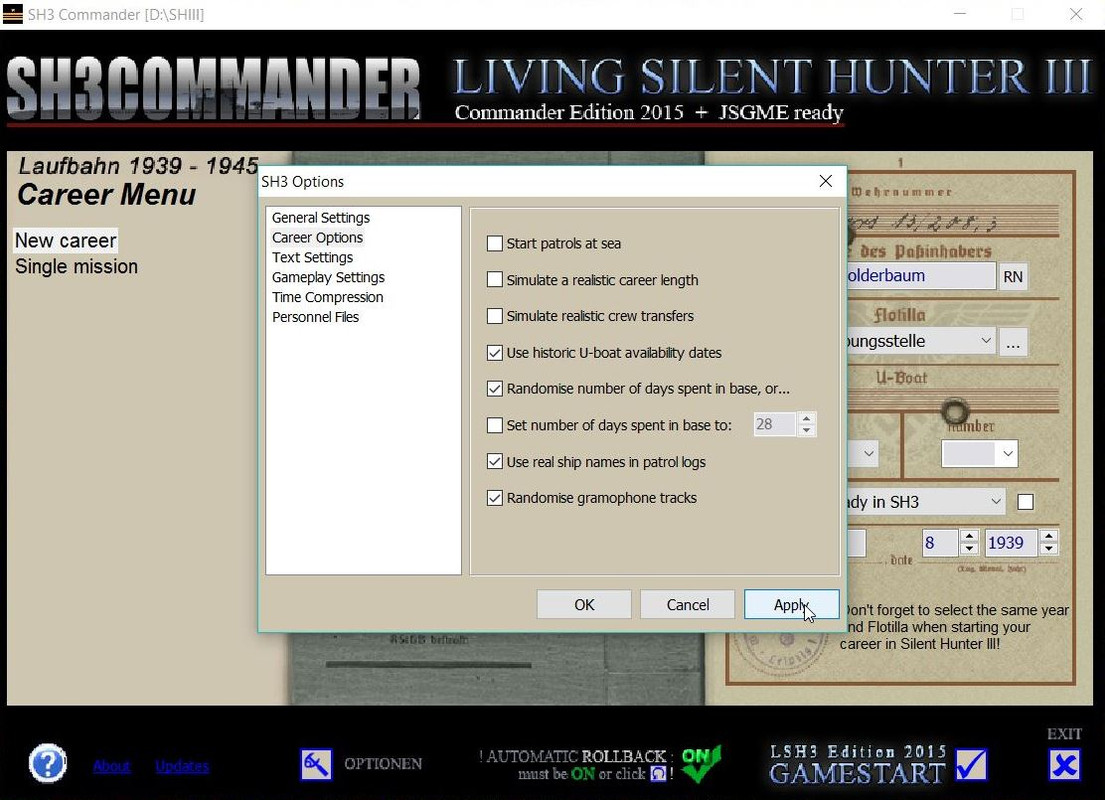 Picture 7 > Game Play Settings. Changes can be made now by > Ticking the box/es. Click on > Apply. Click on > Ok. 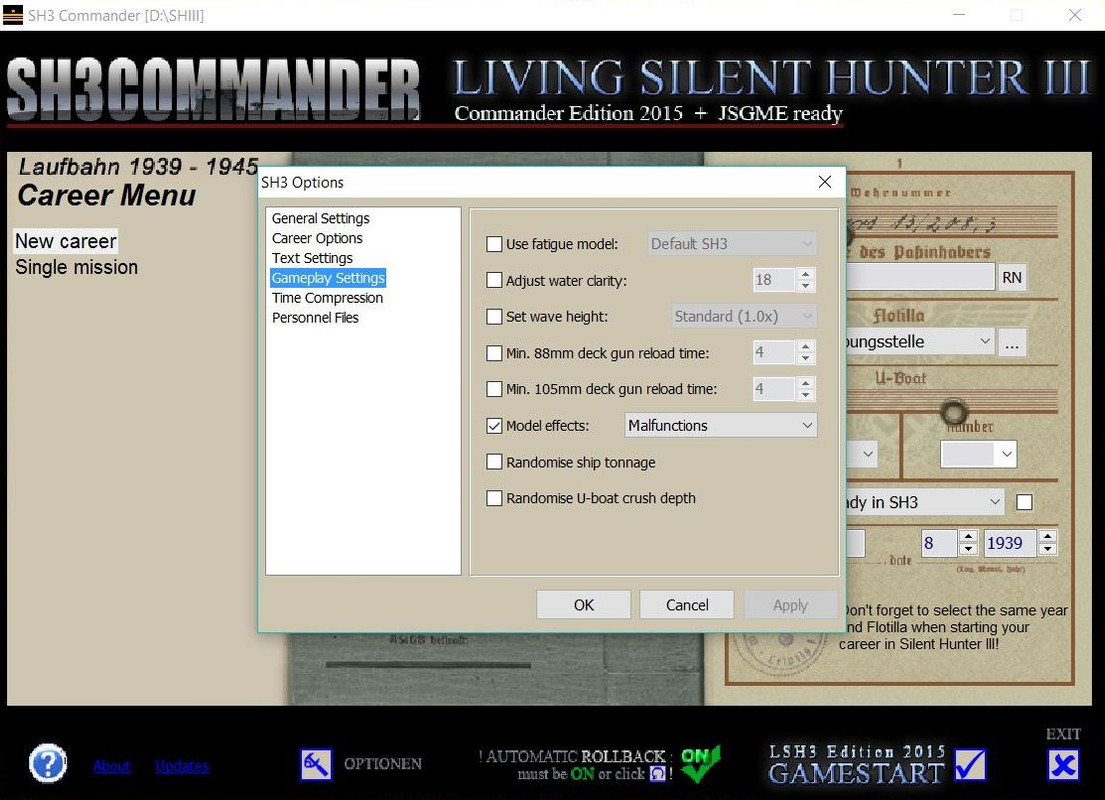 Picture 8 > Game Play Settings > Model Effects. 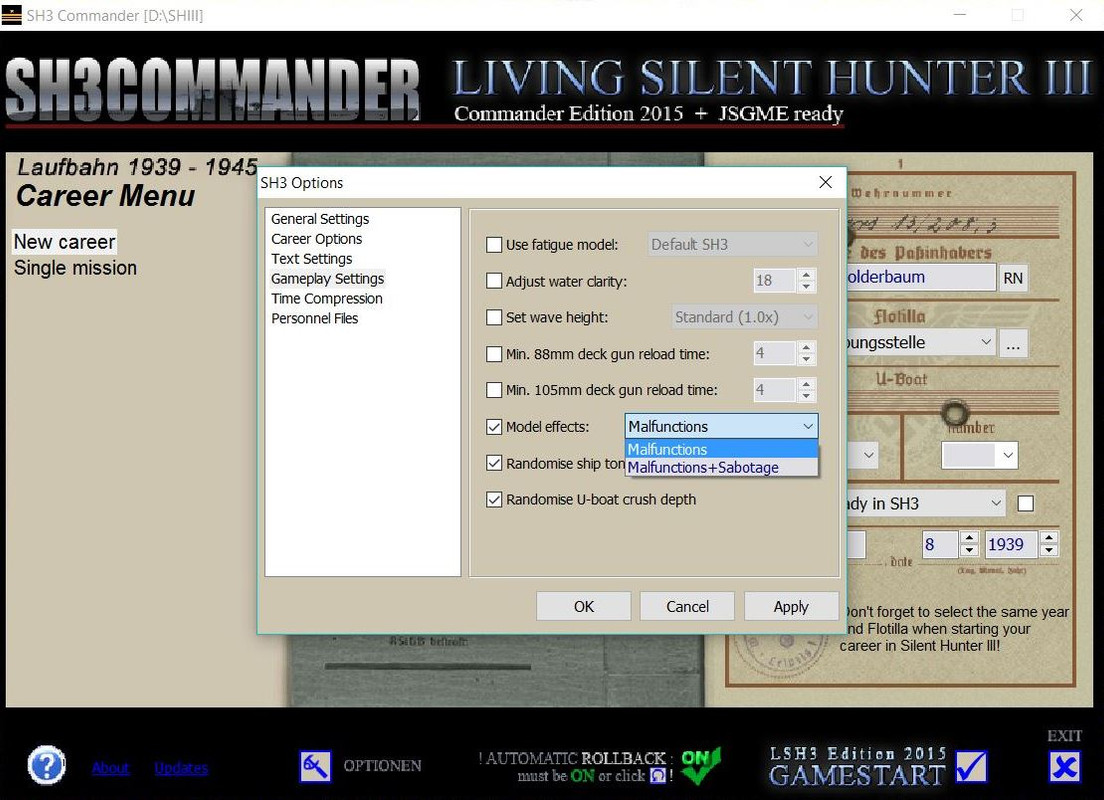 Picture 9 > Back to the Main Menu of > SH3Commander. You have the option here to either > Name your own Captain. Click on > RN and Commander will > Randomize a Captain for you. Press > RN again if the name is not to your liking. 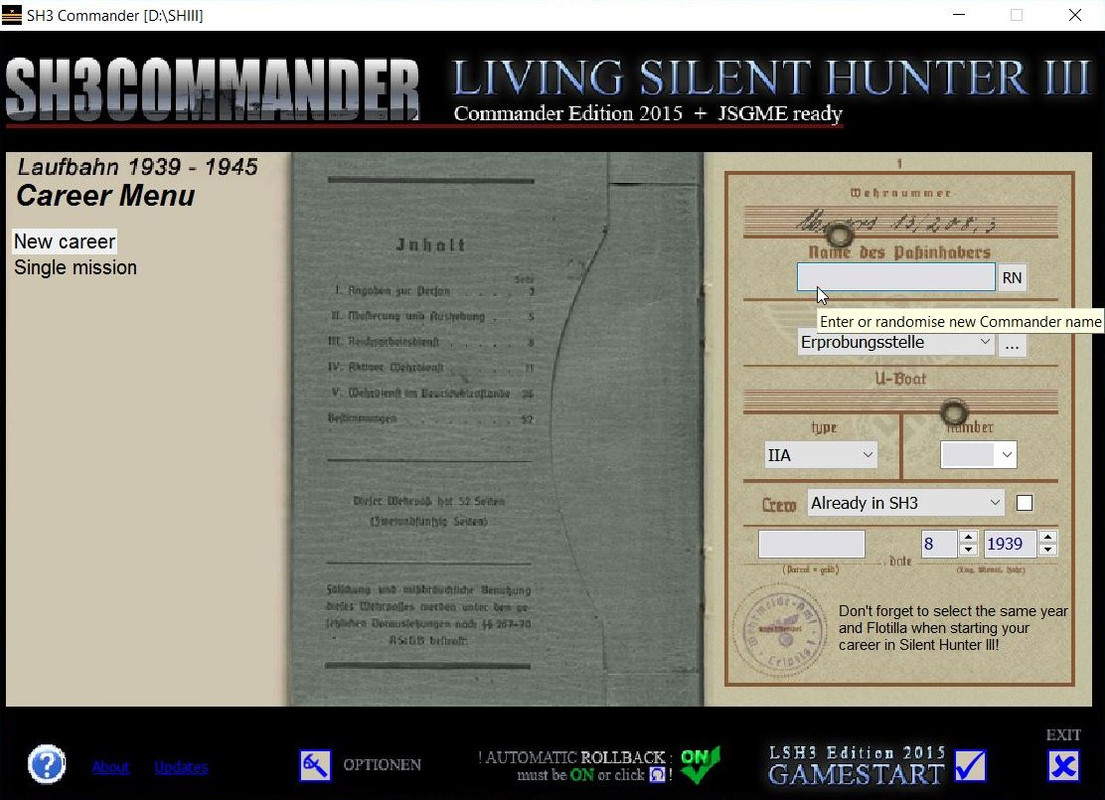 Picture 10 > I have Randomized the Captain > Kurt Holderbaum for my game. I have used the U-boat > drop down box and selected a > VIIB. Notice that you are going to start your > Test Mission in > August before the outbreak of WWII. 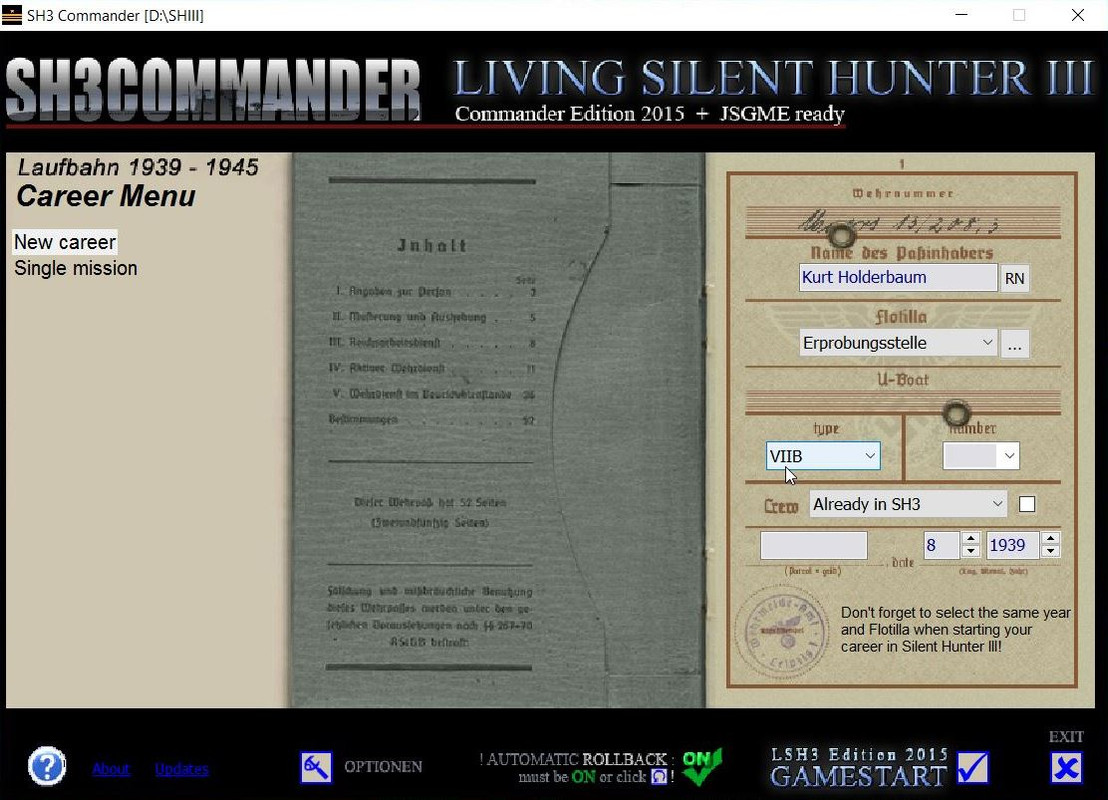 Picture 11 > Shows all the changes have been made for this mission so its time to > Launch SH3 (LSH3) 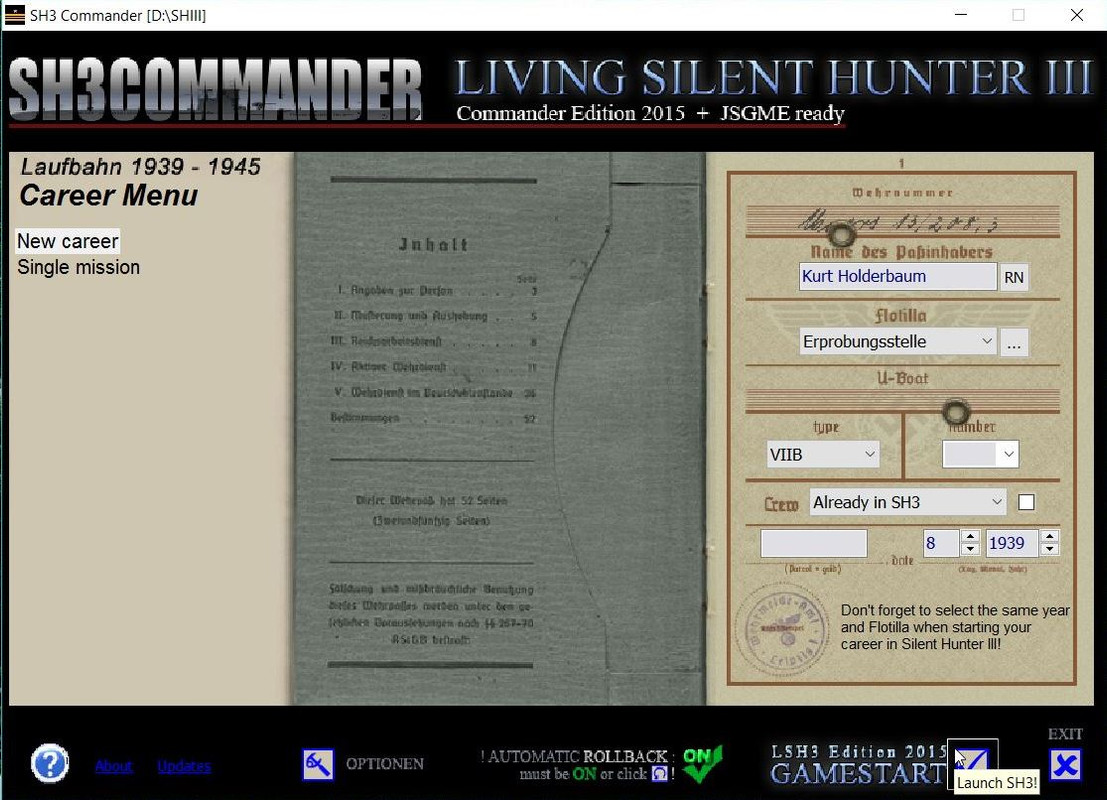 Now go to the next Tutorial.
__________________
LSH3-2015 <> TUTORIALS <> ALL YOU NEED TO KNOW <> ALL IN ONE PLACE SH4 <> TUTORIALS <> HOW TO DO IT <> INFORMATION <> DOWNLOAD LINKS SH5 <> TUTORIALS <> HOW TO DO IT <> INFORMATION <> DOWNLOAD LINKS Always Here To Help A Fellow 'Subber' | Need An Answer to A Question Just Send Me A PM Last edited by THEBERBSTER; 05-04-18 at 04:38 PM. Reason: Replaced missing pictures |
|
|
|
|
05-29-16, 10:22 AM
|
#11 |
|
Growing Old Disgracefully
Join Date: Dec 2012
Location: Hythe - Southampton
Posts: 9,609
Downloads: 1133
Uploads: 0
|
Launching The Game From SH3Commander.
Picture 1 > This picture is just a reminder that > LSH3 must always be started from SH3Commander. The Captain is on board and all ready to meet the crew.   Picture 2 > The game will load to the > Main Menu.  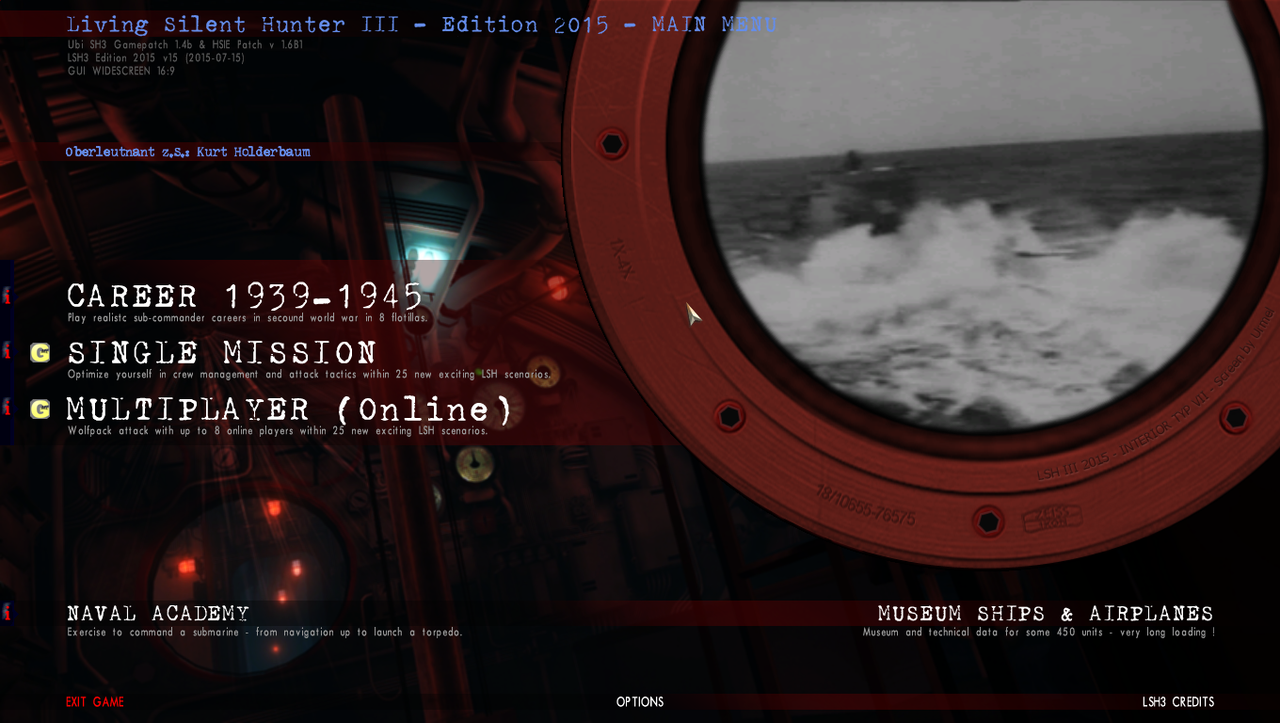 Picture 3 > Options is still available if you are not happy with your previous settings.  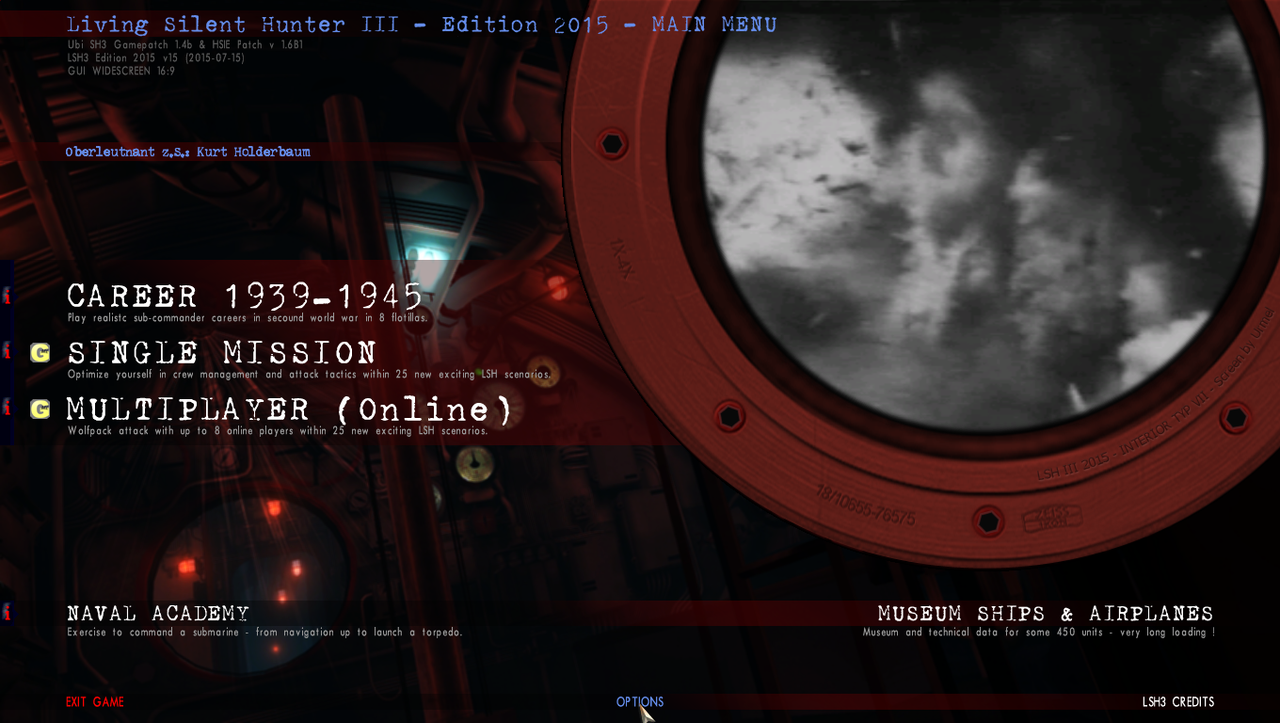 Picture 4 > Shows Kurt Holderbaum is ready for active service.  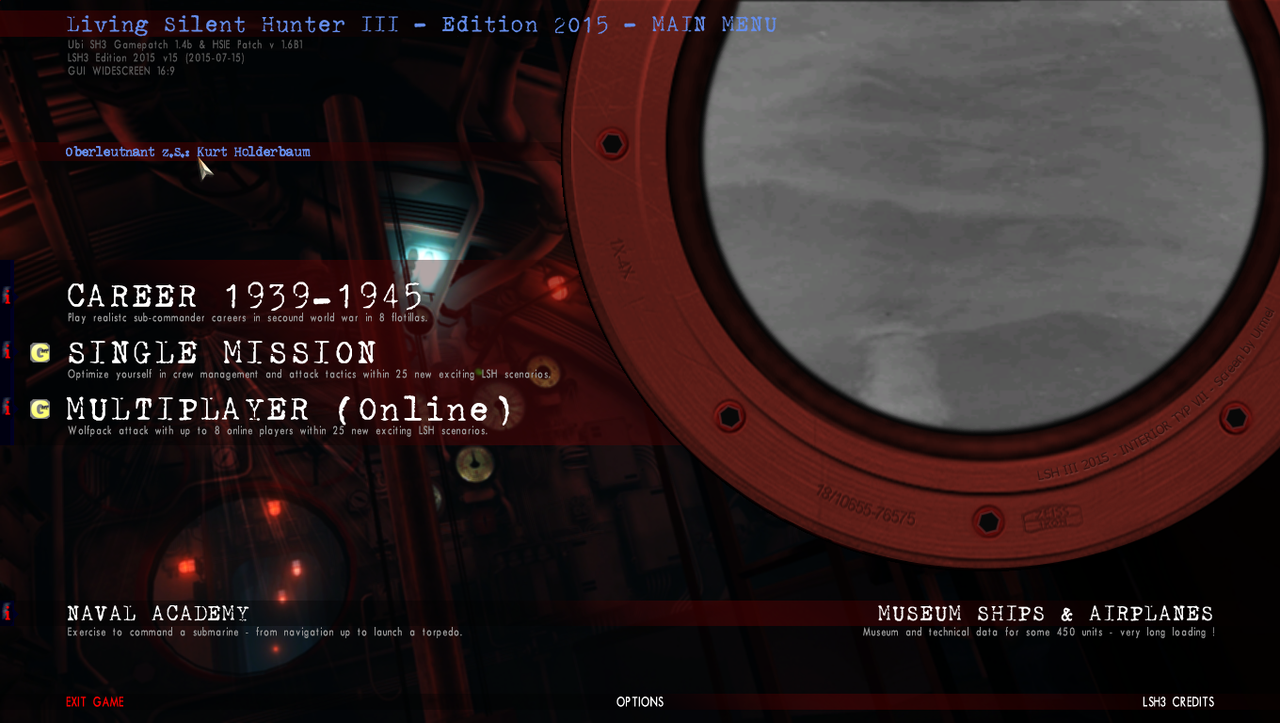 Picture 5 > Click on > Career 1939 1945.  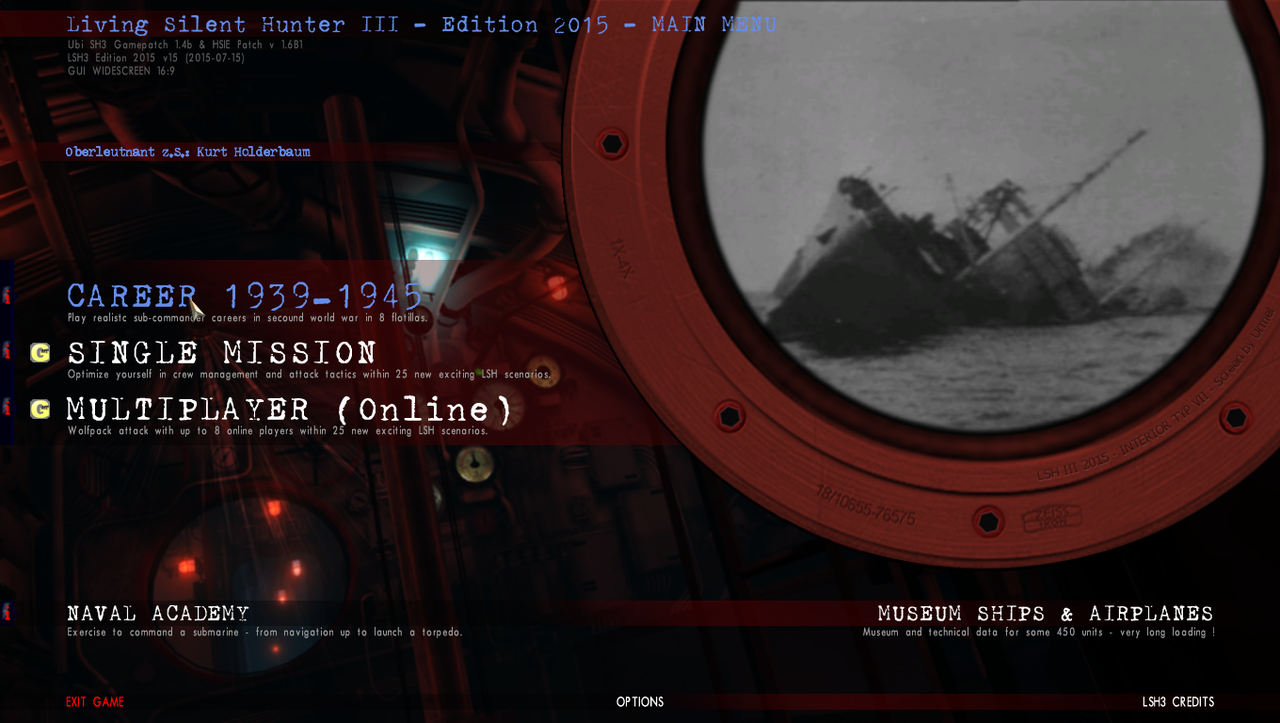 Picture 6 > Click on > Save / Start.  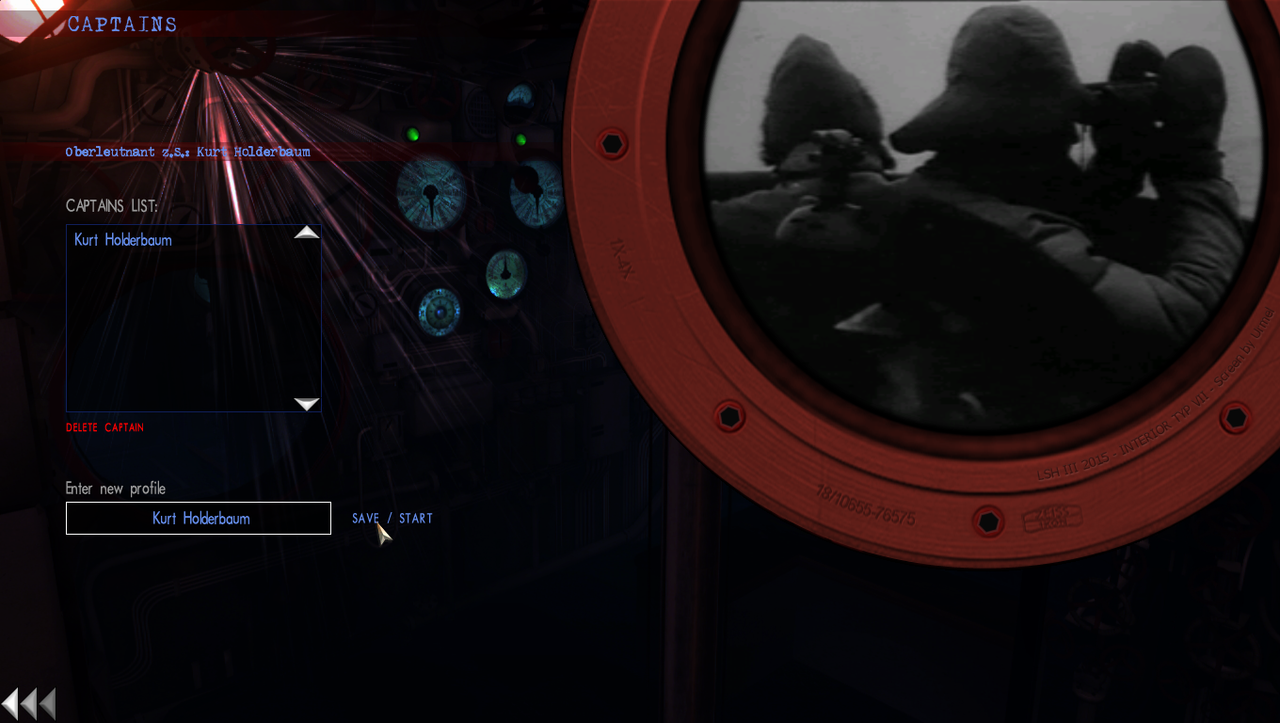 Picture 7 > Click on > New Career.   Picture 8 > This screen confirms the testing flotilla > Eprobungstelle and your > Testing Base is Stralsund.   Picture 9 > Press > Start to continue.  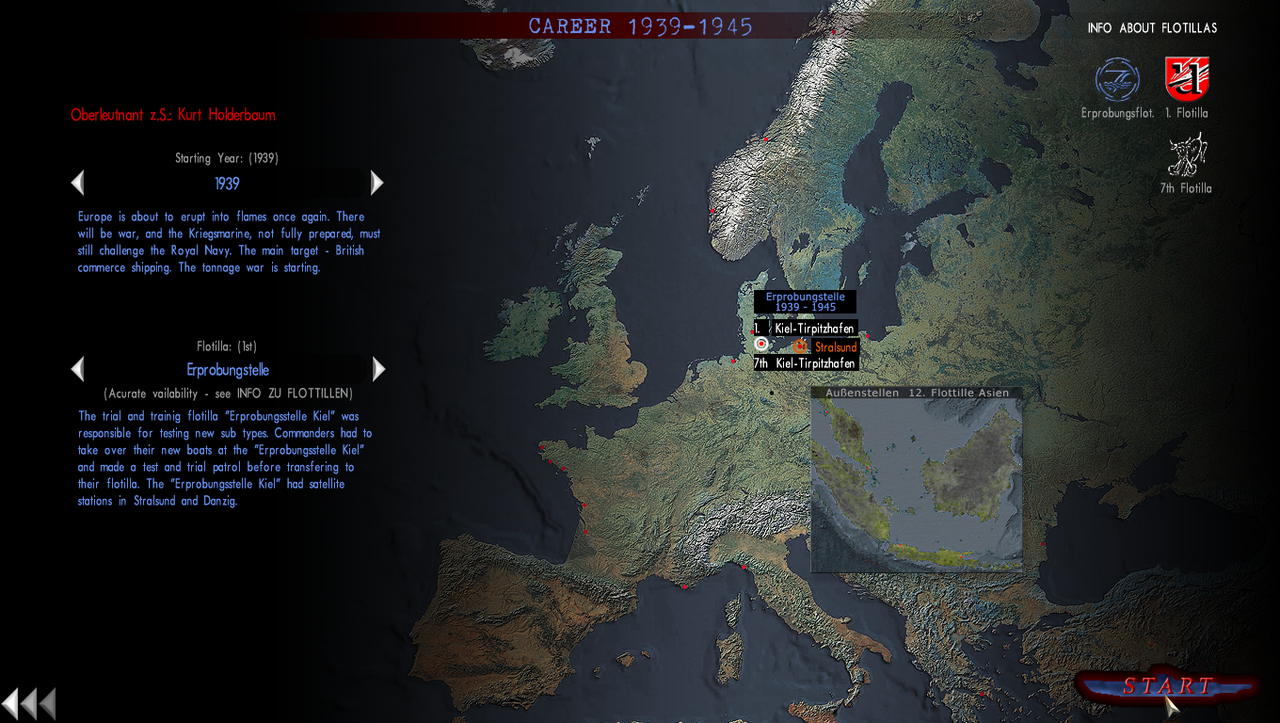 Picture 10 > The Office > Career Menu. It is important to remember that with all testing missions which happen after a transferring no changes should in > The Office should be made. Click on the > Map to load the > Mission.  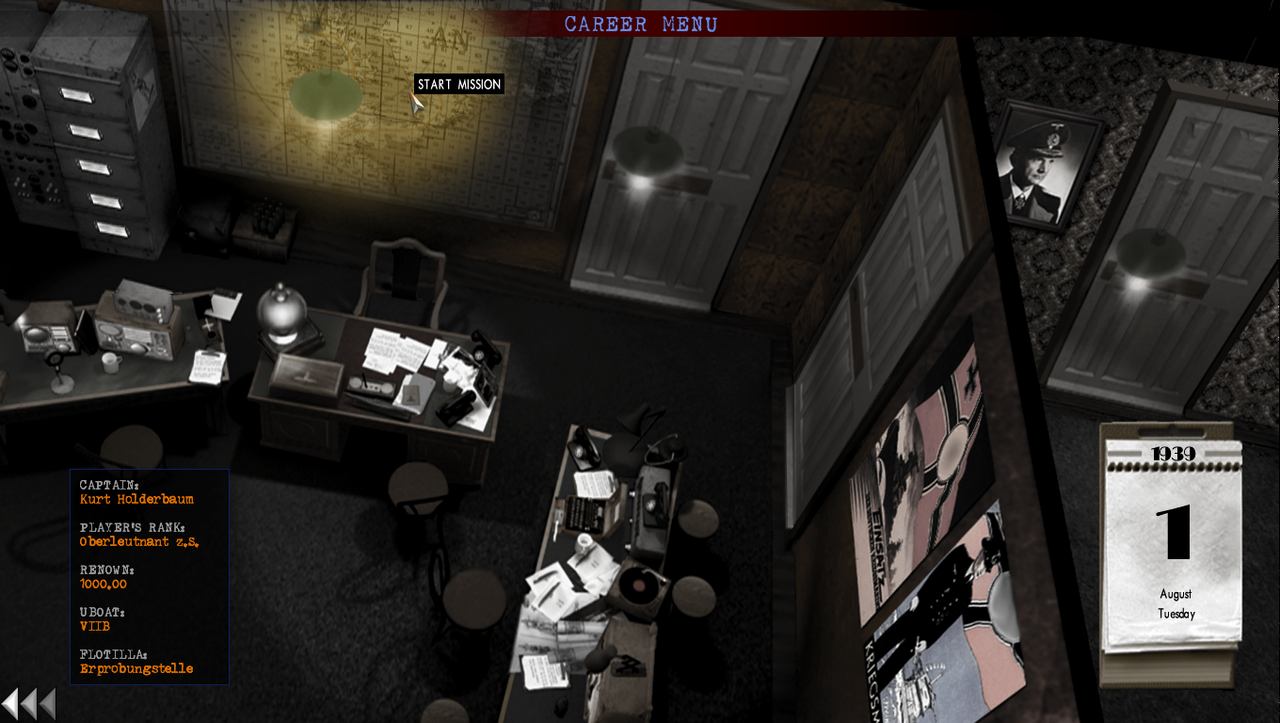 Picture 11 > You will see your orders here and your U-Boat base and the base you should return to unless you receive radio orders telling you otherwise. The default > Realism Game Play Setting of 38% is showing.  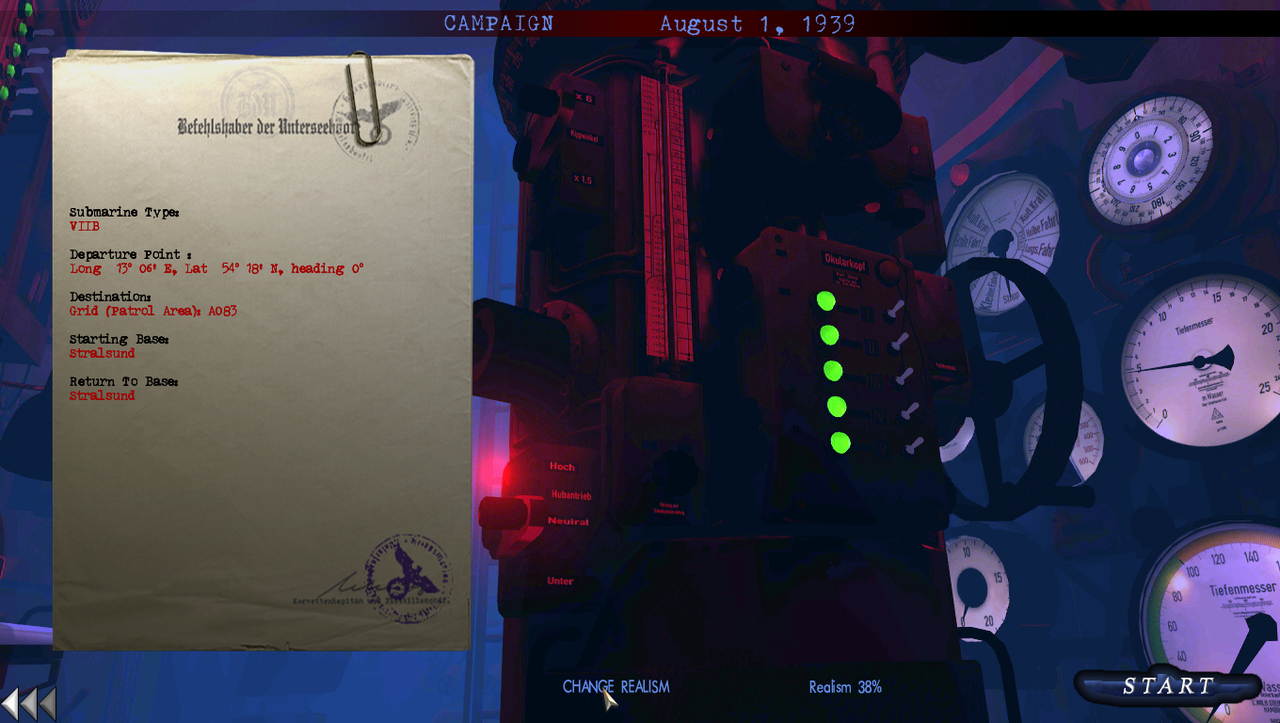 Picture 12 > I have set my > Realism Game Play Setting to 88% for this mission. Click on > Accept to keep the changes.  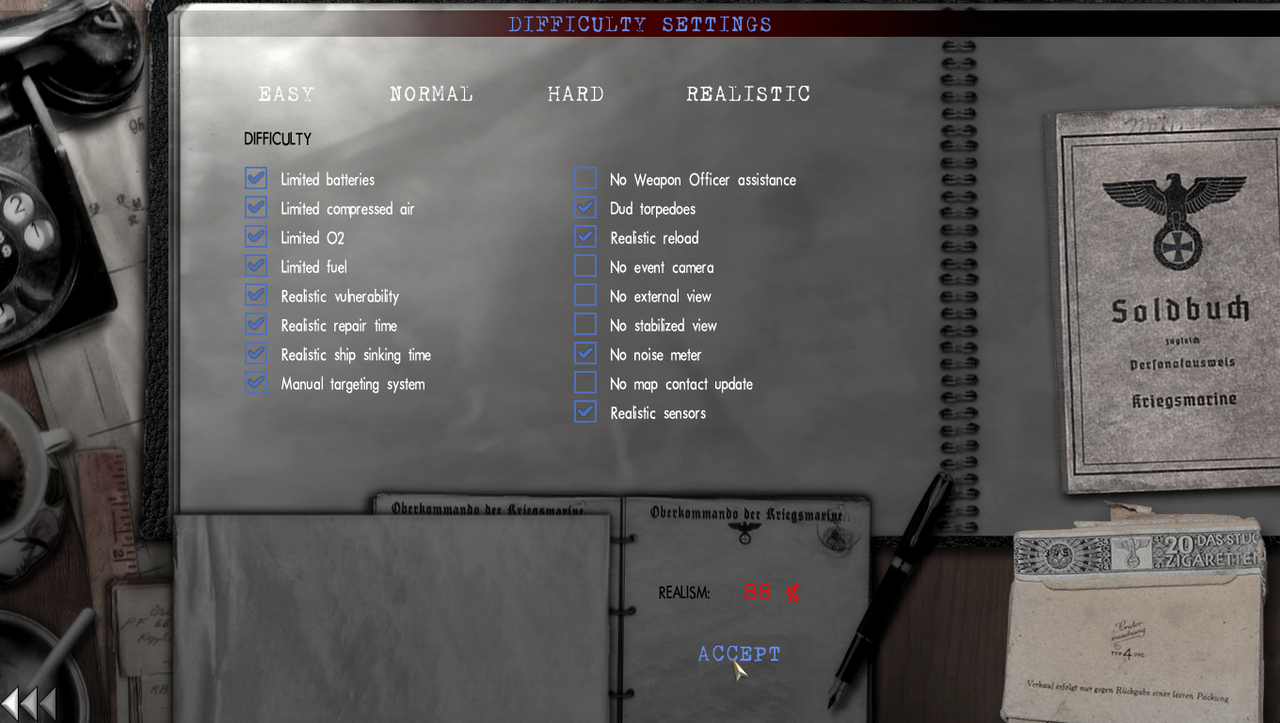 Picture 13 > Confirm with > Yes if you are still sure and have not changed your mind.  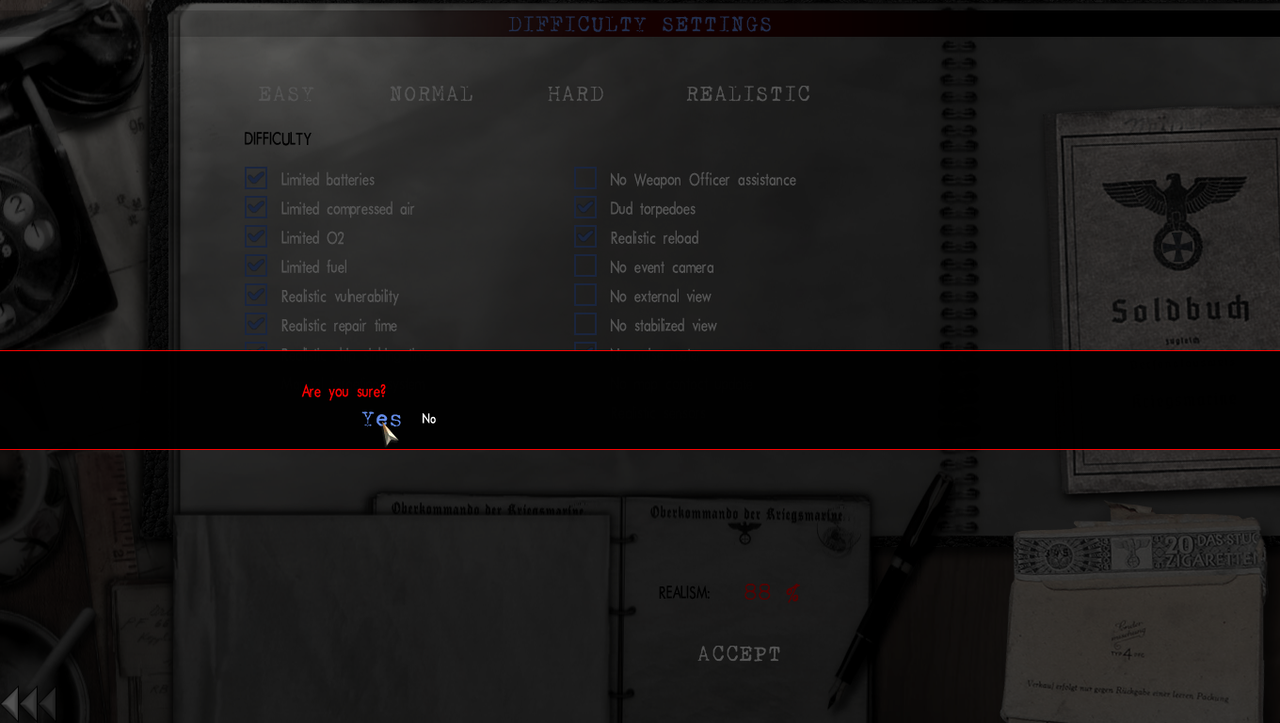 Picture 14 > The Mission Starting Date for this first test mission and the next mission will be sometime before the outbreak of WWII.   Picture 15 > Press > Start to begin the game loading screen. Please note, that the time to load will depend on your > Systems capabilities. The average time is 3 to 6 minutes. The > Loading Bar will appear to freeze when it gets close to the end, this is quite normal, so just be patient. The Loading Bar is is also the most likely place that you will get a CTD. If this happens repeat the loading tutorial again. If you used the > Taskbar previously then this time go to the > Main Game folder and > Start SH3Commanderfrom from there. If you get a further > CTD then you need to look at using or changing the > SH3.exe to a different > Compatibility Mode.   Now go to the next Tutorial.
__________________
LSH3-2015 <> TUTORIALS <> ALL YOU NEED TO KNOW <> ALL IN ONE PLACE SH4 <> TUTORIALS <> HOW TO DO IT <> INFORMATION <> DOWNLOAD LINKS SH5 <> TUTORIALS <> HOW TO DO IT <> INFORMATION <> DOWNLOAD LINKS Always Here To Help A Fellow 'Subber' | Need An Answer to A Question Just Send Me A PM Last edited by THEBERBSTER; 05-04-18 at 04:56 PM. Reason: Replaced missing pictures |
|
|
|
|
05-29-16, 10:22 AM
|
#12 |
|
Growing Old Disgracefully
Join Date: Dec 2012
Location: Hythe - Southampton
Posts: 9,609
Downloads: 1133
Uploads: 0
|
Game Loaded > Raise The flag > Patrol Orders > Using your Weapons Officer > TDC .
Picture 1 > The game always loads to the > Command Room. Commands you are going to use now: F4 > Bridge. F5 > Navigation Map. 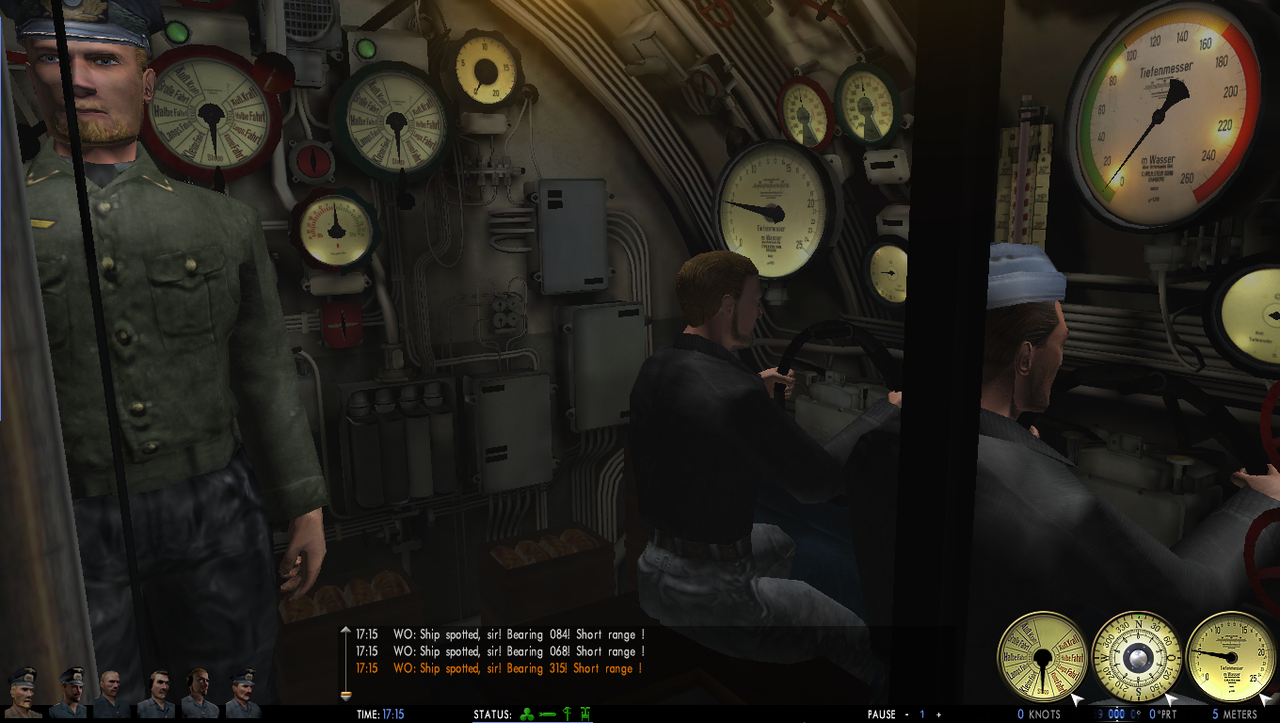 Picture 2 > F4 takes you to the > Bridge. At this point the > Flagstaff is without a Flag flying > Use Ctrl + F to remove the flag. WO: Firing at will will show in the > Message Box when you use CTRL + F11 to take a Picture.  Picture 3 > Use Shift + F to place the Flag on the Flagstaff.  Picture 4 > F5 takes you to the > Navigation Map. The Navigation Map shows the U-Boats position in Stralsund Dock. Note the > Blue ? this is the > Tool Helper. 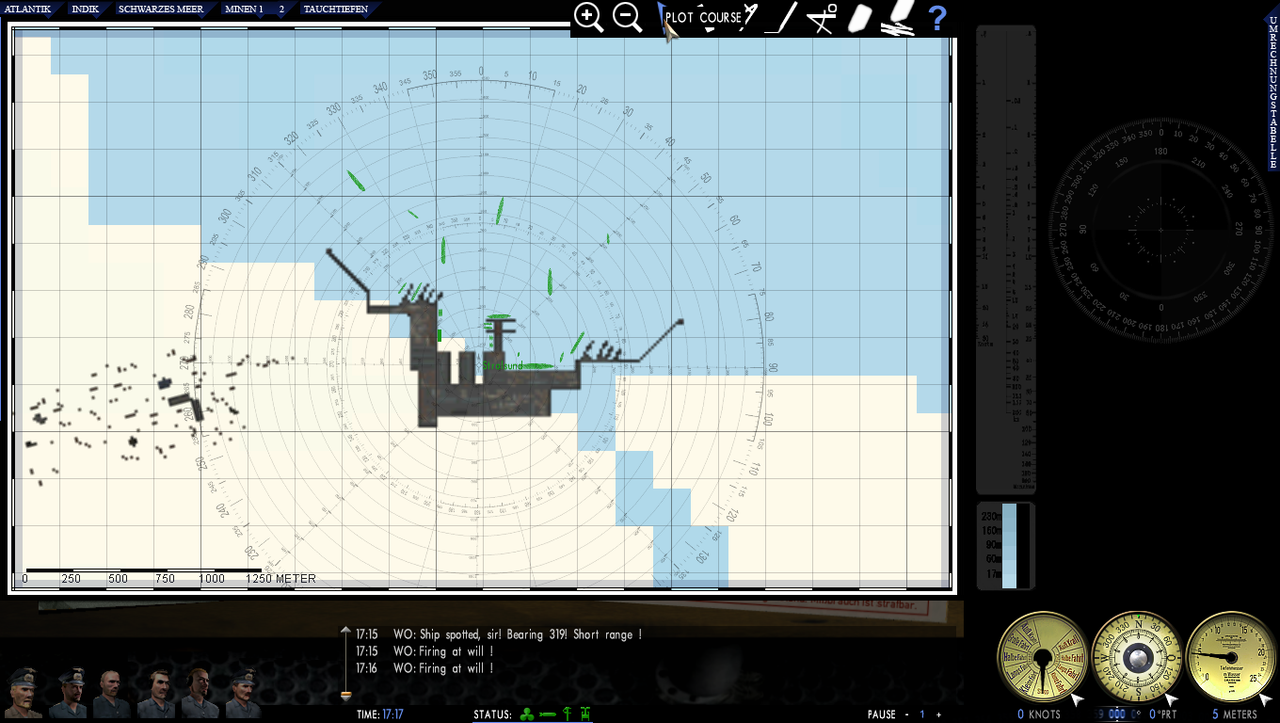 Picture 5 > With the Map expanded (Mouse Scroll Wheel) the first part of the course is plotted. As soon as you release the mouse from the > Plotting Tool (Right Mouse Click) the > U-Boats telegraph will automatically go to > Ahead Standard. 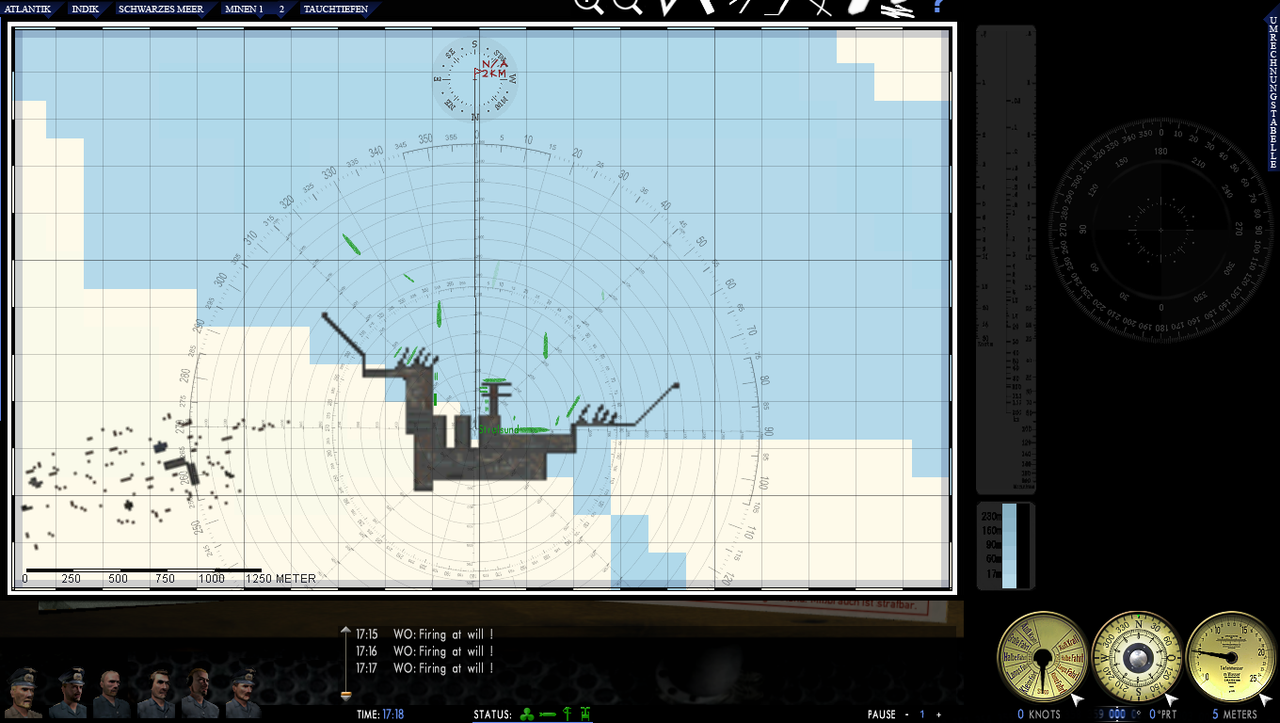 Picture 6 > Pressing the Short Cut K key shows the > Captains Log. 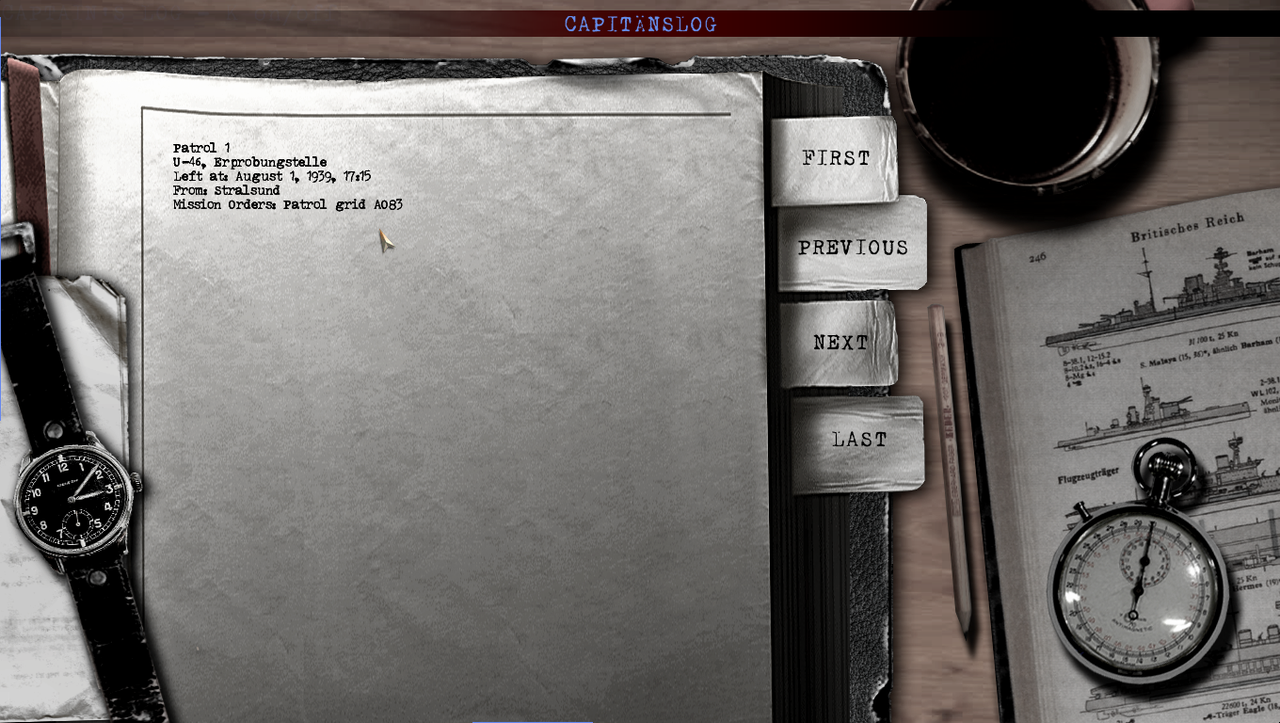 Picture 7 > Pressing F7 shows you your > Crew. The Qualifications showing are the default ones. The Crew positions are default ones. Crew Qualifications can be changed later by using > SH3Commanders > Crew Management. 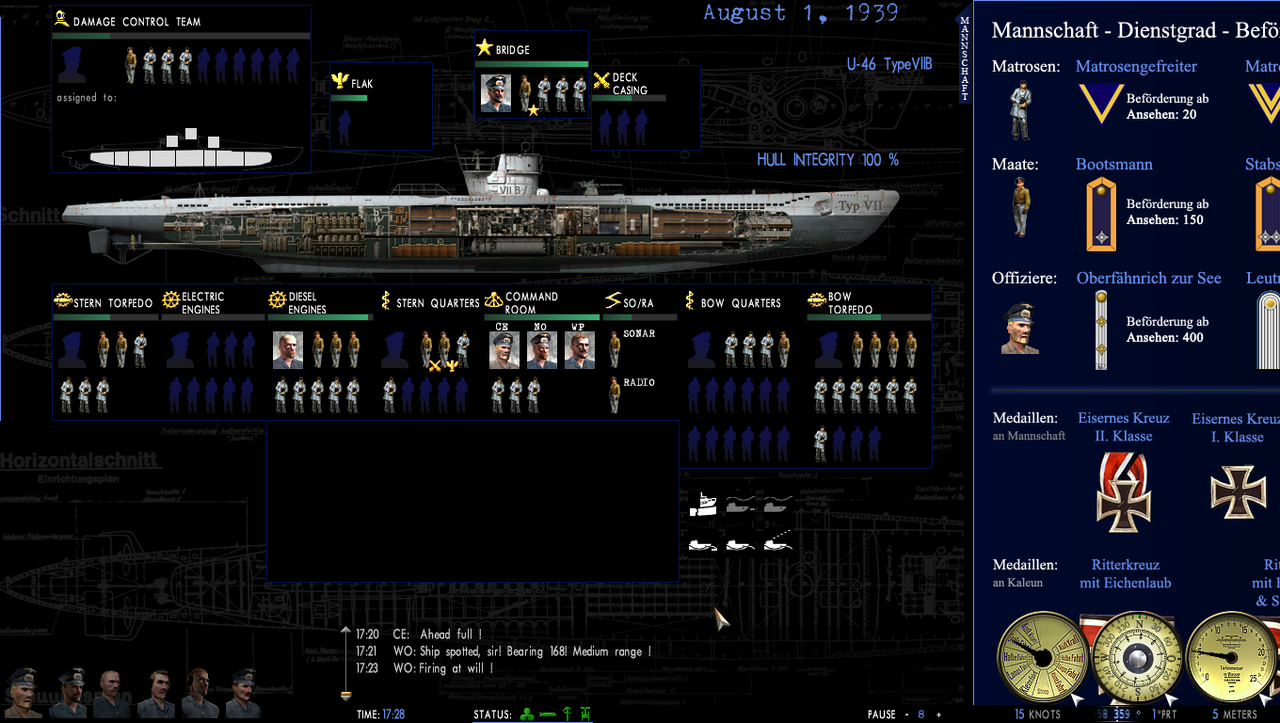 Picture 8 > Pressing the Short Cut I key will take you to the Torpedoes and Ammunition screen. Auto Loading is the default setting. Click on > Auto Loading to remove the > Green tick. Use > Manual Loading if you are carrying more than one type of torpedo. 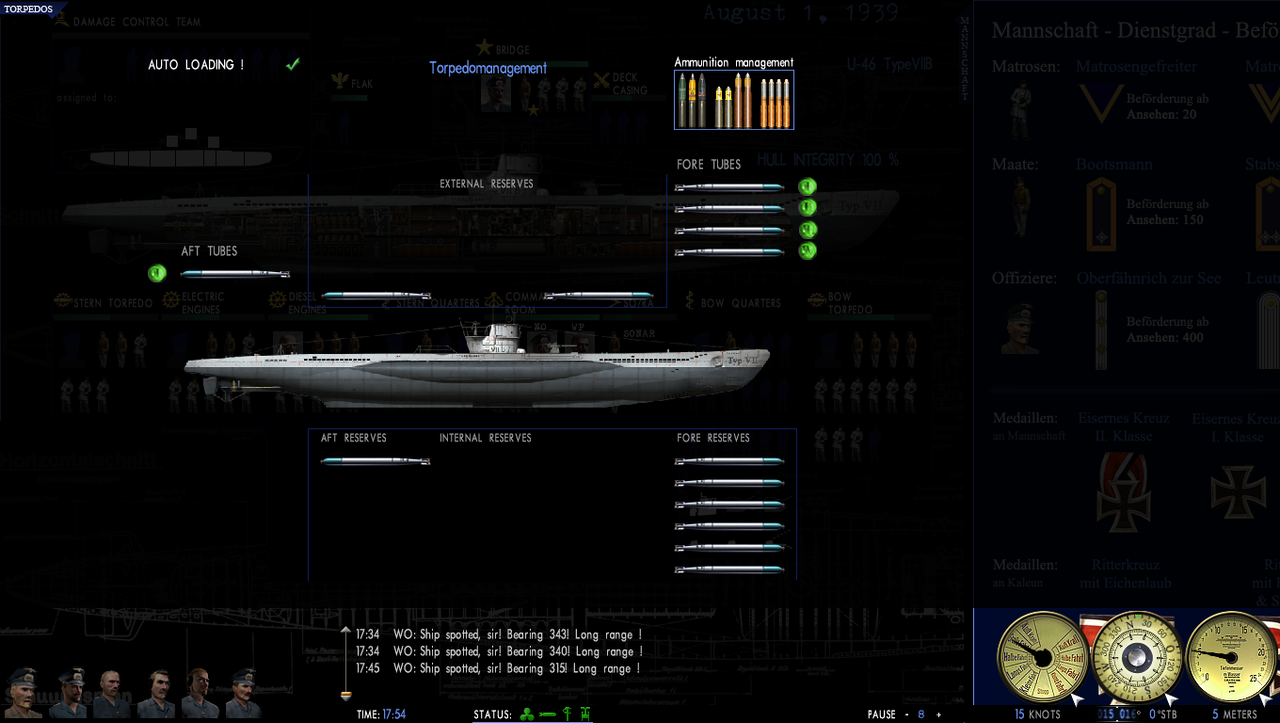 Picture 9 > Press the Short Cut M key to see > Radio Messages. This Radio Message contains your > Objective Orders. New messages are > Red. Old Messages are > Black.  Picture 10 > Shows a Radio Message in the > Message Box was received at 02.01. Plotting a course 25km off the coast to intercept the targets. 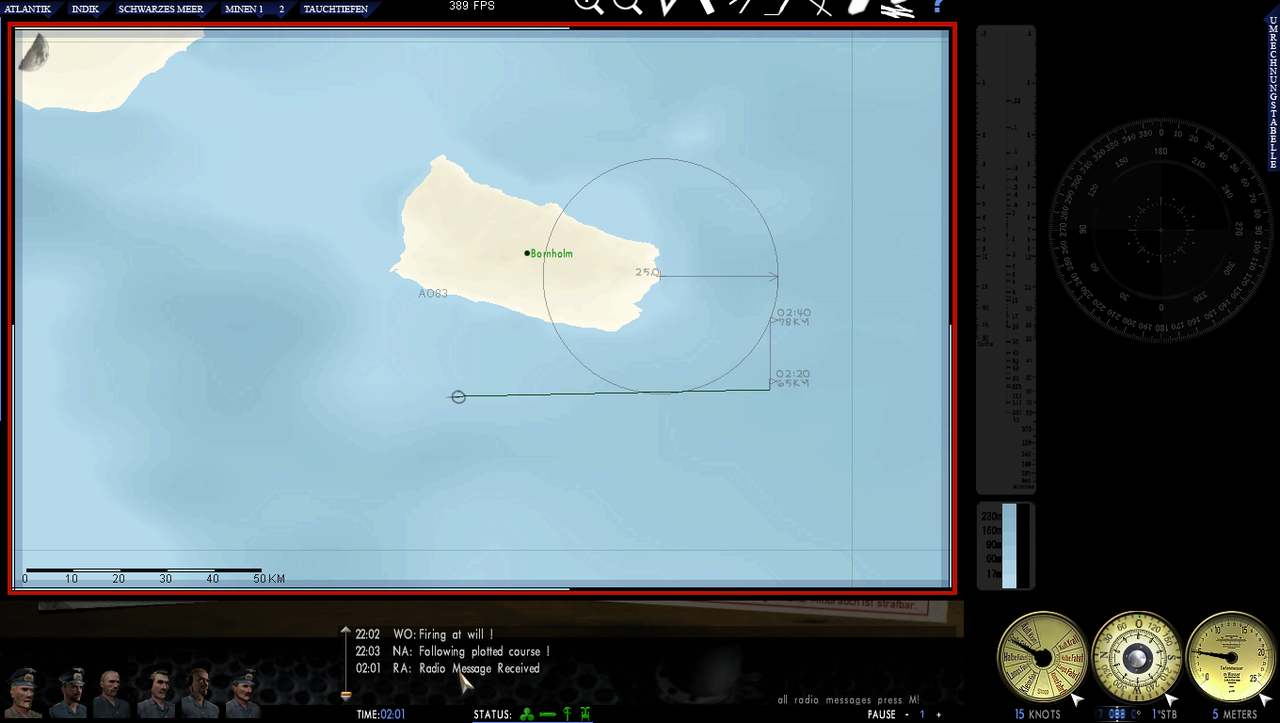 Picture 11 > F4 on the Bridge using the > UZO Shift + U to place the > UZO on its pedestal. Ctrl + U to remove. To Lock the Target use the Short Cut L key. Target Locked > Button turns Green. Weapons Officer Icon (WE) Periscope Bearing > 0ᵒ AOB will be > 90ᵒ Starboard. Speed as per orders > 9 knots. 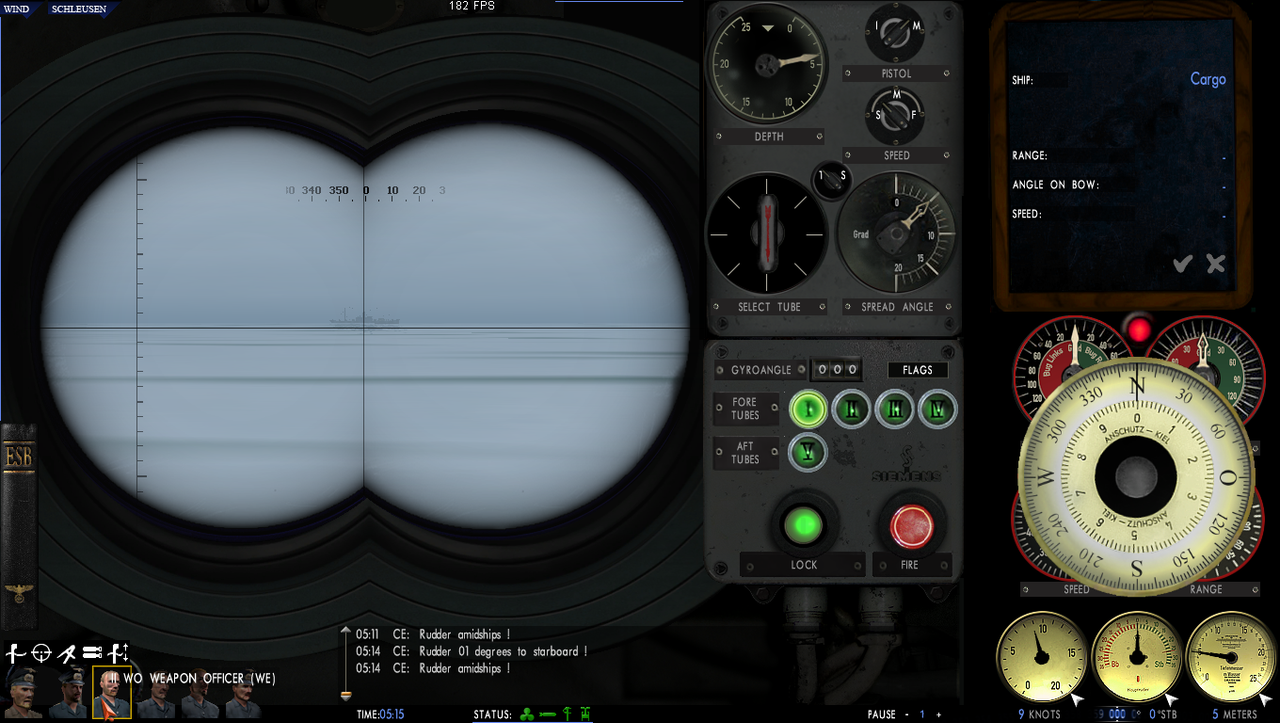 Picture 12 > Weapons Officer Icon (WE) Icon 1 > Torpedo Attack. 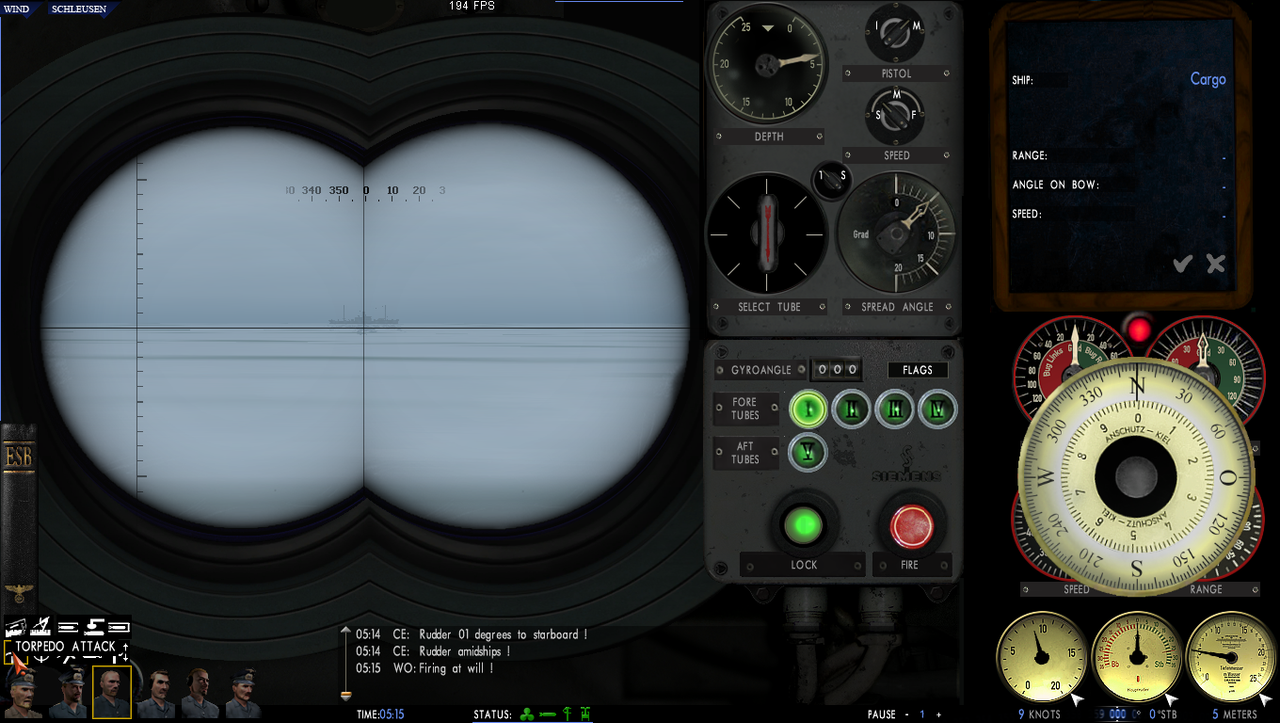 Picture 13 > Weapons Officer Icon (WE). Icon 1 > Lower > Torpedo Attack. Icon 1 > Upper > When pressed will identify the Target. 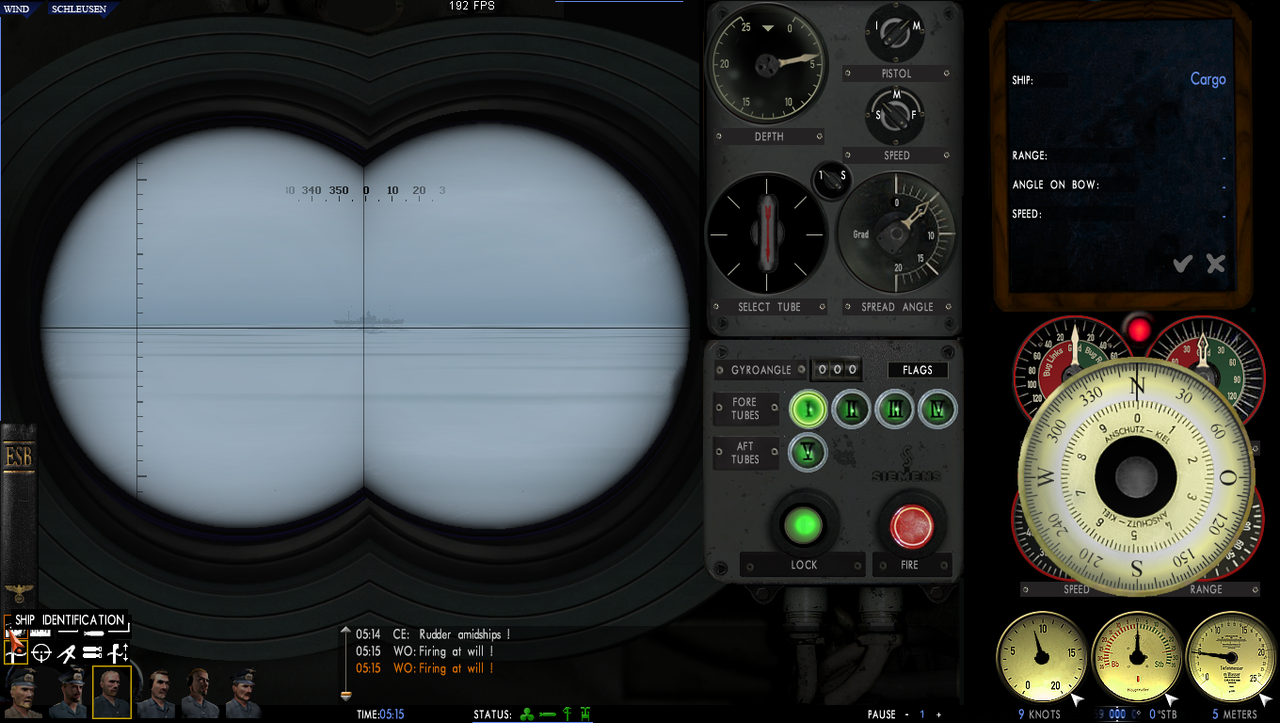 Picture 14 > Weapons Officer Icon (WE). Icon 1 > Lower > Torpedo Attack. Target identified in the > TDC as Frighter (Parcel). Icon 2 > Upper > Torpedo Solution. 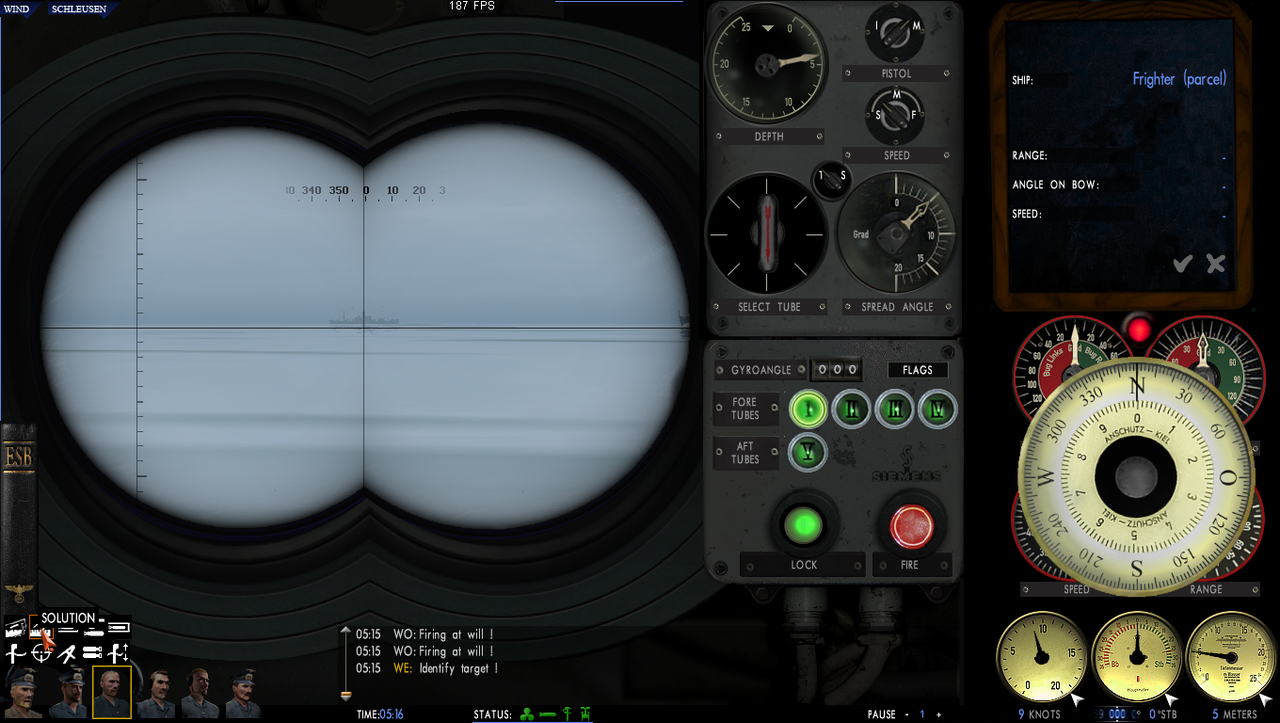 Picture 15 > U-Boat and Targets (Red) > Current positions. Map > Contact Colors. Red > Enemy Targets. Green > Neutrals. Blue > Friendly. Press the > Arrow symbol on the Rudder to remove the > Large Compass. The Compass reverts to normal dial size.  Picture 16 > Weapons Officer Icon (WE). Torpedo Solution showing in the > TDC. Q key has been pressed to > Open Tube 1 Door. Torpedo has been fired by pressing the > Large Red Button. Lock Button has returned to > Black. The > Event Camera shows the torpedo has been fired. The Message Box shows the > Tube Door Torpedo 3 has been opened (Q key again). The W key will cycle through the Torpedoes. Moving from an > Opened Tube Door to a different Torpedo Tube will Close the previously Opened door. It is not possible to have more than 1 Tube Door opened at any one time. 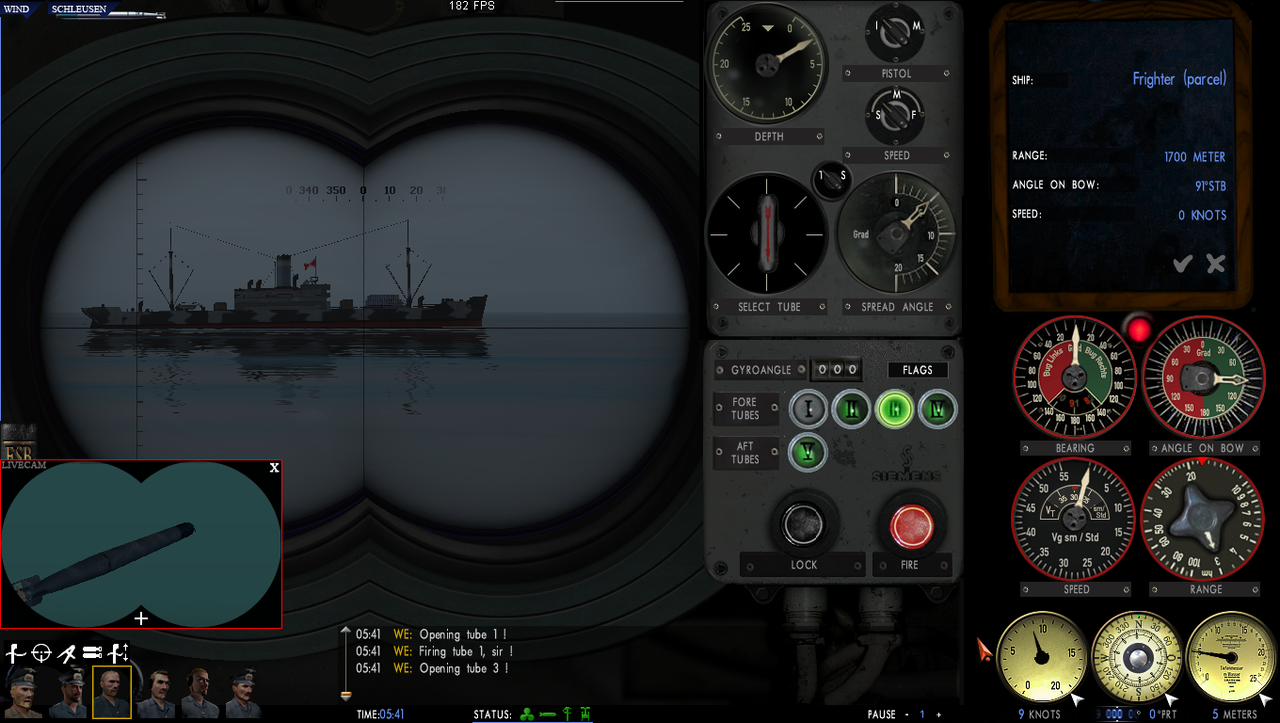 Picture 17 > F6 shows the > Attack Map. The Event Camera has come back on to show Torpedoes 1 and 3 closing on Target 1. Torpedo 2 has been fired at > Target 2. 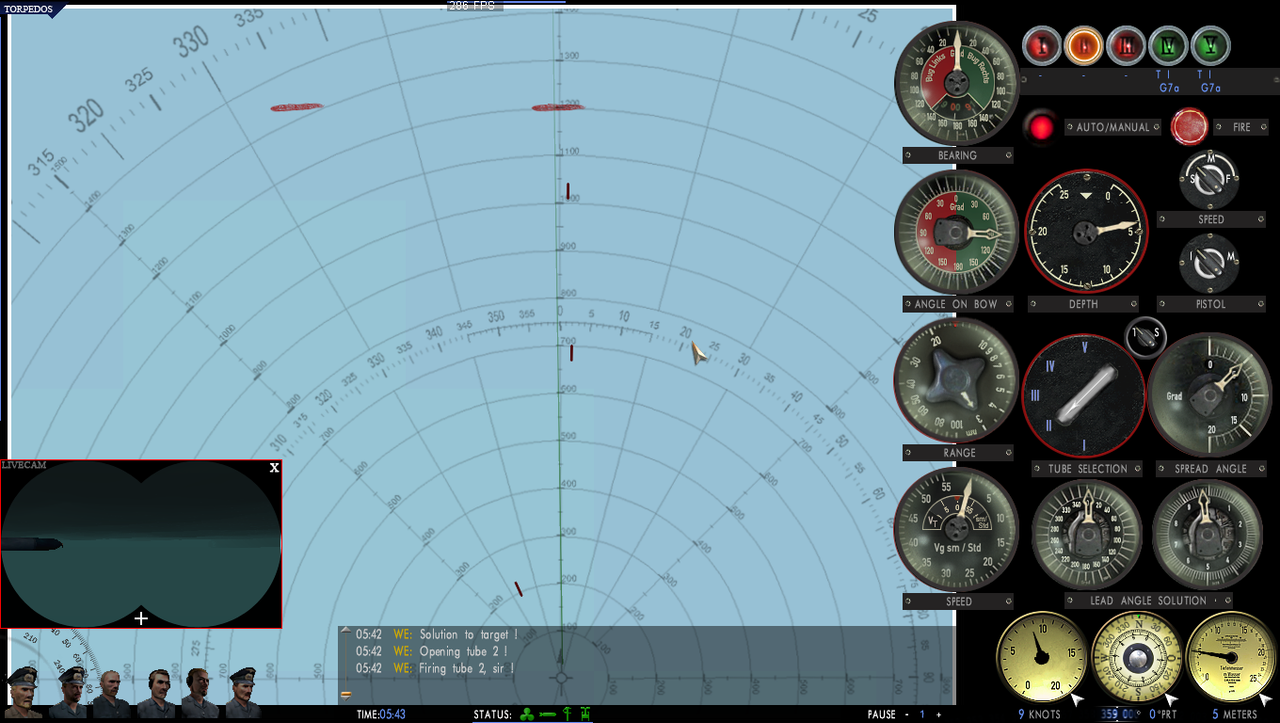 Picture 18 > Torpedo 3 has hit the Bow section. Torpedo 1 > Aimed Amidships was a deep runner and missed. Notice that we are still approaching the Target 1 at > 9 knots. 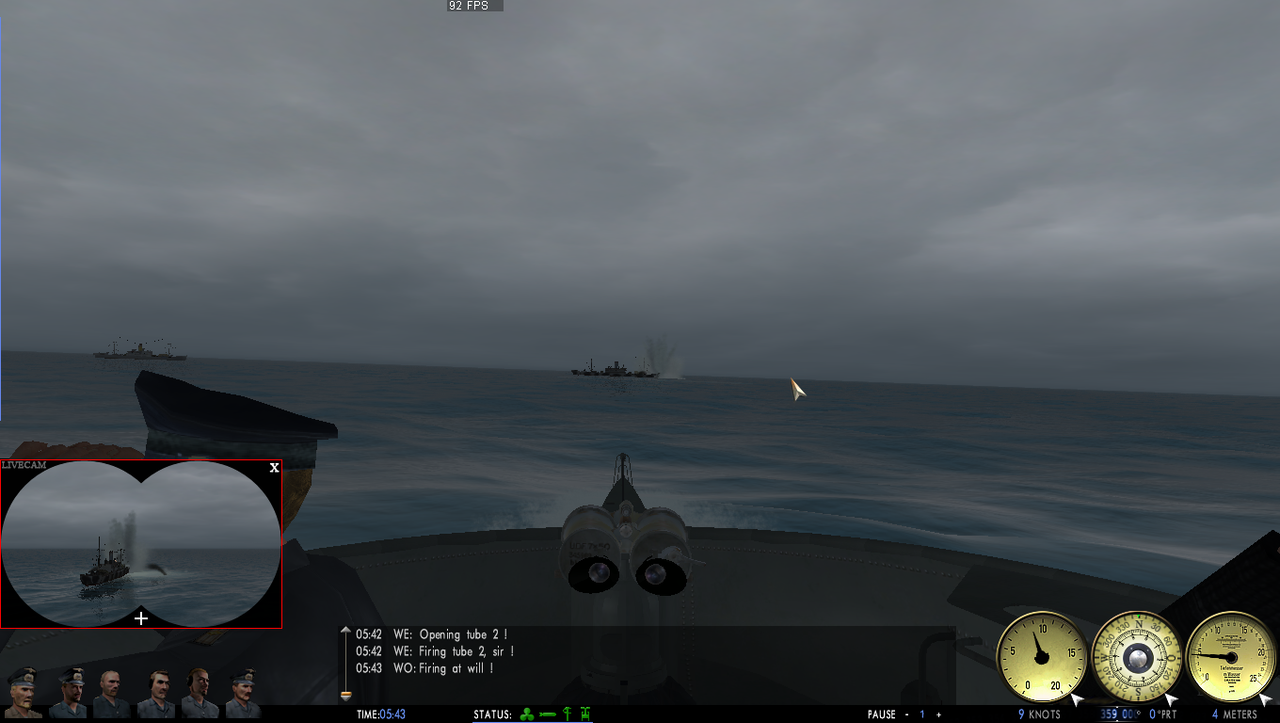 Picture 19 > The Message Box shows > Enemy Unit Destroyed. 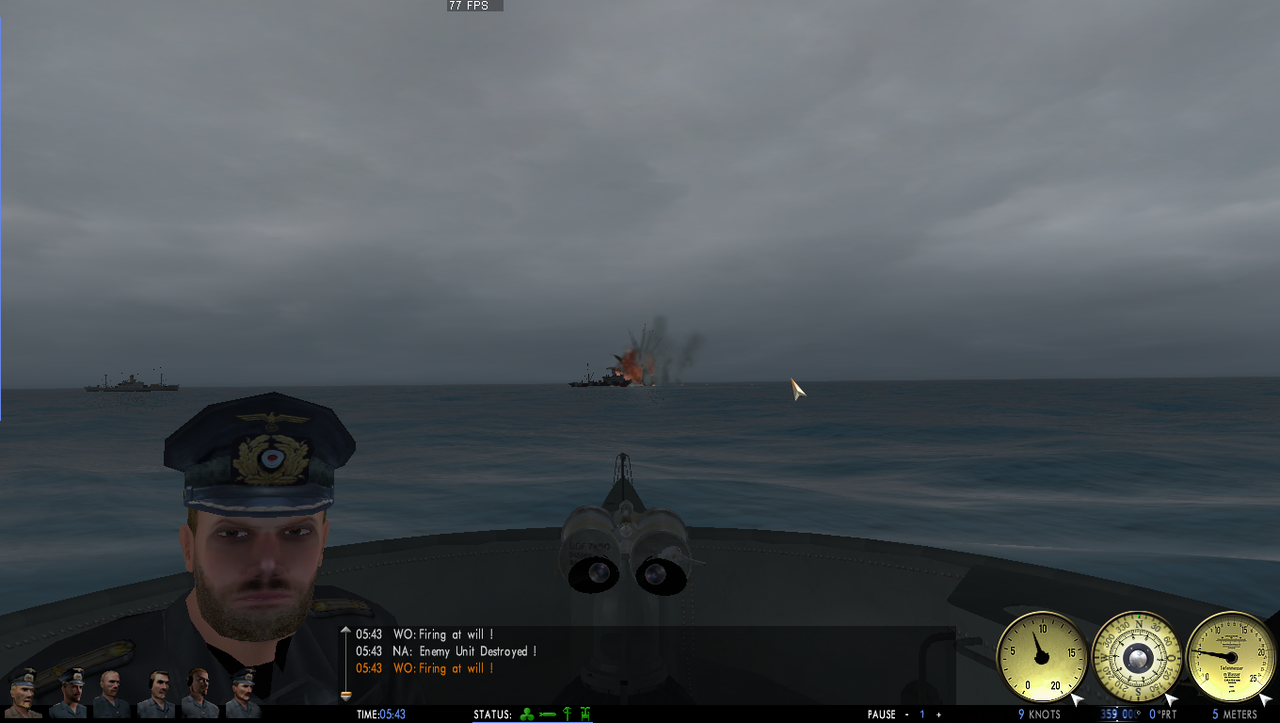 Picture 20 > Shows the > Recognition Manual. Press the > Left Arrow to open it when needed. If you are using the > Weapons Officer Icon (WE) to do all the work you will still need to set manually the > Torpedo Depth in the TDC. Red Button above the > Large Compass > Allows you to enter Manual data to the TDC dials. This should be returned back to > Red after entering the data. 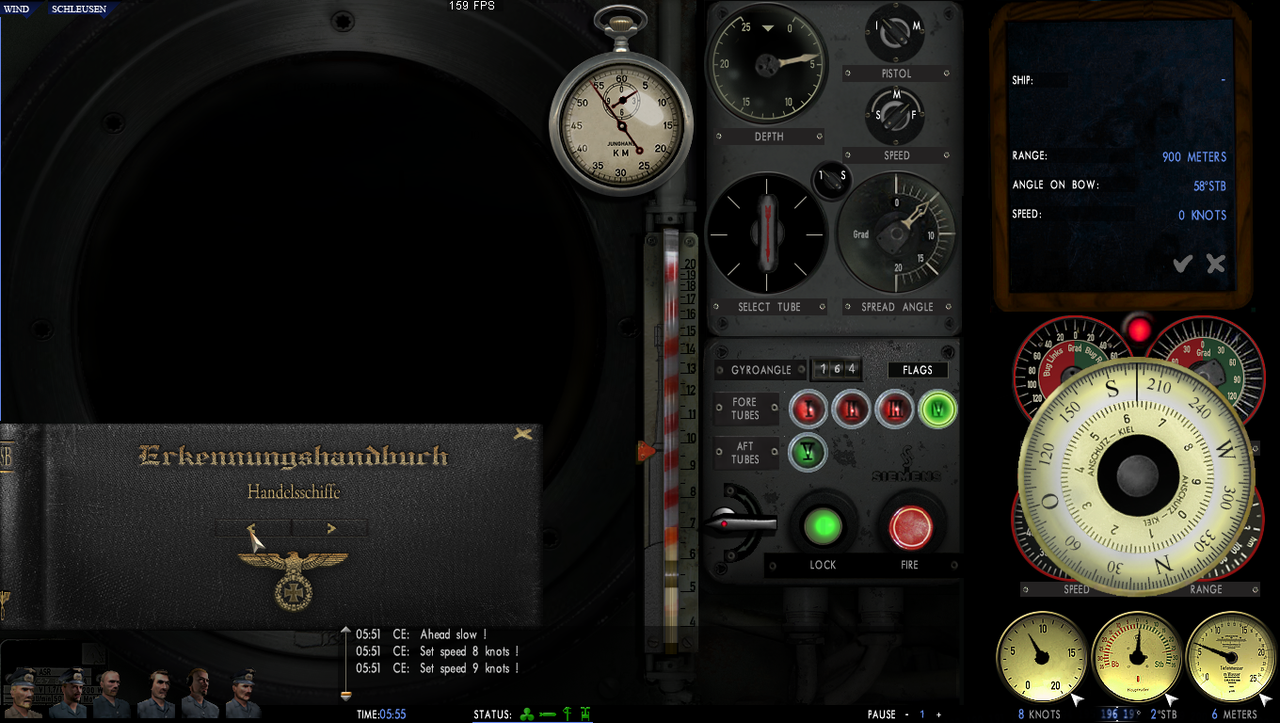 Picture 21 > A new > Radio Message has arrived.  Picture 22 > New Orders.  Picture 23 > Returned to Base to Dock back in > Stralsund. Press > Esc key. Select > Exit Patrol. Click on > DOCK AT Stralsund. 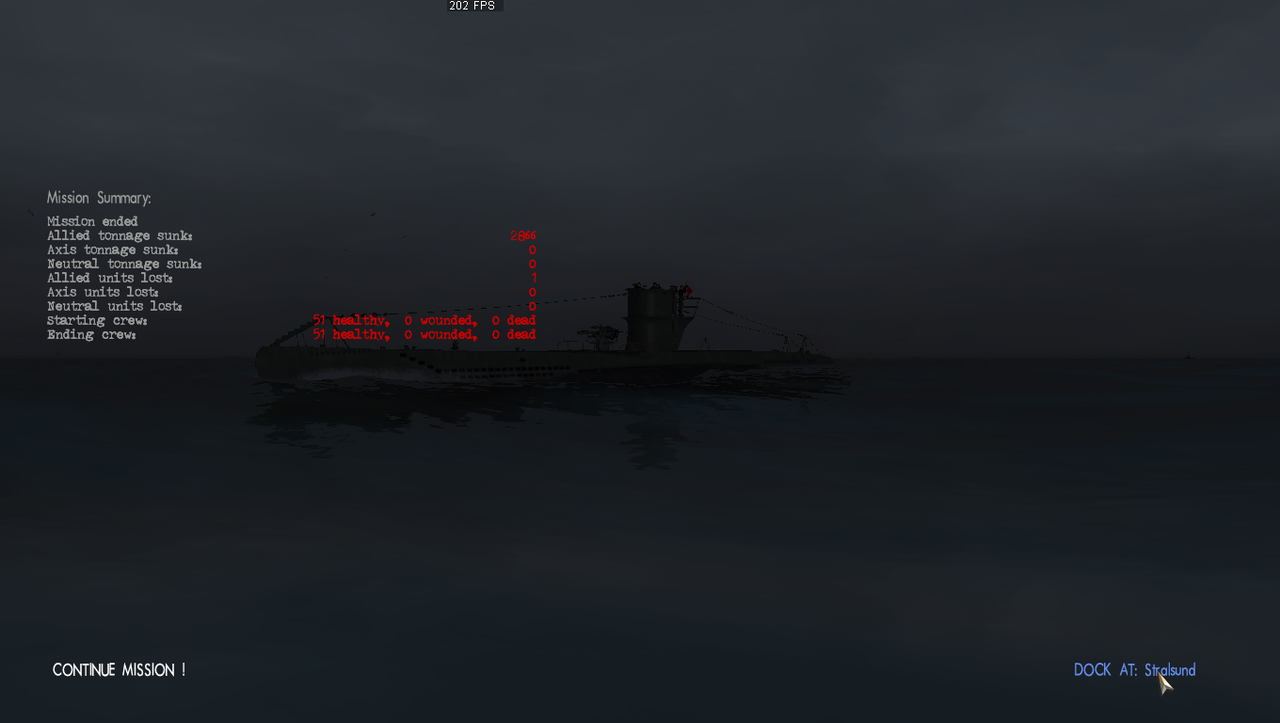 Summary There is nothing to say that any > Eprobungstelle Testing Mission has to be done at all, or you actually need to sink any ship or ships either. It really only affects your > Renown and Crew Bonus points. It does however give you the opportunity to practice and get used to your boat even if you go to the attack point but do not sink the ships. I never really understood why you would be ordered to attack at 9 knots against a stationery target. For an ideal attack procedure you would want to be stationery which would give you a better degree of accuracy. Sinking the 2 Targets adds to your tally of sinkings which is not to everyones taste, as it gives a false account on your Career each time a > Eprobungsstelle Test Mission is done. Alternative Abort Option! When at Picture 2. Press > Esc key. Select > Exit Patrol. Click on > DOCK AT Stralsund. Consequences. 1 Bonus point given to each Crew member. No medals. No promotions etc. No additional Bonus Points available to the Crew as ships were not sunk. Game Note. If you wish to use the > DF Antenna. Shift + V > Raise CTRL + V > Lower Automatically lowers on submerging. Now go to the next Tutorial.
__________________
LSH3-2015 <> TUTORIALS <> ALL YOU NEED TO KNOW <> ALL IN ONE PLACE SH4 <> TUTORIALS <> HOW TO DO IT <> INFORMATION <> DOWNLOAD LINKS SH5 <> TUTORIALS <> HOW TO DO IT <> INFORMATION <> DOWNLOAD LINKS Always Here To Help A Fellow 'Subber' | Need An Answer to A Question Just Send Me A PM Last edited by THEBERBSTER; 05-05-18 at 02:51 PM. Reason: Replaced missing pictures |
|
|
|
|
05-29-16, 10:23 AM
|
#13 |
|
Growing Old Disgracefully
Join Date: Dec 2012
Location: Hythe - Southampton
Posts: 9,609
Downloads: 1133
Uploads: 0
|
Ending The First Test Patrol (Eprobüngstelle) > Promotions > Transferring.
When The Patrol Has Ended What To Do Next! Picture 1 > When you click on > DOCK AT Stralsund you are immediately taken to > Picture 2. Picture 2 > This is your > Patrol History. You can see that the > Renown earned for completing the Mission and sinking one ship is 643.37 points. See also > Post #18 > Updating your Personnel File in SH3Commander. Press the > Back Arrow at the bottom of the screen. 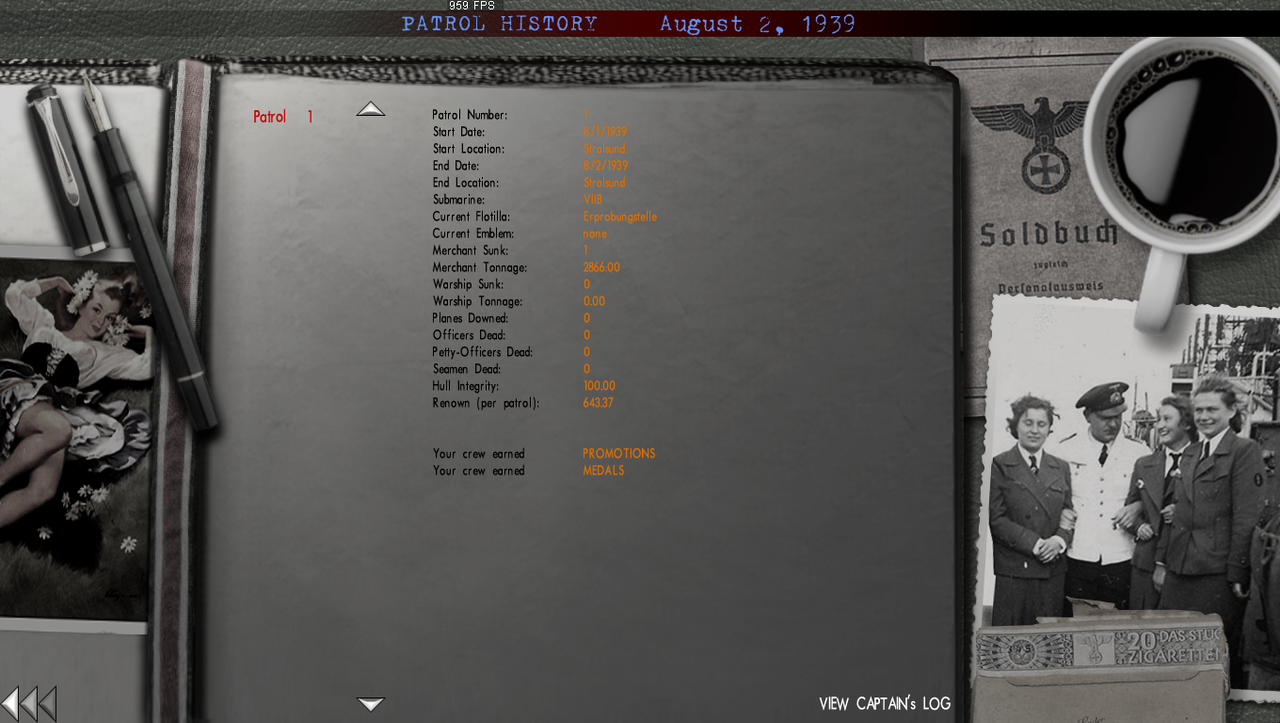 Picture 3 > Writing Desk Documents on the desk > Promotions, Medals, Qualifications. Promotions must be taken now or lost. See also post #18 > Manage your Crew. U- Boat on the desk > Aces rosta. Box on the desk > Your Awards. Telephone on the desk > Transfer Telephone. 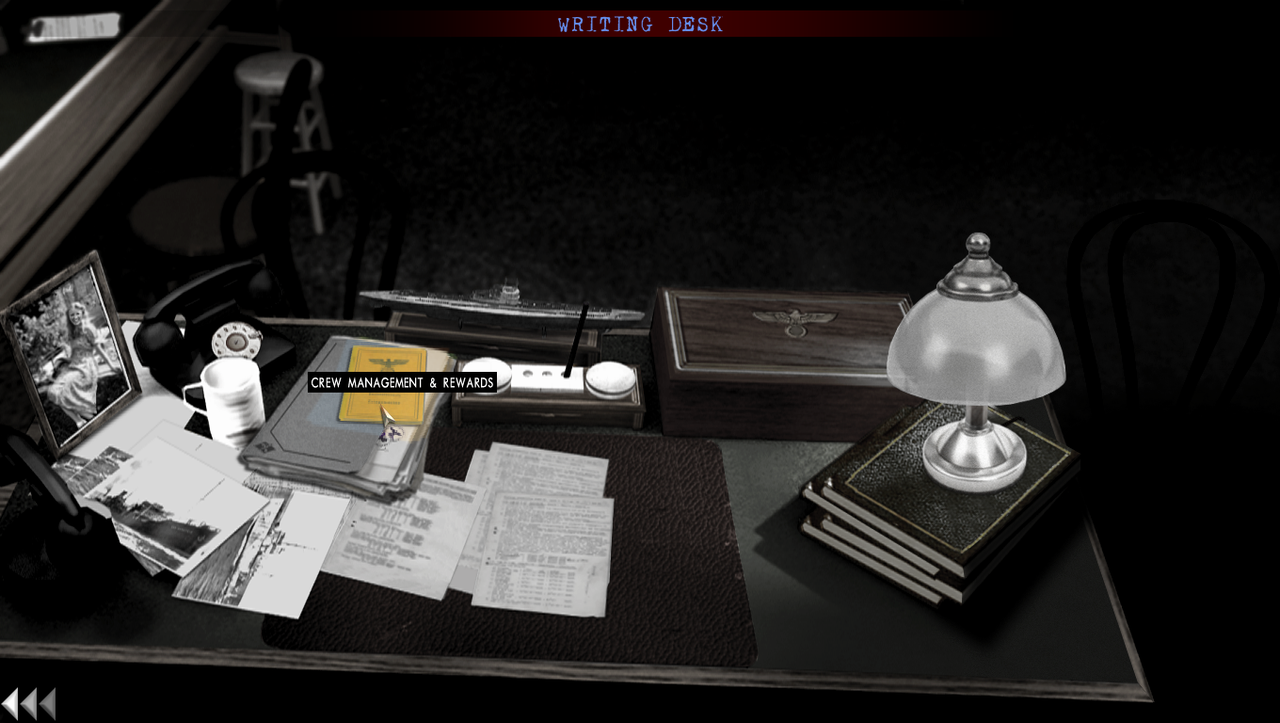 Picture 4 > Clicking on the > Documents on the desk takes you to the > Crew screen. At this stage in your game only > Sailors can receive > Promotions. Officers cannot be promoted. Officers can have a maximum of > 3 Qualifications. The first qualification is the most important one. Petty Officers can be promoted to the value of > 300 Petty Officers have to have already achieved > 150 Resilience before a promotion can be done. Petty Officers can only have > 1 Qualification. Sailors can be promoted up to the value of > 100 Sailors can receive > 1 Qualification but it is not active. Giving Sailors a Qualification is useful for identifying their skill and compartment position. See also post #18 > Manage your Crew.  Picture 5 > You are required to confirm any changes made > Are you sure > Yes. Press the > Back Arrow at the bottom of the screen.  Picture 6 > Medals > Here you can see the Mrdals you have been awarded to date. 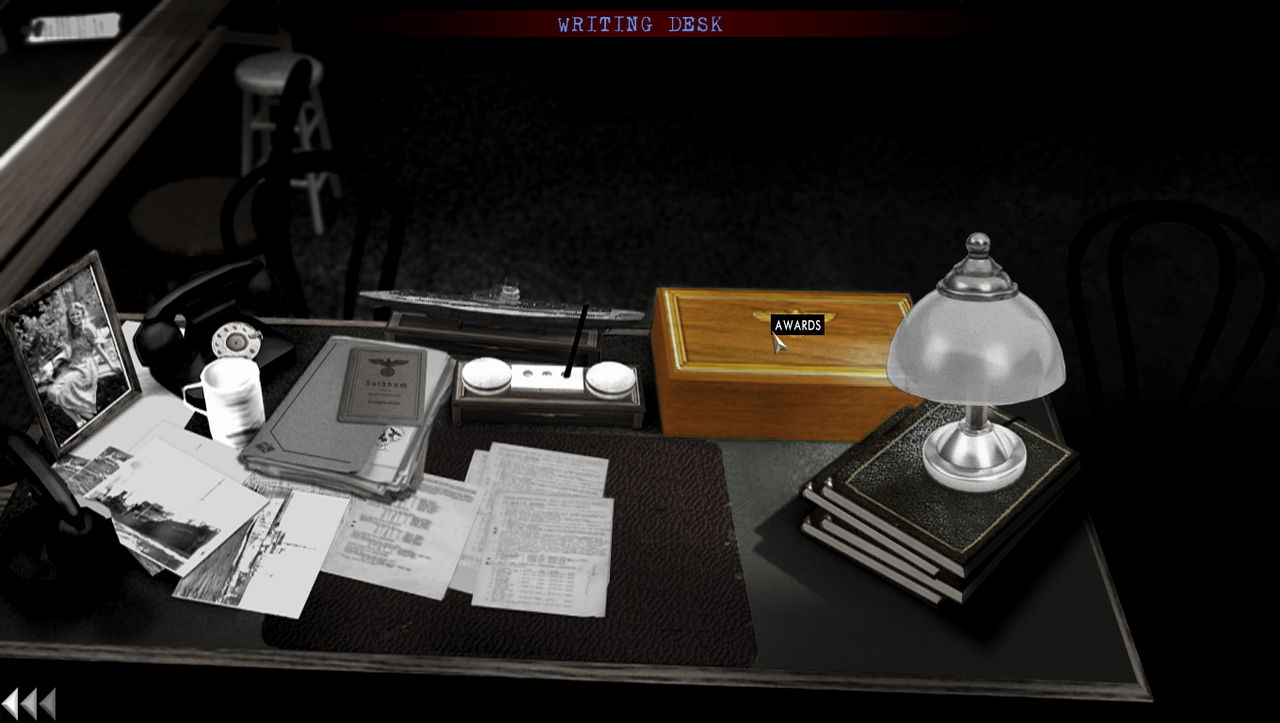 Picture 7 > Career History > You can see your > Mission History here. 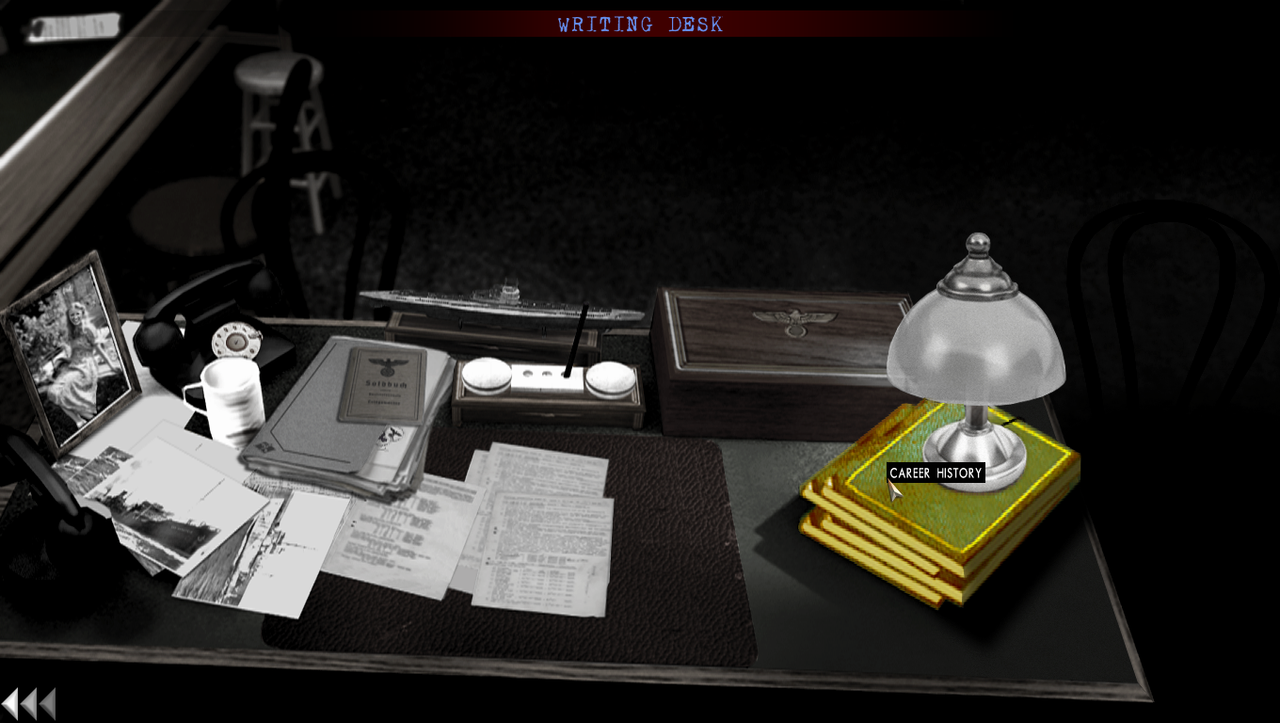 Picture 8 > U-Boat Aces > You can see where you are in the list of the Aces. 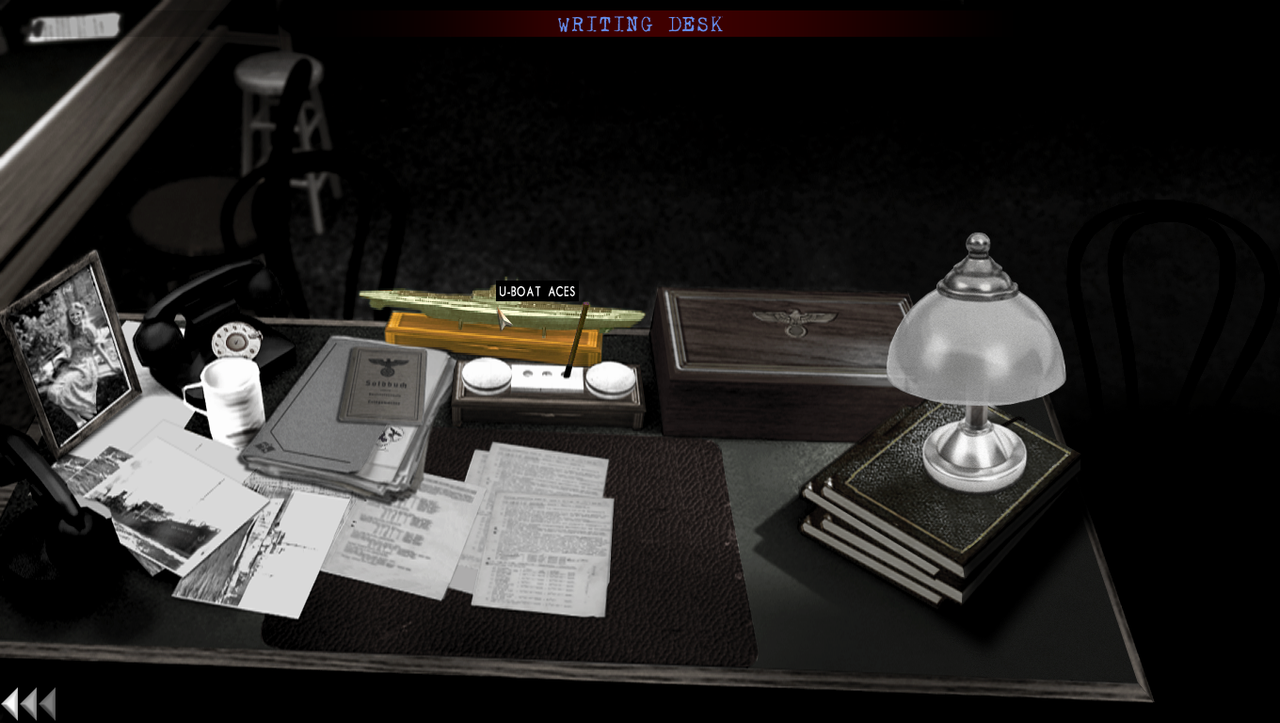 Picture 9 > Transferring from the > Eprobungstelle Testing Flotilla. Click on the > Telephone. Picture 10 > You are going to transfer to >2. Flotilla. A Flotillas availability is controlled by date as you can see from the > Flotilla Chart. Transfers to these other Flotillas then become available using the same method as now. 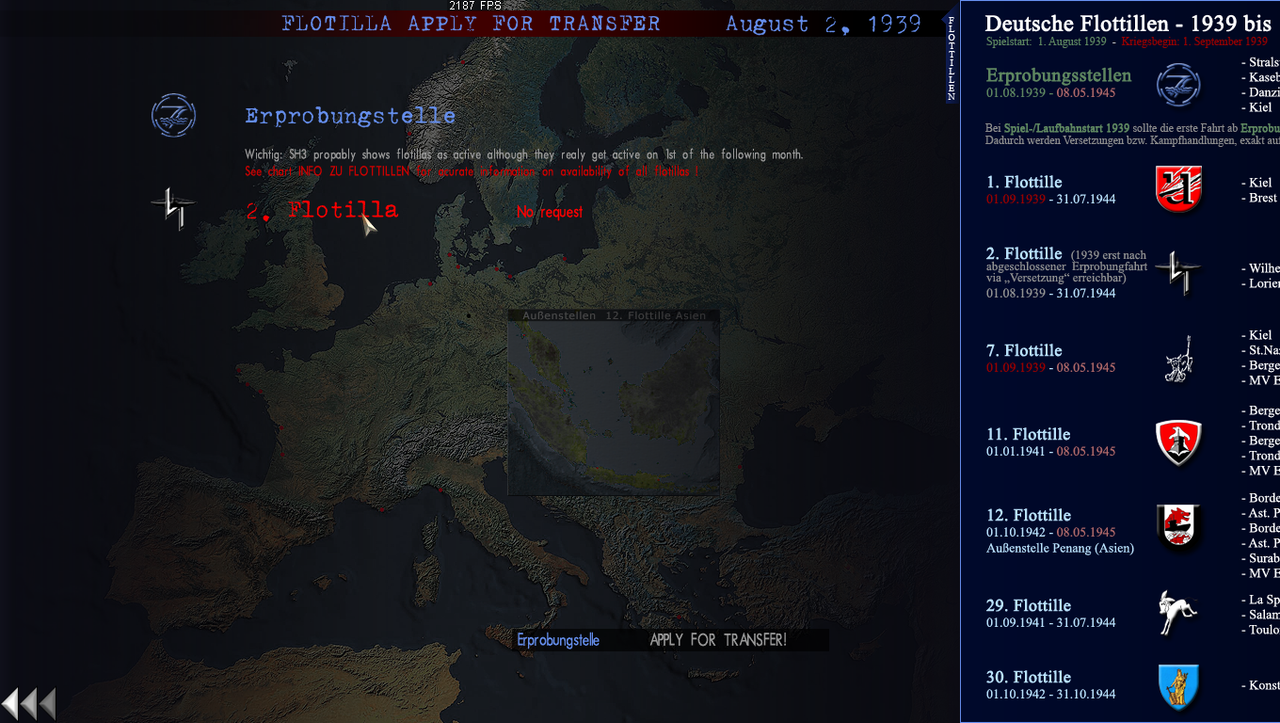 Picture 11 > Click on > Apply For Transfer.  Picture 12 > Click on the >2. Flotilla.  Picture 13 > Click on > Apply For Transfer. Note that the > Flotilla has turned > Blue. 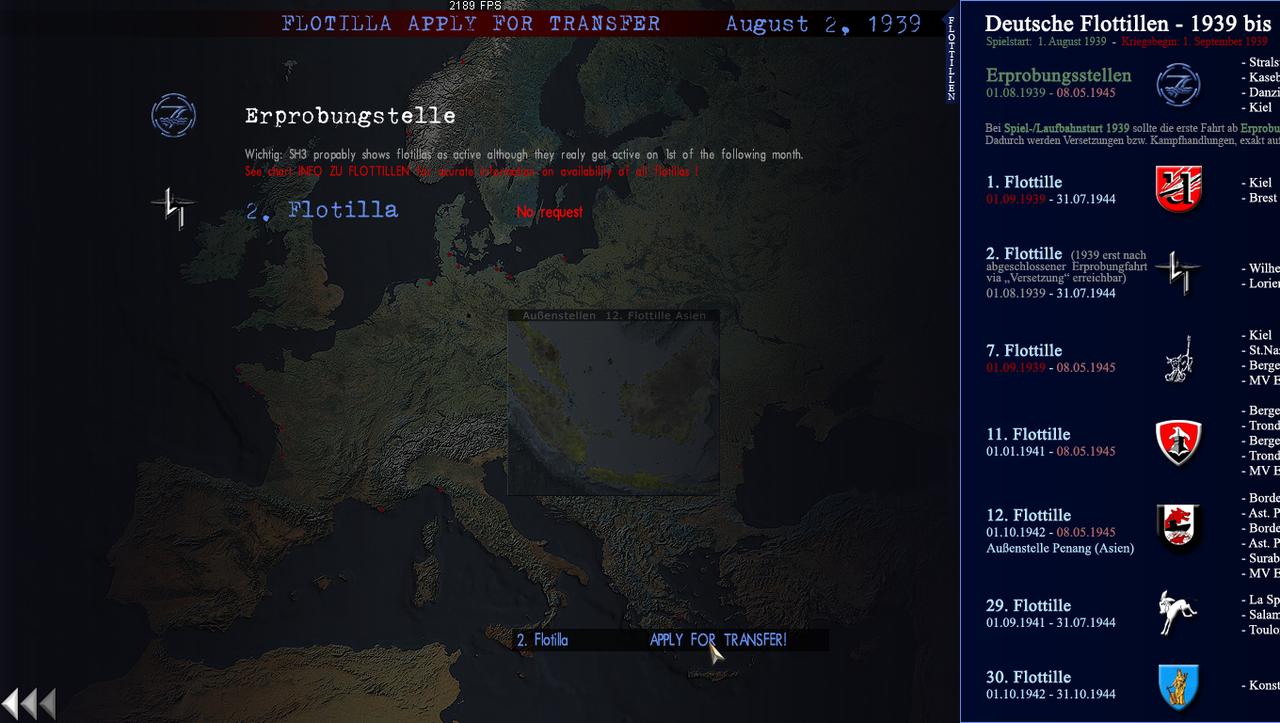 Picture 14 > Shows you new base > Wilhelmshaven. Click > Ok > to confirm your > Transfer request. 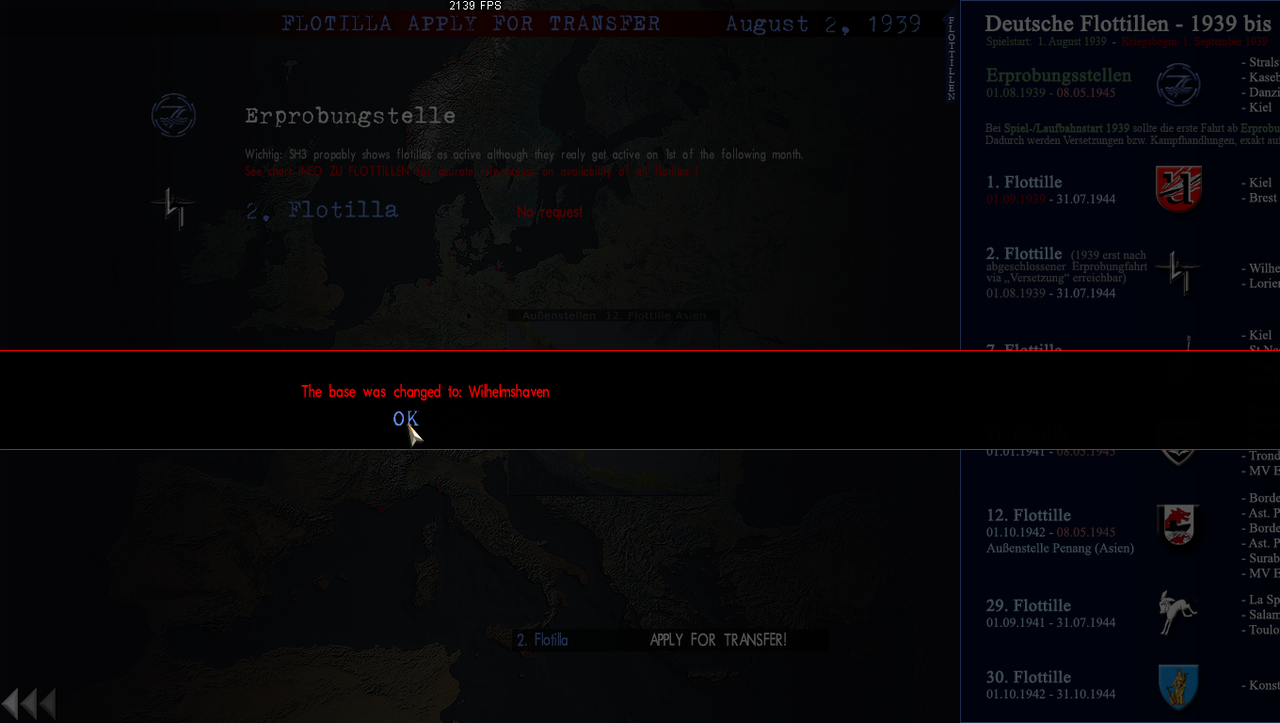 Picture 15 >Request Approved. Press the > Back Arrow at the bottom of the screen. 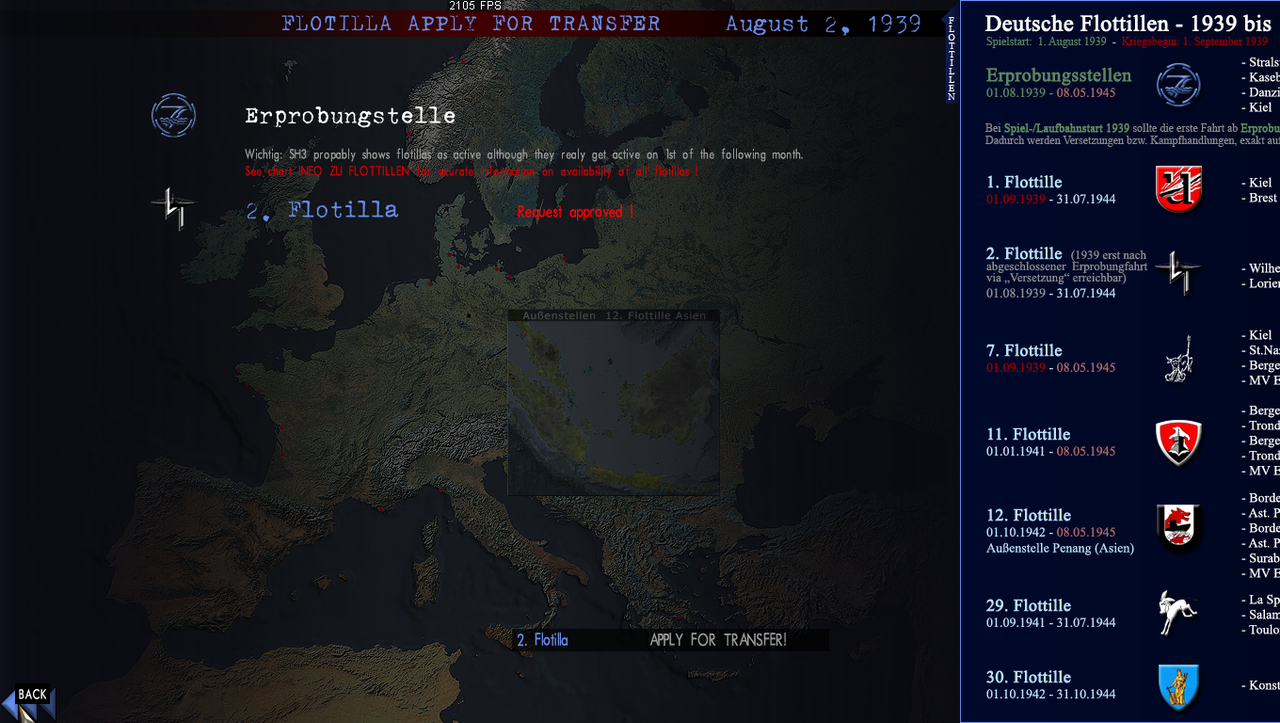 Picture 16 > Writing Desk. Press the > Back Arrow at the bottom of the screen. 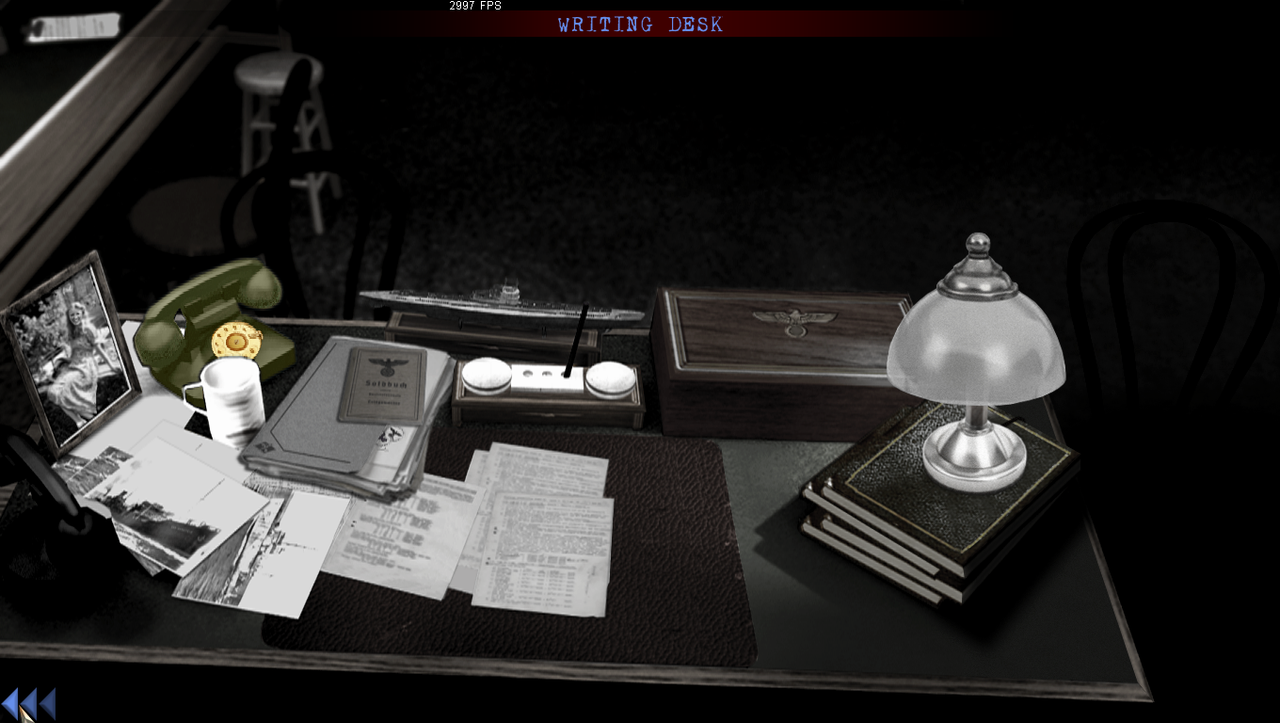 Picture 17 > Press the > Back Arrow at the bottom of the screen. 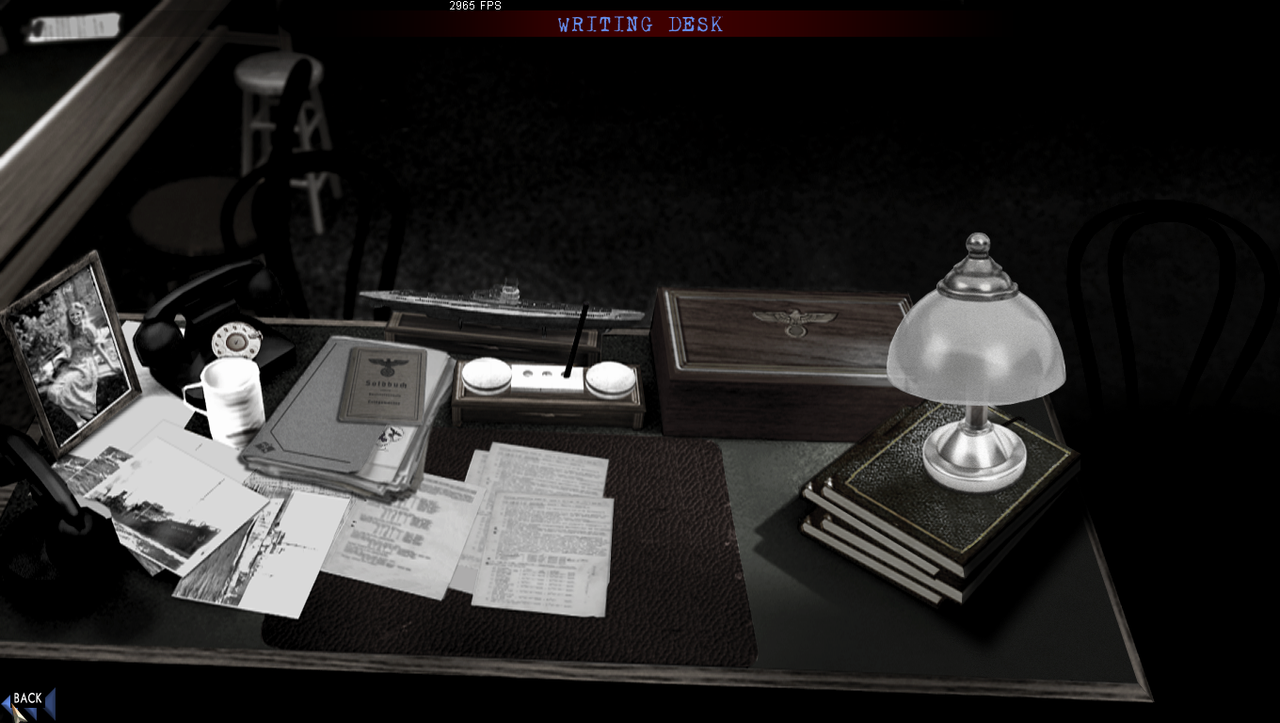 Picture 18 > The Office. The 643.37 Renown points has been added to the original 1000 = 1643.37 Total earned to date. Press the > Back Arrow at the bottom of the screen.  Picture 19 > Career Menu Screen. Press the > Back Arrow at the bottom of the screen. 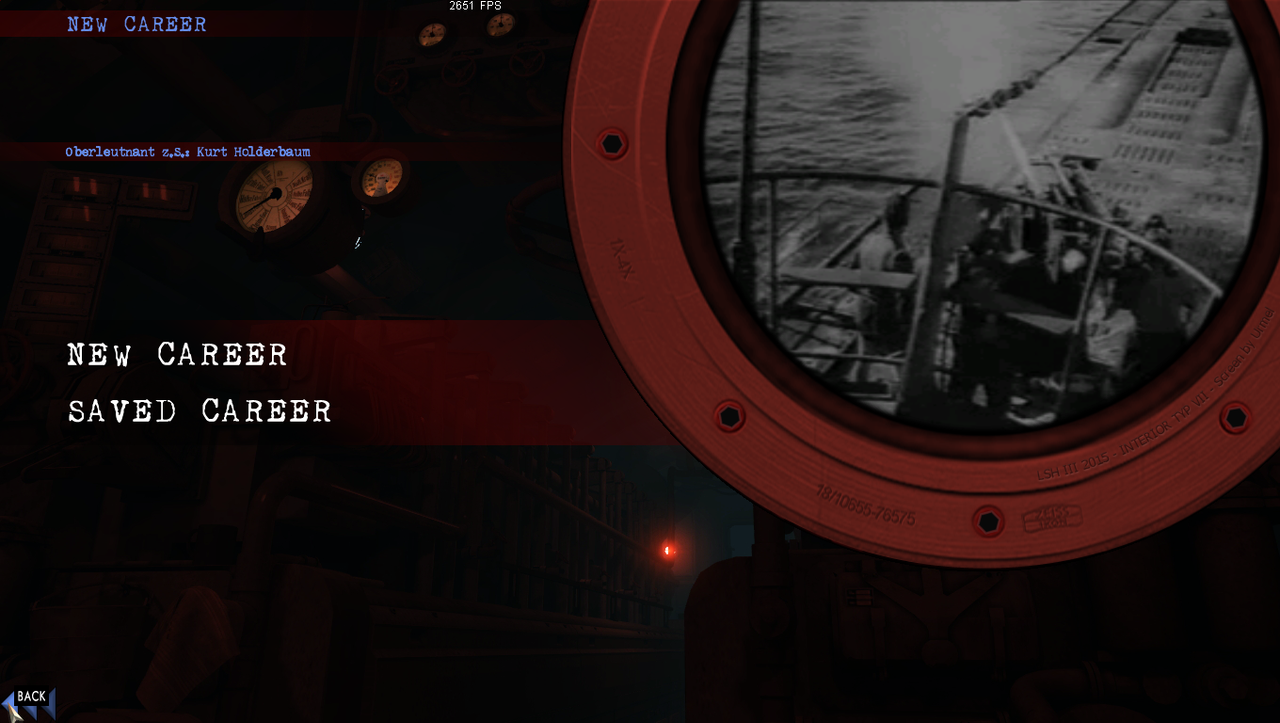 Picture 20 > Captains Menu Screen. Press the > Back Arrow at the bottom of the screen. 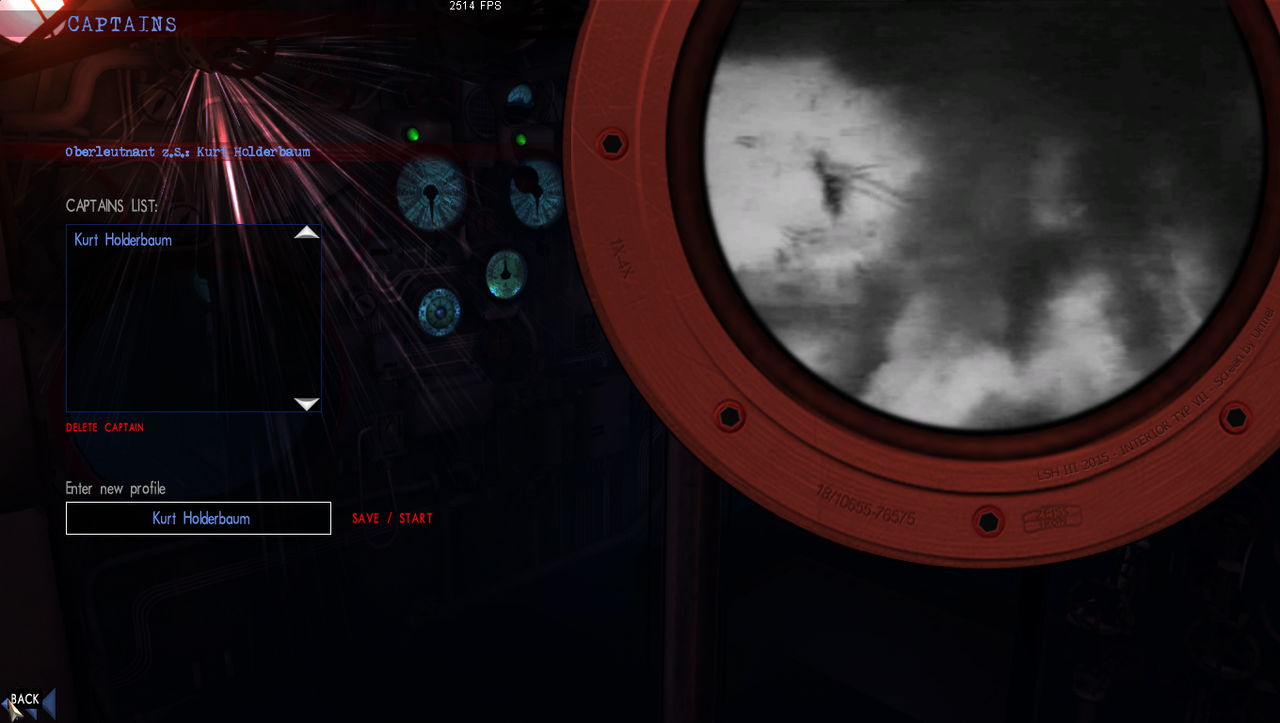 Picture 21 > Main Menu Screen. Click on > Exit Game. 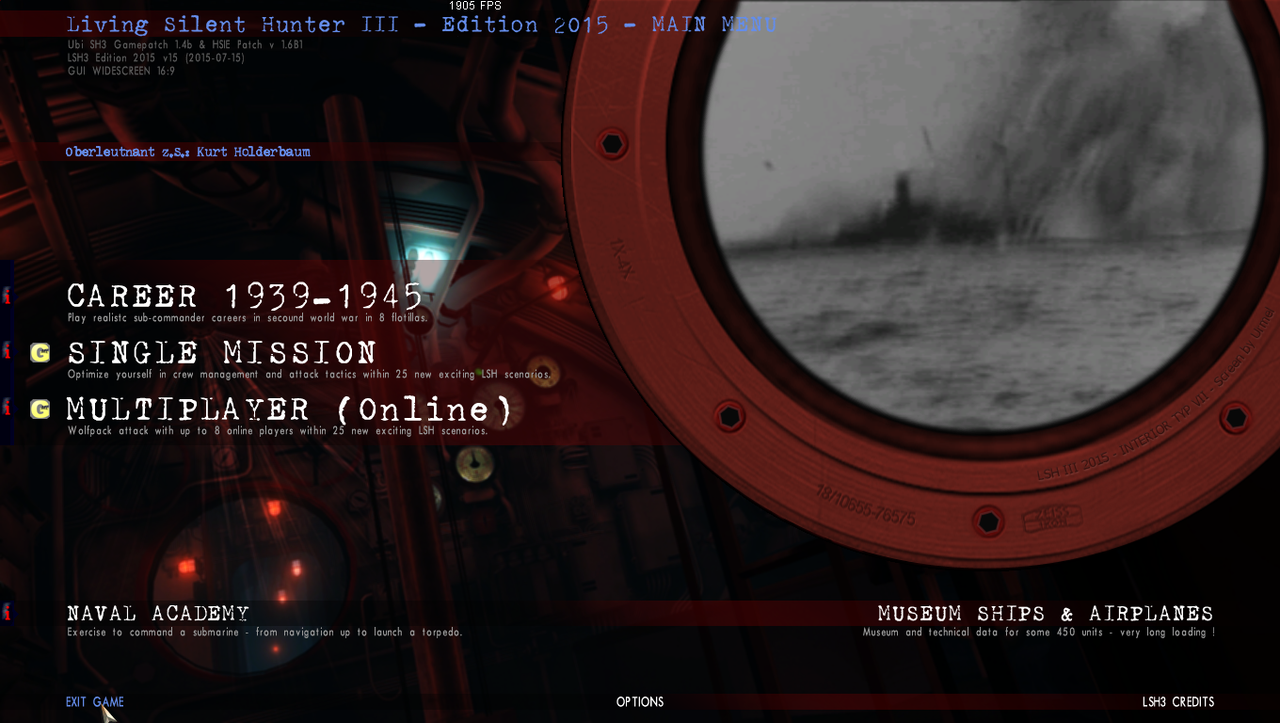 Picture 22 > Quit Game? Click > Yes to confirm. You will be returned to the desk top.  Tutorials on Post # 15 - 16 - 17 are all optional if you want to make changes before starting Mission/Patrol 2 To skip these go to Tutorial Post #19.
__________________
LSH3-2015 <> TUTORIALS <> ALL YOU NEED TO KNOW <> ALL IN ONE PLACE SH4 <> TUTORIALS <> HOW TO DO IT <> INFORMATION <> DOWNLOAD LINKS SH5 <> TUTORIALS <> HOW TO DO IT <> INFORMATION <> DOWNLOAD LINKS Always Here To Help A Fellow 'Subber' | Need An Answer to A Question Just Send Me A PM Last edited by THEBERBSTER; 05-05-18 at 03:18 PM. |
|
|
|
|
05-29-16, 10:23 AM
|
#14 |
|
Growing Old Disgracefully
Join Date: Dec 2012
Location: Hythe - Southampton
Posts: 9,609
Downloads: 1133
Uploads: 0
|
Making Further Changes To The HSIE Optional).
Making changes here will make you game more difficult. Making Further Changes To The HSIE is an > Option Only and > Not Compulsory. Any further changes that are made to the HSIE will increase the difficulty level of your game. It is important to refer to the HSIE Manual so you understand what each patch does. Remember to disable the HSIE Mod/Patch in JSGME first before making any changes to it. Picture 1 > Is a reminder of the default settings in the HSIE.  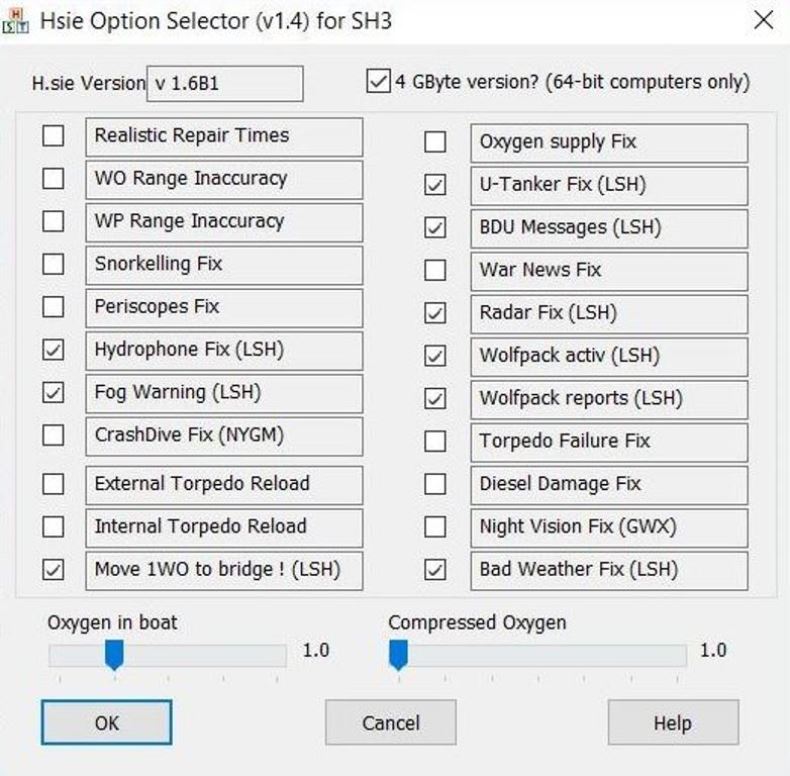 Picture 2 > Shows the additional > HSIE patches enabled. For Patrol 2 > I am going to enable more > HSIE patches.  Note 1. Additional information on the Oxygen Fix patch. The Oxygen Fix patch I have enabled is interesting as it limits the amount of > Oxygen Supply that is in the boat when submerged. When the natural air in the boat gets down to 17% the Crew then have to use > Pressurized Oxygen from bottles. O2 is broken into 2 parts. Part 1 > Renewable O2 that is replenished when the U-Boat surfaces. Part 2 > Non Renewable O2 from Pressurized Oxygen bottles. The 2 Oxygen sliders have been adjusted for use with the > O2 Oxygen Fix patch. Oxygen In Boat > 2.0 (Stiebler's recommendation) Compressed Oxygen > 2.5 (Stiebler's recommendation) Note 2. Oxygen levels in the U-boat. When submerged the Oxygen level starts at 21% until it falls to 17% when Pressurized Oxygen is taken from Bottles. This Oxygen cannot be replaced until you Dock again.
__________________
LSH3-2015 <> TUTORIALS <> ALL YOU NEED TO KNOW <> ALL IN ONE PLACE SH4 <> TUTORIALS <> HOW TO DO IT <> INFORMATION <> DOWNLOAD LINKS SH5 <> TUTORIALS <> HOW TO DO IT <> INFORMATION <> DOWNLOAD LINKS Always Here To Help A Fellow 'Subber' | Need An Answer to A Question Just Send Me A PM Last edited by THEBERBSTER; 05-05-18 at 03:23 PM. |
|
|
|
|
05-29-16, 10:24 AM
|
#15 |
|
Growing Old Disgracefully
Join Date: Dec 2012
Location: Hythe - Southampton
Posts: 9,609
Downloads: 1133
Uploads: 0
|
Adding A New Mod O2-Gauges v2 To The Mods Folder
Option Only > Not Compulsory. If you decide to use the > Oxygen Fix patch it is advisable also to replace the existing > CO2 Gauge with a new O2 Gauge The new gauge changes the graphic design of the former > CO2 Gauge into an O2 Gauge. This mod is called > O2-Gauges v2. Download link. O2-Gauges v2 Picture 1 > How to Install > O2-Gauges v2. Unzip the file. Extract the Mod folder showing.  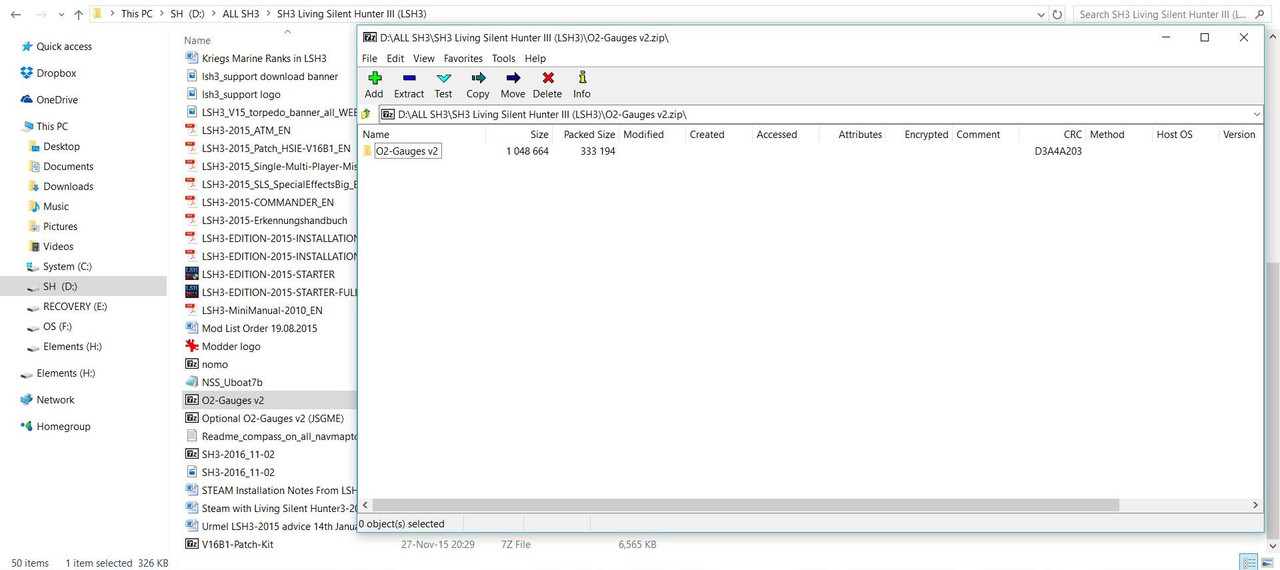 Picture 2 > Copy and Paste the Extracted Mod folder showing into the > LSH3 Mods folder. Enable in > JSGME. This Mod must not be overwritten and should always be placed last in JSGME.  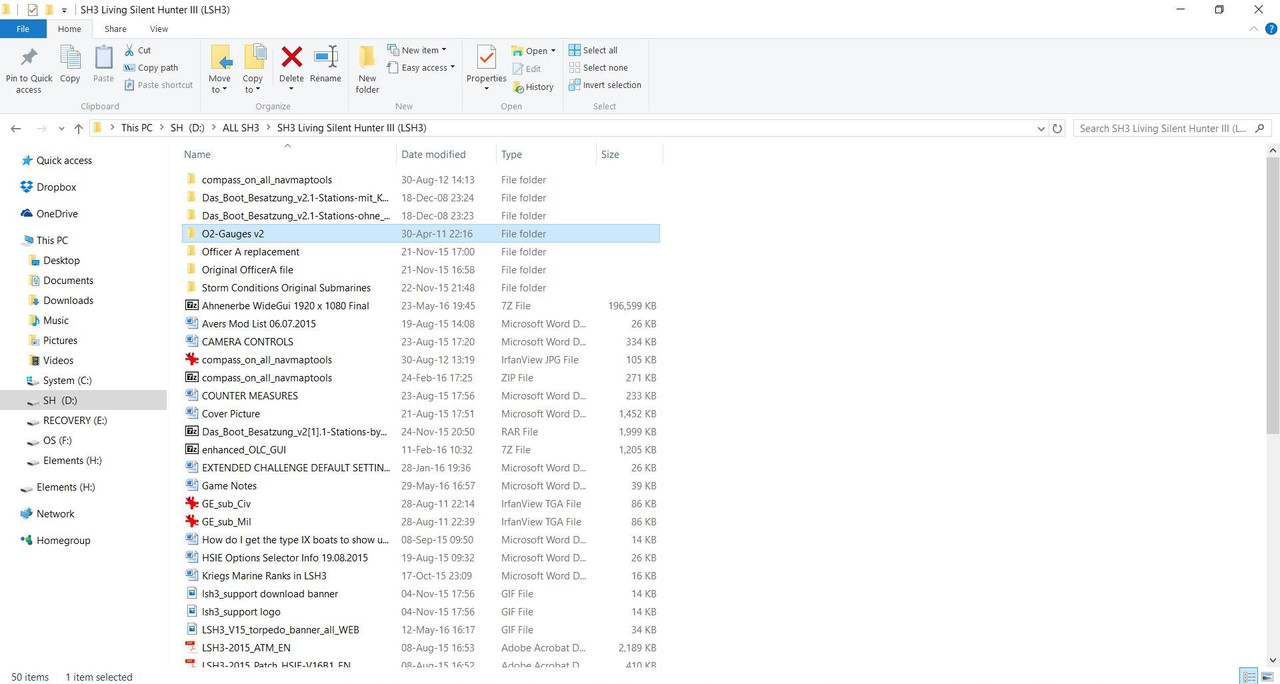 Picture 3 > Gauges.  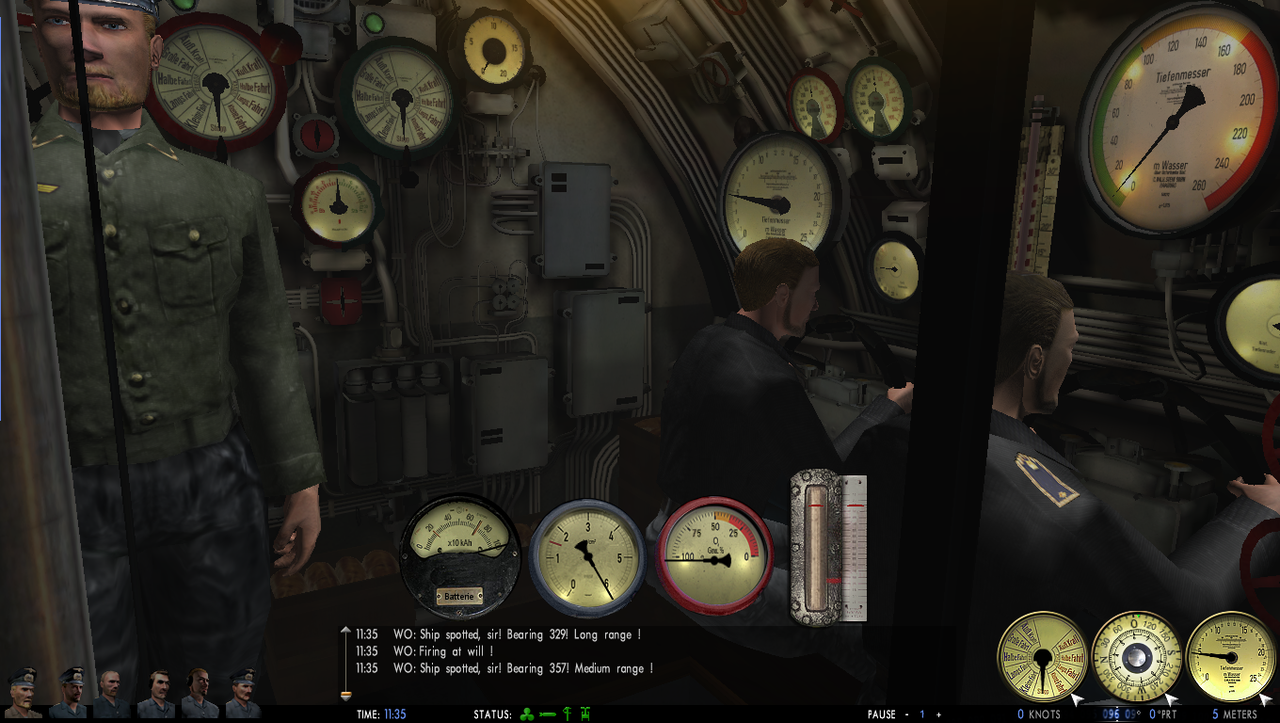 If you wish to upgrade the Fuel Gauge then click on this link to Post #57
__________________
LSH3-2015 <> TUTORIALS <> ALL YOU NEED TO KNOW <> ALL IN ONE PLACE SH4 <> TUTORIALS <> HOW TO DO IT <> INFORMATION <> DOWNLOAD LINKS SH5 <> TUTORIALS <> HOW TO DO IT <> INFORMATION <> DOWNLOAD LINKS Always Here To Help A Fellow 'Subber' | Need An Answer to A Question Just Send Me A PM Last edited by THEBERBSTER; 05-05-18 at 03:37 PM. Reason: Replaced missing pictures |
|
|
|
 |
|
|


 Linear Mode

