
|
|
SUBSIM: The Web's #1 resource for all submarine & naval simulations since 1997
|
SUBSIM: The Web's #1 resource for all submarine & naval simulations since 1997 |
|
|
 06-01-18, 08:22 AM
|
#1 |
|
Growing Old Disgracefully

 Join Date: Dec 2012
Location: Hythe - Southampton
Posts: 9,609
Downloads: 1133
Uploads: 0


|
Automation! > What Is It? > How Does It Work? > Lets Check It Out.
Opening up Automation Let's see what the Scripts do in the game. Are you missing out on a useful set of Tools? So should you be using Automated Scripts? This Tutorial will show you how the Automated Scripts are setup in Automation. Automation to put it simply is a collection of Scripts that have been compiled into different categories to be used as helpful tools depending either on the situation you are currently in or how you wish to use them. Most are straight forward and others will have a message when you hover your mouse over the Script. Some are more sophisticated than others as you will see from the titles. The Automation Panel is broken down into different columns with each column having a heading title. The Arrows <- -> work in a conventional way. 1 Arrow -> will only move 1 Script. 2 Arrows -> -> will move Multiple Scripts. This Tutorial will give you a basic guide how Automation works leaving you to discover and investigate how the different Scripts work when they are enabled. How useful these are I will leave it to you to decide. Picture 1 > Show the Automation Icon which will open the Automation Panel. Picture 2 > How the Automation Panel looks when you first open it. Hovering your mouse over the Titles will give you different information as to what each component does. 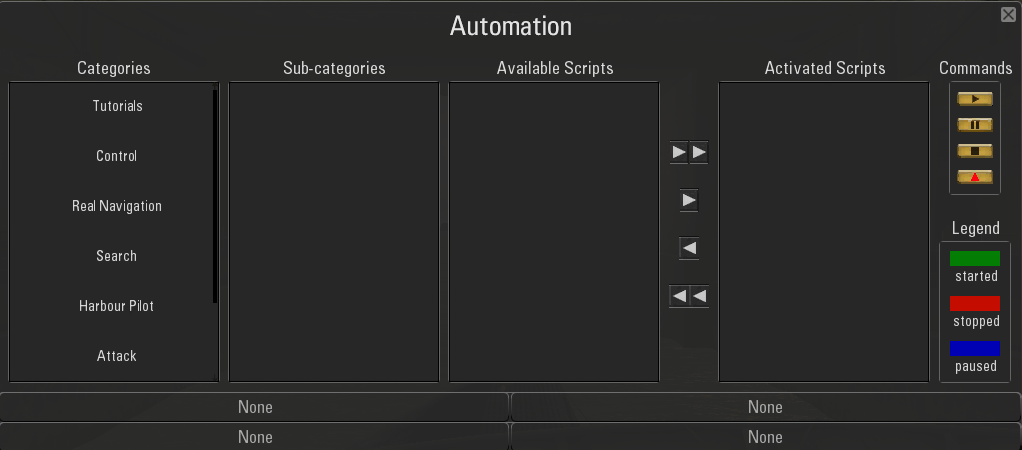 Picture 3 >Tutorials > Sub > Part 1 > Shows you 6 available Scripts you can run. 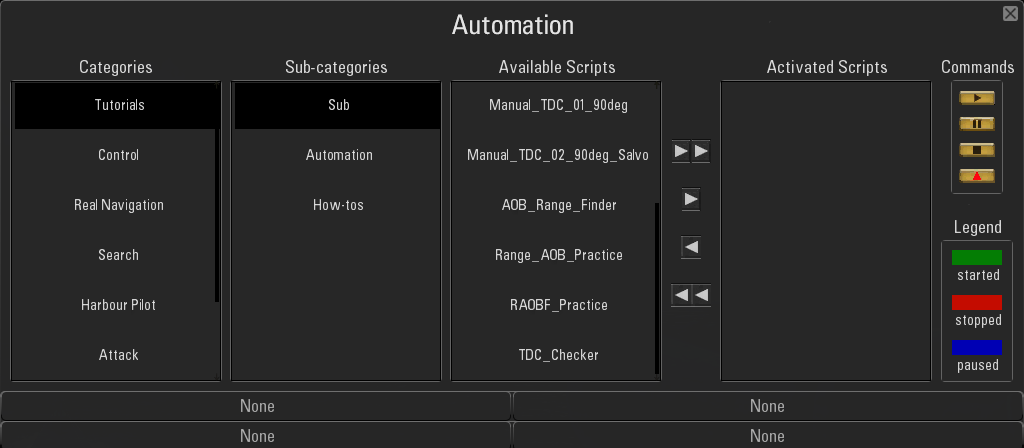 Picture 4 > Tutorials > Sub > Part 2 > Extended from Part 1 shows another 6 Scripts you can run. 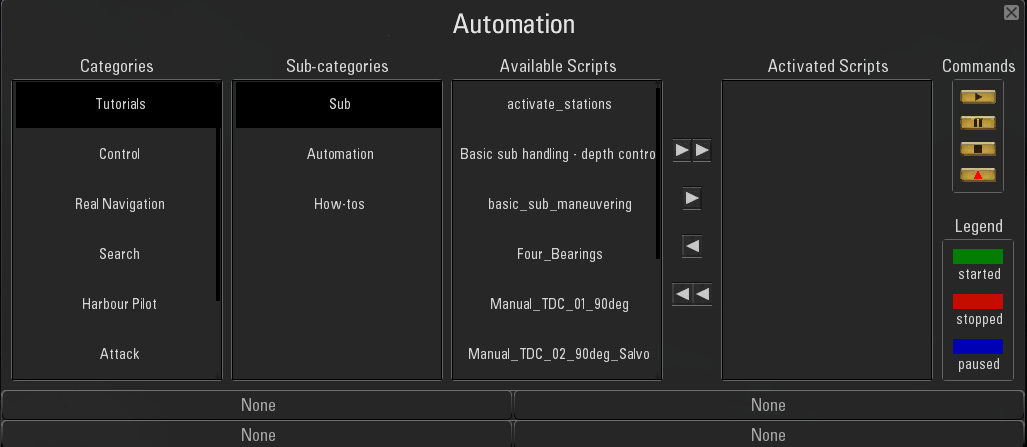 Picture 5 > Tutorials > Automation Hotkeys> Further information can be found by hovering your mouse over the Script. There are 2 Scripts here you can run.  Picture 6 > When the Script is moved to the Activated Scripts by pressing the -> Arrow the Script shows initially in Red. By clicking on the Script a Black Rectangle will form around the Script. 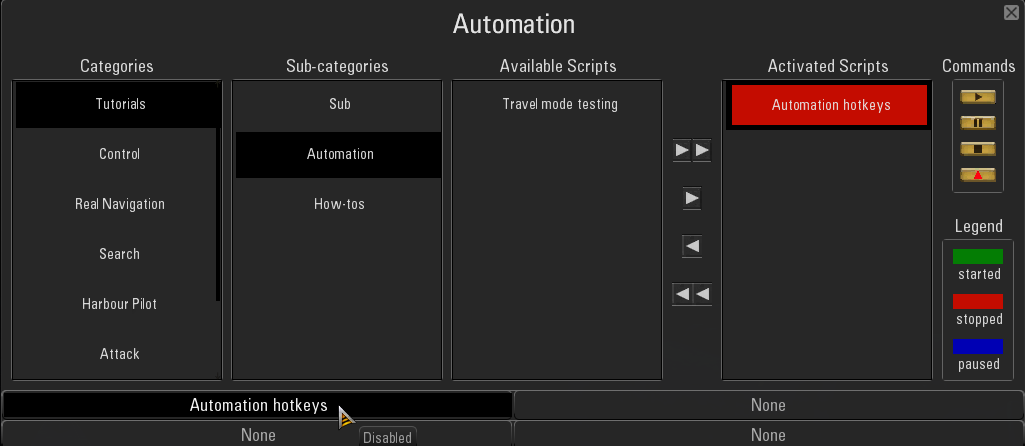 Picture 7 > Shows the Command Controls. These work in a similar way as your TV remote control. The mouse is showing that by pressing the -> the Script will Start to Play.  Picture 8 > As this Script is a Tutorial it opens another dialogue screen which will give you the necessary information. Pressing Play will Start the Tutorial > Pause Game must be off. 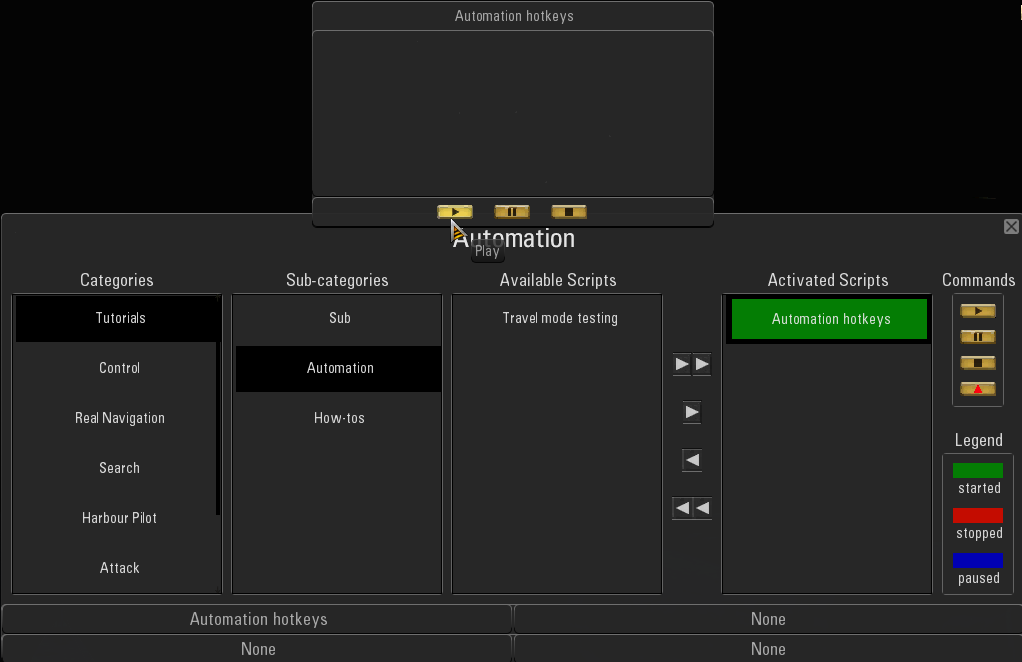 Picture 9 > Tutorial How-tos contains 2 available Scripts. 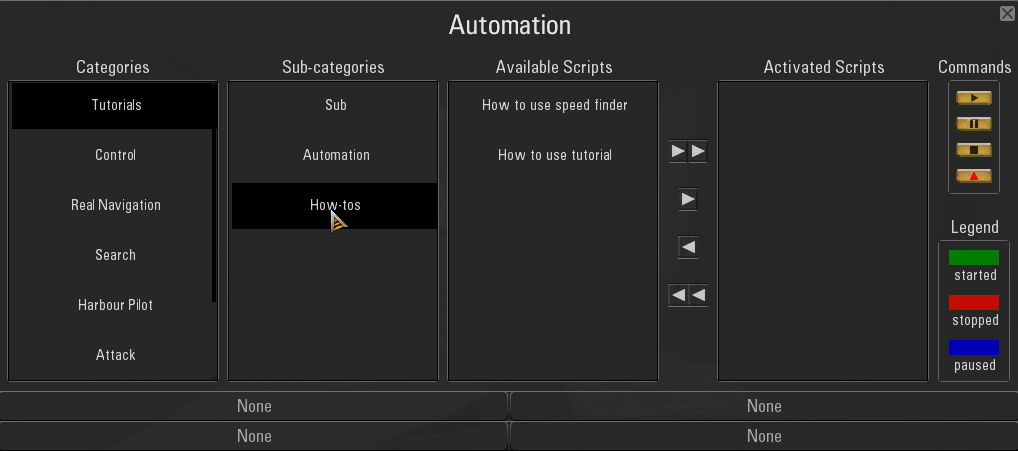 Picture 10 > Control > Automation > Shows 2 available Scripts. 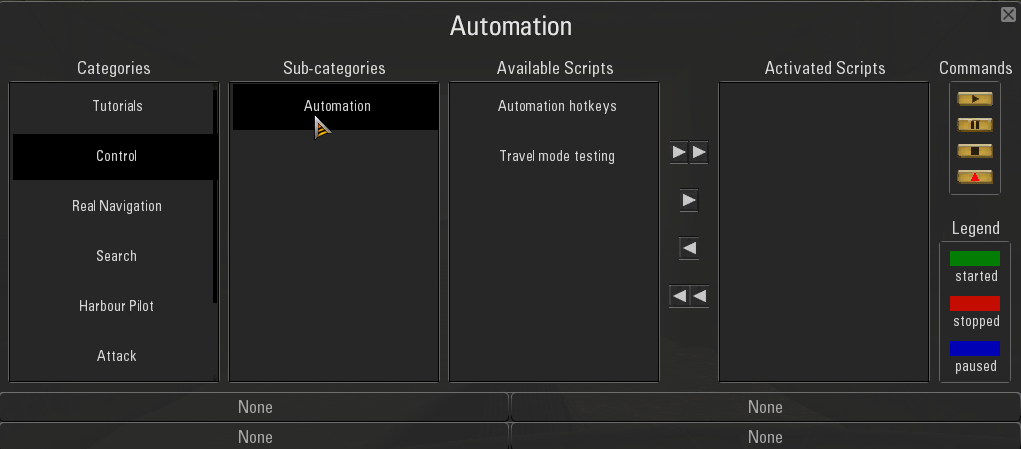 Picture 11 > Automation Hotkeys see the next Post 437 as this has its own Tutorial with much detailed information. 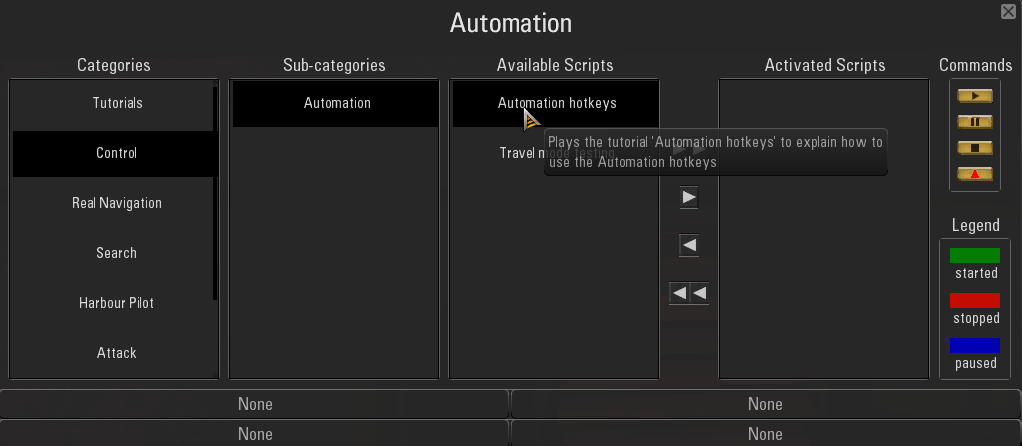 Picture 12 > The Real Navigation Scripts are only used if the Real Navigation Mod has been Enabled in JSGME. You select a Script which falls within the time showing on your boat. This needs to be done for each gaming session until you End the Patrol. The time showing on your boat can be in Nautical or G.M.T. 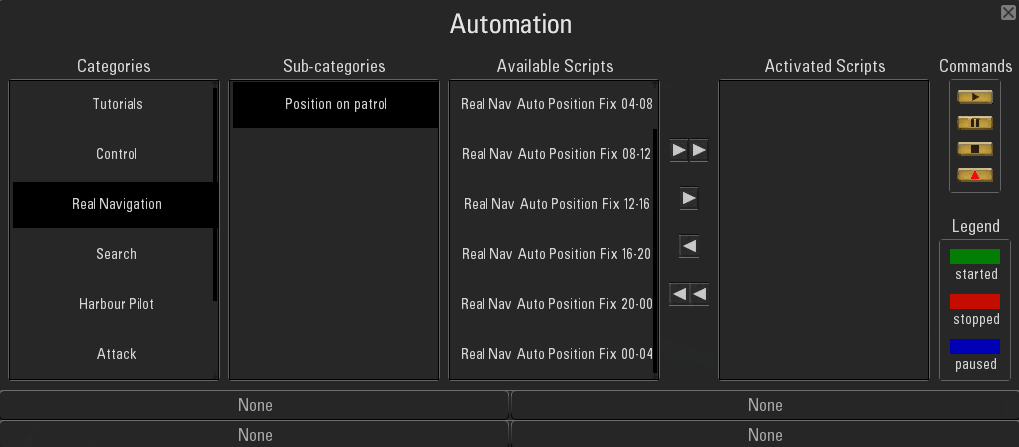 Picture 13 > Search > Shows the first of 6 Scripts. 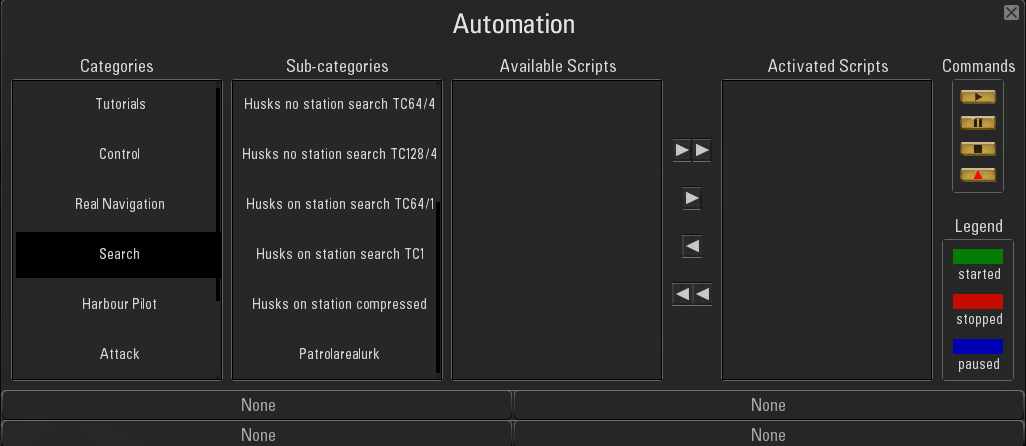 Picture 14 > These Scripts can be selected depending where you are positioned. 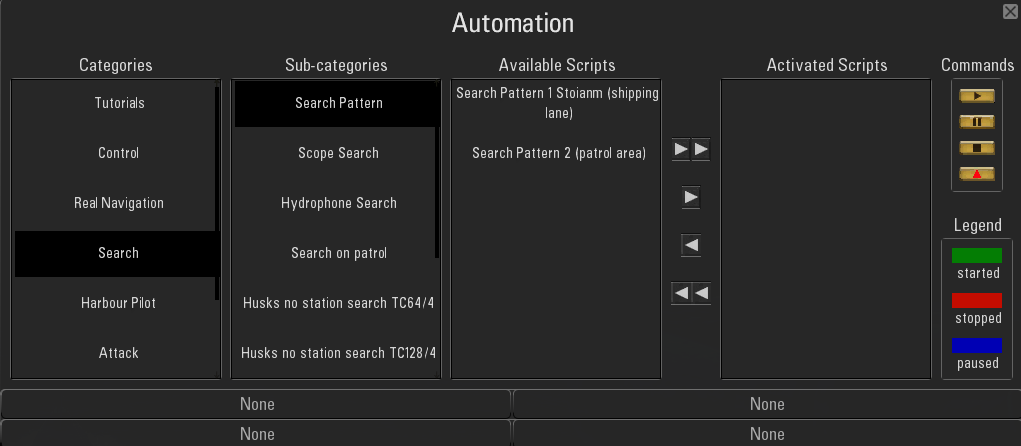 Picture 15 > Scope search Script. 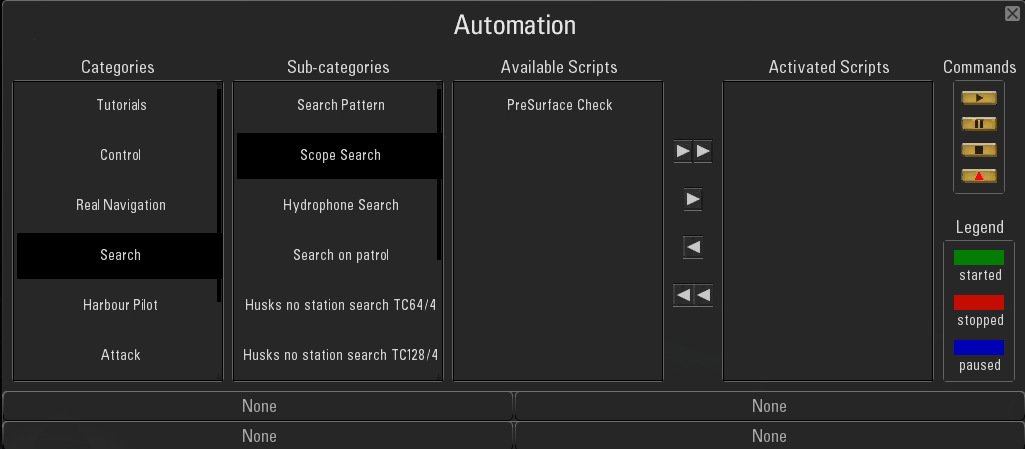 Picture 16 > Hydrophone search Script. 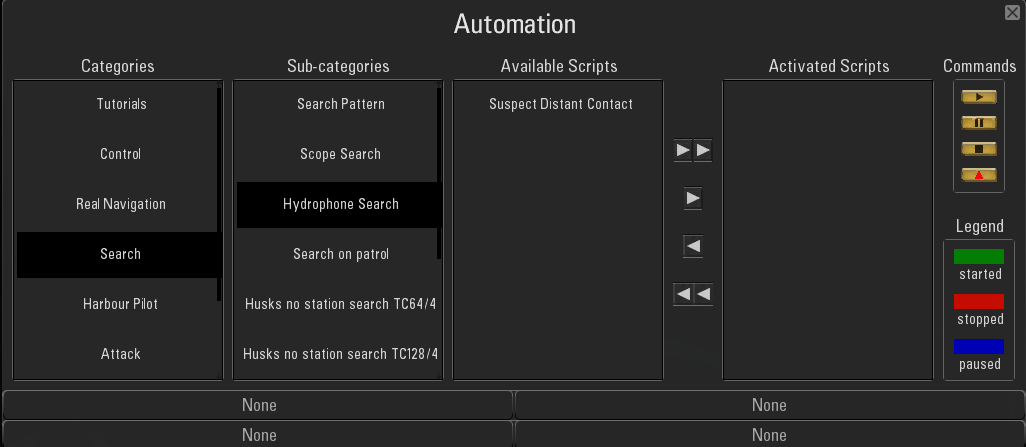 Picture 17 > 3 Specific Hydrophone Scripts. 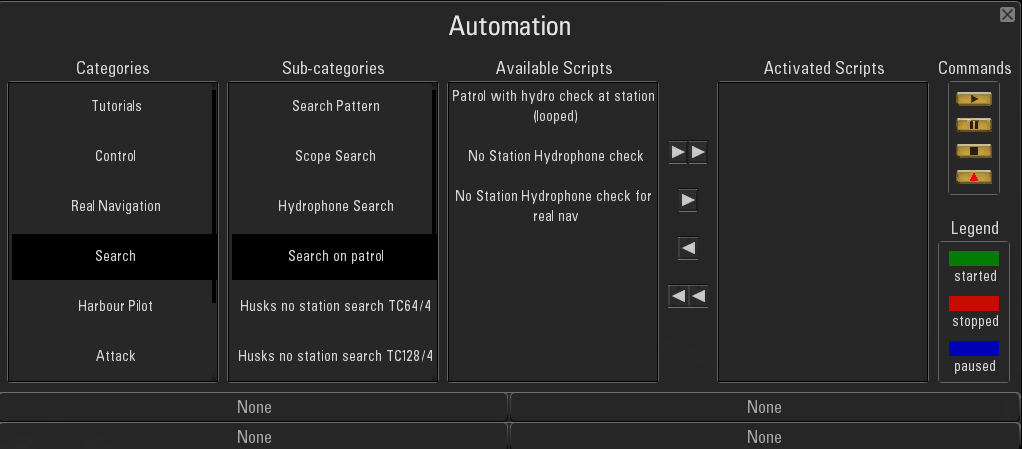 Picture 18 > 6 Hydrophone search Scripts at TC64. 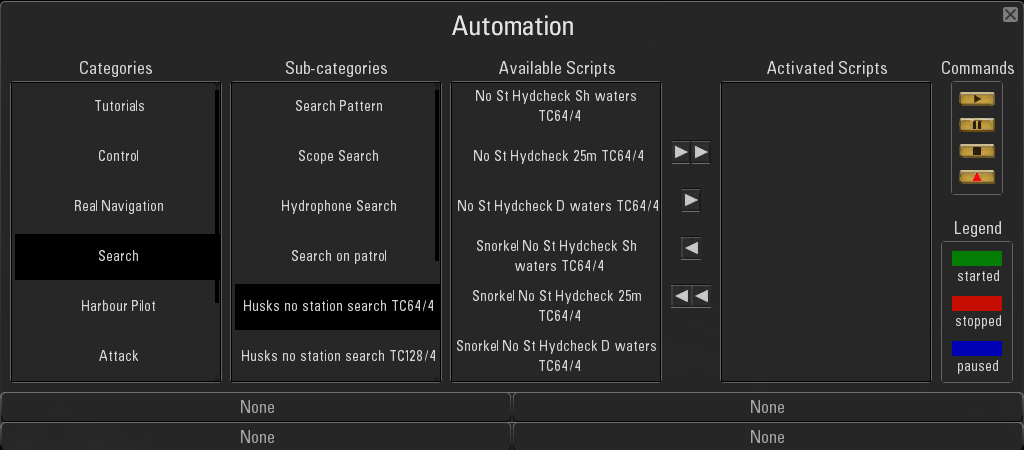 Picture 19 > 6 Hydrophone search Scripts at TC128. 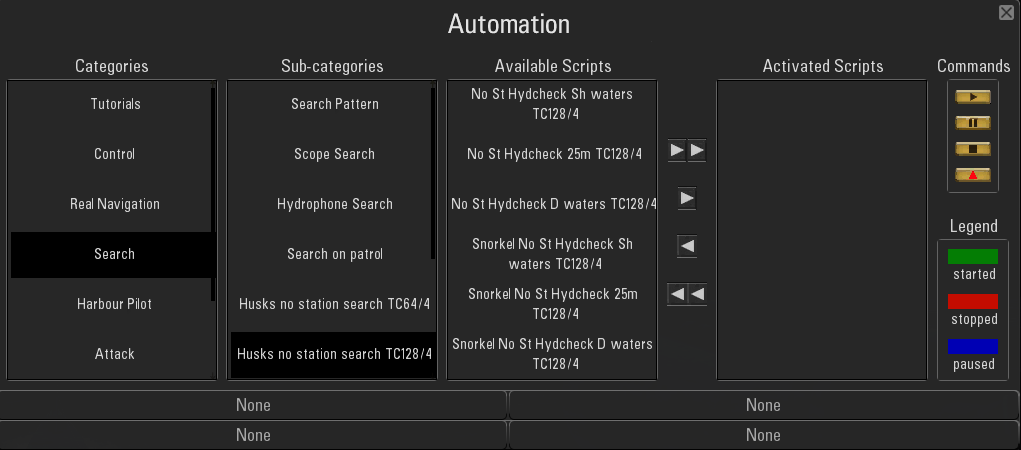 Picture 20 > Harbour Pilot Scripts will automatically take you from the Bunker and Scripts that you can use to end your patrol with. 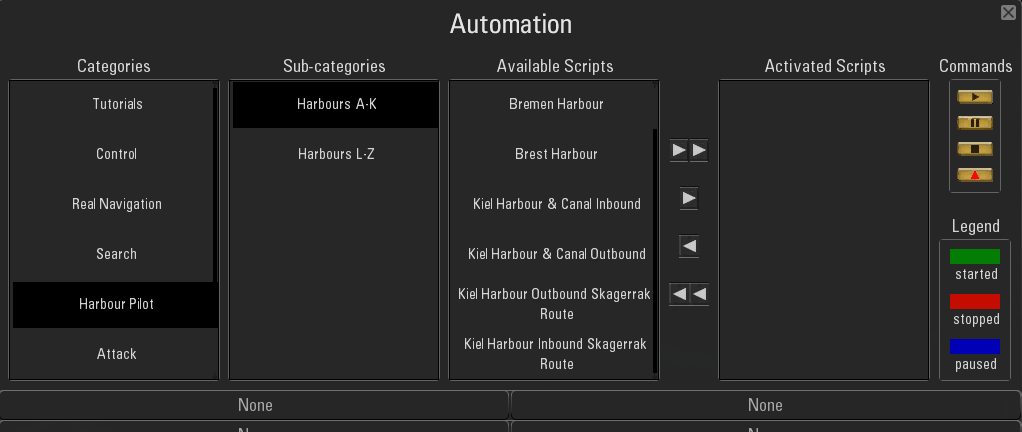 Picture 21 > The Scripts are broken down into 2. Harbours alphabetically > A to K > L to Z.  Picture 22 > These 2 Scripts you can use to take avoiding action when under attack. 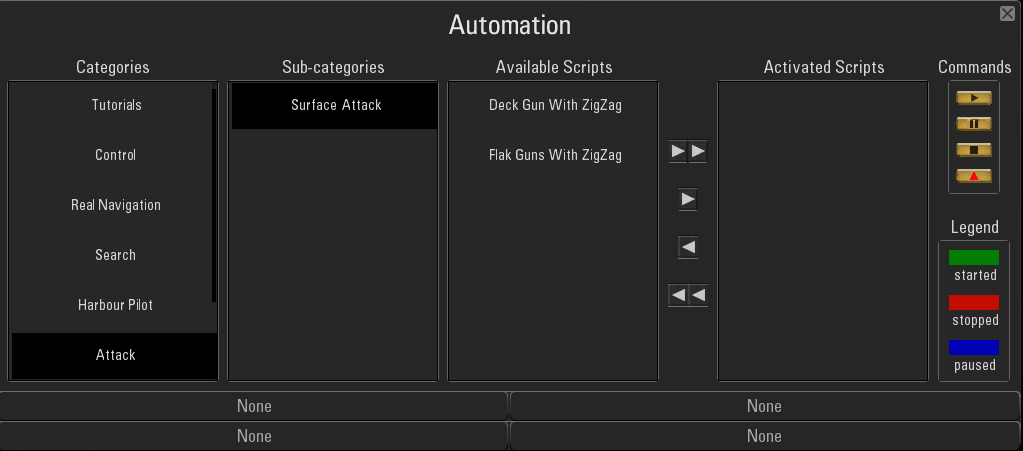 Picture 23 > The Script name says it all. 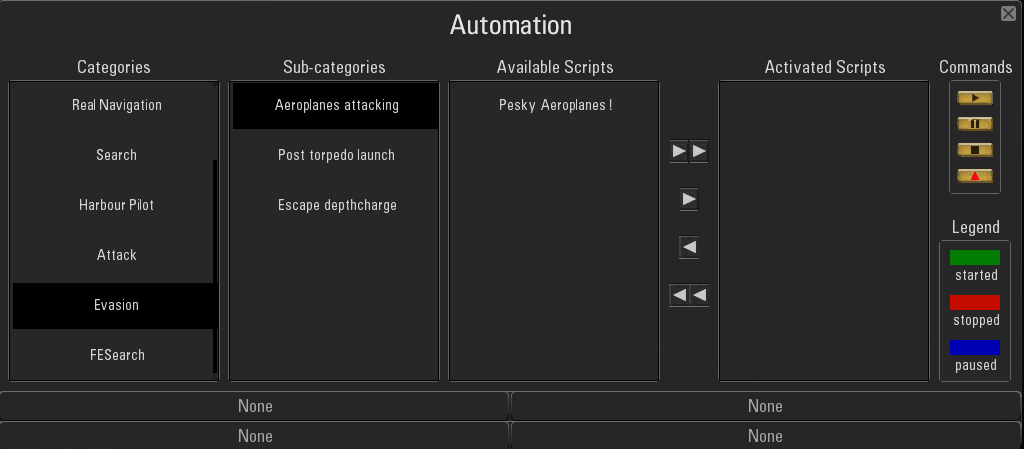 Picture 24 > Sneak away 180 is very useful after attacking an Escorted Convoy. 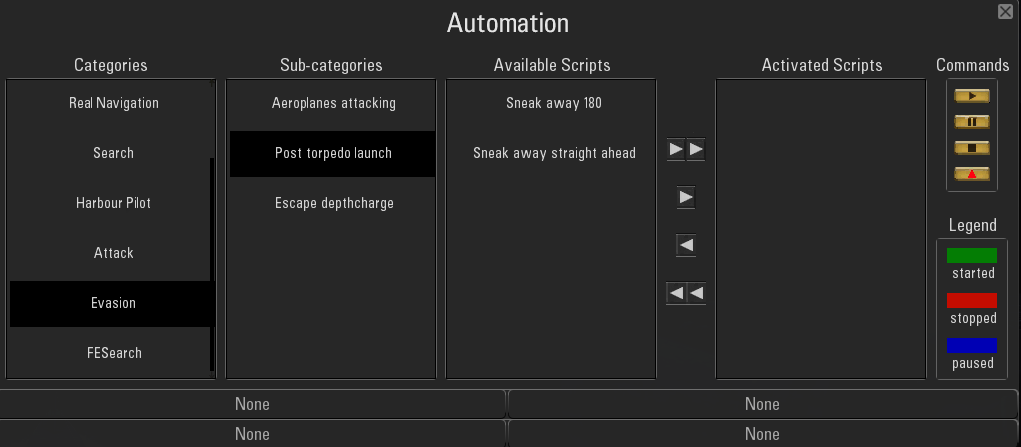 Picture 25 > Not sure what to do when under Depth Charge Attack? This Script might just save your Career. 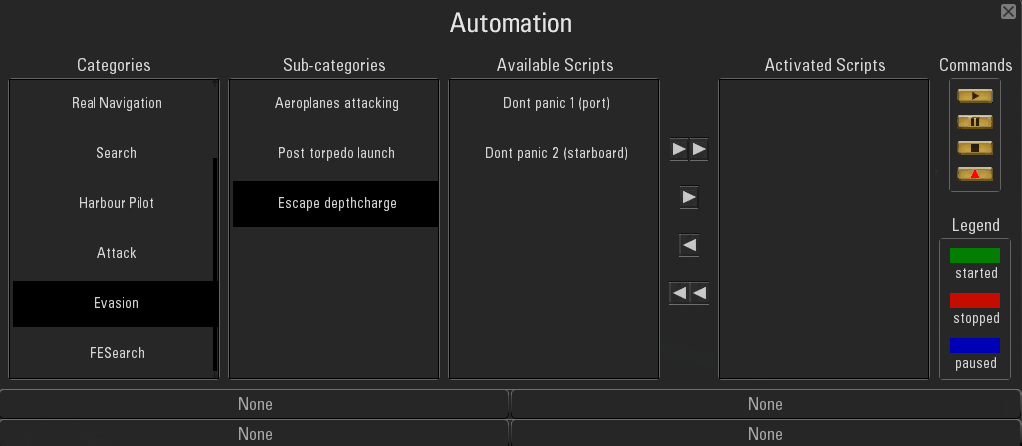 Picture 26 > More search Scripts from Husk 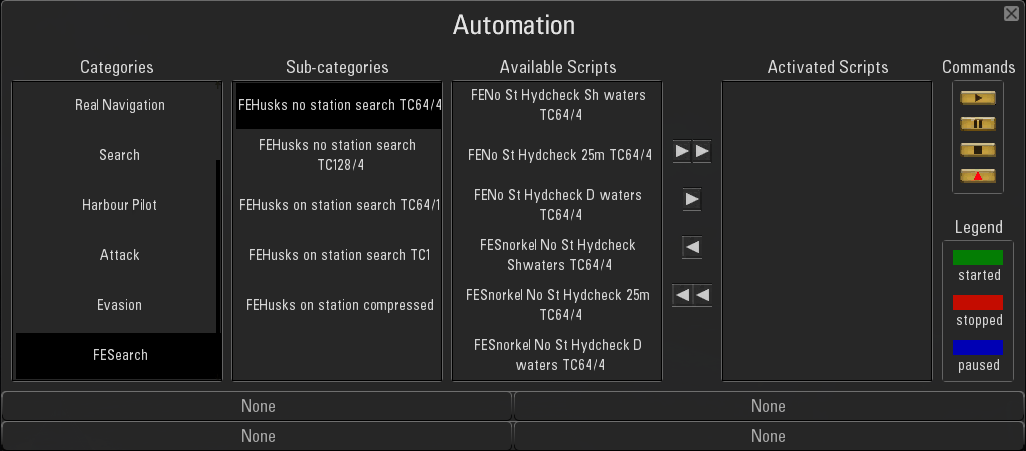 Picture 27 > More search Scripts from Husk 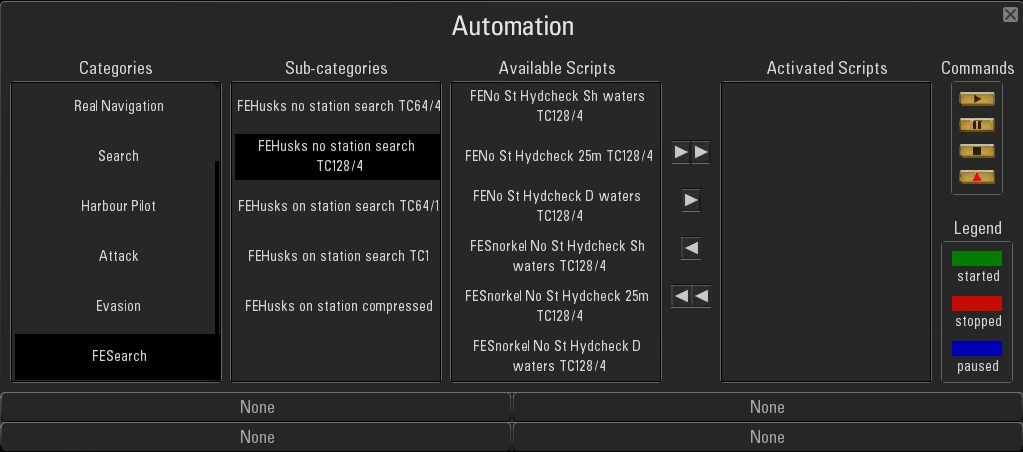 Picture 28 > More search Scripts from Husk 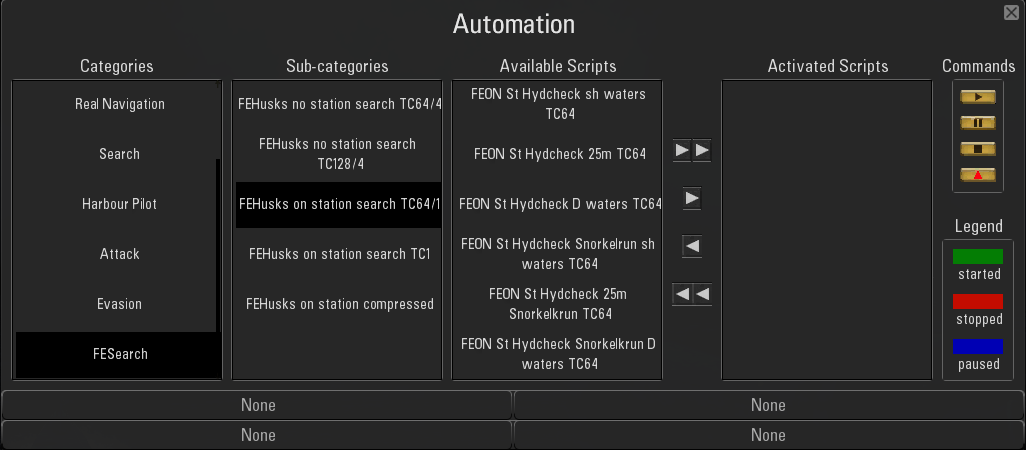 Picture 29 > More search Scripts from Husk 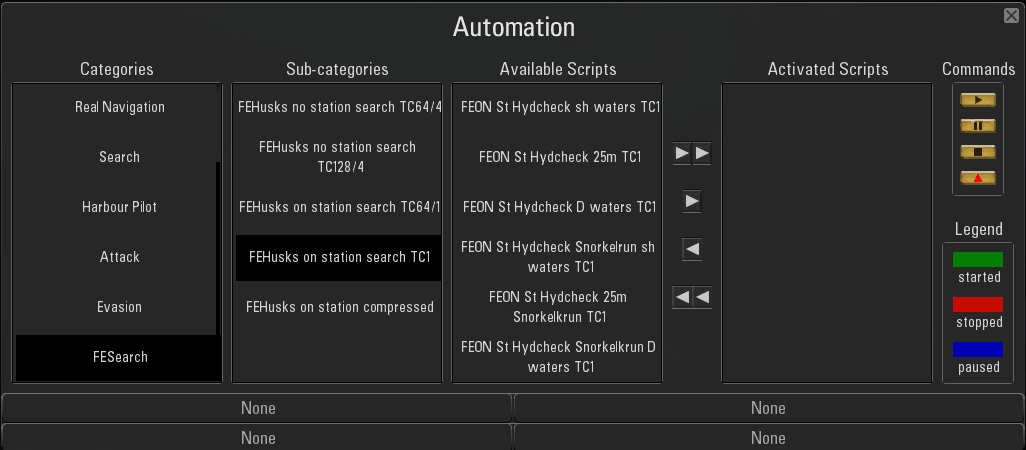 Picture 30 > More search Scripts from Husk 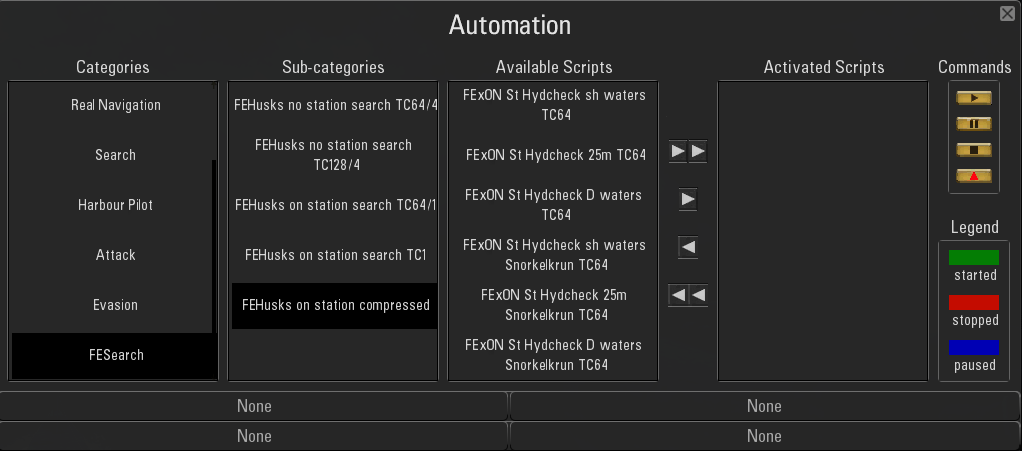 See also the following > Post #437 > Post #438 > Post #439
__________________
LSH3-2015 <> TUTORIALS <> ALL YOU NEED TO KNOW <> ALL IN ONE PLACE SH4 <> TUTORIALS <> HOW TO DO IT <> INFORMATION <> DOWNLOAD LINKS SH5 <> TUTORIALS <> HOW TO DO IT <> INFORMATION <> DOWNLOAD LINKS Always Here To Help A Fellow 'Subber' | Need An Answer to A Question Just Send Me A PM Last edited by THEBERBSTER; 09-20-21 at 11:21 AM. |

|

|
|
06-01-18, 08:23 AM
|
#2 |
|
Growing Old Disgracefully
Join Date: Dec 2012
Location: Hythe - Southampton
Posts: 9,609
Downloads: 1133
Uploads: 0
|
Automation > How To Assign Hotkeys > Part 1
This Tutorial Post #437 covers pictures 1 to 30. If you have already looked at Tutorial Post #436 you will have an idea of what Automation is and looks like. This Tutorial is more specific and centres on how to Setup and assign the Automation Keys. There are 4 Automation Keys which can be customized as pre-sets. Pressing a pre set key in the game will start the selected Script. Picture 1 > Shows the Automation Icon. Picture 2 > Shows Control >Automation > Automation Hotkeys has been selected. 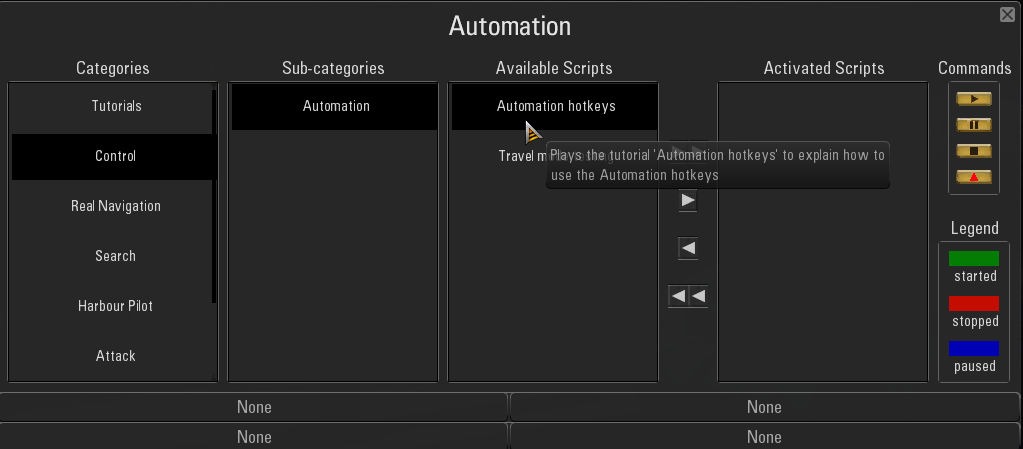 Picture 3 > The Right Arrow -> is pressed to move the Script to Activated Scripts. 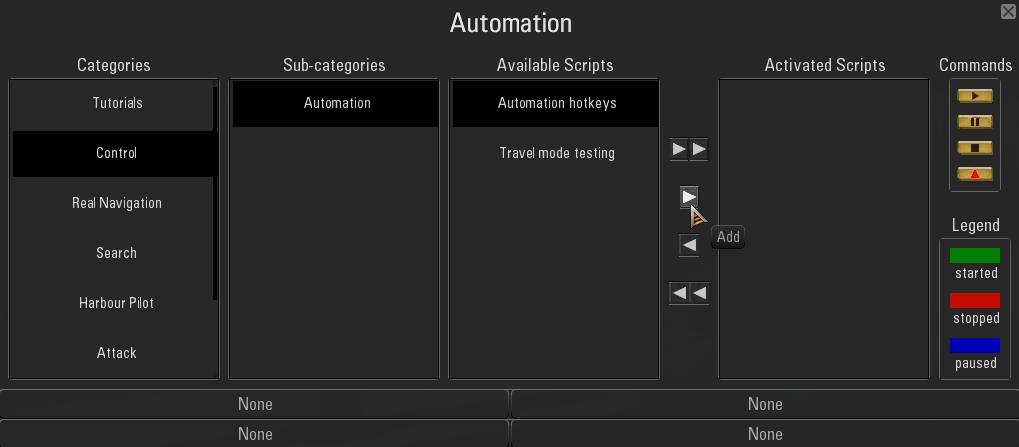 Picture 4 > When you add a Script it appears in the Activated Scripts column without a border. 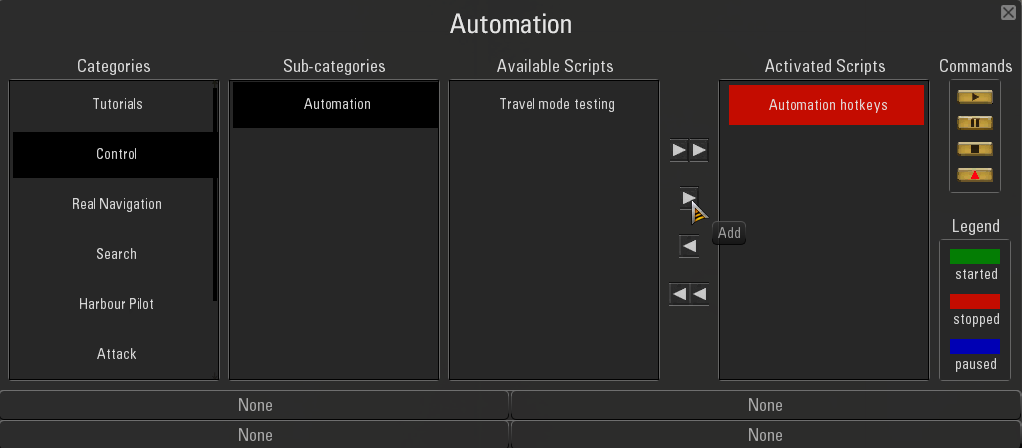 Picture 5 > When you press on the Red color the Script adds a Black Rectangular Border. 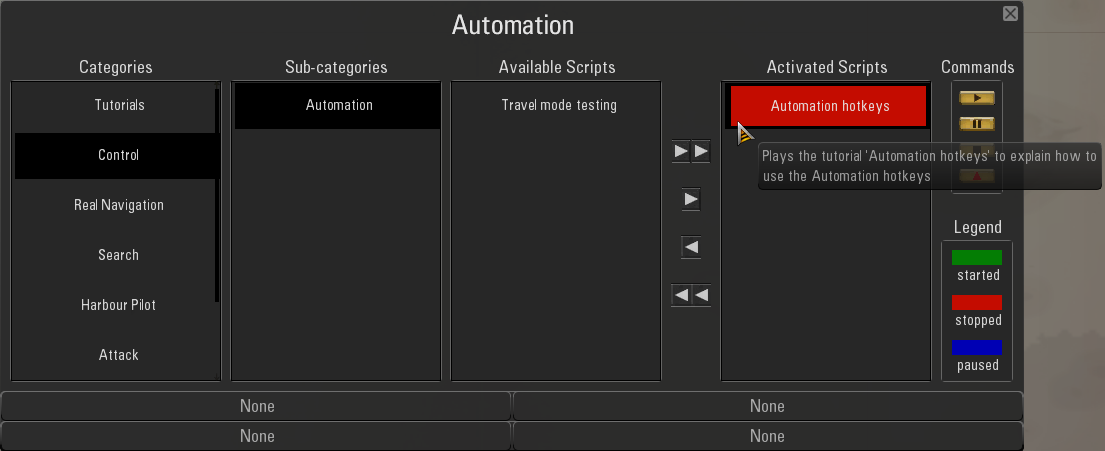 Picture 6 > Pressing the Start button will Activate the Script by turning it Green. 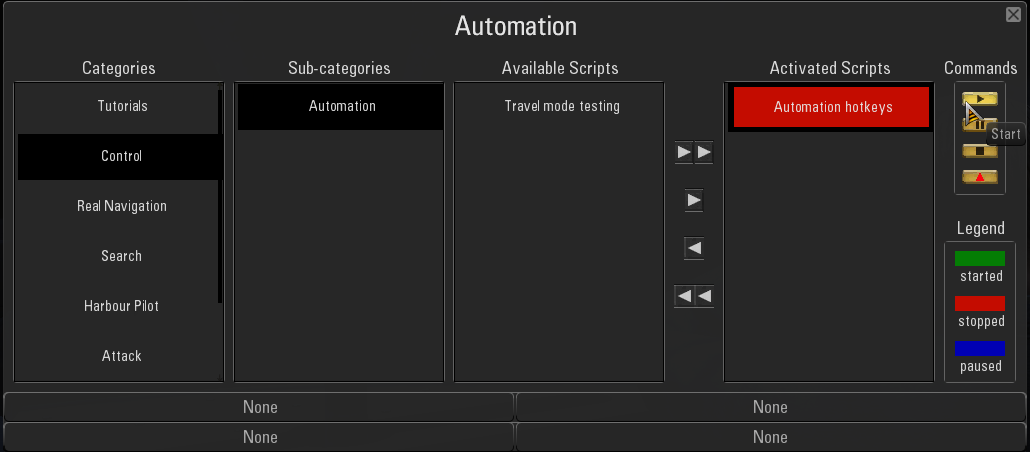 Picture 7 > The Tutorial Screen now shows. The Tutorial will not start if you have Game Pause showing. 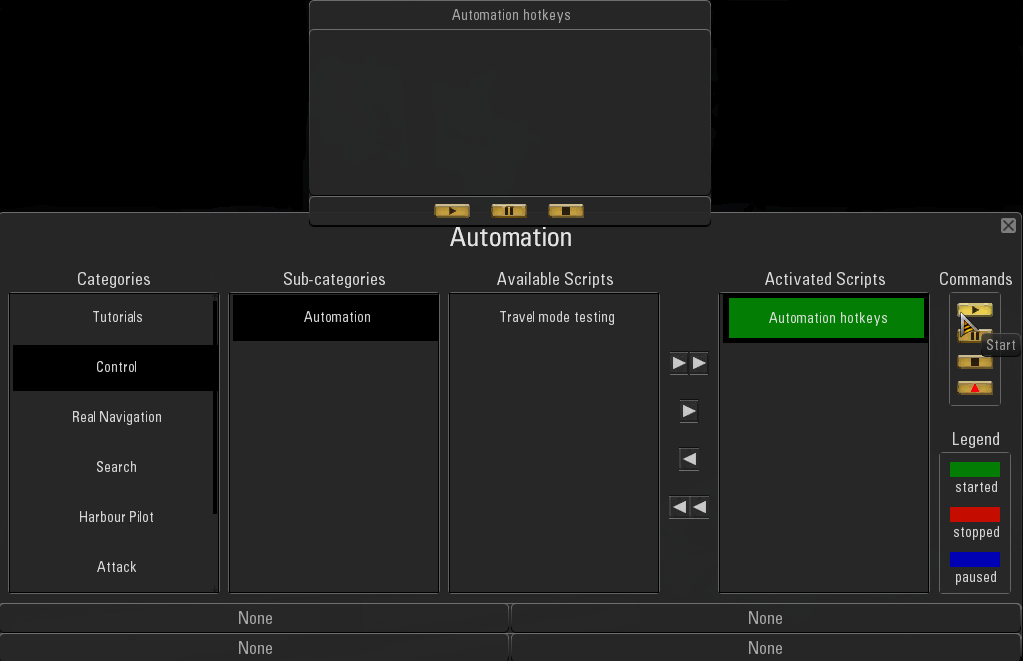 Picture 8 > Pressing the Play button will start the Tutorial. 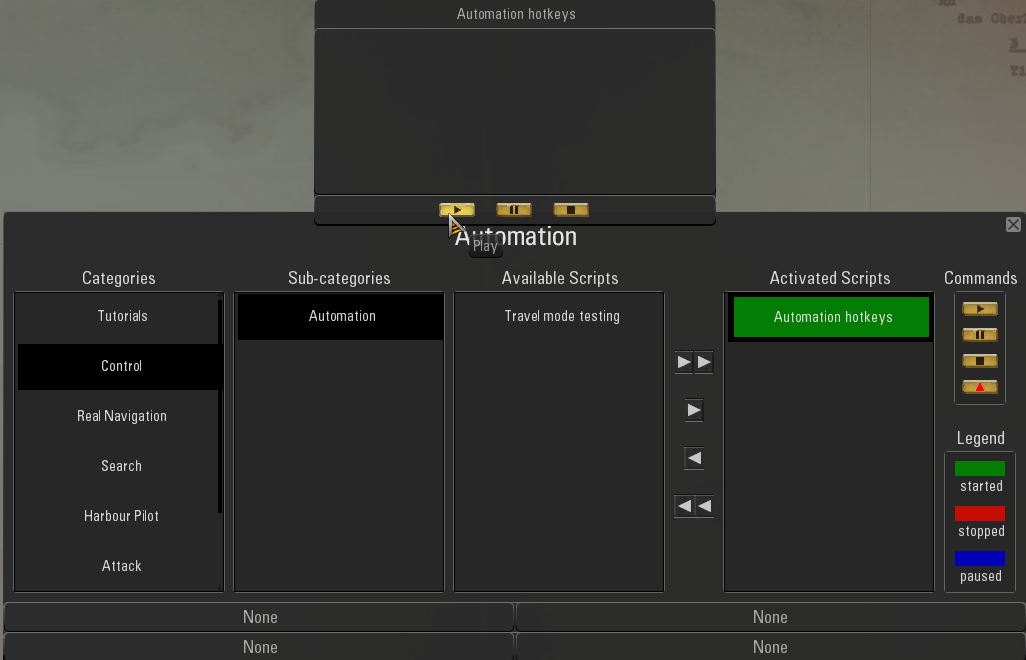 Picture 9 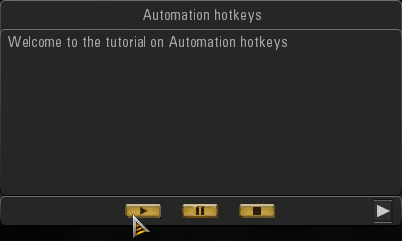 Picture 10 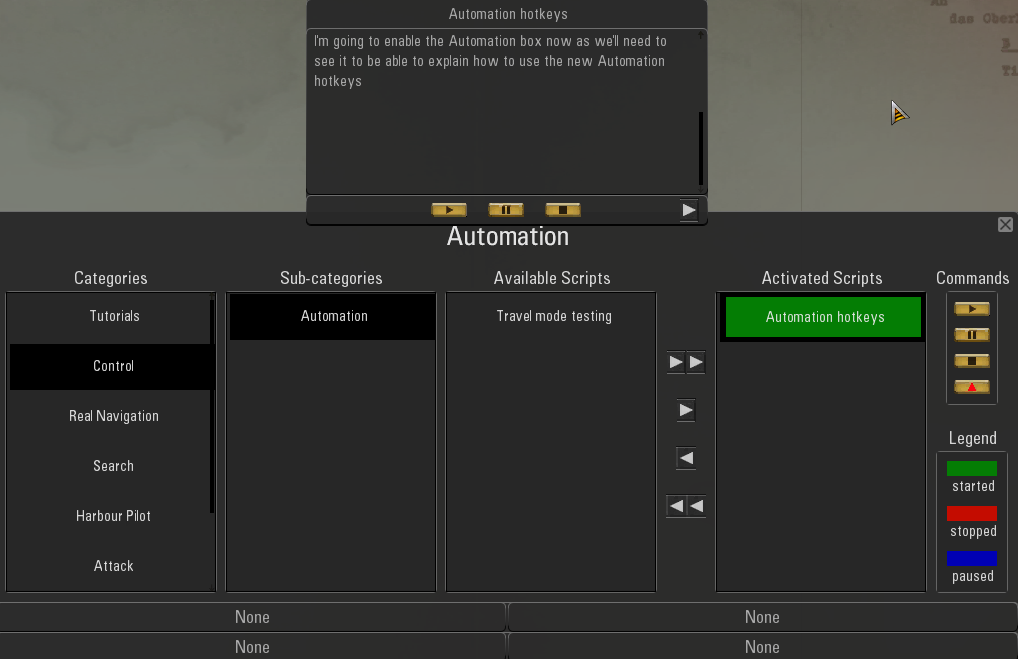 Picture 11 > Automation has its own Shortcut Key Shift + V  Picture 12 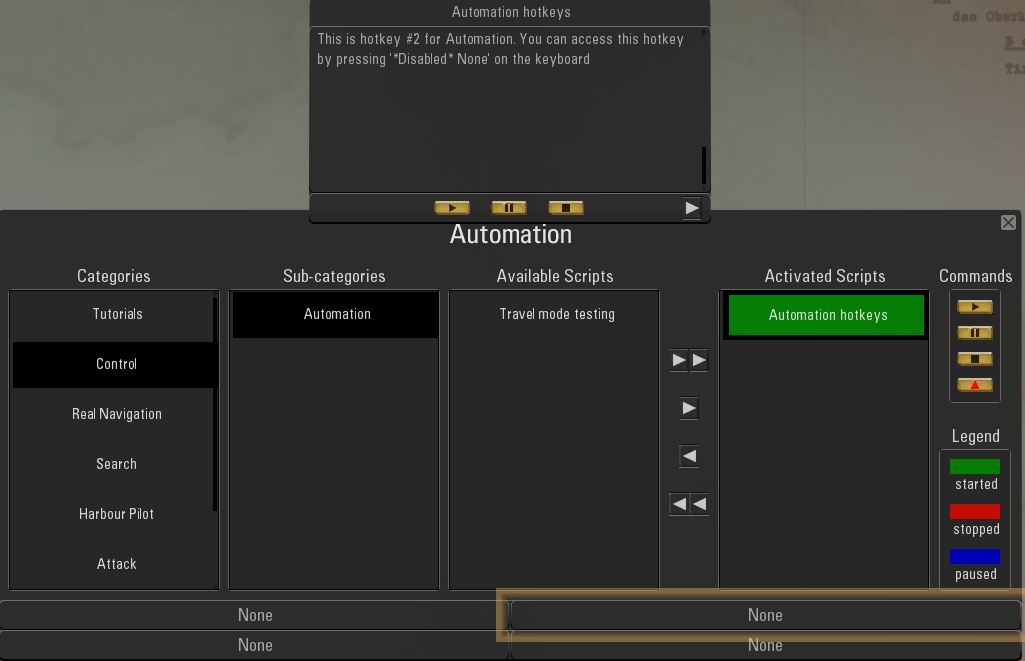 Picture 13 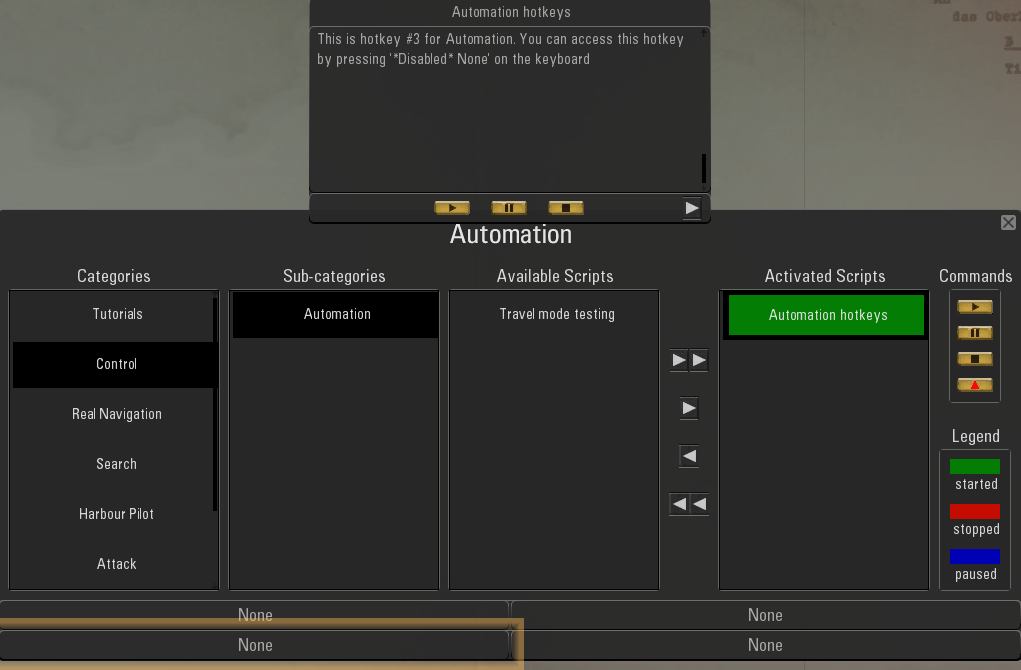 Picture 14 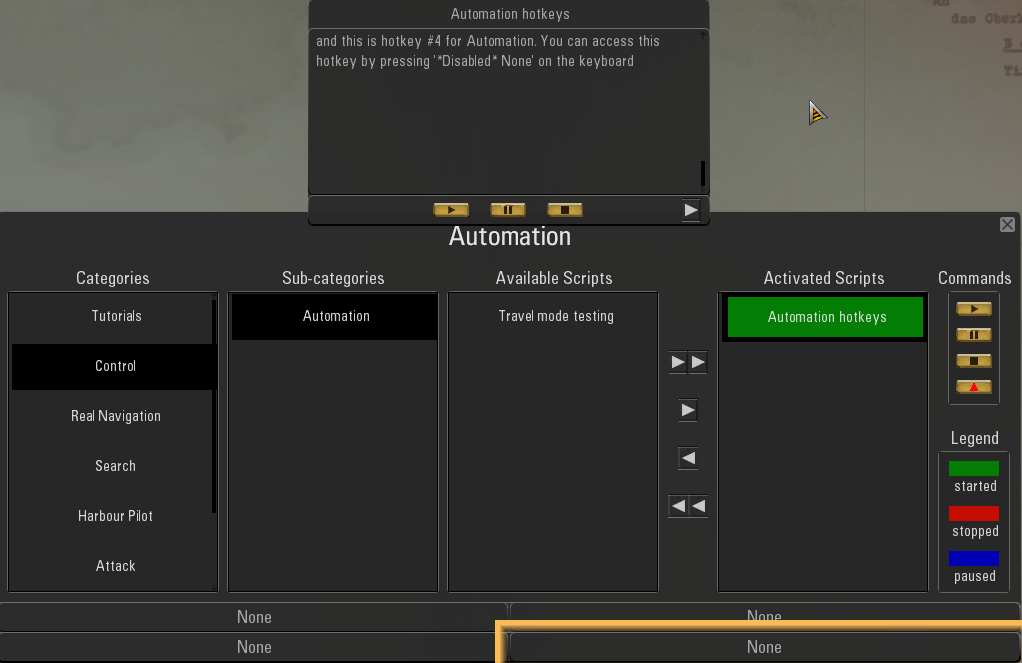 Picture 15 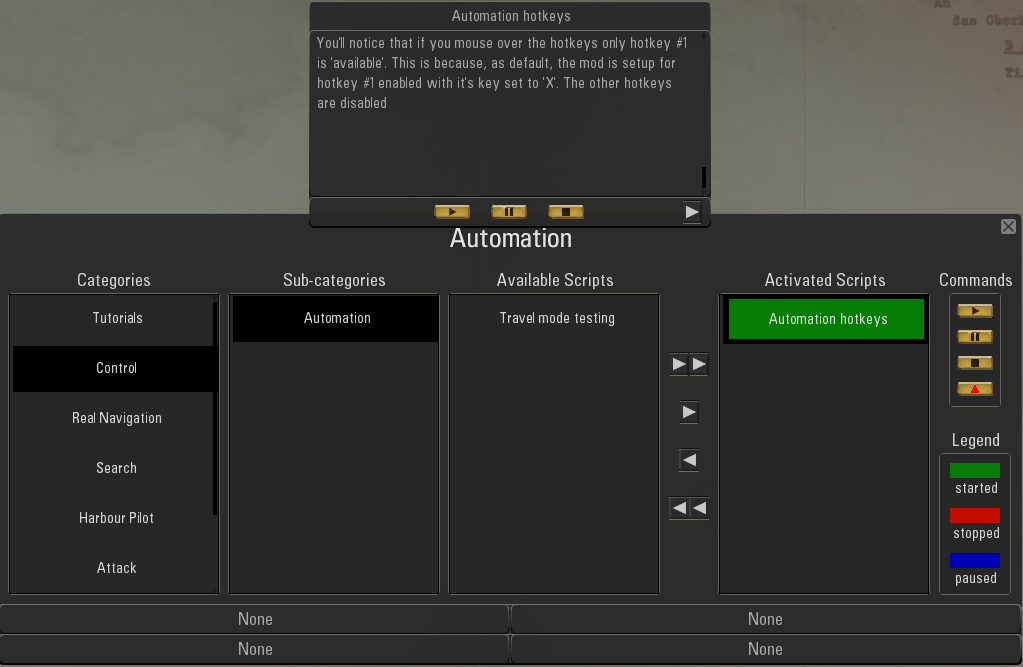 Picture 16 > In this Tutorial only Hotkey 1 is setup as a default in the OFEV. To setup the other 3 Hotkeys these have to be pre-set from TDWs Options File Editor Viewer (OFEV) I have covered this in Tutorial Post #439. 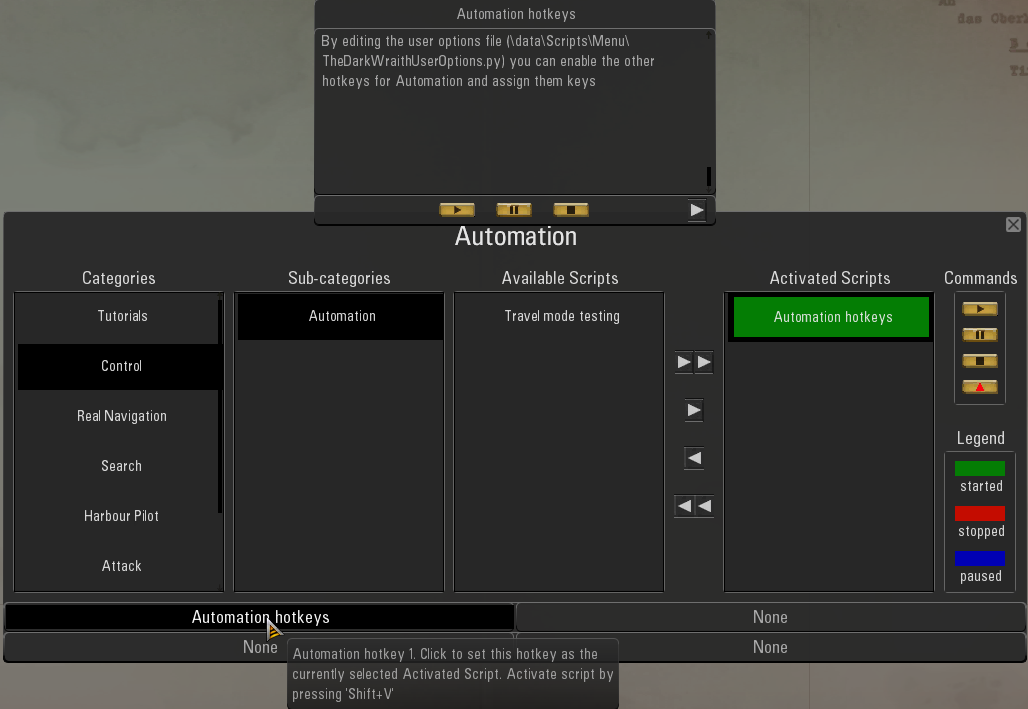 Picture 17 > Shows the 4 Hotkey Automation Patches in the OFEV. You can see that only the 1st Automation Key has been Setup. It is advisable always to use a Shift Key with each pre-set letter being used. Most Keyboard letters will have already have been Sertup on the Keyboard. This will depend on which Keyboard you are using > Stock > TWOS > Churchs > Stormys. Pressing F1 on the Keyboard only shows some of the allocated pre-set keys. Other Keys not showing on the F1 Help screen are hidden and not named on the Keys but some will have been allocated as you will see if you start pressing them when the game is running. Some will work when the boat is surfaced and others when submerged. 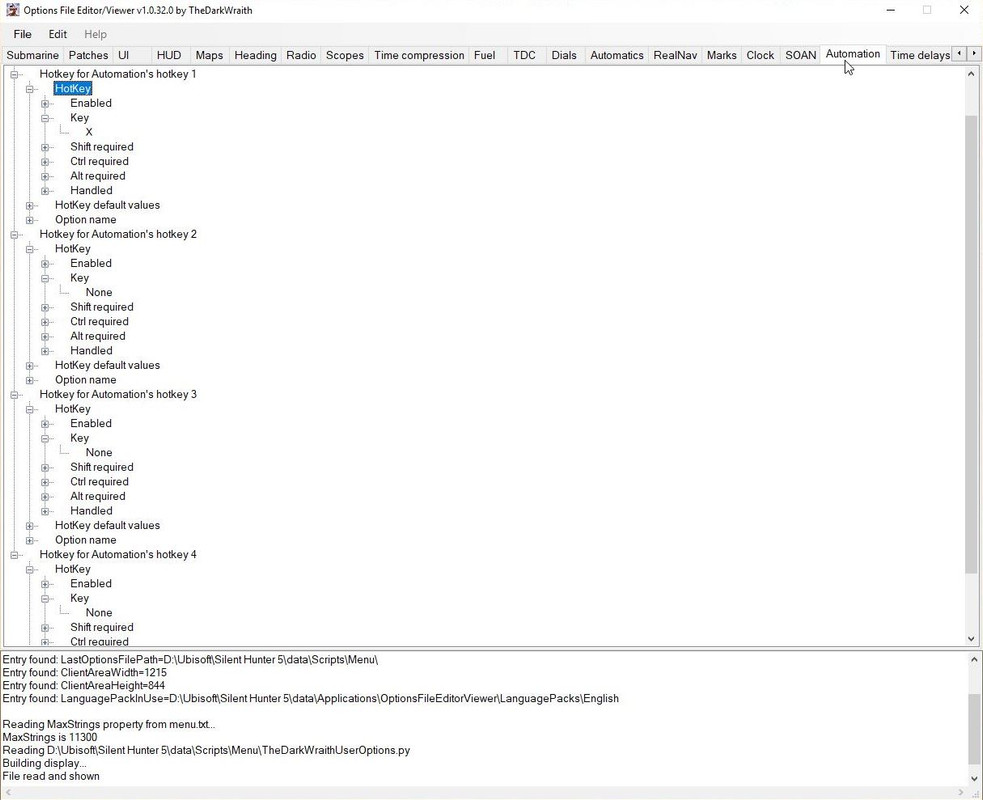 Picture 18 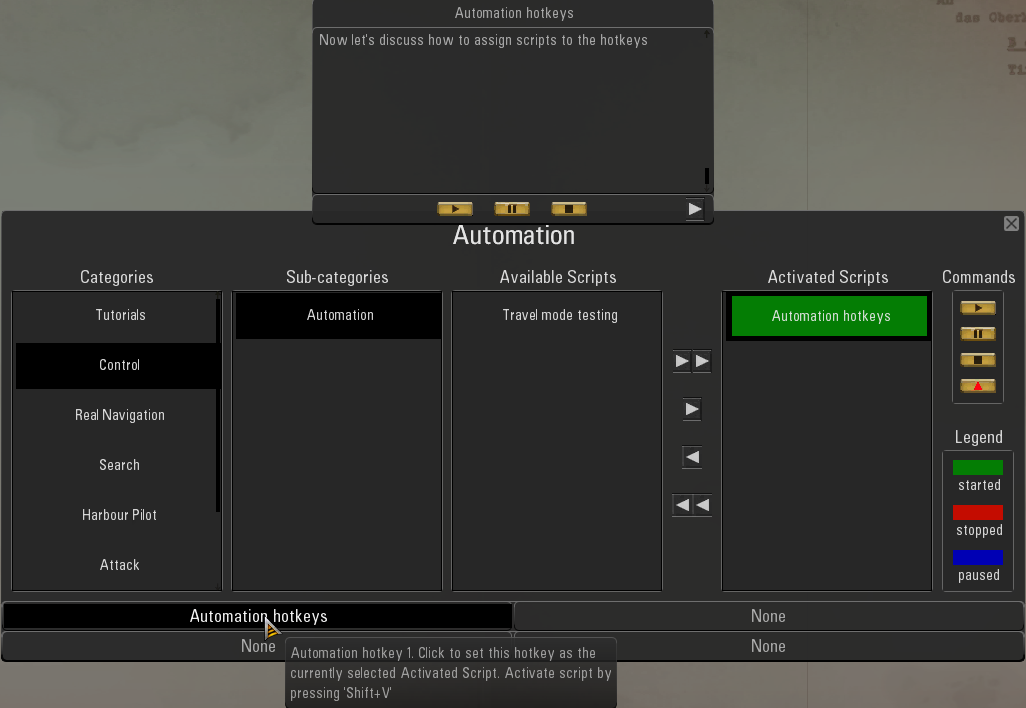 Picture 19  Picture 20 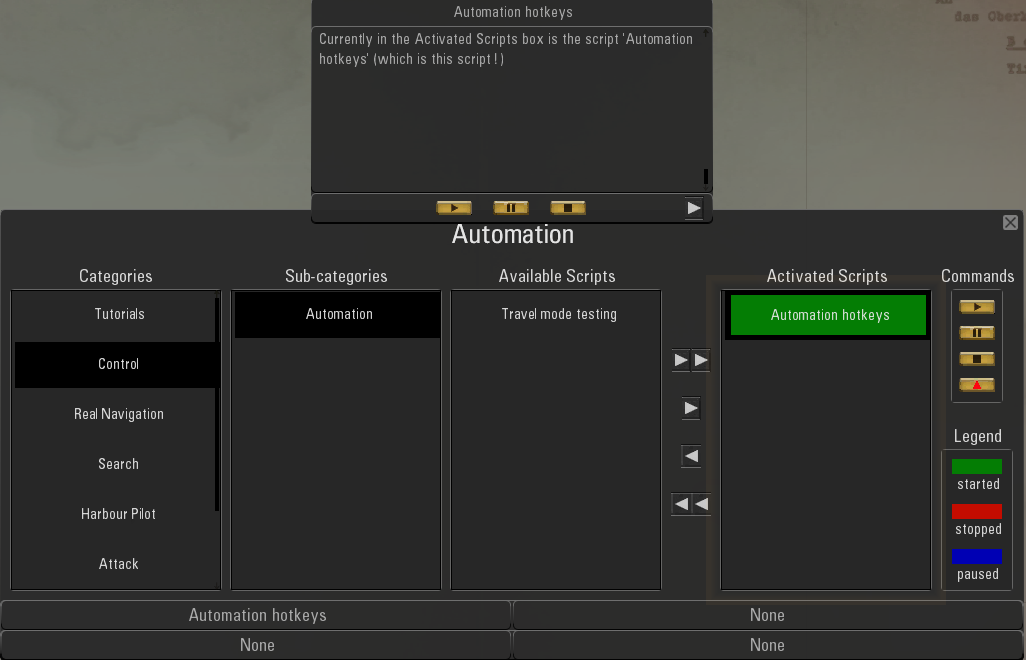 Picture 21 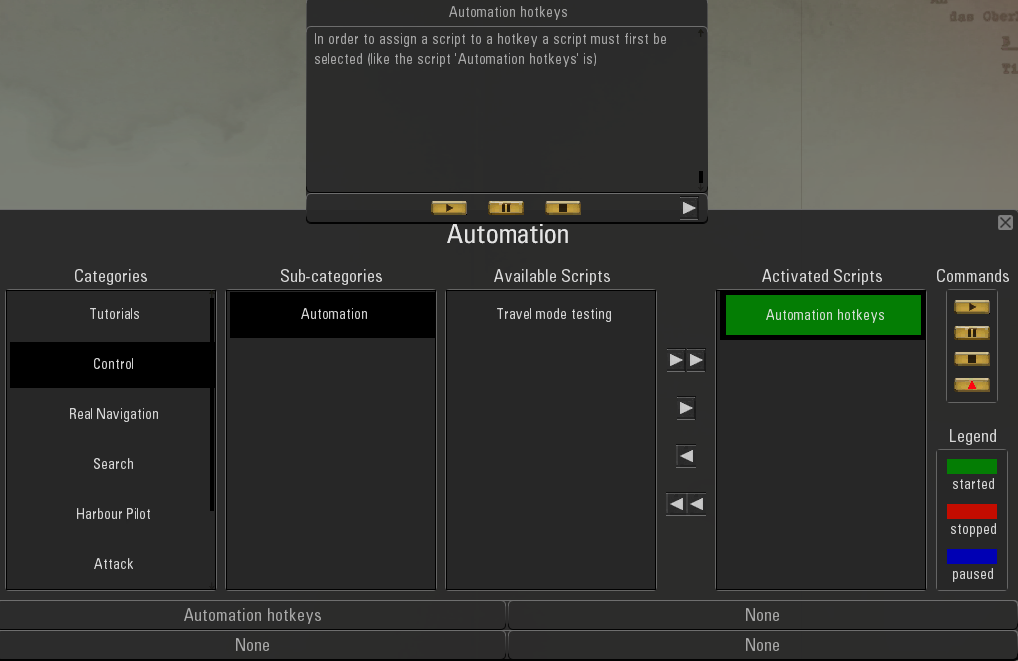 Picture 22 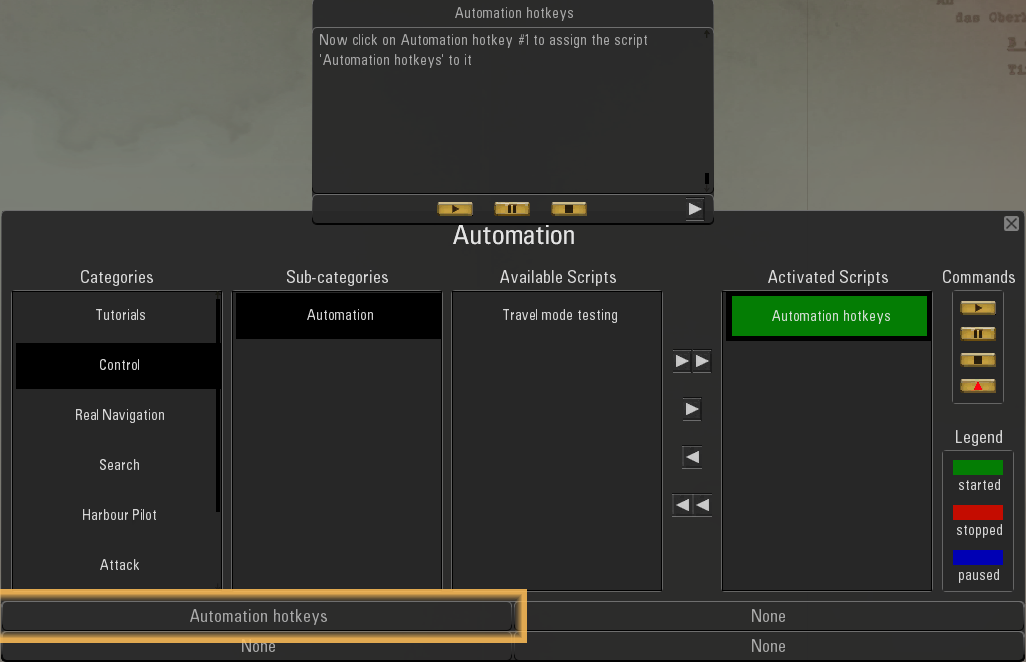 Picture 23 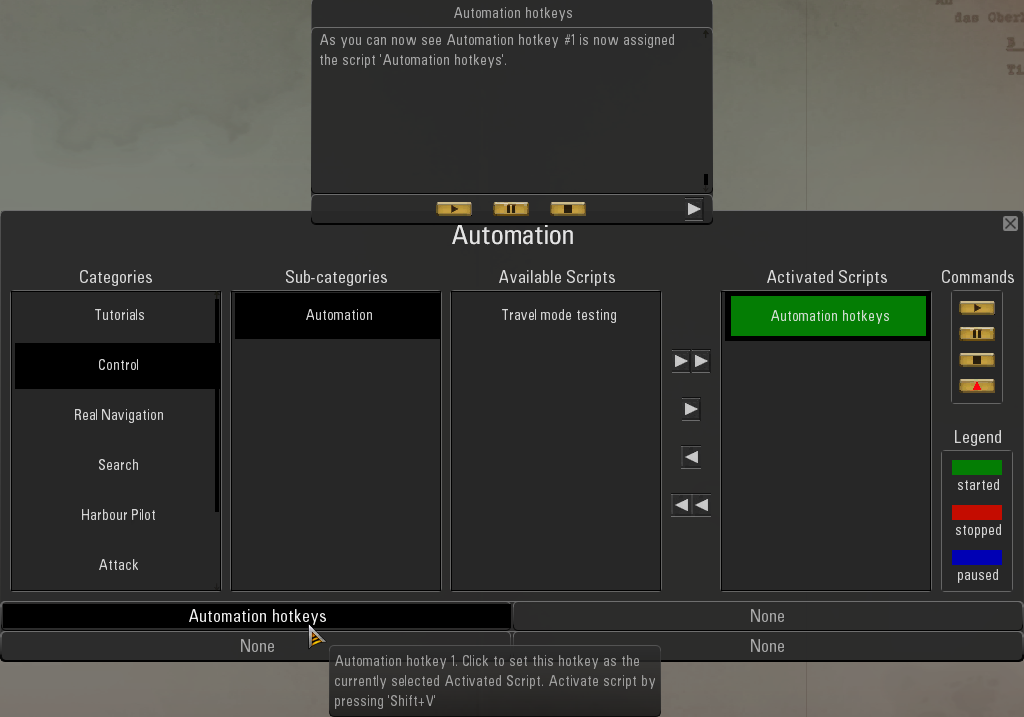 Picture 24 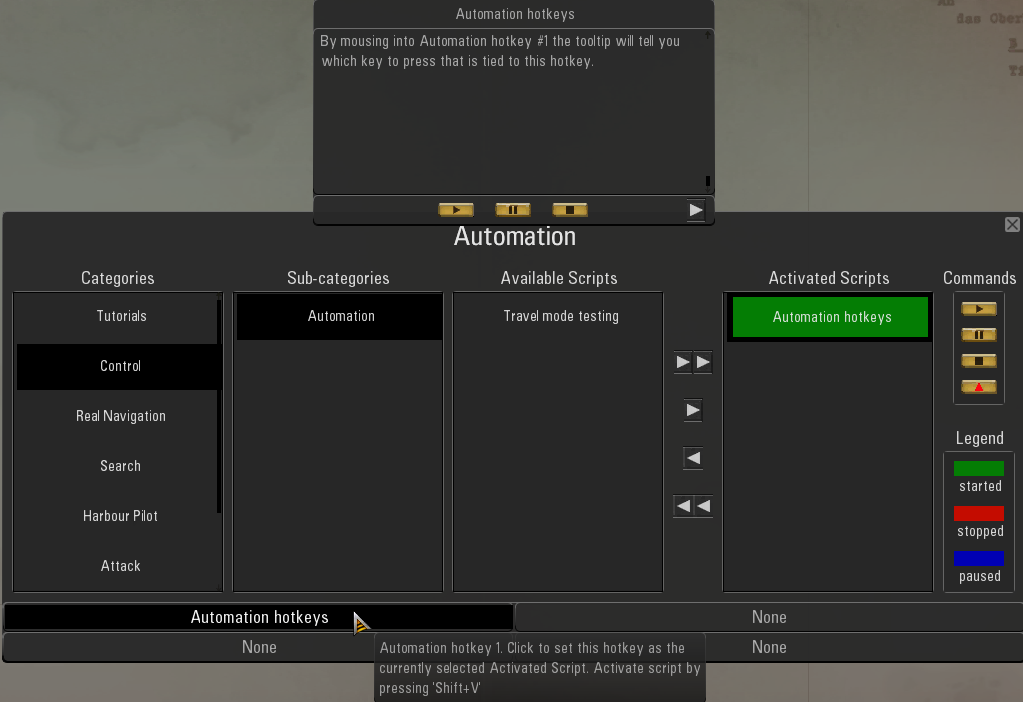 Picture 25 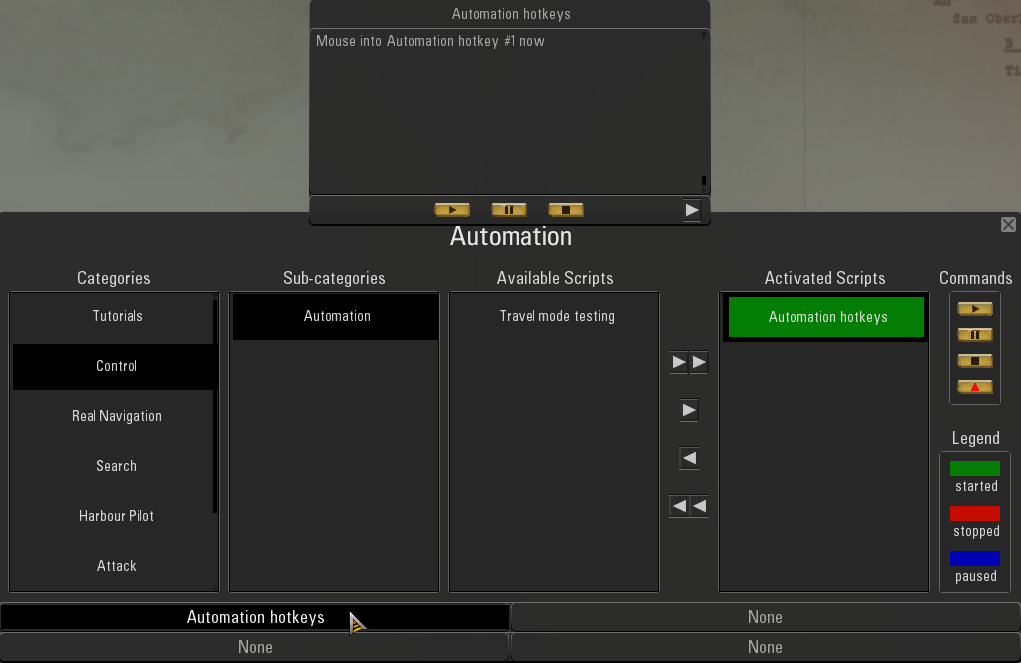 Picture 26 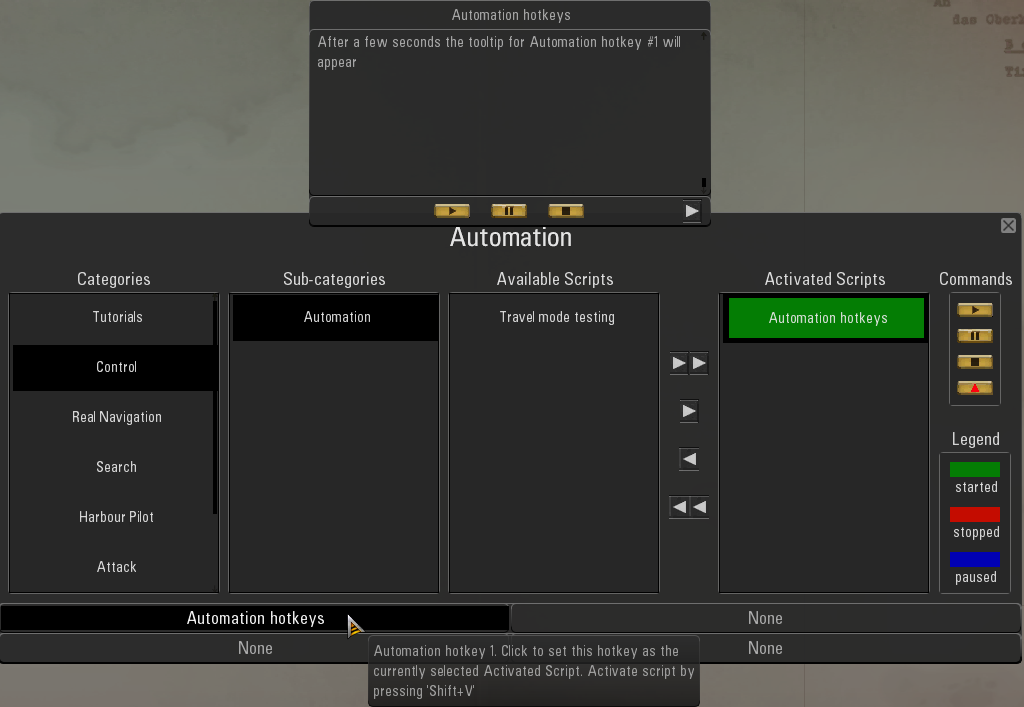 Picture 27 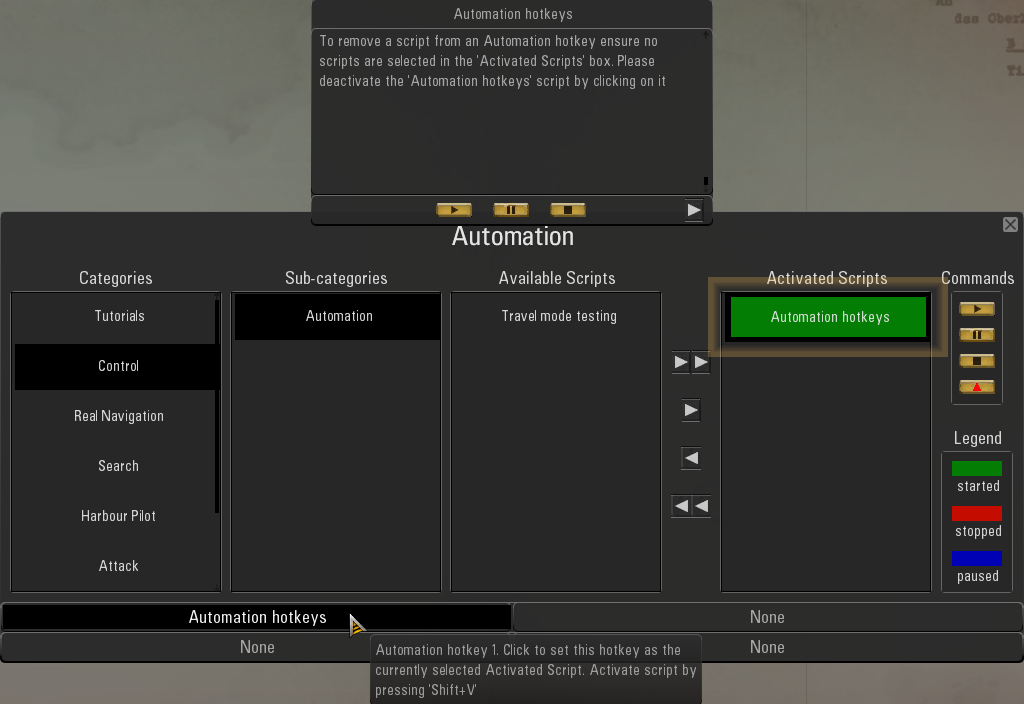 Picture 28 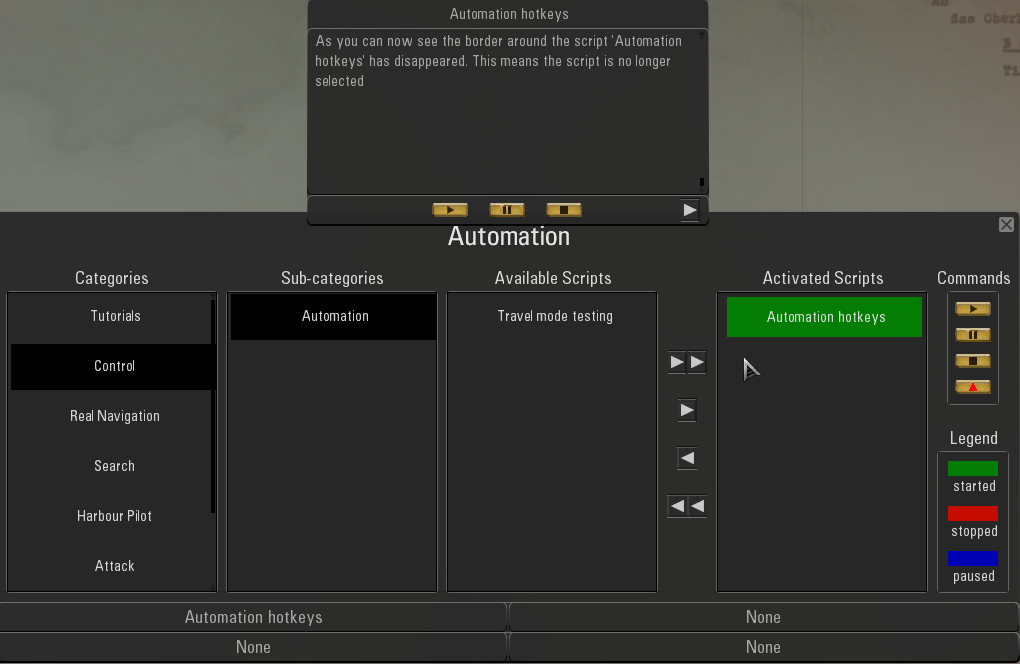 Picture 29  Picture 30  Continued in the next Post #438
__________________
LSH3-2015 <> TUTORIALS <> ALL YOU NEED TO KNOW <> ALL IN ONE PLACE SH4 <> TUTORIALS <> HOW TO DO IT <> INFORMATION <> DOWNLOAD LINKS SH5 <> TUTORIALS <> HOW TO DO IT <> INFORMATION <> DOWNLOAD LINKS Always Here To Help A Fellow 'Subber' | Need An Answer to A Question Just Send Me A PM Last edited by THEBERBSTER; 09-20-21 at 11:49 AM. |
|
|
|
|
06-01-18, 08:25 AM
|
#3 |
|
Growing Old Disgracefully
Join Date: Dec 2012
Location: Hythe - Southampton
Posts: 9,609
Downloads: 1133
Uploads: 0
|
Automation > How To Assign Hotkeys Part 2
Picture 31 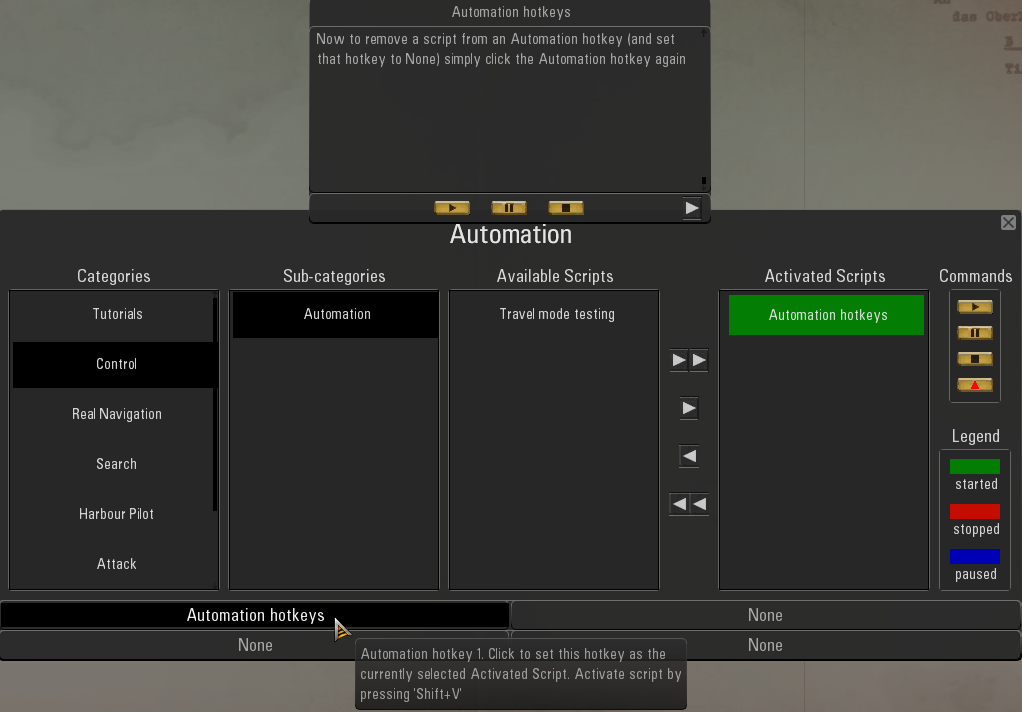 Picture 32 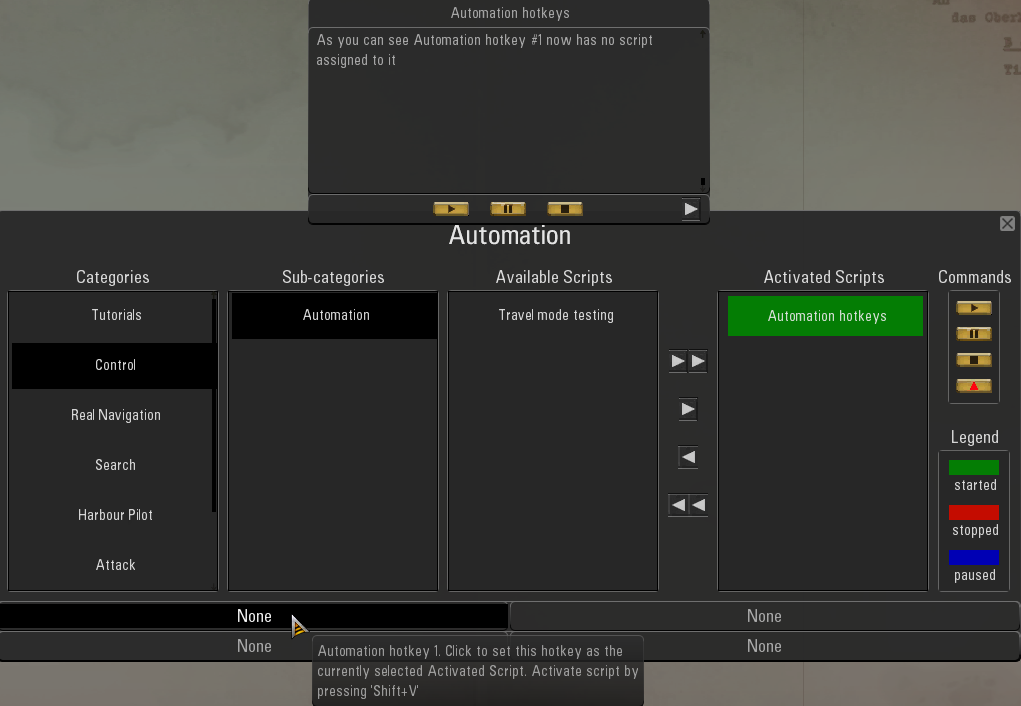 Picture 33 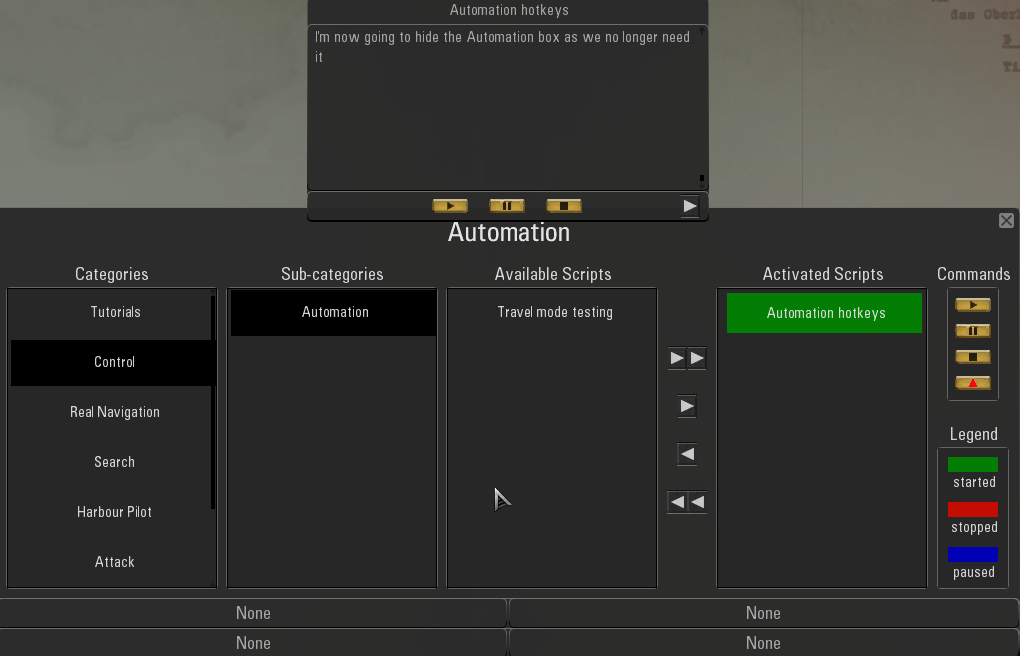 Picture 34 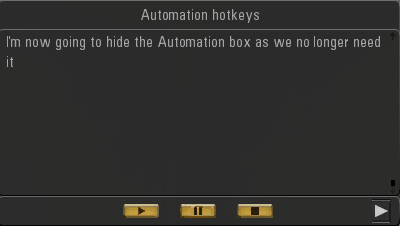 Picture 35 > The Tutorial has completed so I now want to remove the Script as it is no longer needed. 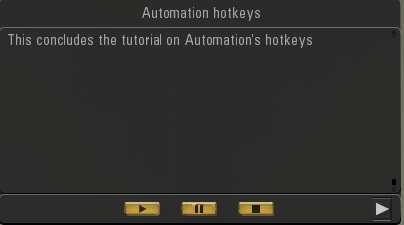 Picture 36 > The Tutorial has removed the Black Rectangle from the Script. 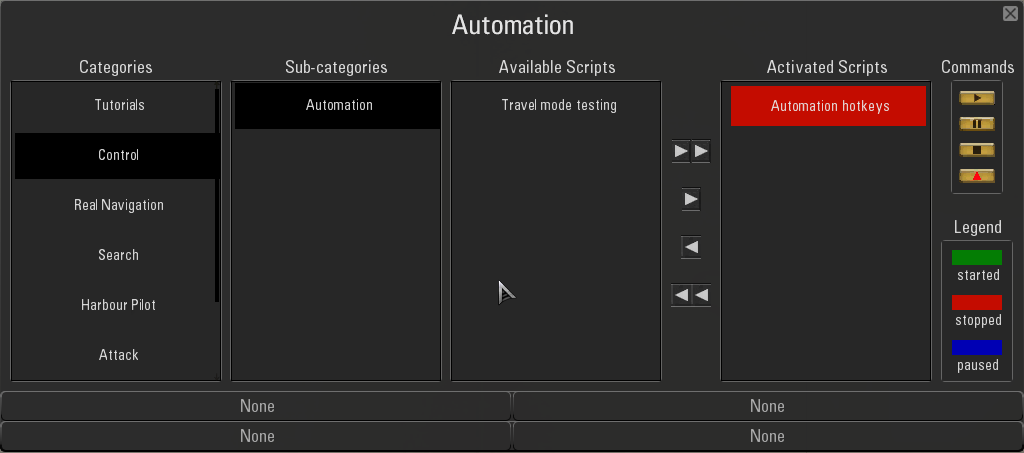 Picture 37 > You can use either <- or <- <- to Remove the Script. 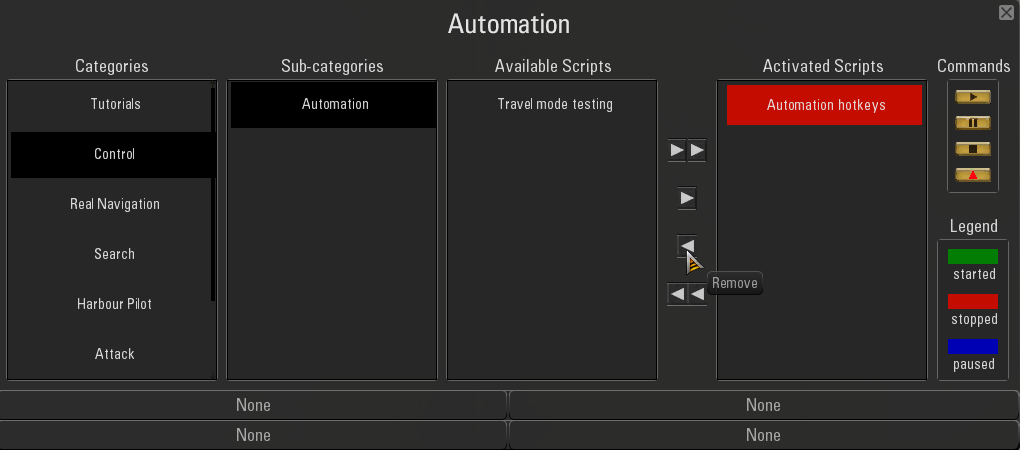 Picture 38 > This completes the Automation Tutorial. 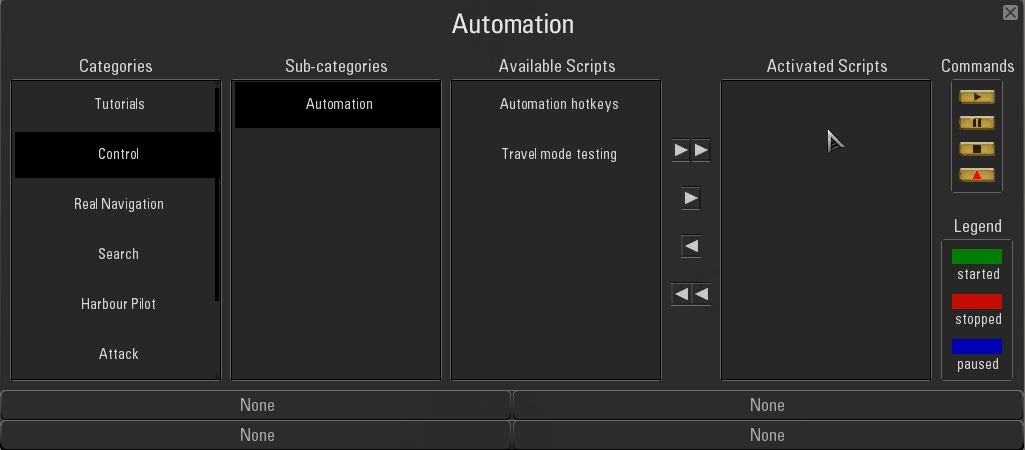
__________________
LSH3-2015 <> TUTORIALS <> ALL YOU NEED TO KNOW <> ALL IN ONE PLACE SH4 <> TUTORIALS <> HOW TO DO IT <> INFORMATION <> DOWNLOAD LINKS SH5 <> TUTORIALS <> HOW TO DO IT <> INFORMATION <> DOWNLOAD LINKS Always Here To Help A Fellow 'Subber' | Need An Answer to A Question Just Send Me A PM Last edited by THEBERBSTER; 03-07-19 at 04:40 PM. |
|
|
|
|
06-01-18, 10:56 AM
|
#4 |
|
Growing Old Disgracefully
Join Date: Dec 2012
Location: Hythe - Southampton
Posts: 9,609
Downloads: 1133
Uploads: 0
|
How To Set Up The OFEV Automation Hotkeys.
This Tutorial will show you how to assign Hotkeys to Automation. Once this has been done you can allocate different Automation Scripts to the 4 Hotkeys. You can change a Script to any Hotkey as you wish. If you are using your own mod list you will need to Disable the Main NewUi mod 7-4-2- or 7-5-0 first. Picture 1 > Open the OFEV and select the Automation Tab. 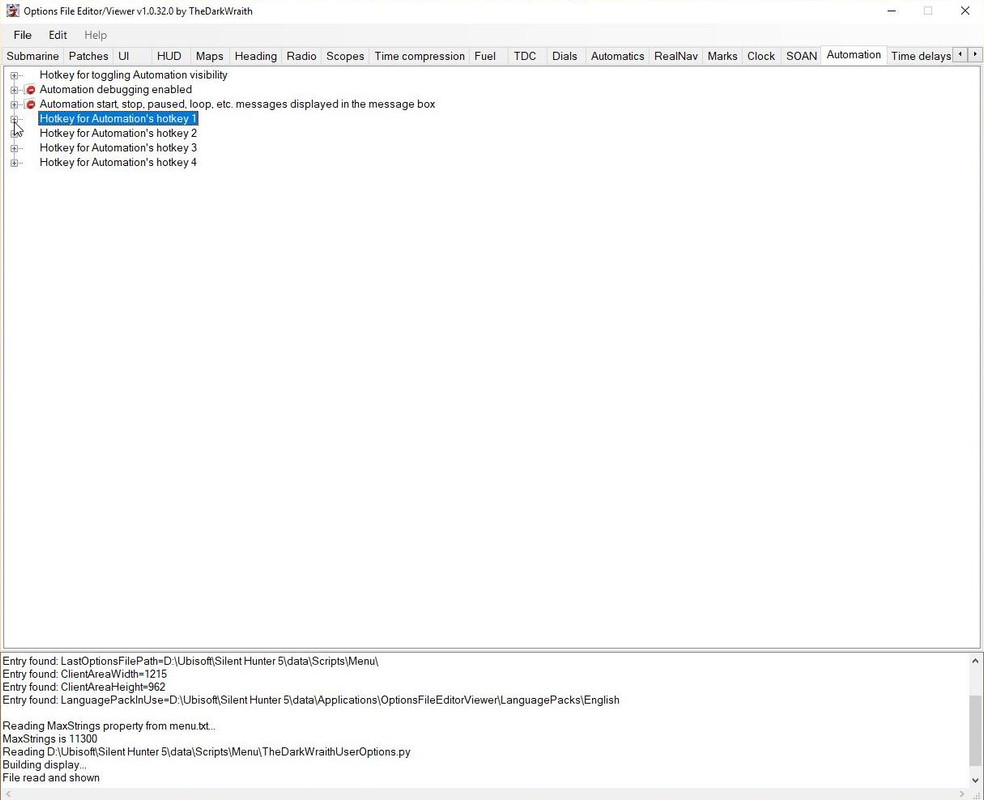 Picture 2 > This shows you how Automation key is setup and looks like. 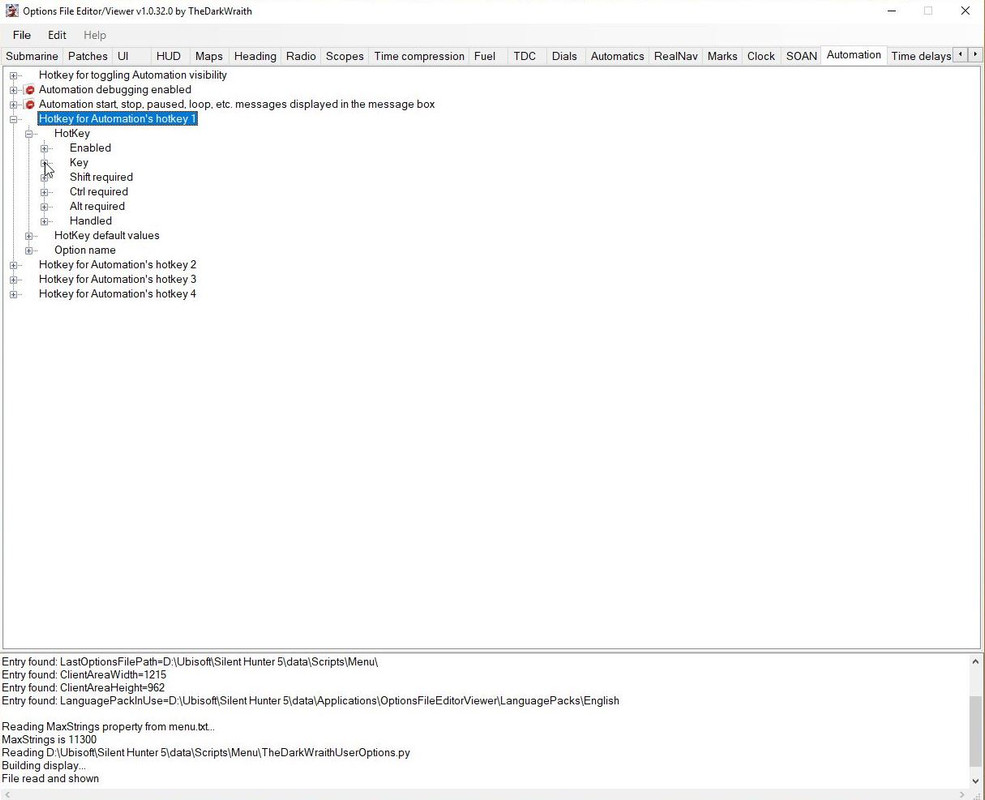 Picture 3 > Pressing Key will show the current hotkey being used if any.shows the X key you saw in the Automation Tutorial. 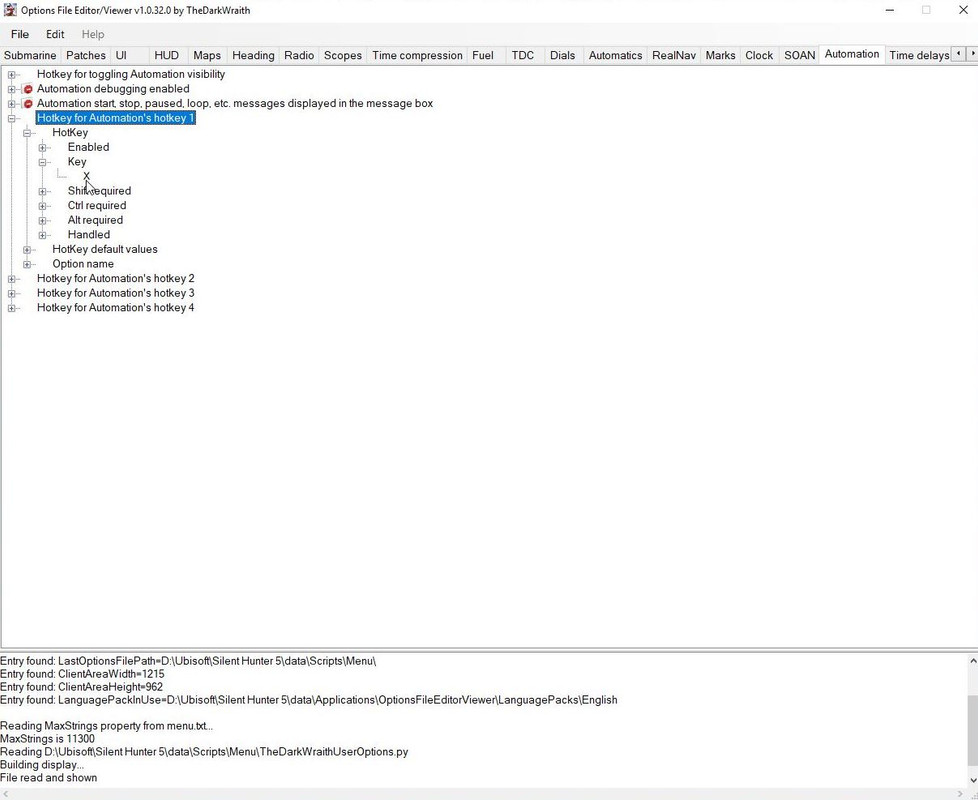 Picture 4 > Pressing Hotkey opens the Patch. 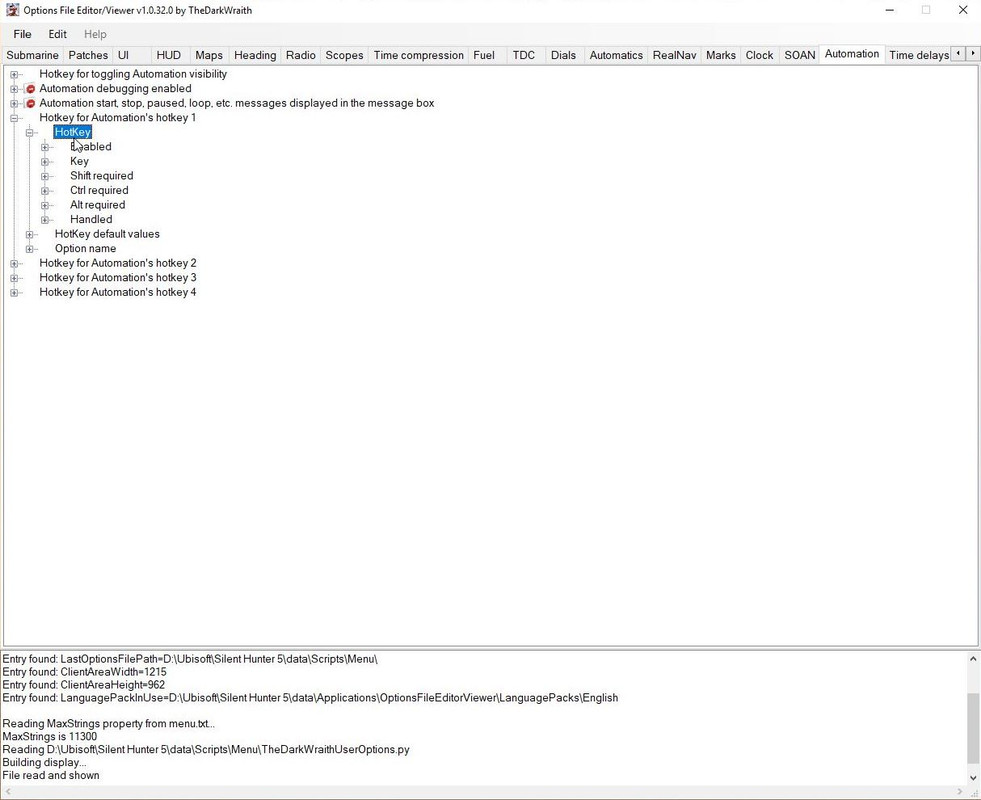 Picture 5 > Changing one of the settings will open the Accept button. 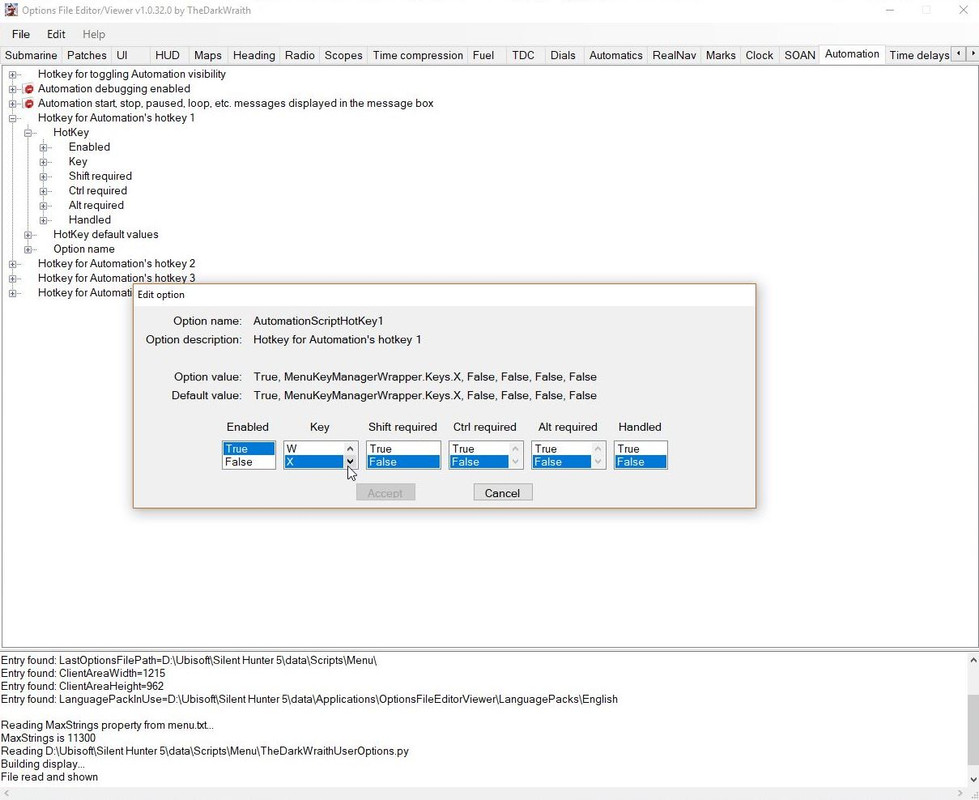 Picture 6 > I have added Shift to the Hotkey and used W as an example. I recommend you always use a Shift Key so it is always independent of your U-Boat Command Keys. 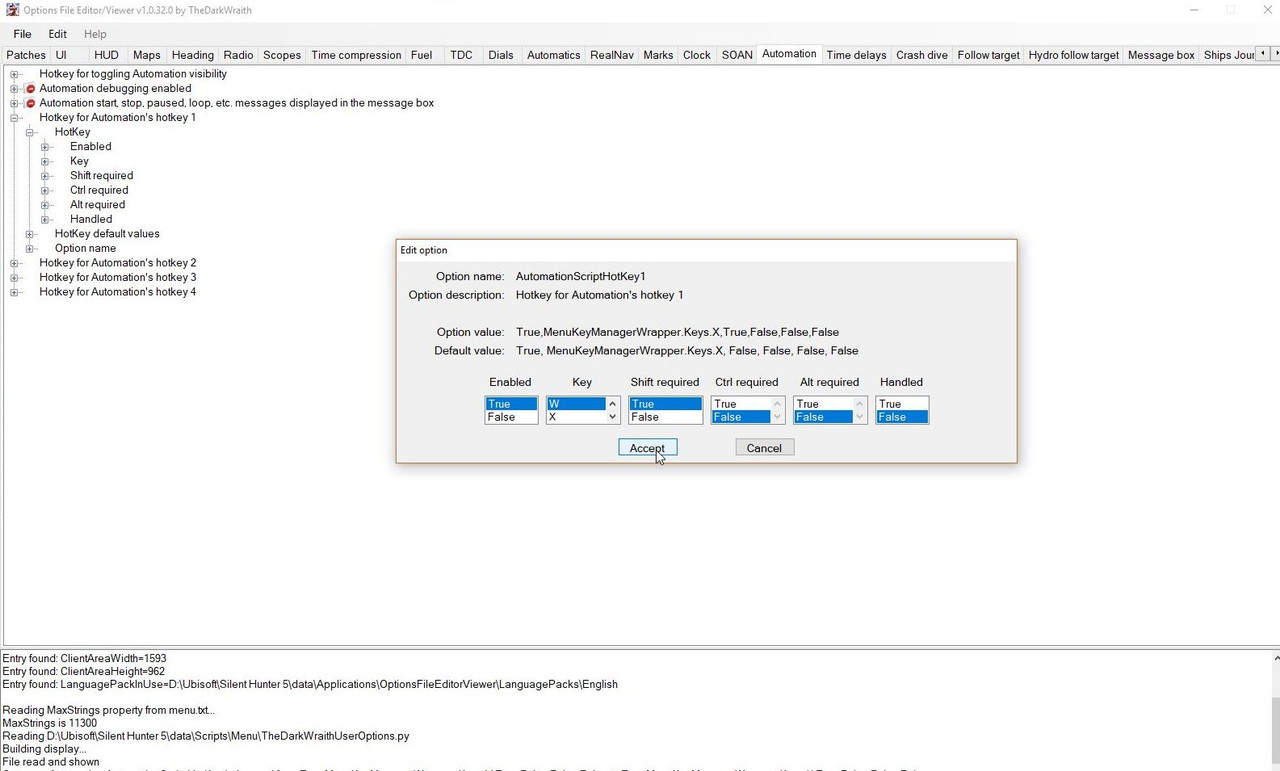 Picture 7 > In this picture you can see that Shift is now True so Shift + W now works for Hotkey 1 instead of X. 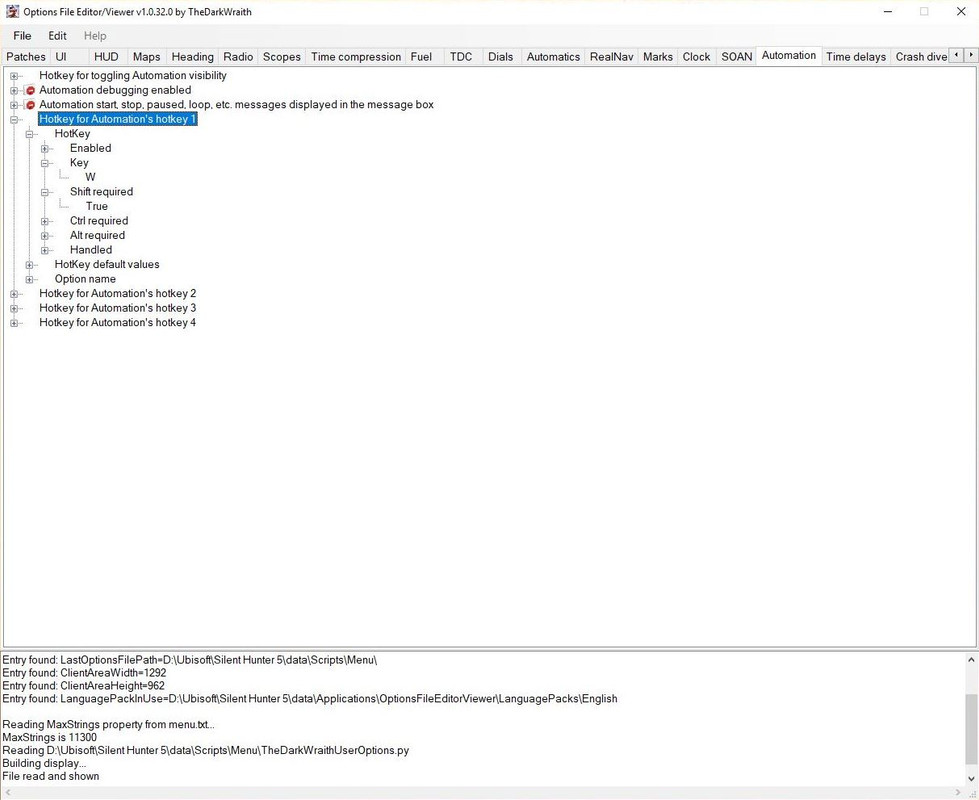 Picture 8 > I have opened up the other 3 Hotkeys which have no Hotkeys patched. 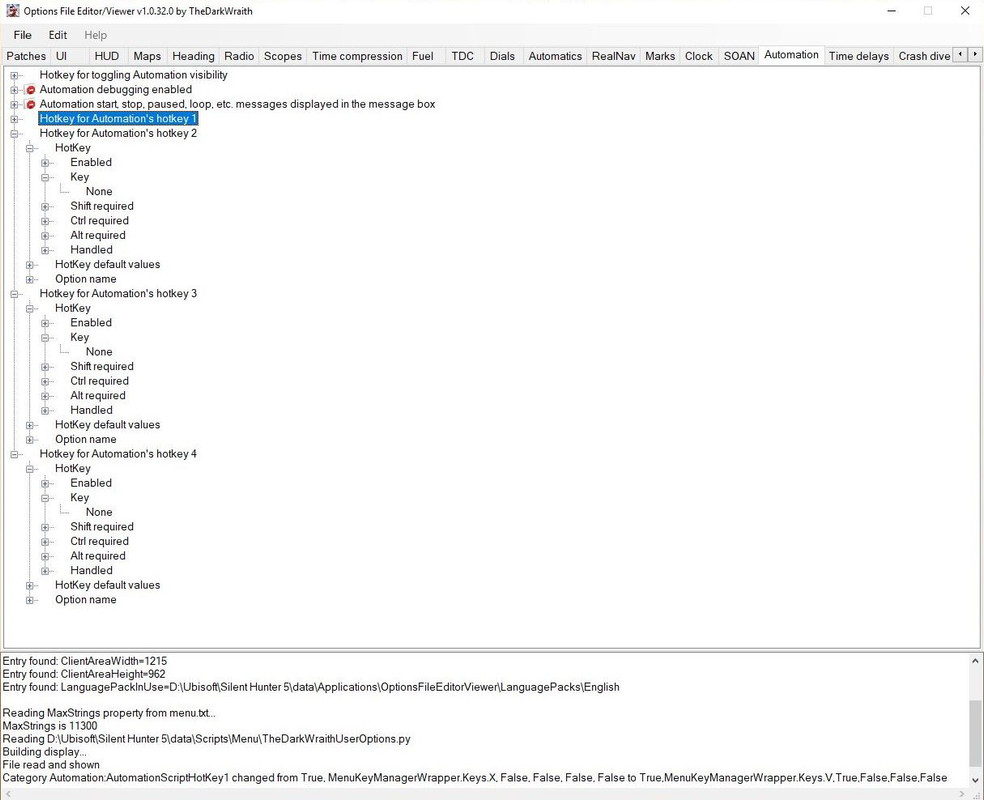 Picture 9 > When you have completed your changes go to > File > Select Save. 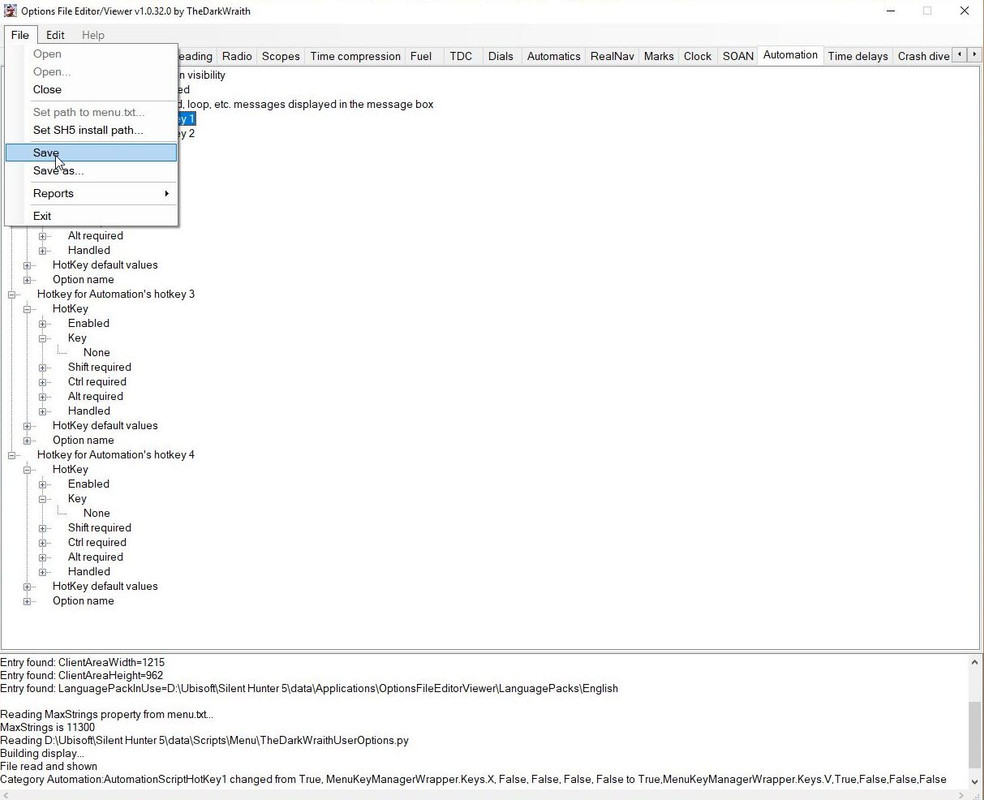 Picture 10 > Pressing Yes Saves the changes to the OFEV py file. 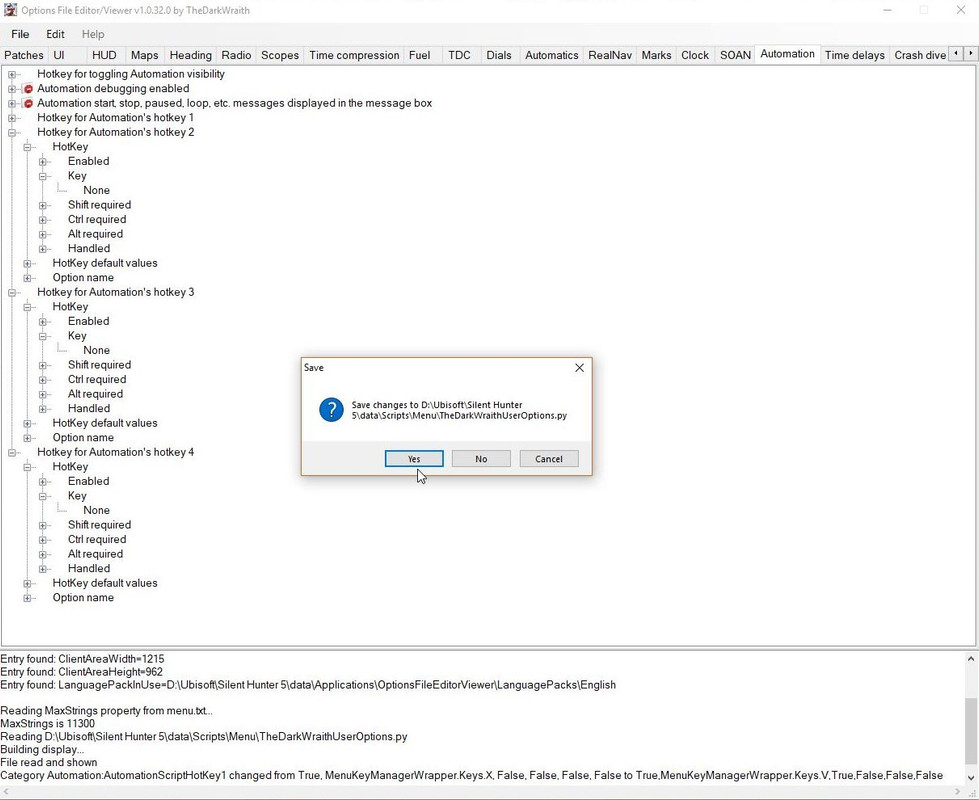 Picture 11 > Pressing save confirms the changes have been successfully saved and will appear in your next gaming session. 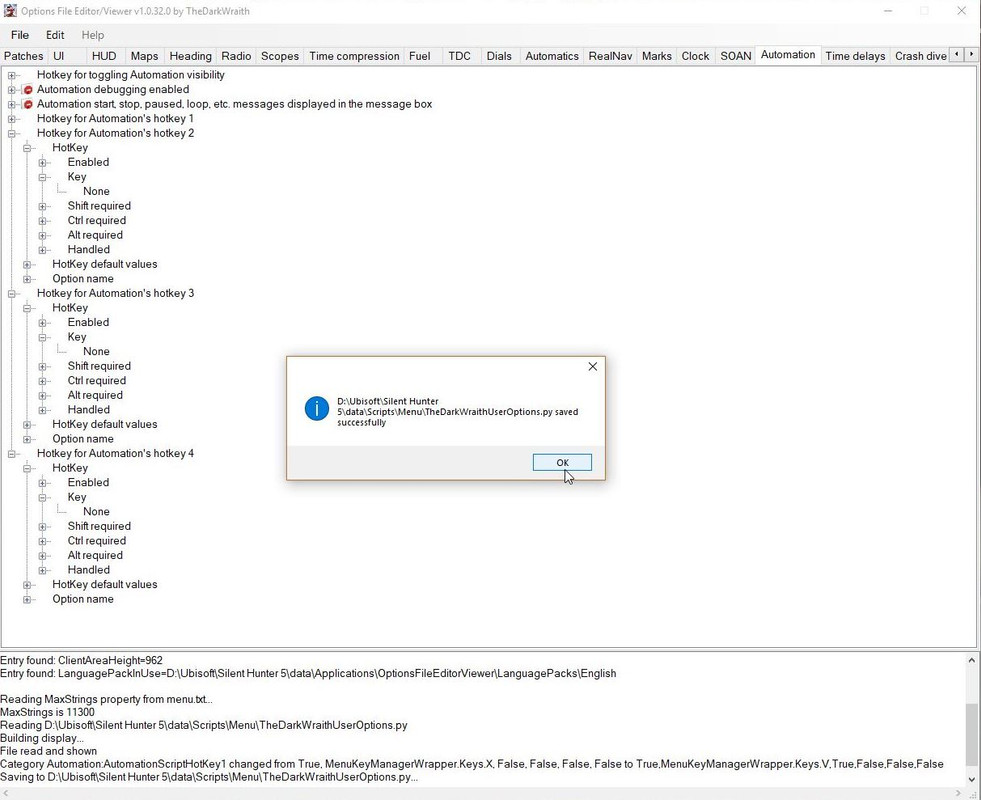
__________________
LSH3-2015 <> TUTORIALS <> ALL YOU NEED TO KNOW <> ALL IN ONE PLACE SH4 <> TUTORIALS <> HOW TO DO IT <> INFORMATION <> DOWNLOAD LINKS SH5 <> TUTORIALS <> HOW TO DO IT <> INFORMATION <> DOWNLOAD LINKS Always Here To Help A Fellow 'Subber' | Need An Answer to A Question Just Send Me A PM Last edited by THEBERBSTER; 06-18-18 at 04:01 AM. |
|
|
|
|
06-01-18, 10:58 AM
|
#5 |
|
Growing Old Disgracefully
Join Date: Dec 2012
Location: Hythe - Southampton
Posts: 9,609
Downloads: 1133
Uploads: 0
|
Different Types Of Keyboards Used In Silent Hunter 5 > Pictorial
Some Keys when used with TDWs Options File Editor Viewer will have a duplicated function and will need to be allocated a different unused key. Picture 1 > Stock 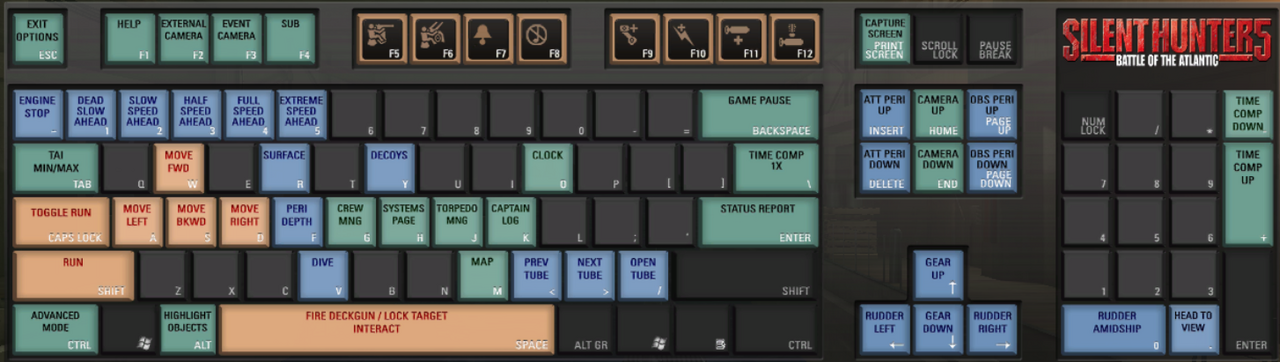 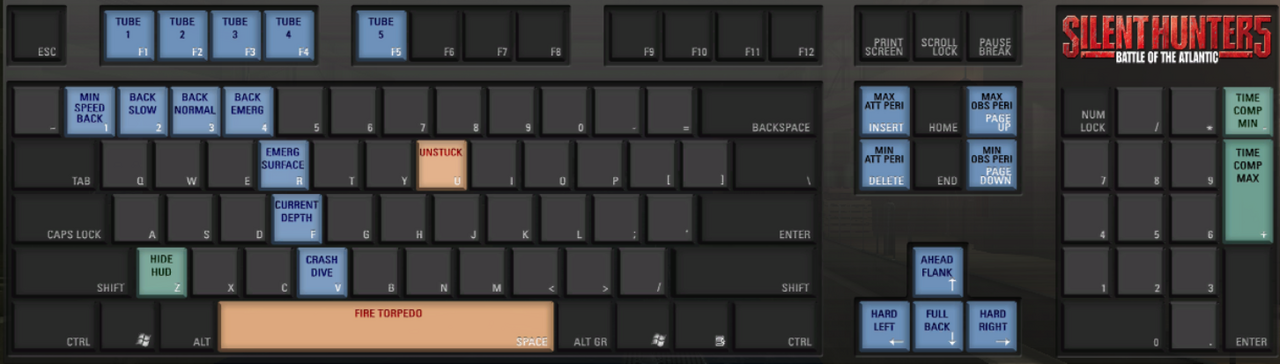 Picture 2 > The Wolves Of Steel (TWoS) Old Version 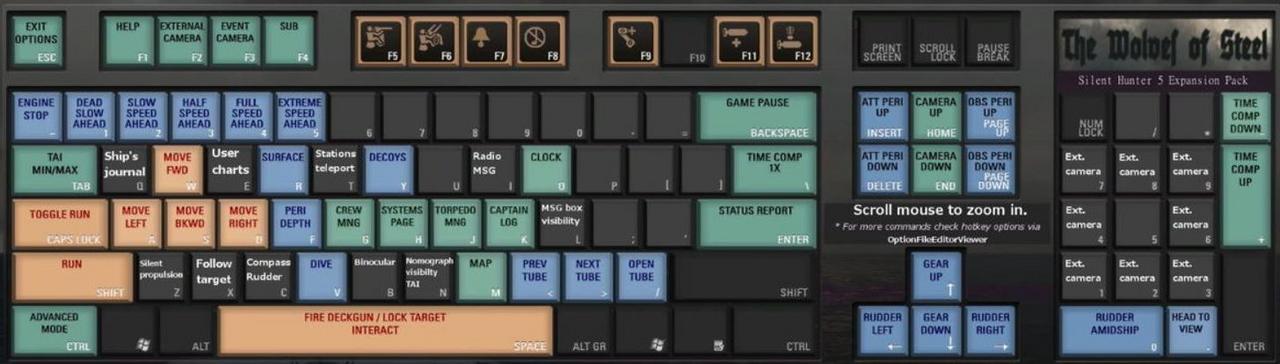 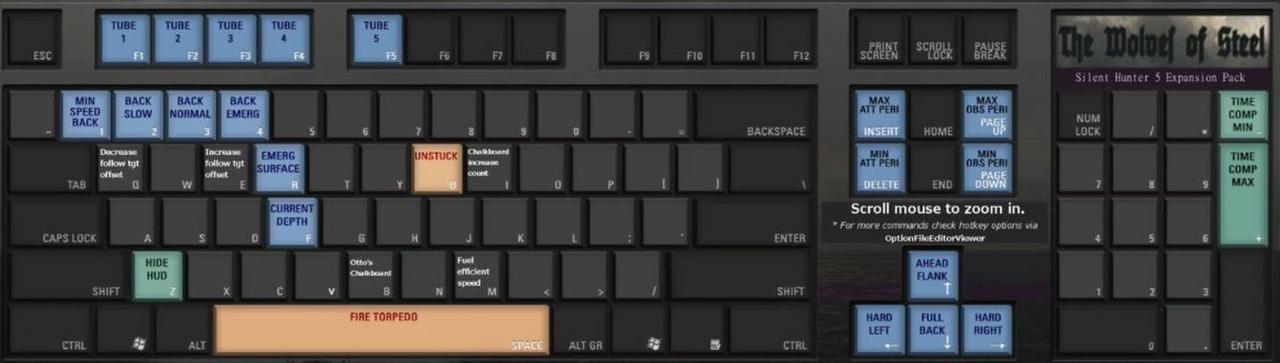 Picture 3 > The Wolves Of Steel (TWoS) Latest Version From v2.2.9 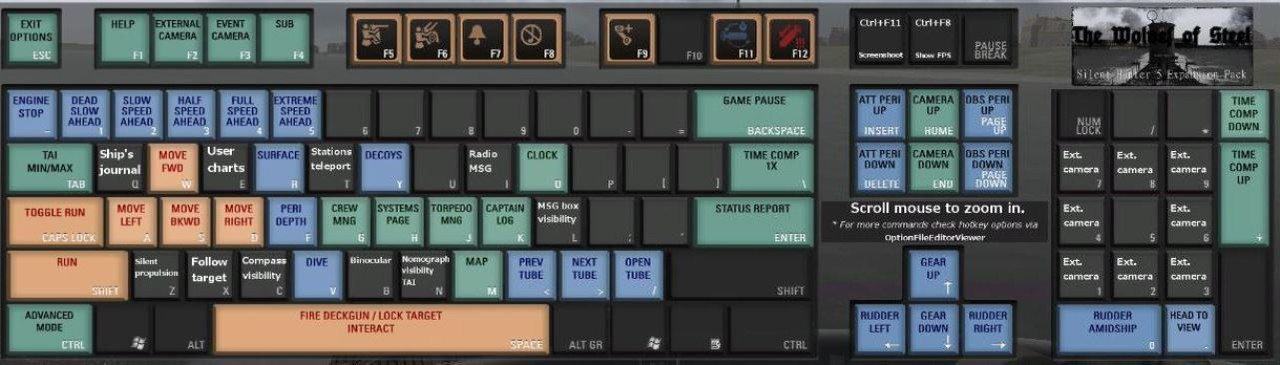 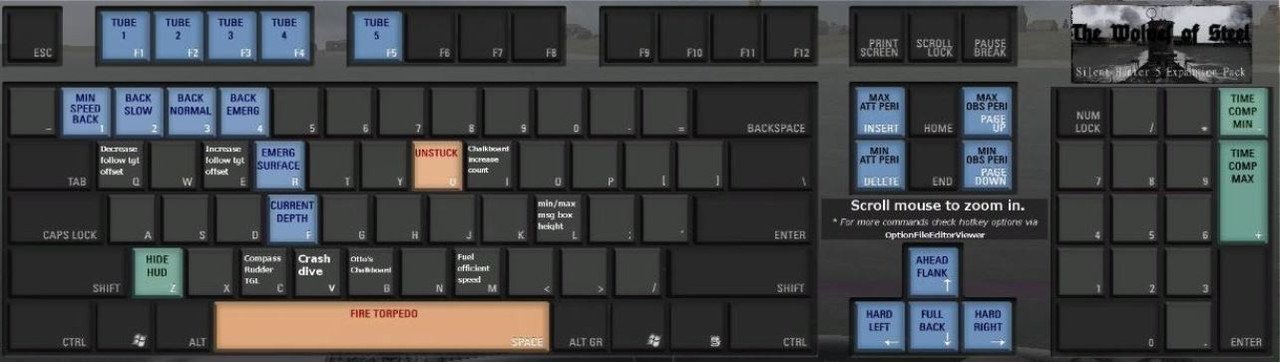 Picture 4 > Churchs 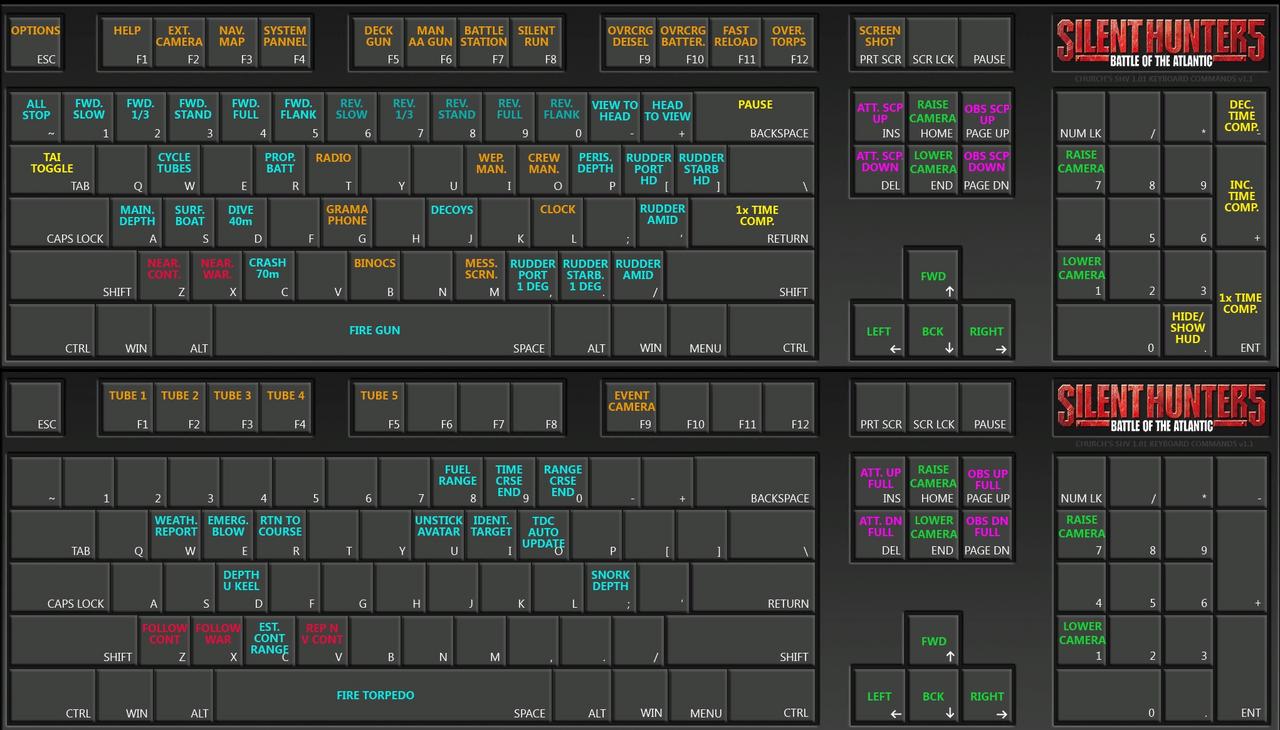 Picture 5 > Stormys 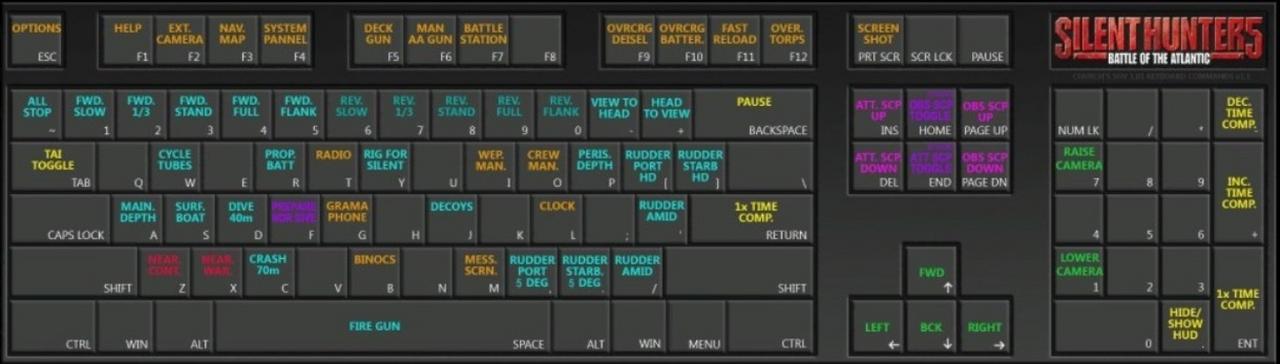 
__________________
LSH3-2015 <> TUTORIALS <> ALL YOU NEED TO KNOW <> ALL IN ONE PLACE SH4 <> TUTORIALS <> HOW TO DO IT <> INFORMATION <> DOWNLOAD LINKS SH5 <> TUTORIALS <> HOW TO DO IT <> INFORMATION <> DOWNLOAD LINKS Always Here To Help A Fellow 'Subber' | Need An Answer to A Question Just Send Me A PM Last edited by THEBERBSTER; 09-20-21 at 12:37 PM. Reason: added new keyboard |
|
|
|
|
06-04-18, 03:44 PM
|
#6 |
|
Growing Old Disgracefully
Join Date: Dec 2012
Location: Hythe - Southampton
Posts: 9,609
Downloads: 1133
Uploads: 0
|
Last updated 27th July 2018
German to English Translations Of Rankings and Submarine Terms In Silent Hunter III & V ttabsoberbootsmann > Senior Petty Officer Bootsmann > Petty Officer Matrosengefreiter > Leading Seaman Matrosen > Seaman Auftreff-Winkel > Impingement Angle Eigenen > Own Entfernung > Distance to Target Gegenfahrt > Targets Speed Gegenfahrt Tafel > Enemy Speed chart Gegnerkurs > Targets Course Geradlauf > Straight Running Grad > Degree Lage > Position Lagenwinkel > Position Angle > A.O.B. Lagewinkel Schätzung > AOB Estimation Laufstrecke > running distance Petlung > Bearing Richtungsanderlung > Of Direction Schiffspeilung > Own Boats Course Shubwinkel > Gyro Angle Streuwinkel > Angle Tiefe > Depth of Torpedo Vergrößerung > Magnification Ziellänge in Metern > Target length in meters Zielrichtung > Upper > Target Angle to Lower Periscope Bearing Target Bearing or TB > (Schiffspeilung, Seitenwinkel, or omega ω) > the angle from the bow of the U-boat to the target (0° being the bow of the U-boat). Angle on the Bow or AOB > (Lagenwinkel or gamma γ) > the angle from the targets bow that their crew would see you (0° being the bow of the target ship). Lead Angle > (Vorhaltewinkel or beta β) > the angle ahead of the target bearing that the torpedo or U-boat must run to intercept the target (also called the deflection angle). Intercept Angle > (Schneidungswinkel or alpha α) > the angle between the targets course and the torpedos track (also equal to 180° Track Angle). Track Angle > The angle at which the torpedo will intercept the target (0° being the bow of the target ship). Gyro Angle > (Schußwinkel) > the angle that the torpedo is programmed to turn once it leaves the U-boat (0° being the bow of the U-boat). Own Course > (Eigenerkurs) > the true direction the U-boat is traveling (0° being north). Own Speed > (U-bootgeschwindigkeit) > the speed of the U-boat in knots. Target Course > (Gegnerkurs) > the true direction the target is traveling (0° being north) Target Speed > (Gegnergeschwindigkeit or Vg) > the speed of the target in knots Target Range > (Entfernung) > the distance to the target in meters. Torpedo Speed > (Torpedogeschwindigkeit or Vt) > the speed of the torpedo in knots. Firing Range > (Schußweite) > the distance the torpedo will travel to hit the target Träger und Schlachtschiffe > Carriers and Battleships Schwere Kreuzer > Heavy Cruisers Leichte Kreuzer > Light Cruisers Zerstörer > Destroyer Korvetten > Corvettes S-Boot >= Patrol Boats Courtesy acknowledgement to Toni87 for additional translations.
__________________
LSH3-2015 <> TUTORIALS <> ALL YOU NEED TO KNOW <> ALL IN ONE PLACE SH4 <> TUTORIALS <> HOW TO DO IT <> INFORMATION <> DOWNLOAD LINKS SH5 <> TUTORIALS <> HOW TO DO IT <> INFORMATION <> DOWNLOAD LINKS Always Here To Help A Fellow 'Subber' | Need An Answer to A Question Just Send Me A PM Last edited by THEBERBSTER; 07-27-18 at 03:47 AM. |
|
|
|
|
06-04-18, 04:32 PM
|
#7 |
|
Growing Old Disgracefully
Join Date: Dec 2012
Location: Hythe - Southampton
Posts: 9,609
Downloads: 1133
Uploads: 0
|
Enlarging the SH3 Dials UI for SH5 > Zoom Time Changing > Changing the X and Y Axis.
Go to > TDWs Options File Editor Viewer (OFEV) Application > Dials Tab. This SH3 Option replaces the Default SH5 Enhanced GUI. Picture 1 > Default SH5 Enhanced GUI.  This Tutorial is in 3 Parts all changes and sizes are Optional. Tutorial 1 > How to change Dial sizes. Tutorial 2 > How to Change the Grow (Zoom in) and Shrink Times (Zoom out) Tutorial 3 > Change the X and Y Axis if part of the Dial is missing, off the screen. Tutorial 1> How to Enlarge a Dial so you can see a bigger image. You may change the sizes of any of the 6 dials to a size that suits you by clicking on the number showing under the Zoom Factor on Mouse in and then entering your own number. In the game when moussing in the Pointer should be placed quickly into the dial so as to reduce the chance of juddering/flickering. Picture 2 > All Dials Normal Size without Glass Covers. 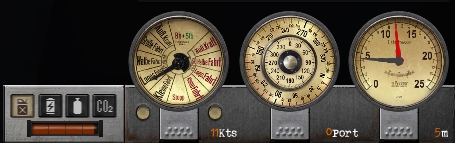 Picture 3 > All Dials Normal Size with Glass Covers. 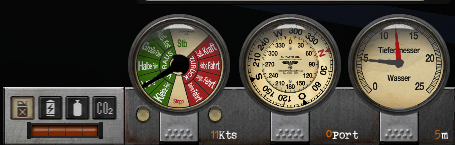 Picture 4 > Telegraph Dial enlarged to 350 without Glass Cover. 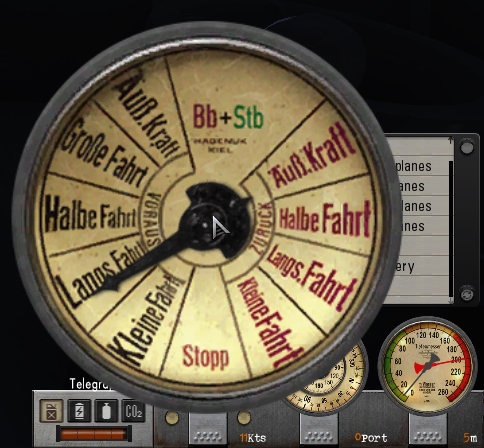 Picture 5 > Telegraph Dial enlarged to 350 with Glass Cover. 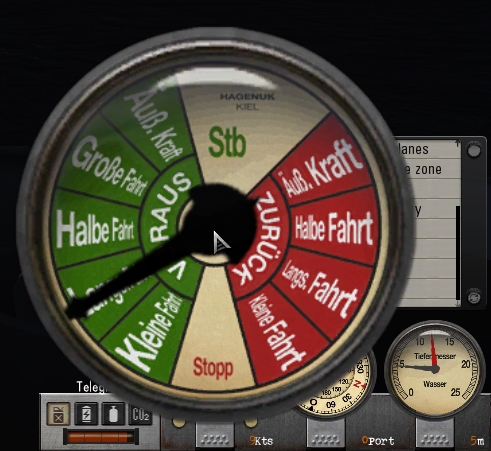 Picture 6 > Speed Dial enlarged to 350 without Glass Cover.  Picture 7 > Speed Dial enlarged to 350 with Glass Cover. 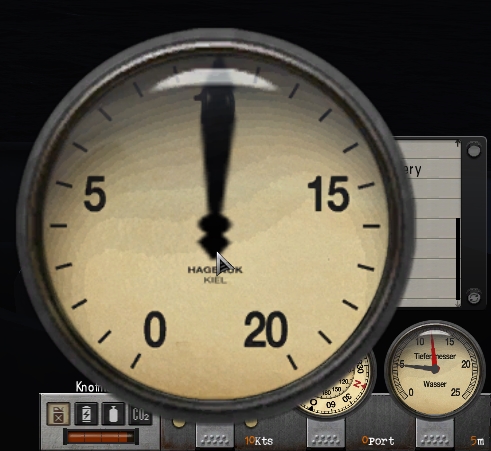 Picture 8 > Compass Dial enlarged to 500 without Glass Cover. 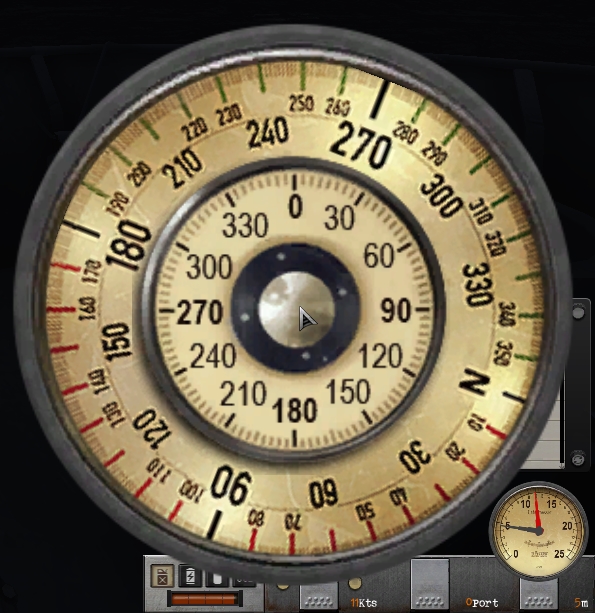 Picture 9 > Compass Dial enlarged to 500 with Glass Cover. 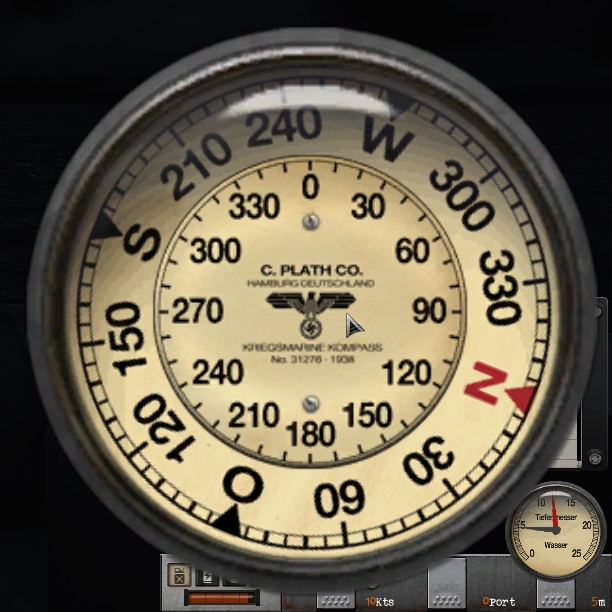 Picture 10 > Bridge view with enlarged Compass Dial without Glass Cover. 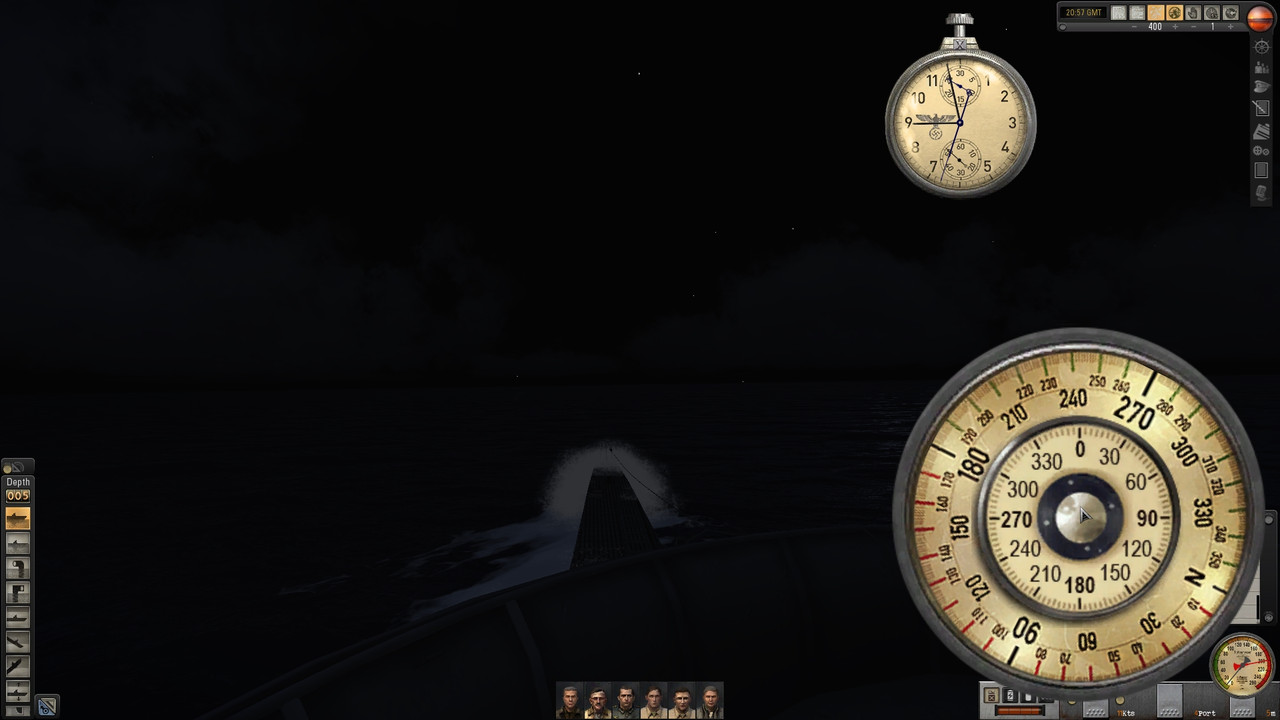 Picture 11 > Bridge view with enlarged Compass Dial with Glass Cover. 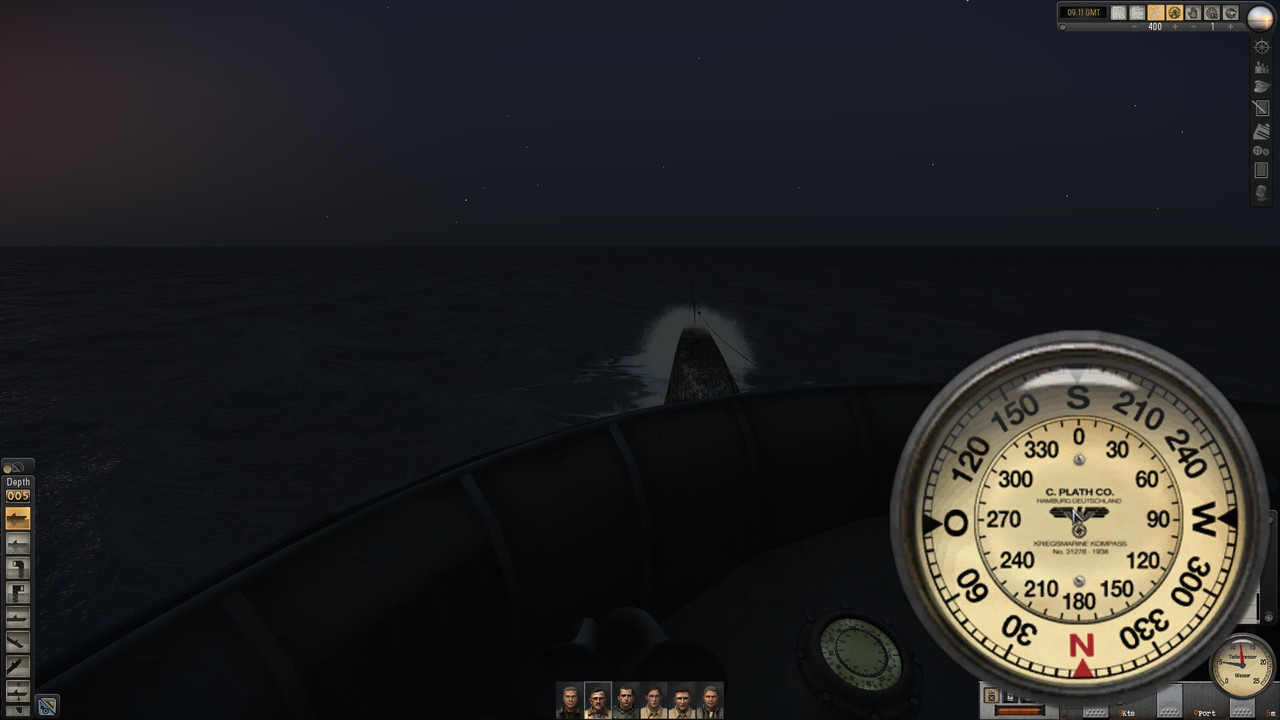 Picture 12> Rudder Dial enlarged to 350 without Glass Cover. 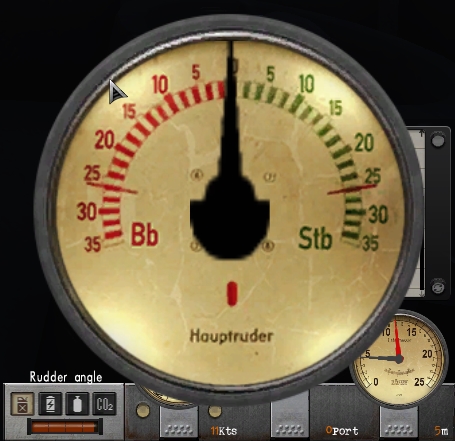 Picture 13 > Rudder Dial enlarged to 350 with Glass Cover. 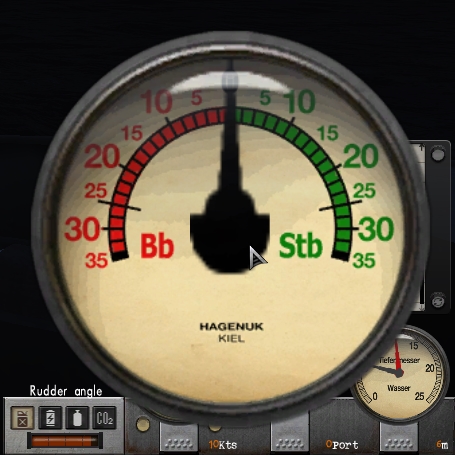 Picture 14 > 25m Depth Gauge Dial enlarged to 350 without Glass Cover. 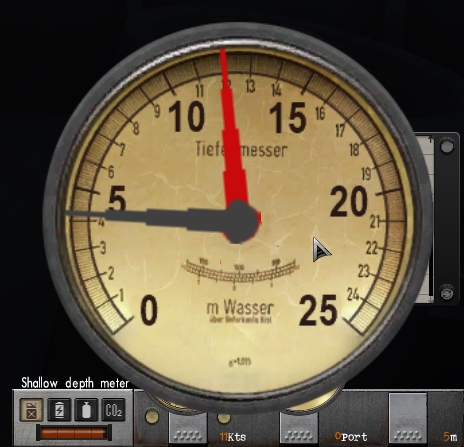 Picture 15 > 25m Depth Gauge Dial enlarged to 350 with Glass Cover. 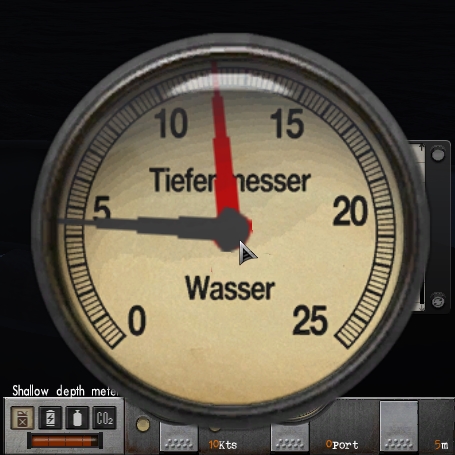 Picture 16 > 260m Depth Gauge Dial enlarged to 500 without Glass Cover. 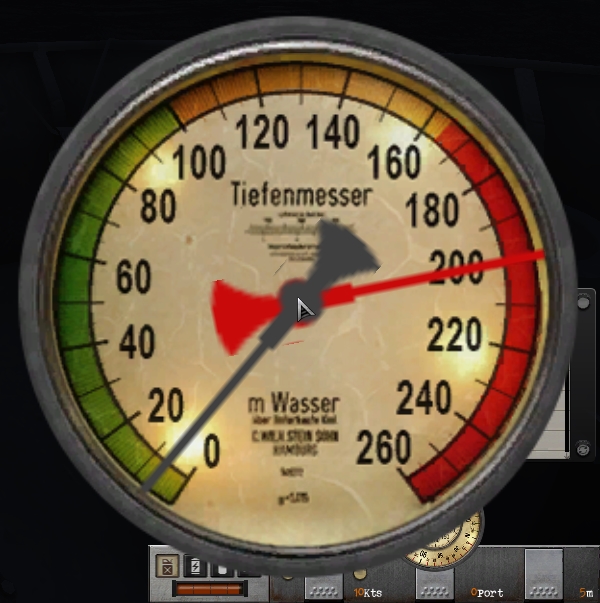 Picture 17 > 260m Depth Gauge Dial enlarged to 500 with Glass Cover. 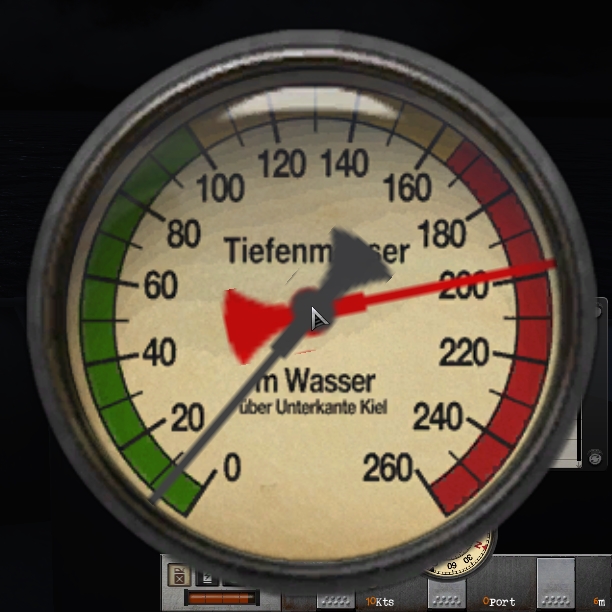 Picture 18 > Command Room with enlarged 260m Depth Gauge Dial without Glass Cover. 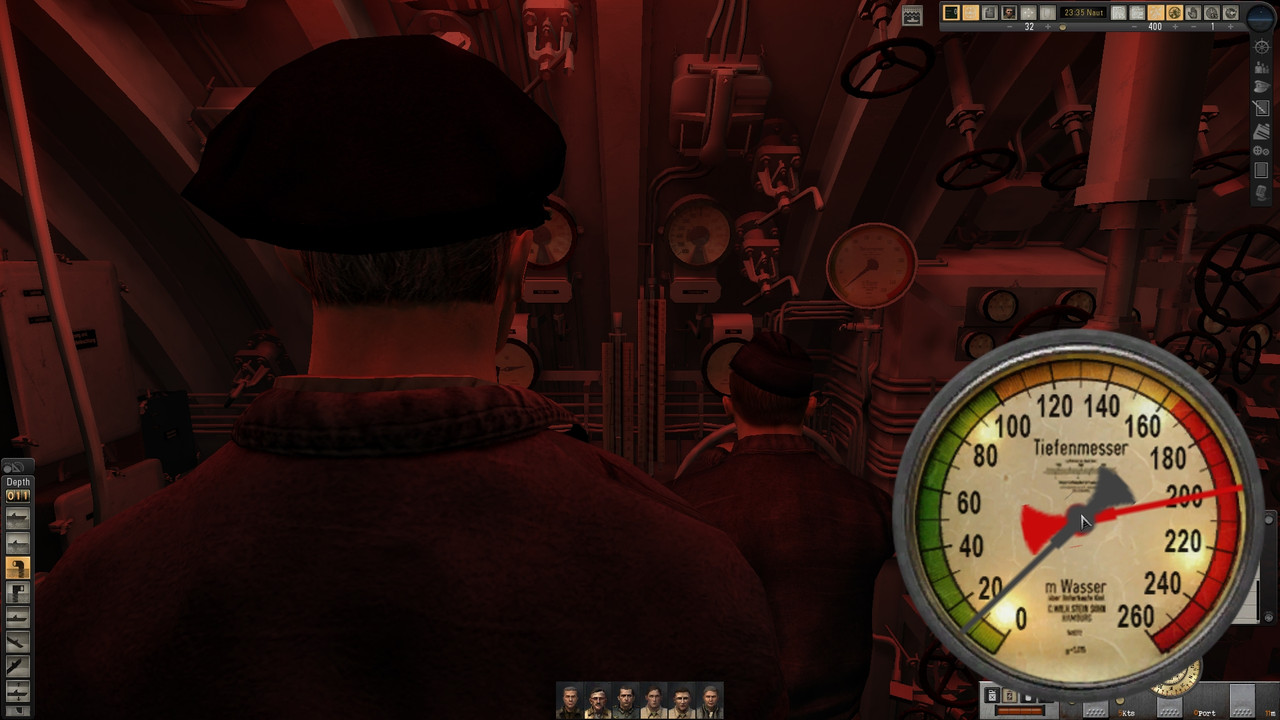 Picture 19 > Command Room with enlarged 260m Depth Gauge Dial with Glass Cover. 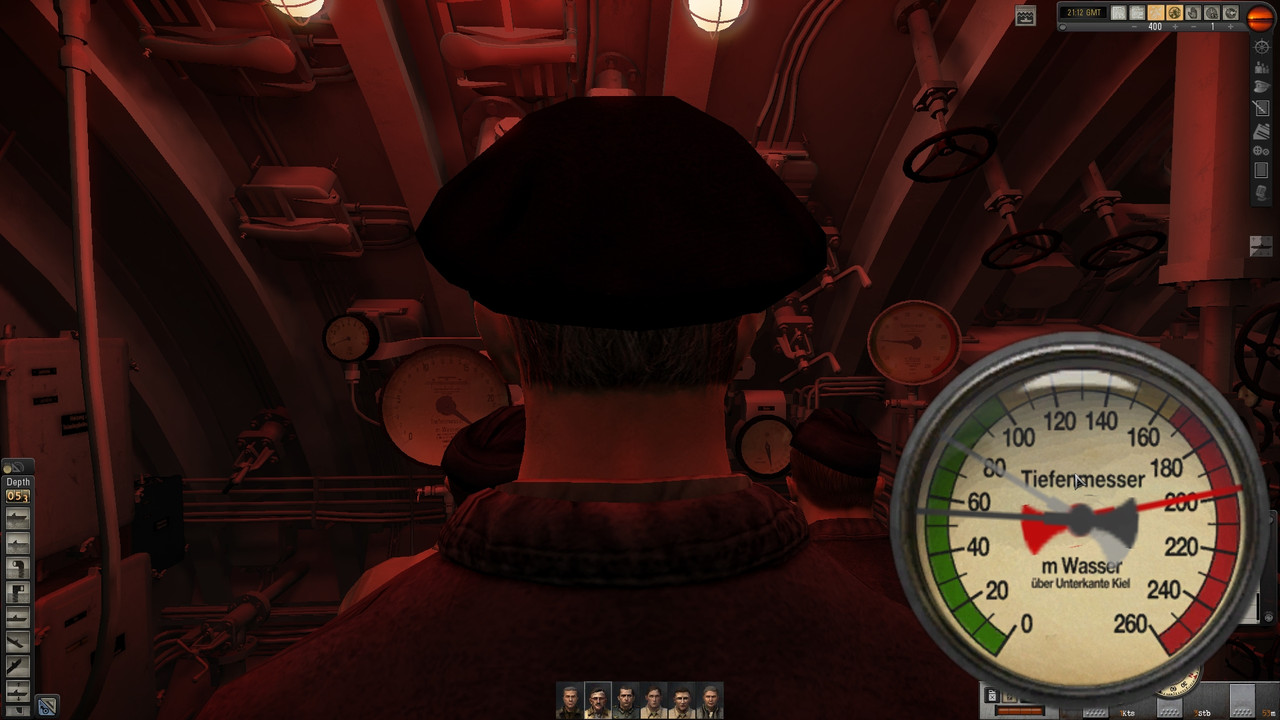 Picture 20 > Dial sizes enlarged and patched in TDWs Option Files Editor Viewer (OFEV) 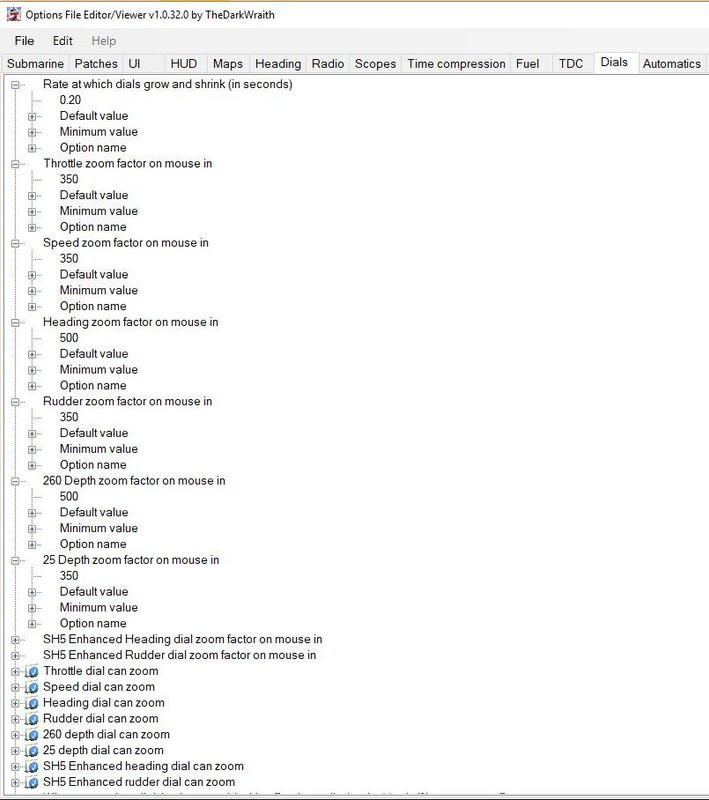 Tutorial 2 > How to Change the Grow (Zoom in) and Shrink Times (Zoom out) Picture 21 > The Default value of 0.10 is the number of seconds that you will see the dial zoomed before it returns to its normal size. In the Tutorial picture the value has been doubled to 0.20 which means all the dials will stay zoomed and enlarged for 20 seconds before returning to their normal size. 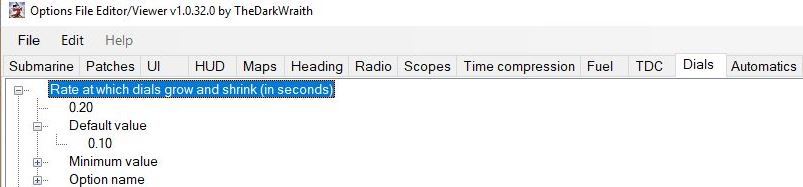 Tutorial 3 > Changing the X and Y Axis Picture 22 > X and Y Axis changes made in the OFEV have been changed to 50. This change is only needed if part of the dial is off the screen. 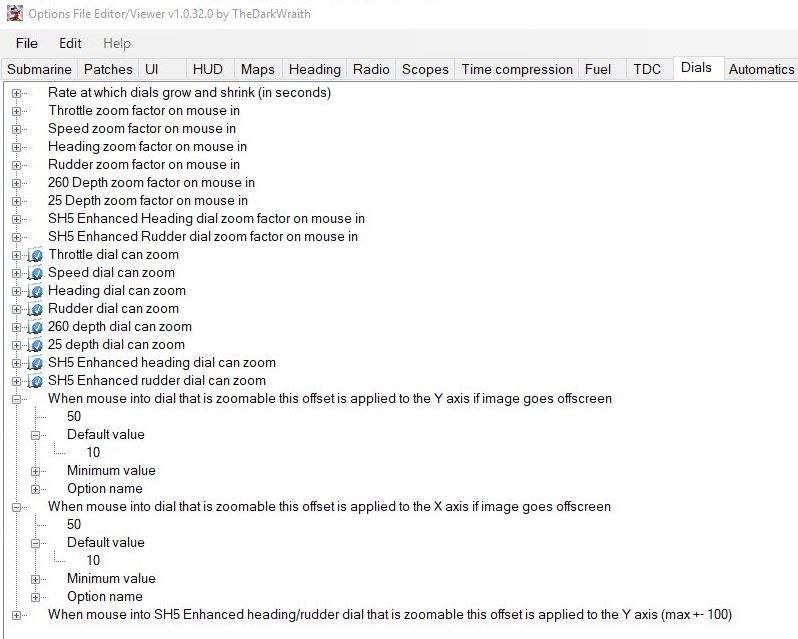 Download Link The Wolves Of Steel (TWoS) Glass Covers For The SH3 GUI Style Dials Add on Mod By vdr1981 > Enable JSGME
__________________
LSH3-2015 <> TUTORIALS <> ALL YOU NEED TO KNOW <> ALL IN ONE PLACE SH4 <> TUTORIALS <> HOW TO DO IT <> INFORMATION <> DOWNLOAD LINKS SH5 <> TUTORIALS <> HOW TO DO IT <> INFORMATION <> DOWNLOAD LINKS Always Here To Help A Fellow 'Subber' | Need An Answer to A Question Just Send Me A PM Last edited by THEBERBSTER; 09-20-21 at 12:52 PM. |
|
|
|
 |
| Thread Tools | |
| Display Modes | |
|
|


 Hybrid Mode
