
|
|
SUBSIM: The Web's #1 resource for all submarine & naval simulations since 1997
|
SUBSIM: The Web's #1 resource for all submarine & naval simulations since 1997 |
|
|
 02-23-09, 11:52 AM
|
#1 |
|
Rear Admiral
 Join Date: Mar 2005
Posts: 13,224
Downloads: 5
Uploads: 0
|
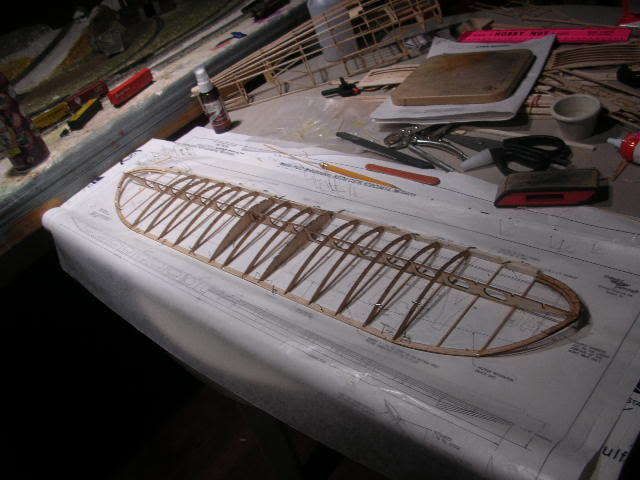
Some progress has been made
The fuselage is more or less complete, the next step is to bend and place the wire for the landing gear but I'm putting that off till later. 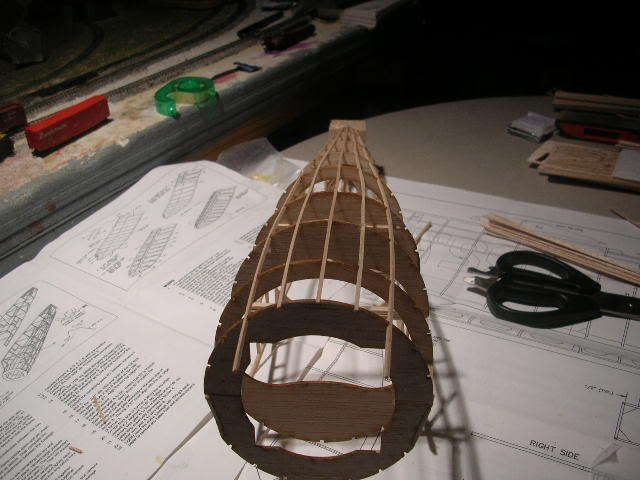 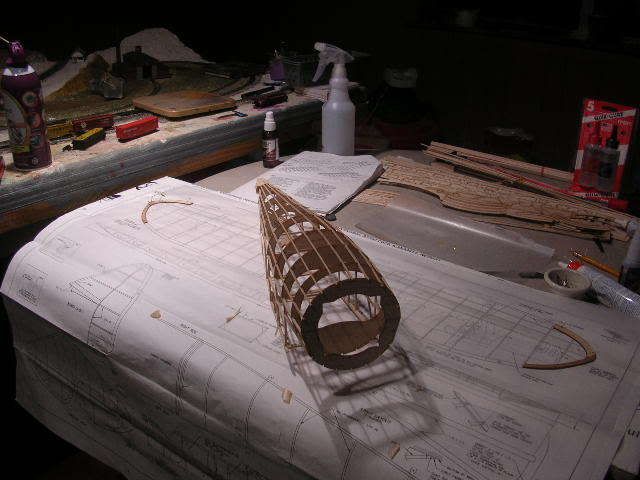  Starting on the wing now. You saw the tips in the previous photo. 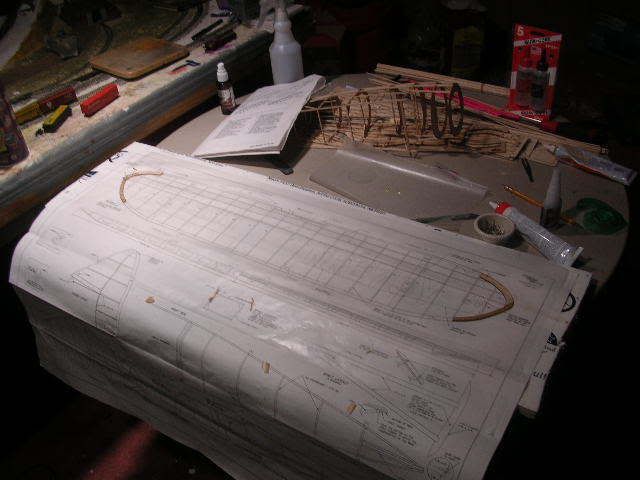 The tips get doubled up not only for strength but for shaping. They will be rounded off later. 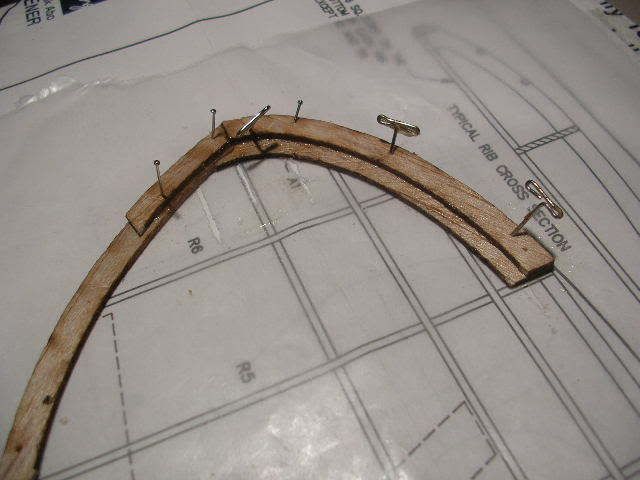 Some sections are just layed out over the plan. Diheadral or angles will be added later at some point. You have to be careful what you glue and what you dont. You really have to think ahead at this point. (I apologize for my lame photoshop skills). 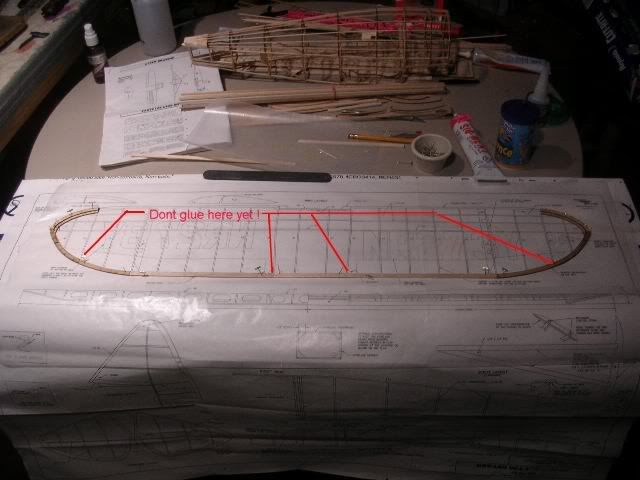
|

|

|
|
02-25-09, 12:10 AM
|
#2 |
|
Weps
 Join Date: Aug 2006
Posts: 362
Downloads: 13
Uploads: 0
|
I wish I had the your patience!
I'm with Syxx (as usual): keep us posted! This is fascinating! |
|
|
|
|
02-26-09, 10:03 AM
|
#3 |
|
Rear Admiral
Join Date: Mar 2005
Posts: 13,224
Downloads: 5
Uploads: 0
|
Thanks for the words of encouragement.
Some small progress made on the wing. Center section takes shape and lower ribs on the starbord wing section. I had to stop here because I ran out of pins  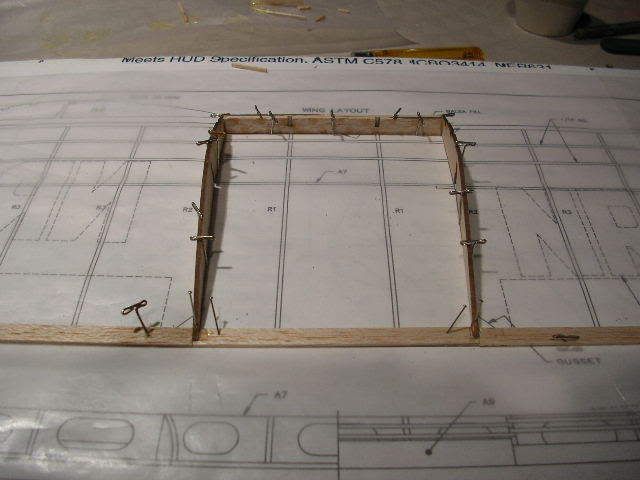 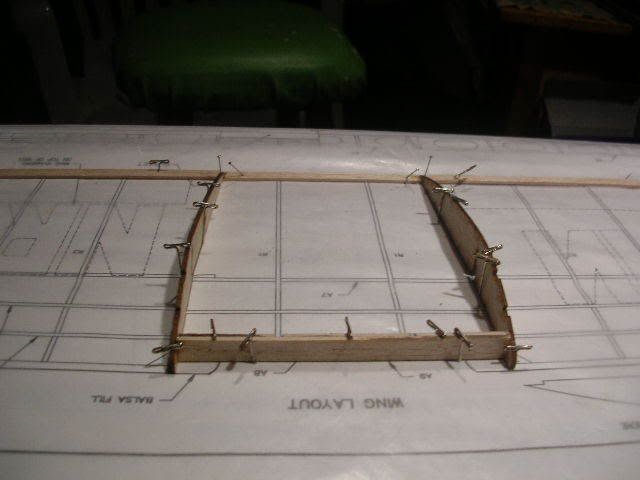 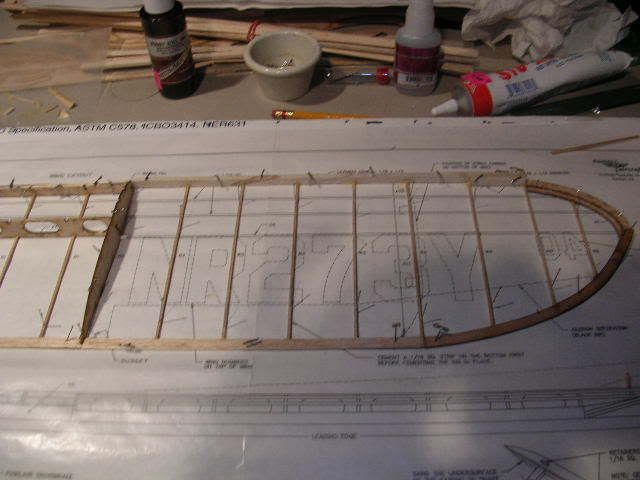
__________________
Follow the progress of Mr. Mulligan : http://www.subsim.com/radioroom/showthread.php?t=147648 |
|
|
|
|
03-06-09, 12:12 PM
|
#4 |
|
Rear Admiral
Join Date: Mar 2005
Posts: 13,224
Downloads: 5
Uploads: 0
|
The wing is really starting to take shape now with the constant chord ribs in place.
 I like the engineering of this model. Notice the lightning holes in the main spar and the 'hollow' ribs. Although I did find a mistake in the instructions, the main spar is part A6 not A7. and the center spar is A7 not A6. It was pretty easy to figure out. 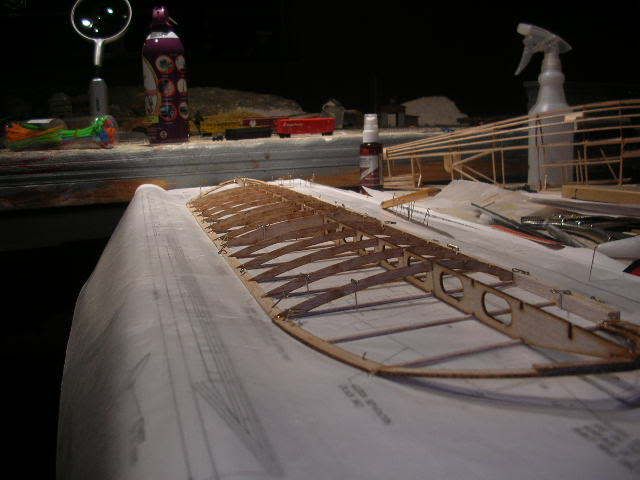
__________________
Follow the progress of Mr. Mulligan : http://www.subsim.com/radioroom/showthread.php?t=147648 |
|
|
|
|
03-06-09, 12:50 PM
|
#5 |
|
Lucky Jack
 
Join Date: Jun 2005
Location: In a 1954 Buick.
Posts: 28,280
Downloads: 90
Uploads: 0

|
Been a long time since I made a balsa wood plane. I could never get the covering on the wings and fuselage right. Good luck!
__________________
You're painfully alive in a drugged and dying culture. ― Richard Yates, Revolutionary Road |
|
|
|
|
03-06-09, 04:46 PM
|
#6 | |
|
Rear Admiral
Join Date: Mar 2005
Posts: 13,224
Downloads: 5
Uploads: 0
|
Quote:
As to applying the tissue it's a real artform. Ill try to post some of my tips and tricks when I get there. The main thing is lots of little pieces on the curved parts, a soft pencil, and an xacto blade... a NEW one. But thats down the road a bit. Im going to try to get the wing finished, set the diheadral and get it off the board this weekend. The stabilizers go together fast. So its starting to come together.
__________________
Follow the progress of Mr. Mulligan : http://www.subsim.com/radioroom/showthread.php?t=147648 |
|
|
|
|
|
03-09-09, 01:04 PM
|
#7 |
|
Rear Admiral
Join Date: Mar 2005
Posts: 13,224
Downloads: 5
Uploads: 0
|
I dident get as much done as I wished. I started to work on it one night and perhaps had a little too much to drink and ended up doing more damage than progress
 So I spent alot of time repairing the damage. So I spent alot of time repairing the damage.I did get the damage repaired and the dihedral set on the starbord tip. The port tip will be done the same (sans damage) and add the stringers to the top of the wing and the wing will be structurally done. Lots of sanding and trimming to do on it though. 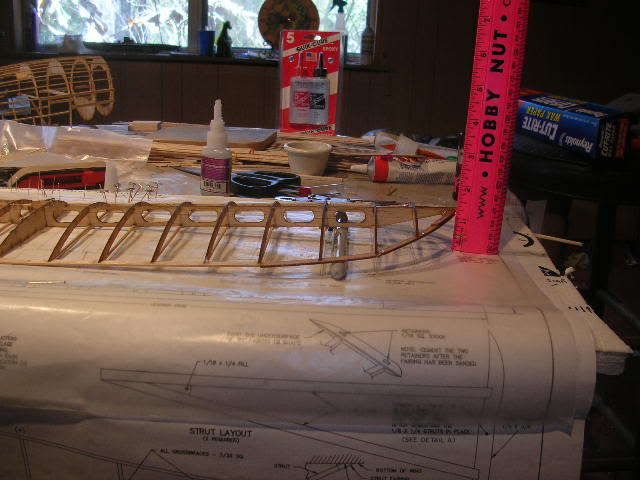
__________________
Follow the progress of Mr. Mulligan : http://www.subsim.com/radioroom/showthread.php?t=147648 |
|
|
|
|
09-30-09, 01:20 PM
|
#8 | |
|
Fleet Admiral

 Join Date: Jul 2003
Location: Patroling the Slot.
Posts: 17,952
Downloads: 90
Uploads: 0
|
Quote:
Last one I built was in high school, a loooooooooooooooooooooong time ago. A Me-109.
__________________
 
|
|
|
|
|
|
09-30-09, 01:32 PM
|
#9 |
|
Rear Admiral
Join Date: Mar 2005
Posts: 13,224
Downloads: 5
Uploads: 0
|
Just a quick update since this thread got bumped.
I am at the stage of sanding / shaping the parts now. Not much to show photographically really and its my least favorite part of construction. But I have worked on it some. I have a razor plane to help things along but it still is slow and tedious. Everything has to be in 'finished' condition before applying tissue because the flaws really jump out once its covered. The fuse is mostly done however one of the first things you learn is to cover the wing first  So maybe in a week or so I can get to the actual covering of the thing. Ill post lots of pics for that.
__________________
Follow the progress of Mr. Mulligan : http://www.subsim.com/radioroom/showthread.php?t=147648 |
|
|
|
|
02-20-11, 11:48 AM
|
#10 | |
|
Watch
 Join Date: Oct 2006
Location: New Mexico(USA)
Posts: 30
Downloads: 2062
Uploads: 0
|
words cannot describe
I havn't seen that type of glue for years, smeels good to. The name of that glue starts with a A doesn't it? It's beyond excellent work. 10 being best. +++++++++10 That's as high as I can go with 10 pluses. wow
AND SilkSpan!! Quote:
|
|
|
|
|
 |
| Thread Tools | |
| Display Modes | |
|
|


 Hybrid Mode
