
|
|
SUBSIM: The Web's #1 resource for all submarine & naval simulations since 1997
|
SUBSIM: The Web's #1 resource for all submarine & naval simulations since 1997 |
|
|
 10-21-10, 08:10 AM
|
#1 |
|
Lucky Jack
 Join Date: Apr 2005
Location: Finland
Posts: 25,054
Downloads: 32
Uploads: 0


|
Yees yees, another AAR when I haven't even finished the last ones. Sue me.
Game: Close Combat - Last Stand Arnhem Campaign: Eindhoven Sector Campaign Lenght: 1800 17 Sep. - 0600 19 Sep. Side: Axis Difficulty: Line - Line Rules: 30min, VL cap w/ 2min warning, morale defeat Standing Orders Eindhoven Sector - 1800 17 September 1944 to 0600 19 September 1944 Your first order of business is to defend or destroy the bridges in this sector, to prevent Allied ground forces from linking up with their airborne units. Counter-attack the airborne landings when reinforcements arrive and cut off the Allied spearhead. Situation 1800 17 September (see legend below the image) 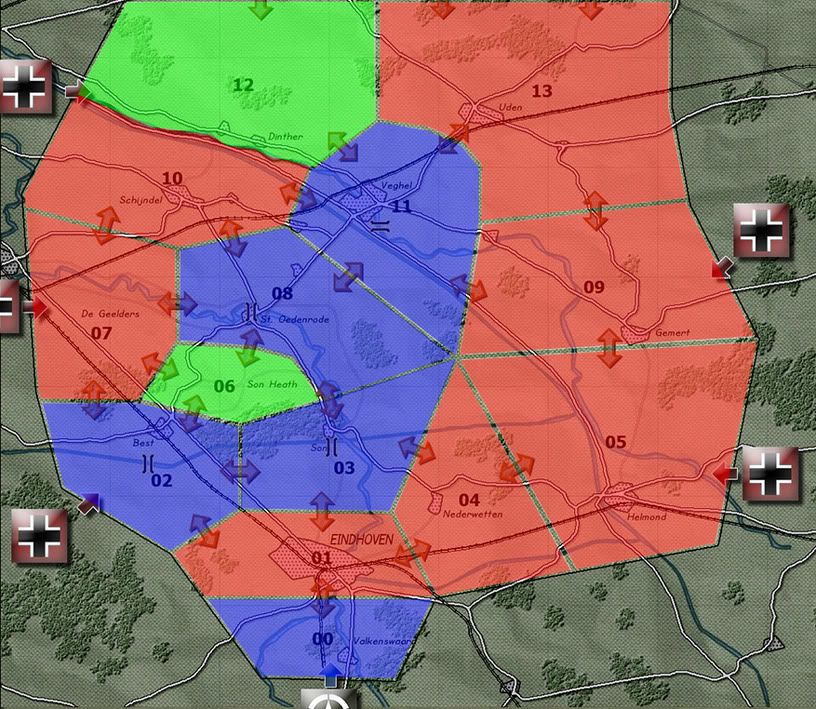 AXIS ALLIED CONTESTED 00 - Valkenswaard 01 - Eindhoven 02 - Best 03 - Son 04 - Nederwetten 05 - Helmond 06 - Son Heath 07 - De Geelders 08 - St. Oedenrode 09 - Gemert 10 - Schijndel 11 - Veghel 12 - Dinther 13 - Uden Objective(s) for 17 September LSA introduces garrison troops, basically what happened to be stationed on that sector when the attacks started. These are small groups of mixed units, some sectors have only few infantry squads while some have flak guns or tanks to back them up. Every sector that doesn't have battlegroup in it, will have a small garrison group. That's what I start with against allied paras and armored Irish Guards pushing from Valkenswaard. My objective is to hold Valkenswaard, Best and Son as long as I can. St. Oedenrode and Veghel I can't hold, so I plan to inflict Allies as much casualties as I can there and blow the bridges. Reinforcements 18 September 0000 - KG RINK/347 I.D. - Best 0600 - KG 59 I.D. - De Geelders 0600 - FJ RGT. JUNGWIRTH - Dinther 0900 - 107 PANZER BDE. - Helmond 19 September --none-- |

|

|
|
10-21-10, 08:39 AM
|
#2 |
|
Kaiser Bill's batman

Join Date: May 2010
Location: AN72
Posts: 13,203
Downloads: 76
Uploads: 0
|
Look, a bridge! But it's too far!

__________________
|
|
|
|
|
10-21-10, 09:50 AM
|
#3 |
|
Lucky Jack
Join Date: Apr 2005
Location: Finland
Posts: 25,054
Downloads: 32
Uploads: 0
|
DAY 1 TURN 1
Valkenswaard, German garrison vs. Irish Guards This is the sector from where the Allied armor tries to breakthrough to relief the paratroopers up north. From past experience, I knew I'd have heavy losses if I tried to hold the flags I have in the middle and southern part of the map. That in mind, I decided to make my stand in the town to the north of the map. Unit composition 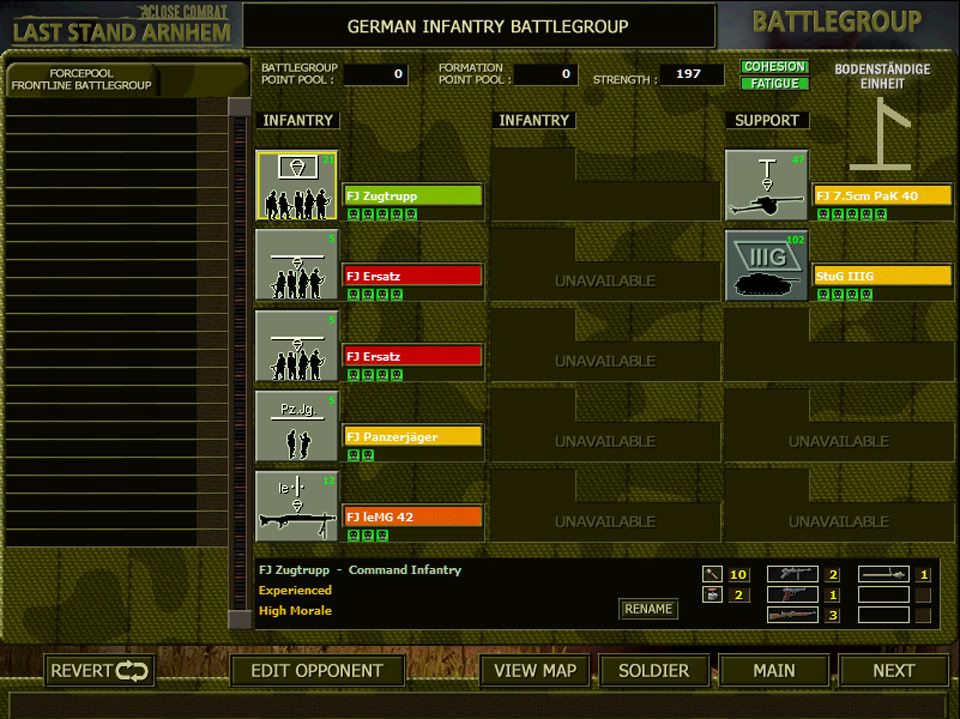 Suspected Allied route and my first and only line of defence. The PaK and the StuG both have line of fire to the road aswell as to the fields to the east of the mill. The Panzerjäger squad acts as forward recon. 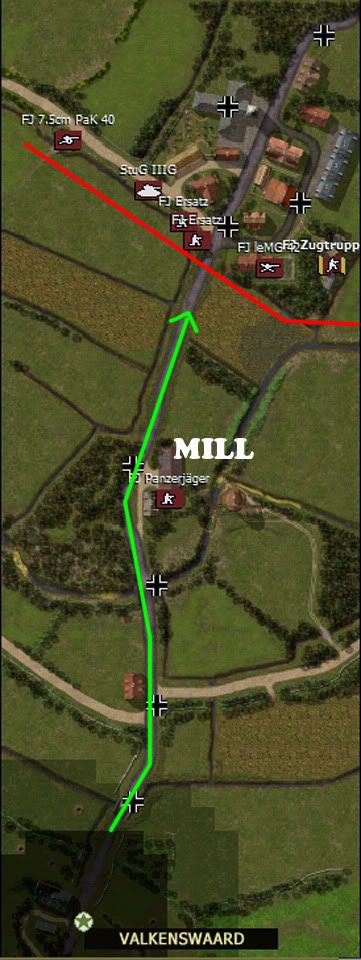 The first sight of the enemy was a Sherman Firefly that had a shot at the StuG, luckily missing it by a mile. The Firefly wasn't so lucky. 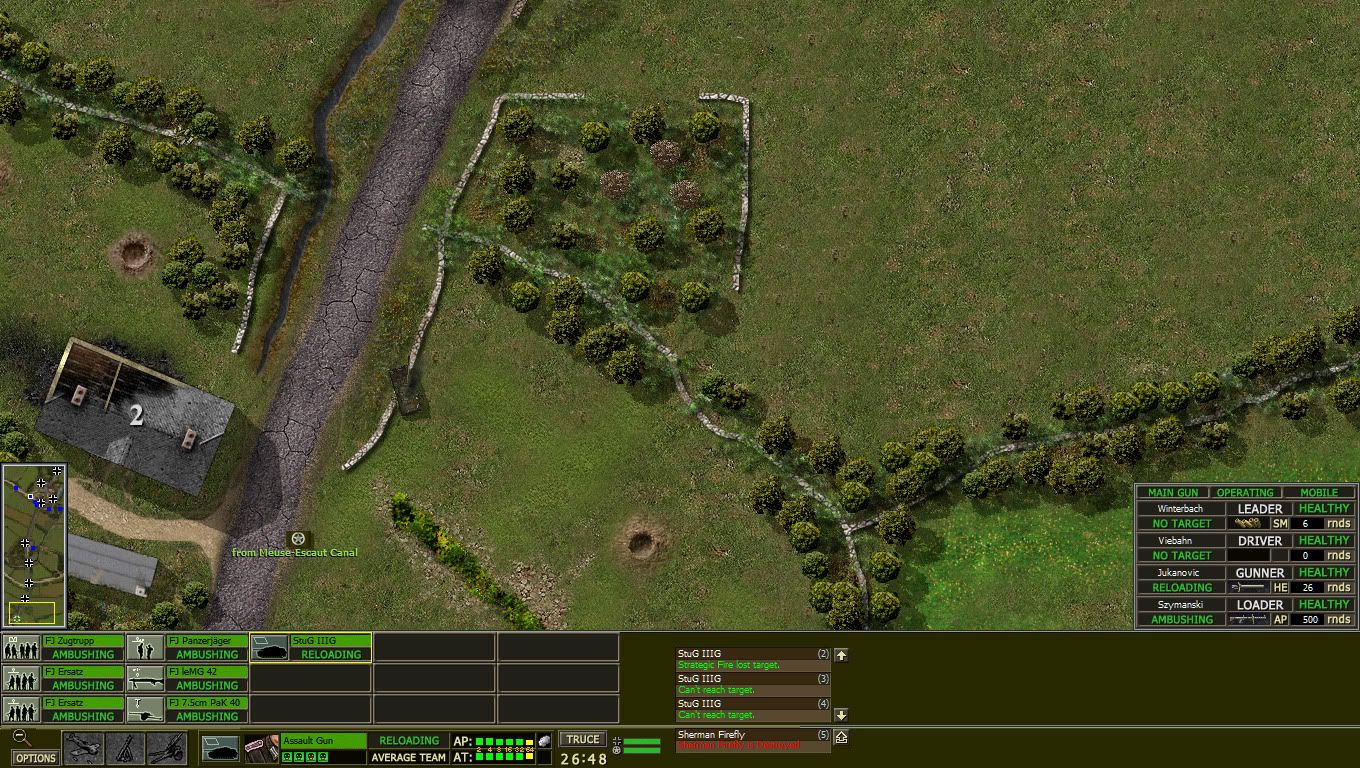 Time to pull the recon out as enemy infantry closes in to take the mill. 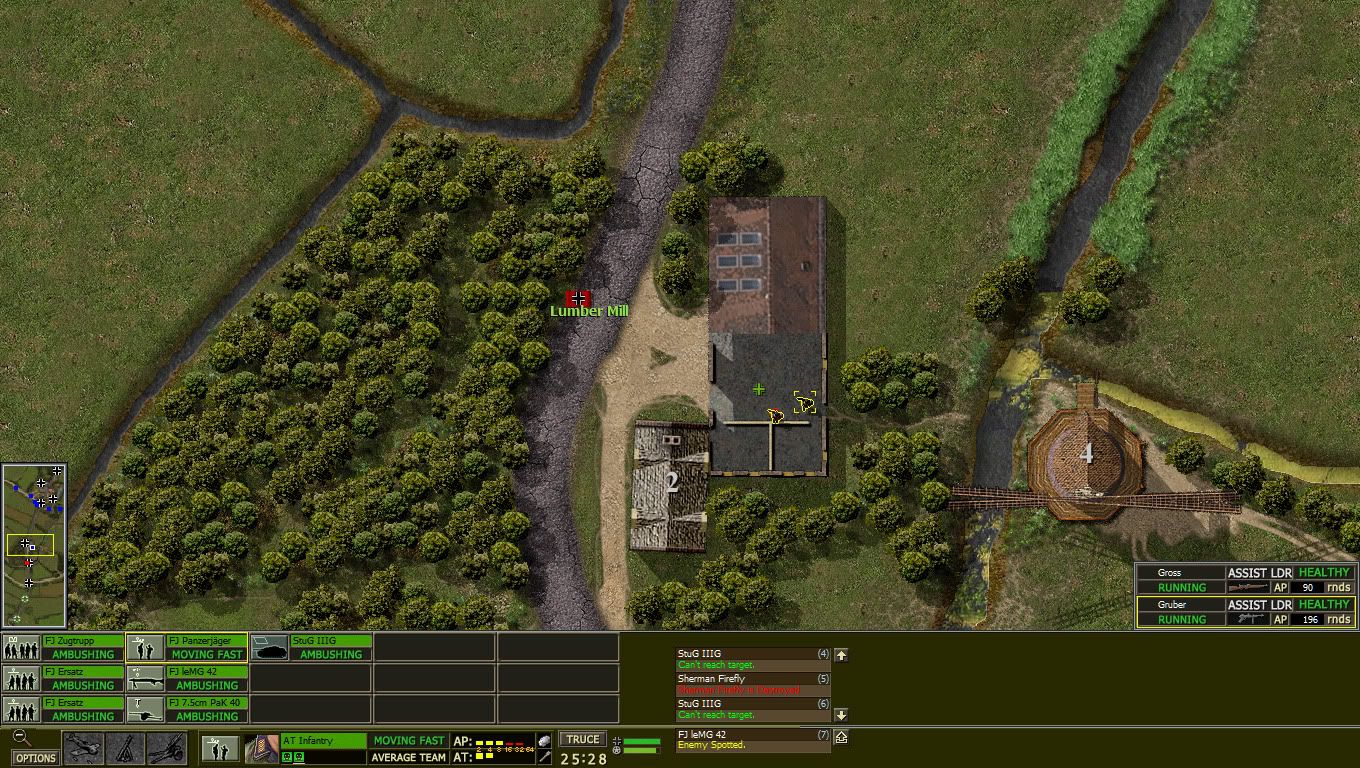 The pointy end of the Allied attack ambushed by my rifles and MG42 (that one remaining guy actually lasted VERY long in that ditch). 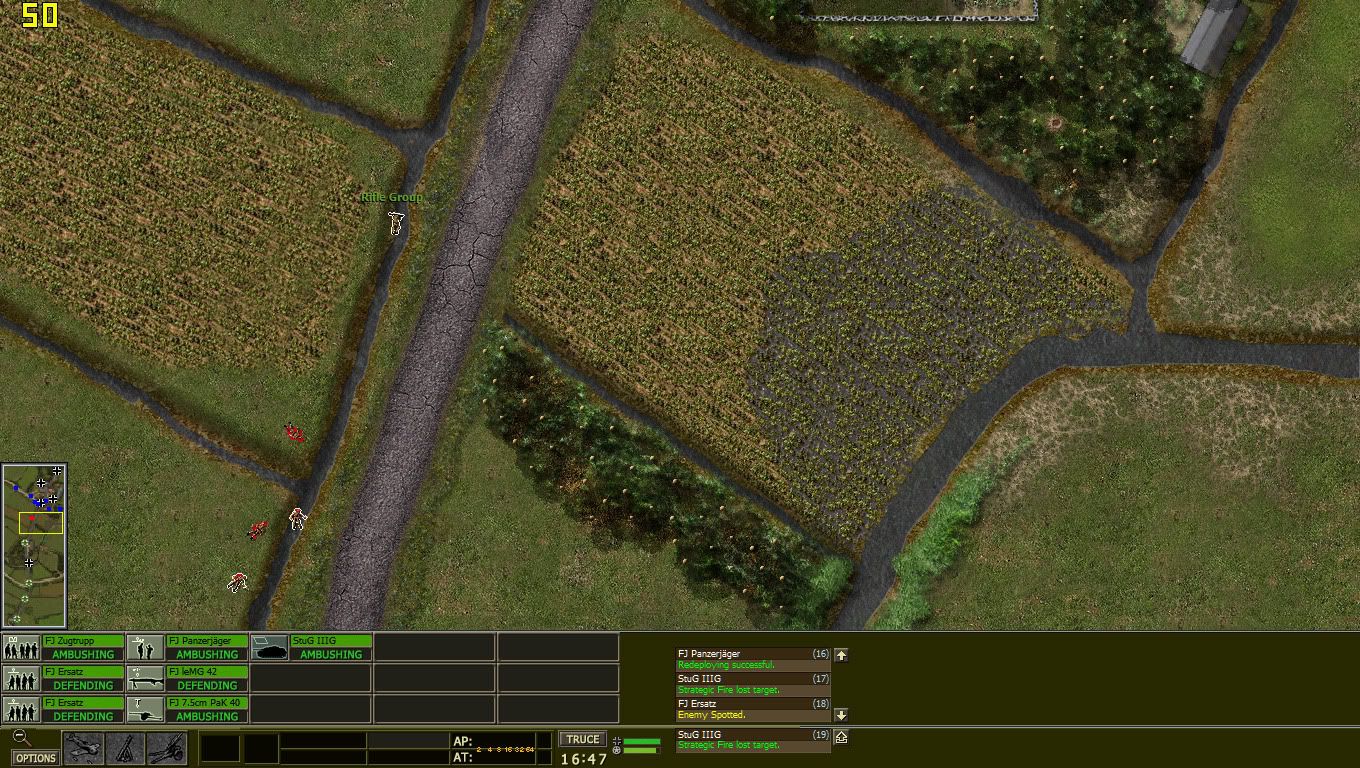 Shot to the side finishes this Sherman before it can get a round off. Stug 2 - allies 0  More Allied infantry tries to cross the open fields, only to be slaughtered by the rifles and MGs. 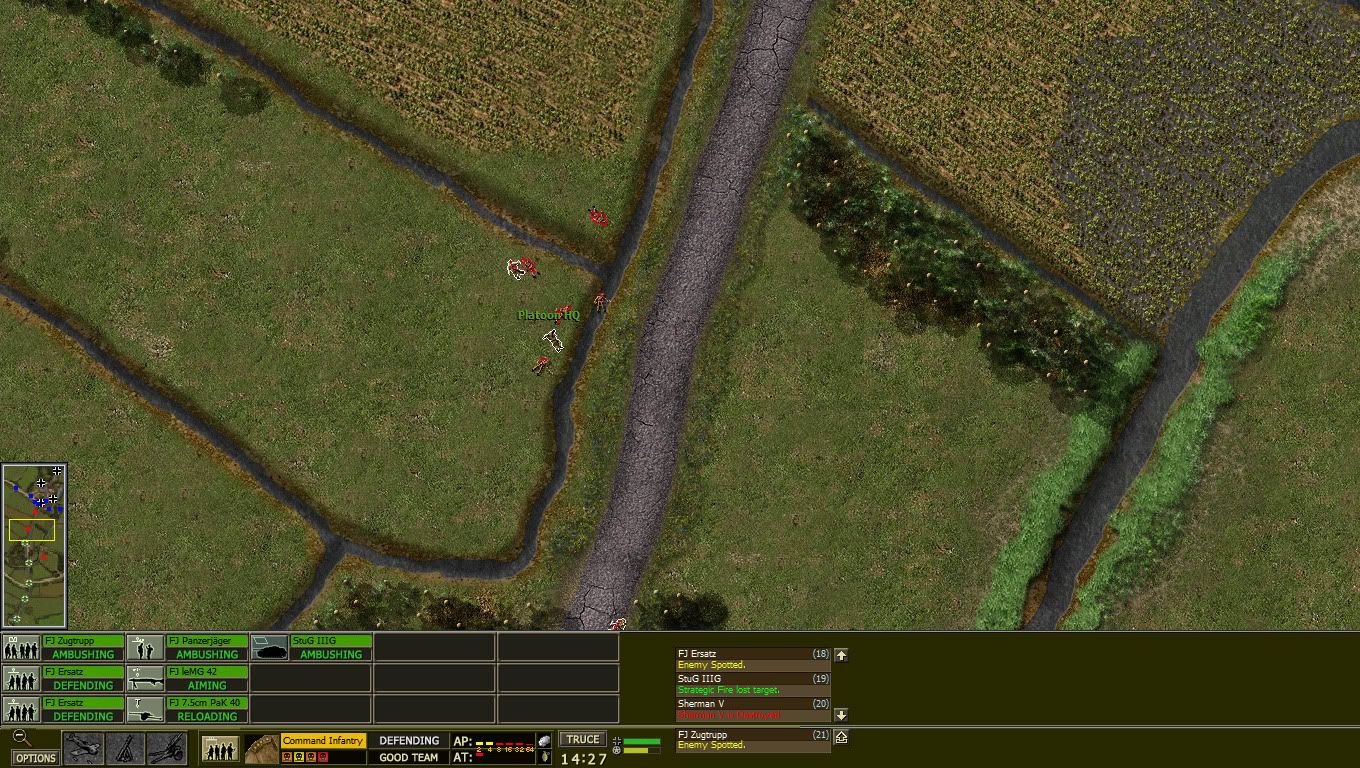 #3 for the StuG 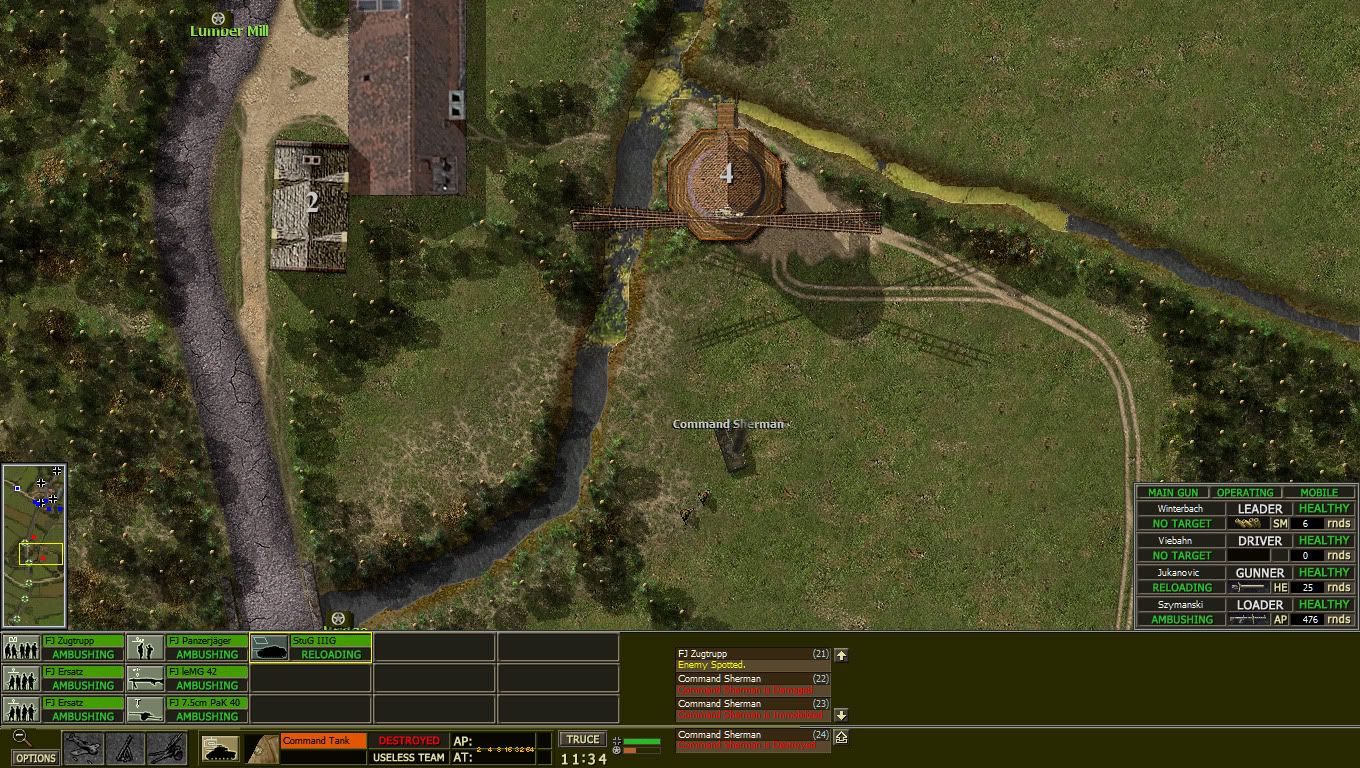 Shortly after the 3rd kill, the StuG spotted it's 4th victim, which broke the Allied morale. A bit worried about the small Allied deployment zone near my town.  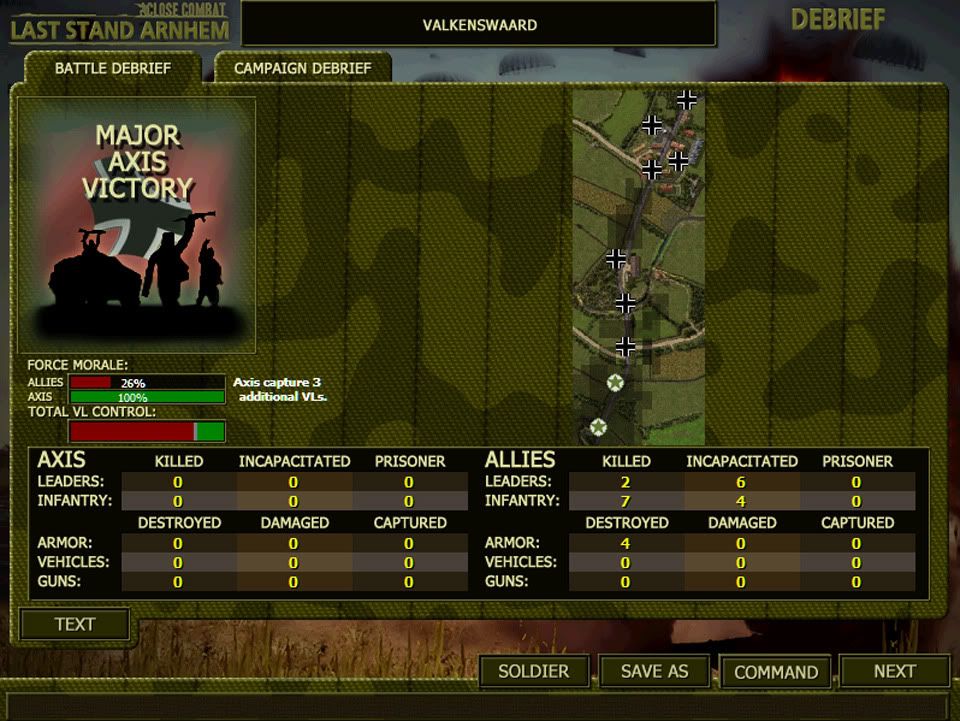 And the star of the show.   All in all, very surprising battle. This was the 5th time I play this battle and every single time I have lost either the PaK or the StuG and some infantry with it. Important victory denying the allied armor from getting any further North. |
|
|
|
|
10-21-10, 09:51 AM
|
#4 | |
|
Navy Seal
 Join Date: Jun 2008
Location: Land of windmills, tulips, wooden shoes and cheese. Lots of cheese.
Posts: 8,467
Downloads: 53
Uploads: 10
|
Quote:
(my kind of humour though  ) )
__________________
 Contritium praecedit superbia. |
|
|
|
|
|
10-21-10, 09:53 AM
|
#5 | |
|
Lucky Jack
Join Date: Apr 2005
Location: Finland
Posts: 25,054
Downloads: 32
Uploads: 0
|
Quote:
|
|
|
|
|
|
10-21-10, 09:57 AM
|
#6 |
|
Navy Seal
Join Date: Jun 2008
Location: Land of windmills, tulips, wooden shoes and cheese. Lots of cheese.
Posts: 8,467
Downloads: 53
Uploads: 10
|
I keep telling you; it's ma brain! It does weird things.
 Nice write-up, remarkable victory. 
__________________
Contritium praecedit superbia. |
|
|
|
|
10-21-10, 10:01 AM
|
#7 |
|
Navy Seal
Join Date: Jul 2007
Location: Stavka
Posts: 8,211
Downloads: 13
Uploads: 0
|
No losses for all that? Nice.
__________________
Current Eastern Front status: Probable Victory |
|
|
|
|
10-21-10, 11:55 AM
|
#8 |
|
Lucky Jack
Join Date: Apr 2005
Location: Finland
Posts: 25,054
Downloads: 32
Uploads: 0
|
DAY 1 TURN 1
Best, German garrison vs. 1st Bn./502nd PIR Nothing special on this one. Again, I had played this one before and had quite a good idea on what the enemy would try. The FlaK guns I had (1x20mm 2x88mm) were locked to where they were to simulate the surprise attack I guess. But they were in good positions to fire across the map. Surely, the AI attacked the same way as it had before, it went for the center road flag, exactly where I had placed my troops to. I saw only 3 or 4 enemy squads that crossed the road, I have no idea what the rest were doing. I held them back with the rifles and MG42 with the help of occasional shot or two from the farthest 88mm. Their losses piled up during the first 10-15 minutes and they pretty much gave up on attacking. The most notable thing on the battle was that the allied bastards called air on top of my southern 88 and I lost that one. Next turn, I should be able to win this one as my reinforcements arrive.  Unit composition 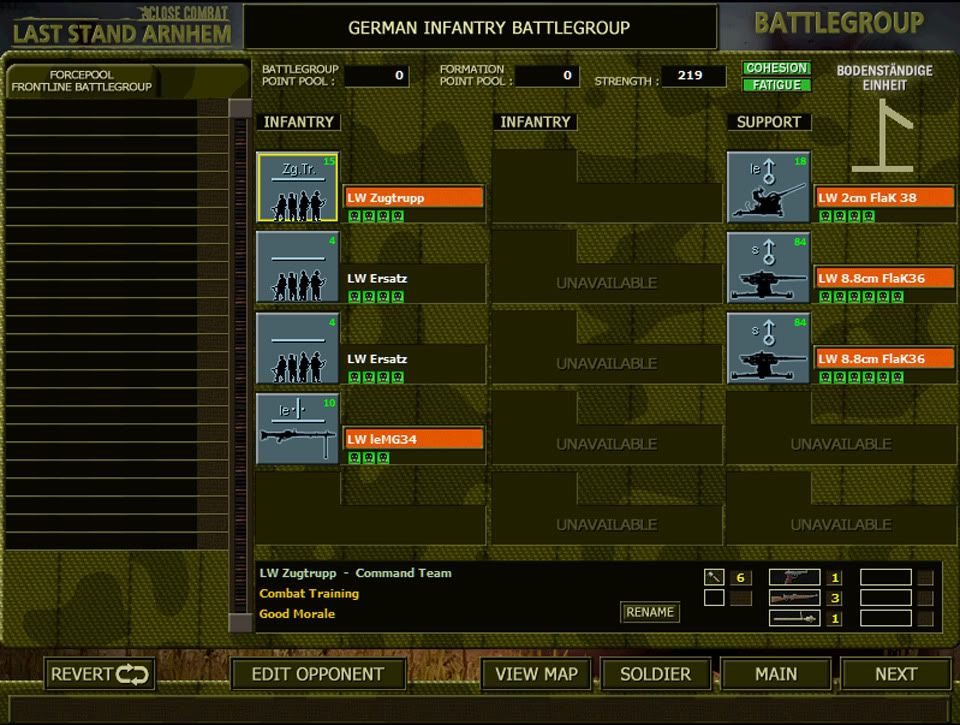 Firing lines and allied movement 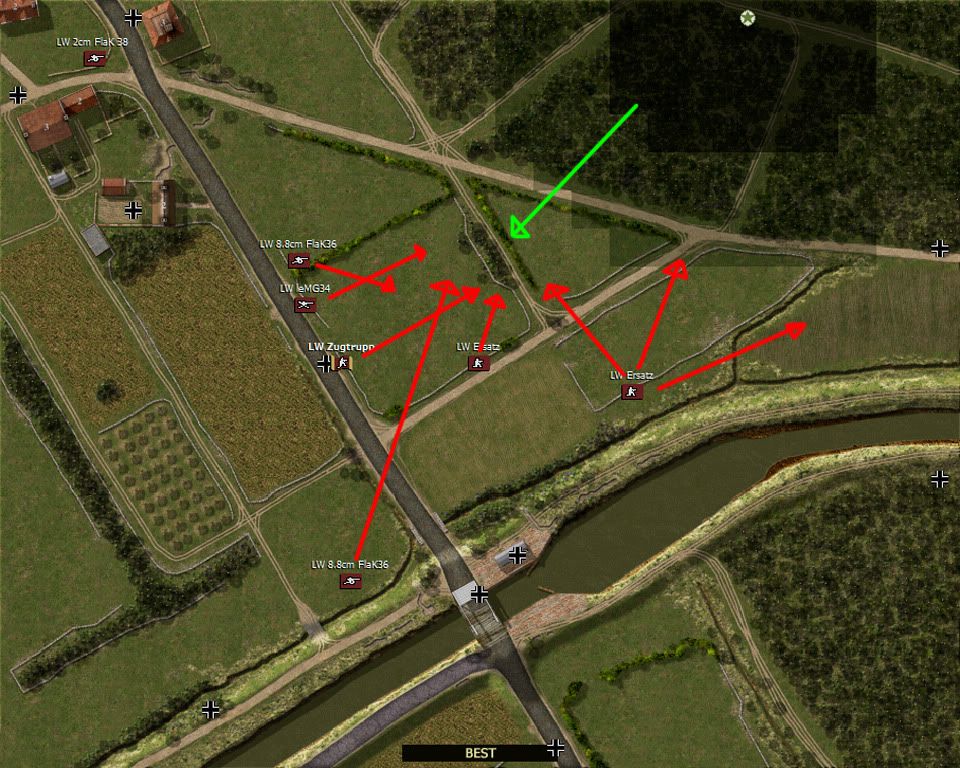 20mm FlaK got lucky (it's horribly inaccurate from distance) 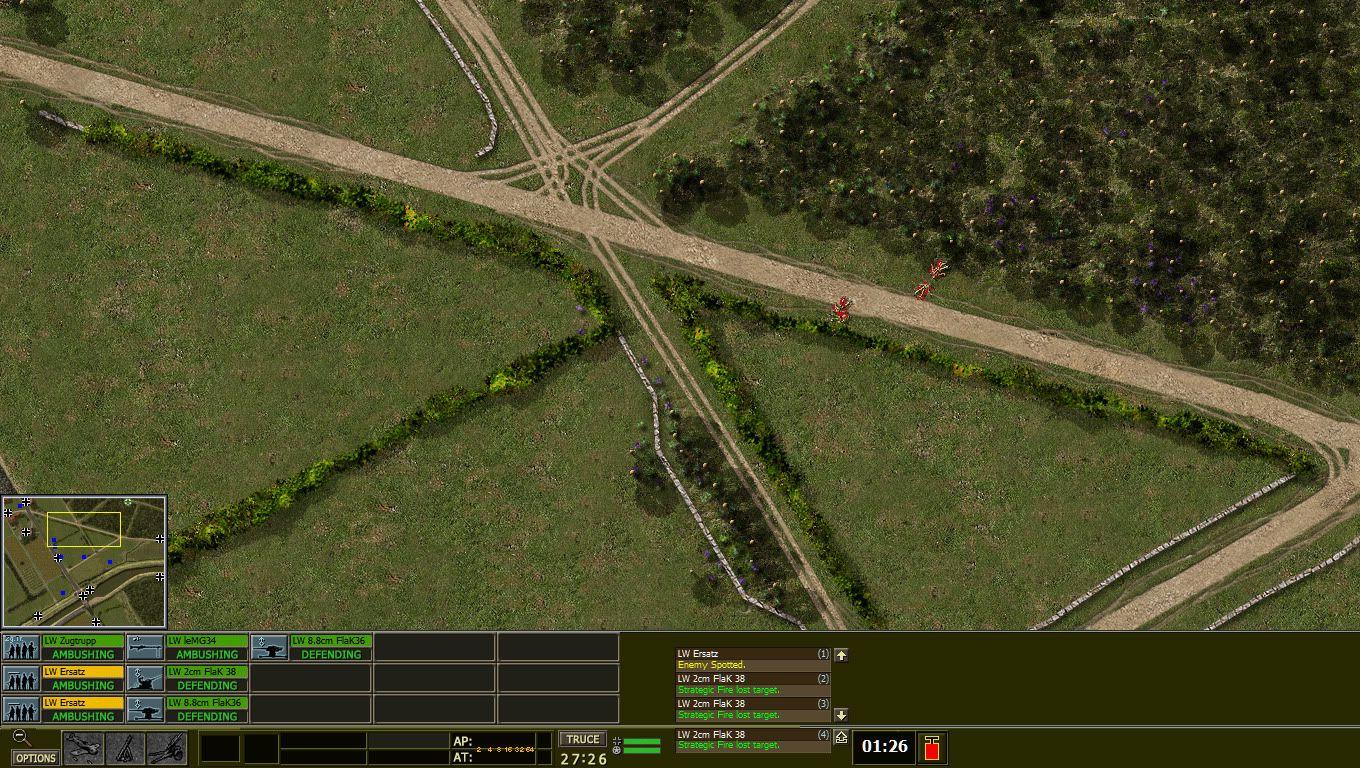 Poor 88  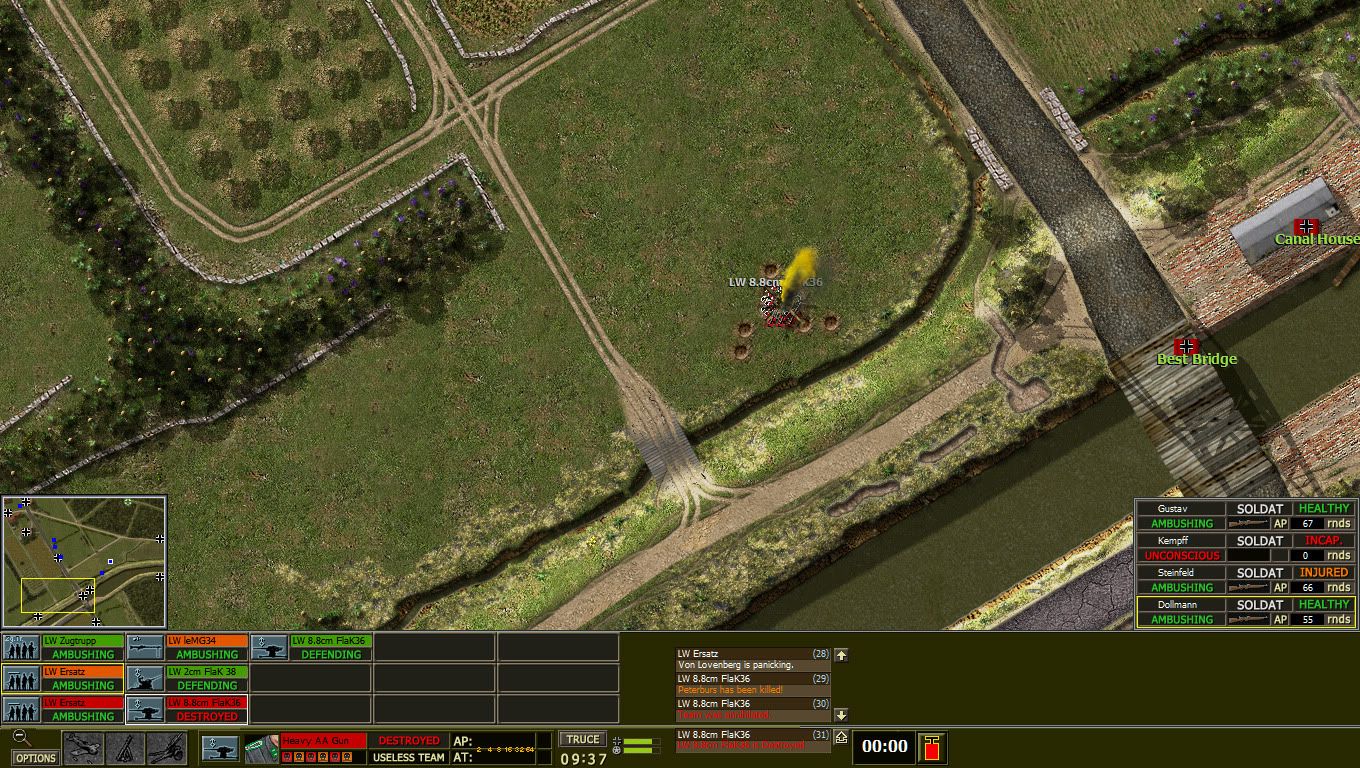 This allied squad was blocked from crossing the road by the 3 riflemen I had to the south of them. Later on I brought in another riflesquad, but I didn't manage to kill any of the allies, just suppress them and make the retreat. 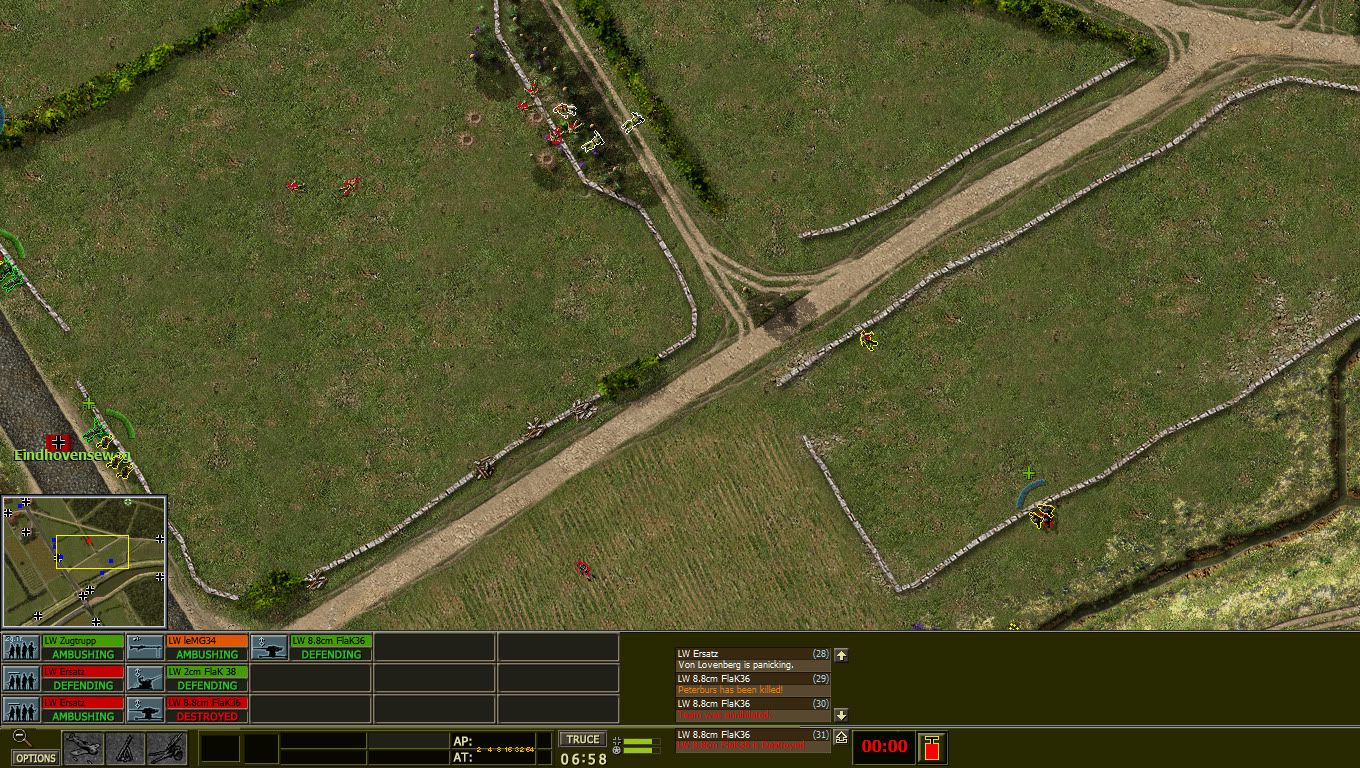 End result 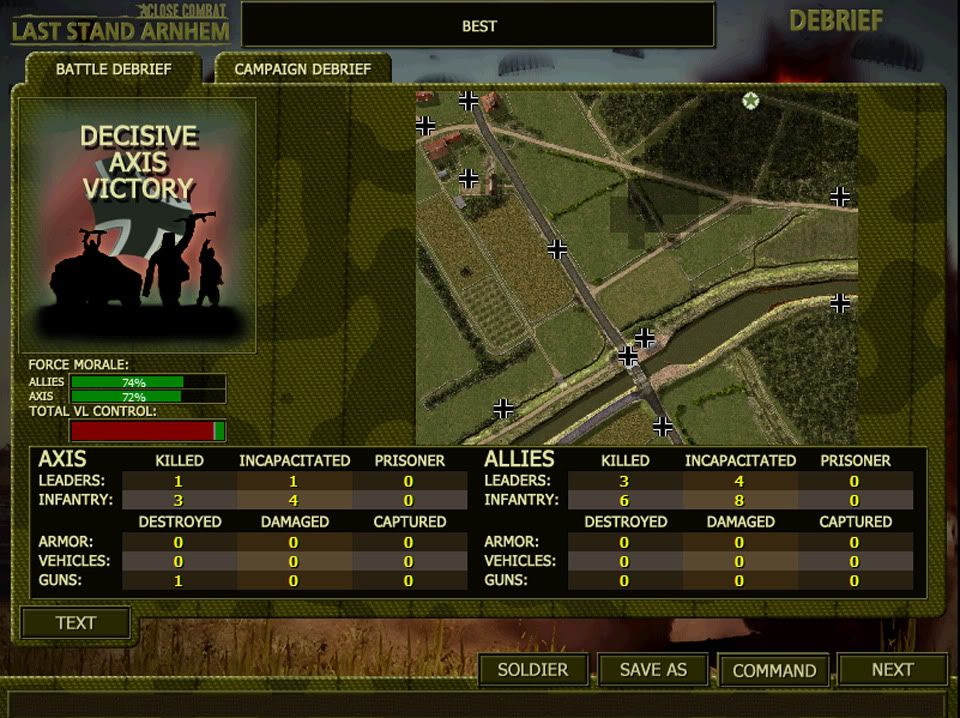
|
|
|
|
|
10-21-10, 01:35 PM
|
#9 |
|
Lucky Jack
Join Date: Apr 2005
Location: Finland
Posts: 25,054
Downloads: 32
Uploads: 0
|
DAY 1 TURN 1
Son, German garrison vs. 506th PIR/101st AB DIV Last sector I want (can) to hold during this turn and it doesn't look good. I have 2 88s, again locked, on the north side of the river companied by 3 x rifleteams, 1 x command team and 1 x light MG34 against, what I believe, full BG of paratroopers. Looking at the map, I come to the conclusion that I have to sacrifice the two 88s and pull my infantry to the south side of the river. Hopefully I can hold the bridge for atleast 2 turns, as I THINK I might get KG RINK here in time if I can deal with the situation at Best on the next turn. The enemy will probably take control of the Northwest part of the town before they try to cross the bridge. That might cause them additional losses due to the 88s. Unit composition 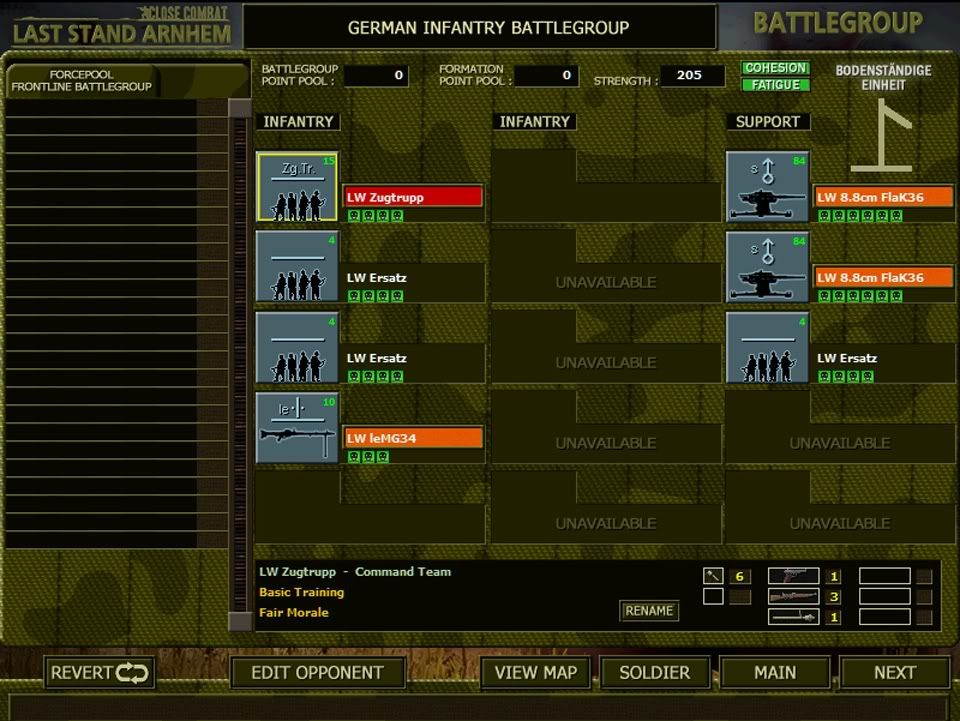 Most likely allied movement and the area I let them come before opening fire. 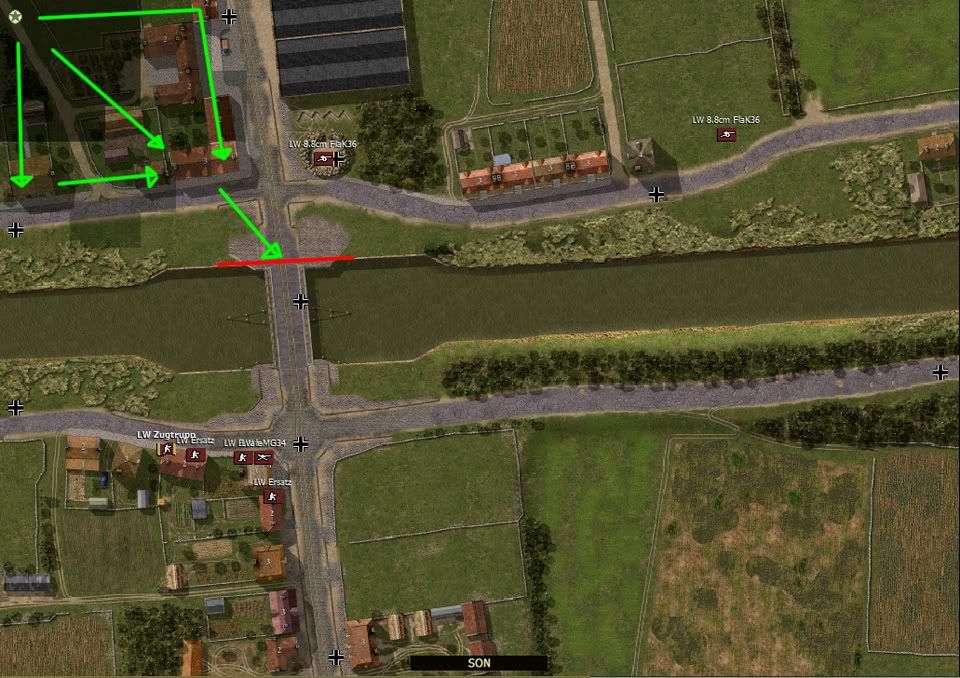 The first 88 was quickly eliminated by and assault from 2 sides. The second 88 was destroyed when a mortar shell fell right on it. 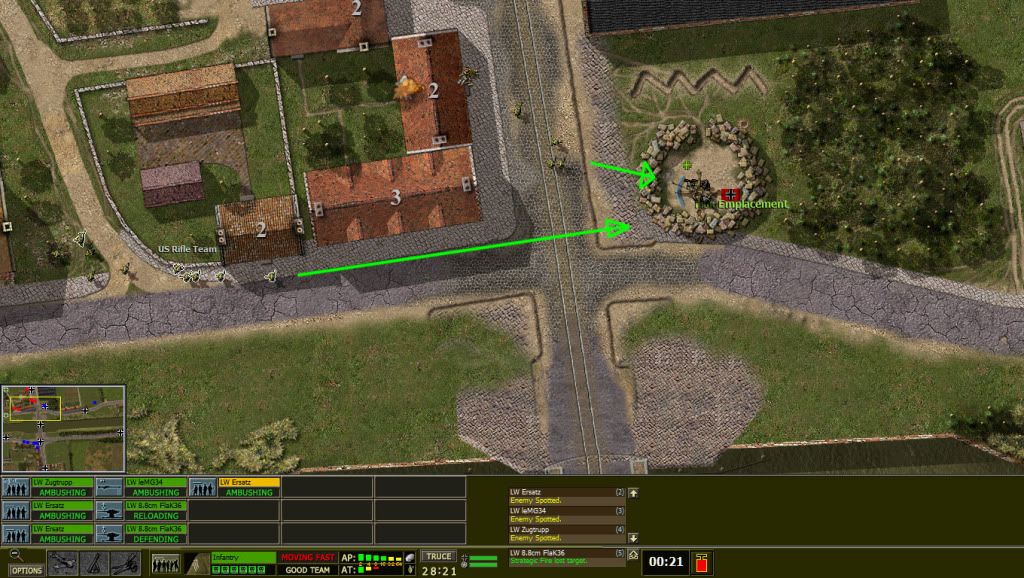 Their first attempt to cross the bridge was met with fierce MG and rifle fire from my side of the river. 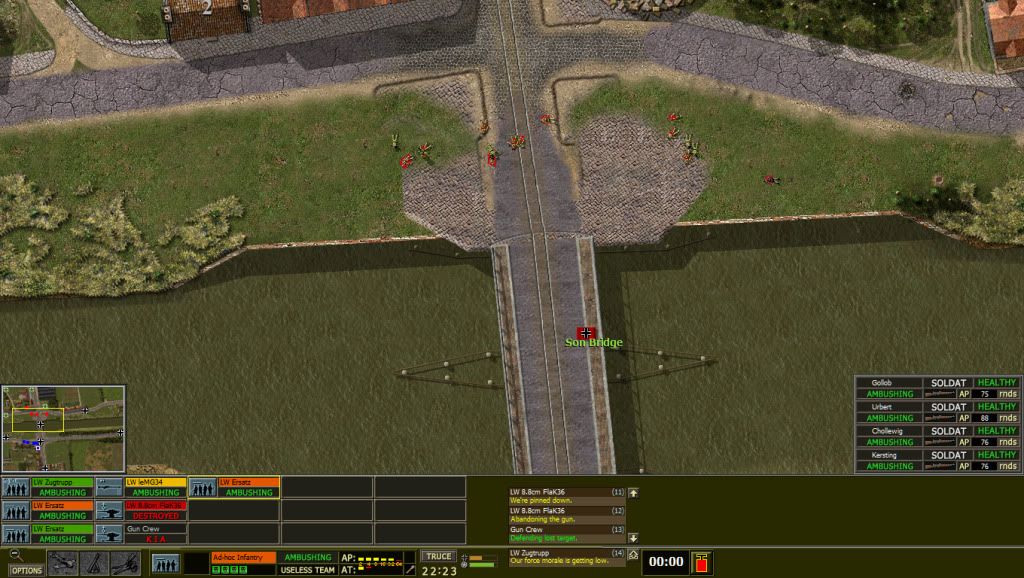 They made their second attempt in the end of the battle, which was again repulsed. 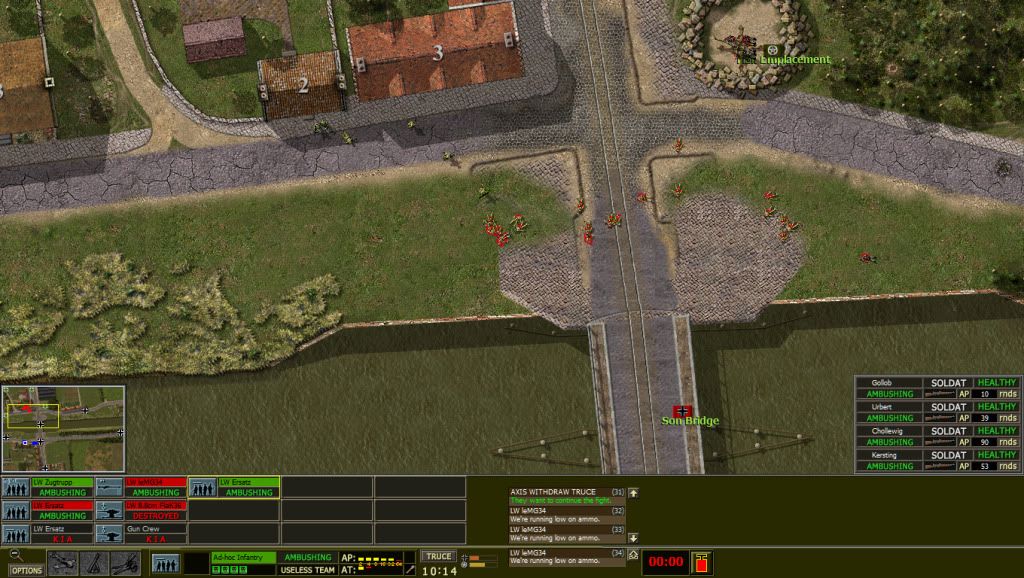 End result 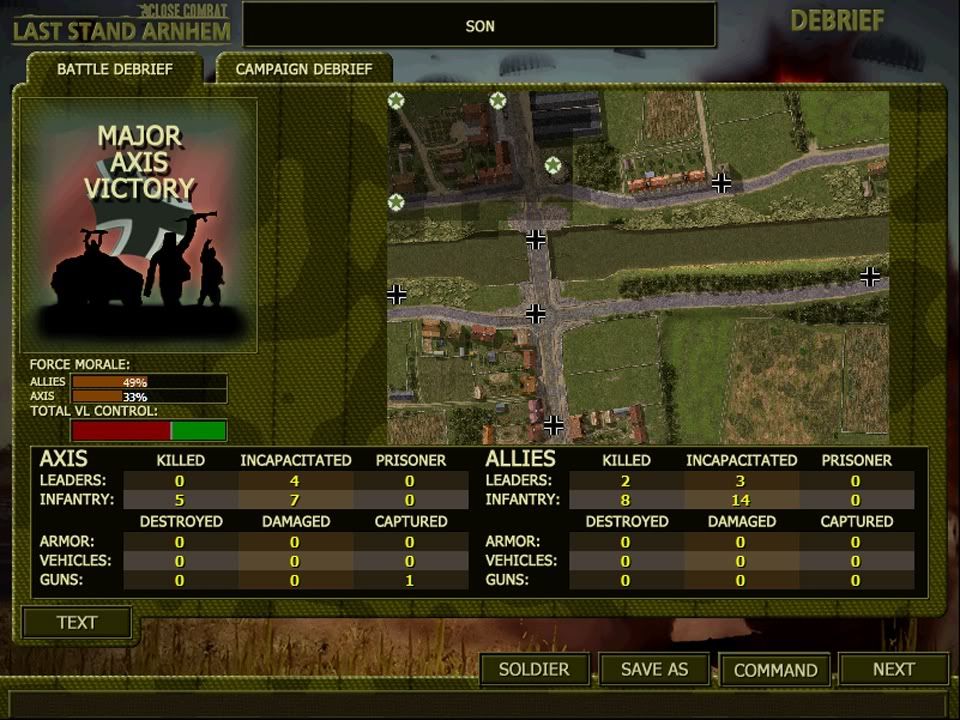 It's going to be tough to hold this one on the next round. Last edited by Dowly; 10-21-10 at 01:49 PM. |
|
|
|
|
10-21-10, 03:34 PM
|
#10 |
|
Lucky Jack
Join Date: Apr 2005
Location: Finland
Posts: 25,054
Downloads: 32
Uploads: 0
|
DAY 1 TURN 1
St. Oedenrode, German garrison vs 501st PIR/101st AB DIV + reserve battlegroup Oh dear... oh dear. Another new feature of LSA is that one can stack 2 BG's into one sector, the other is frontline BG and the other is reserve, giving the side that has stacked them a huge force pool. And they give me 2 x 20mm flaks, 3 x rifleteams, 1 x command team and 1 x light MG34 to counter them. Looking at the map, I see the allies are coming from East and South, which means I cannot focus my fire on just one direction. There goes my chances. Unit composition 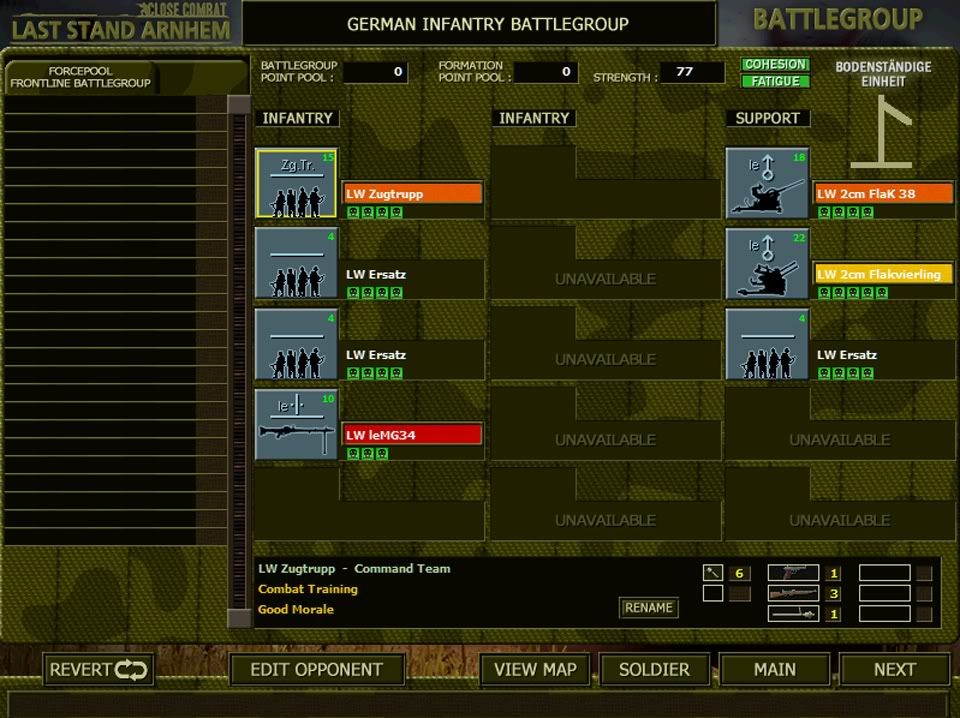 Knowing the AI, it probably takes the shortest route to the main flag, bridge in this case.  All they had coming from South was one Bazooka team, good diversion thought. 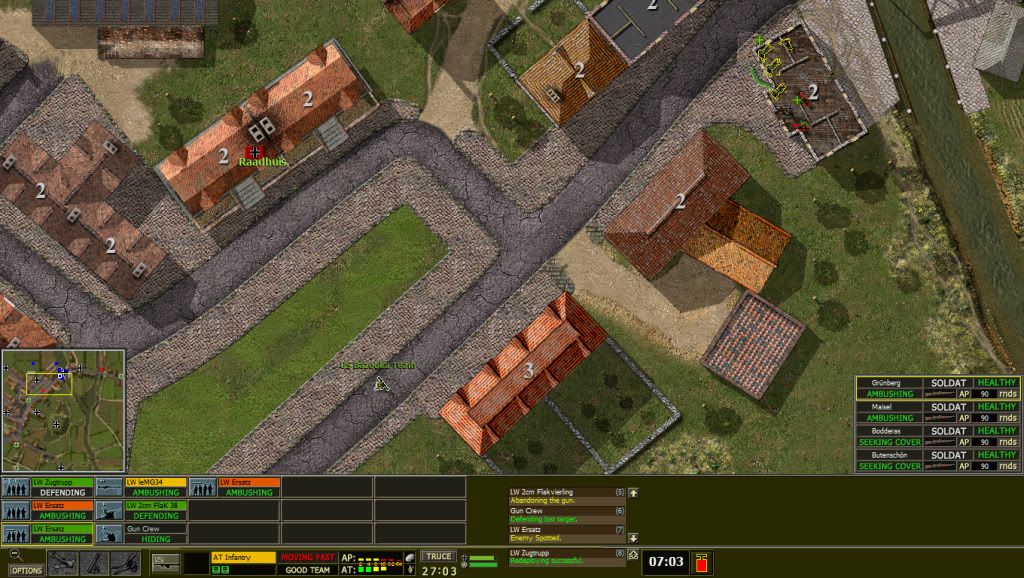 10 minutes in and it became a race on who runs out of ammo first with both sides holed up into the buildings along the river. Sadly, I would be the one to run out of ammo first.  12 minutes remaining and I was running extremely short on ammo, so I decided to blow the bridge and give allies total victory. 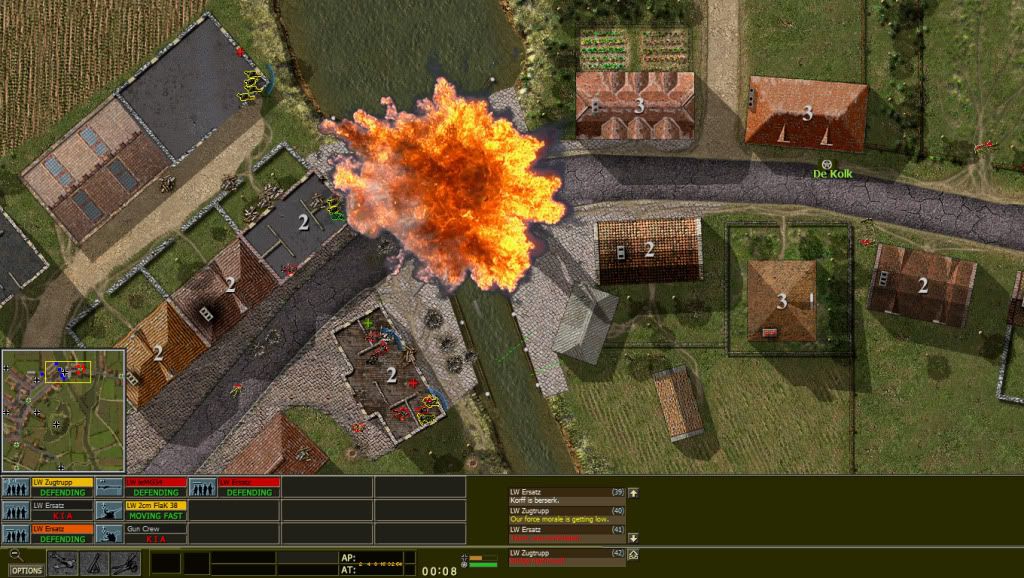 End result 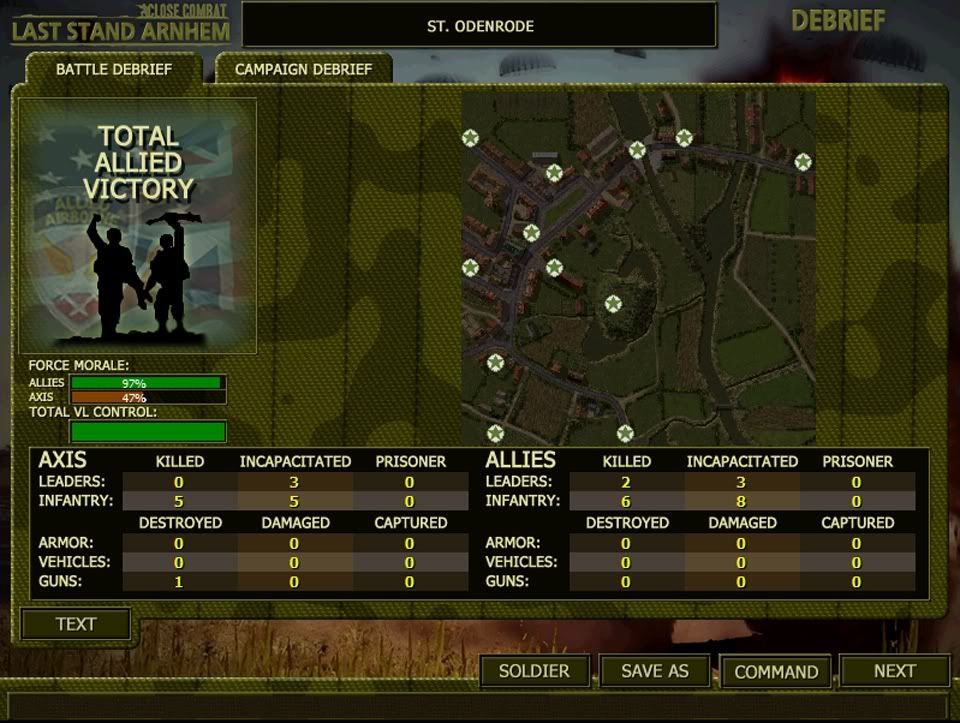 With another MG I think I could've held them atleast for this turn, but not with what I had. Just not enough ammunition.
|
|
|
|
|
10-21-10, 05:31 PM
|
#11 |
|
Seasoned Skipper
 Join Date: Apr 2010
Location: Right by the hydrophone station
Posts: 724
Downloads: 96
Uploads: 0
|
Looks like you're doing a better job than me Dowly, just getting back into CC again. Looks like I'm going to have to create a thread dedicated to AAR's as between this and HoI 3 I'm going to be doing a lot of spamming methinks
Just tried attacking Valkenswaard and got annihilated by the Stug and the AA guns.
__________________
|
|
|
|
|
10-21-10, 05:34 PM
|
#12 |
|
Lucky Jack
Join Date: Apr 2005
Location: Finland
Posts: 25,054
Downloads: 32
Uploads: 0
|
Hehe, haven't played as allies yet, usually play only german as I suck at attacking anything.
I care too much for my men to try anything risky and possibly lose great many of them. |
|
|
|
 |
|
|


 Hybrid Mode
