
|
|
SUBSIM: The Web's #1 resource for all submarine & naval simulations since 1997
|
SUBSIM: The Web's #1 resource for all submarine & naval simulations since 1997 |
 12-18-21, 01:55 PM
|
#1 |
|
Ocean Warrior
 Join Date: Oct 2017
Posts: 2,652
Downloads: 60
Uploads: 0

|
 So, I got a notification last week and bought this on the spot:  I/18th scale diecast 1997 (legacy) Mini Cooper, left hand drive. The quirky met. purple just screams "Mini" and the detail is very good, although the model only features opening doors and steerable wheels. Then again, there isn't much to see under the bonnet or in the boot, anyway. A friend I knew in college had a 60's era Austin Mini (right hand drive) that had been "willed" to him by an Uncle or Grandfather who had it imported from the UK. The Austin was as bare bones as it got but it could corner on a man hole cover and the tires could be used as seat cushions for a child's stool.  What was great was that if you ran out of gas, you could just pick it up and carry it back to the dorm. Seriously, these things cornered like a skate board and it was easy to drive yourself out of danger.I parked the model next to another 1/18th scale car, a 1964 1/2 Mustang, and the Ford dwarfed the Mini to the point where I wondered if the scale was wrong. So I did some checking and broke out a ruler to check, and danged if the Mini didn't scale out perfectly.  Recommended, as long as you don't need working/opening everything. https://www.diecastmodelswholesale.c...car-by-solido/ |

|

|
|
04-23-22, 10:41 AM
|
#2 |
|
Starte das Auto

 Join Date: Aug 2014
Location: The Fens
Posts: 17,368
Downloads: 5
Uploads: 0


|
I don't expect you've ever sat in one of those? Your backside is about four inches from the road. My mate had one and we stopped next to a London bus in slow traffic... all I could see out the window was this huge wheel
__________________

|

|
|
|
04-24-22, 10:40 AM
|
#3 | |
|
Ocean Warrior
Join Date: Oct 2017
Posts: 2,652
Downloads: 60
Uploads: 0
|
Quote:
 That would mean that I knew how those tire tracks wound up on some guy's lawn late one night. It almost looked like someone was driving really fast when they un-expectantly came up on one of those "T" intersections. 
|
|
|
|
|
|
06-23-22, 03:38 AM
|
#4 |
|
Ocean Warrior
Join Date: Oct 2017
Posts: 2,652
Downloads: 60
Uploads: 0
|
I went a little crazy on the Mini and started to detail it out a bit.
Note that the lighting in the picture makes the metallic purple look lighter than it is. 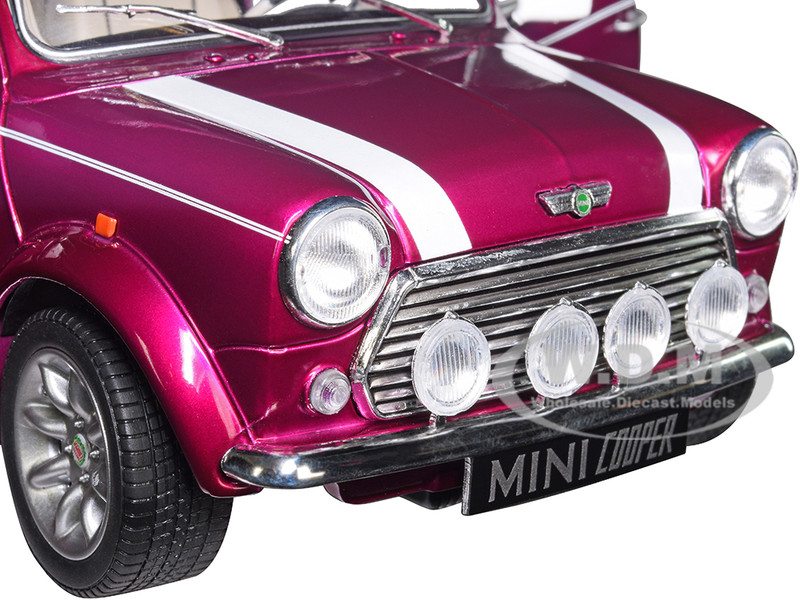 The first phase of this project involved some basic painting of exterior parts. I painted the fog lights on the bumper with a couple of coats of Tamiya clear yellow (acrylic) to change them up slightly. The marker lights on the front fenders were painted in a basic orange which just didn't look right, so I carefully added a coat of Tamiya clear orange to darken them a bit and give more of a 3D effect. Based on past experience, I like to add a clear coat of paint to protect decals and some pad printing on the exterior parts. This helps prevent chips or decals lifting or flaking over time. This die cast has nice Mini emblems on the chrome badges and "final edition" logos on the wheel hubs that I wanted to protect so I added a thick drop of Tamiya acrylic clear to cover only the decal parts of these assemblies and allowed the paint to dry and fully cure. Again, this also gives the logos a more 3D look of a clear plastic or epoxy covering. After allowing the exterior paint time to fully dry and cure, I put a sheet of paper between the windshield wipers and the wind shield and then carefully pried the wiper arms out just enough to paint the wiper blades with Tamiya NATO black for the top of the blades and Tamiya Tire black for the rubber part. Using various shades of black gives you a more detailed looking part with minimal fuss. I also wanted to drill out the tip of the exhaust pipe but after a quick rummage through my parts drawer I found some aluminum tubing that perfectly fit over the pipe so I cut the die cast's pipe back a bit and cut off some tubing and after some sanding and polishing I glued on a nice "stinger" pipe tip. It was getting time to move on to the interior but I took some time to figure out what kind of colors I wanted to use. The basic interior of this die cast is nice but it needed some help. The pictures don't really show it, but this 'cast has a really nice wood grain pattern applied to the dash board, its some kind of hybrid sticker/decal but there were no gauge bezels included. I wanted to keep the seats in their basic white with black piping but the steering wheel and shifter just didn't look "right" so it was time to rummage through the paint bottles before I broke out the screw drivers to tear this thing apart.  Again, prior experience told me to check this thing out before ripping it apart and I noticed that the most delicate parts were the side mirrors and radio antenna. The antenna I could replace with either a shirt pin or a steel guitar string but for now I just taped some foam to the roof for protection. For the mirrors, it wasn't a question of if they would break loose, but when. I've learned its better to make mirrors like this stronger and easily fixable. I carefully twisted each mirror loose (they were melted into place with a soldering iron) and then carefully drilled out the posts with my pin vice so I could insert and glue steel rods (shirt pins with the ends cut off) while also drilling in to the plastic door cards on the other side of the body. To glue the parts back on to the doors, I'll use "clear parts glue" so the glue joint is now the weakest part. When a mirror does break off down-the-road it won't be a big deal to add some more glue and reposition the part.  The pins will also help in keeping a broken mirror post hanging off the door instead of falling into a thick carpet where it will disappear forever. The pins will also help in keeping a broken mirror post hanging off the door instead of falling into a thick carpet where it will disappear forever.  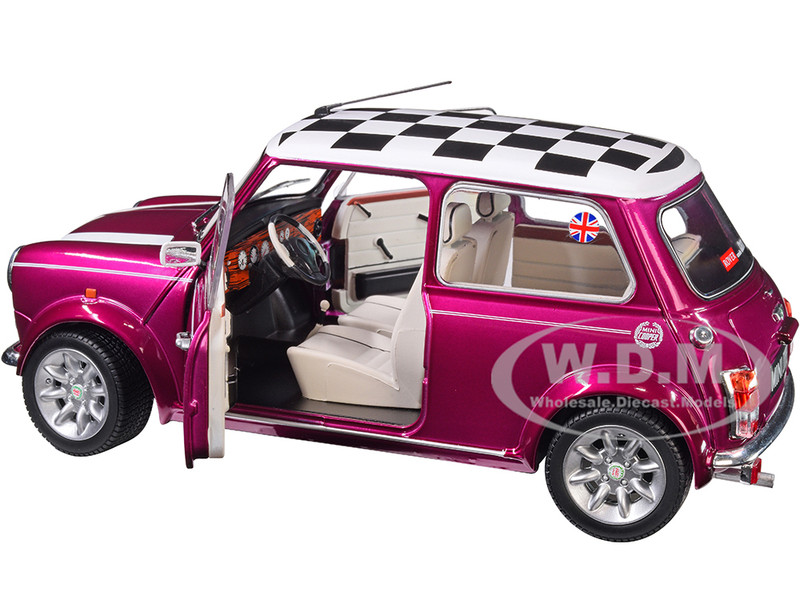 Tear down went mostly according to plan.  This is specific to the Solido Mini, but you'll want to unscrew and remove the rear suspension assembly (two screws) so its easier to access the rear body screws. After that, remove the four body screws and two center line screws and detach the lower body pan. Don't sweat the steering arm, its easy to re-align it during re-assembly. Just make a note of how things come apart and try to keep the screws organized so they go back in the same locations. This is specific to the Solido Mini, but you'll want to unscrew and remove the rear suspension assembly (two screws) so its easier to access the rear body screws. After that, remove the four body screws and two center line screws and detach the lower body pan. Don't sweat the steering arm, its easy to re-align it during re-assembly. Just make a note of how things come apart and try to keep the screws organized so they go back in the same locations.The main interior is the fiddly part of this die cast. I still don't understand why it binds up (it shouldn't) but removing and (especially) re-installing the interior can get frustrating. It seems to help if you get a grip on the seat back and firewall and give a gentle squeeze. Just take your time and avoid using a crow bar and you'll do fine.  You might want to open both doors for this operation, but you really don't have to. You might want to open both doors for this operation, but you really don't have to.Once you get the interior removed, you'll find two screws that attach the dash board to the interior shell. Remove them so the dash is easier to work on. I started on the steering wheel and shifter. I repainted the white part of the wheel with "antique ivory" gloss enamel and later a coat of clear satin varnish. Real Mini's tend to get customized by their owners, so you can go a little crazy with this stuff. For the dash board, I started out by giving the "decal" a good soaking with Micro Sol to get it to settle into all of the contours. I then added small 1/25th scale P/E gauge bezels to the small gauges in the center of the dash followed with clear parts glue to form the "glass" and really tack the bezels in place. The large gauges behind the steering wheel were more tricky and I had to cut three "slices" from 3/16" dia. aluminum tubing which I then filed and sanded until they were about three times as thick as the P/E bezels. I wanted a chrome look at first but then settled on a more "rustic" brushed metal look. These bezels were also glued into place and clear glass faces were added using clear parts glue. Soaking the dash with Micro Sol had reveled the outlines of the glove box so I carefully cut the "decal" around the perimeter of the glove box door and used a 2 mm scribing blade to give the door a little more depth followed by some black panel liner to make the door "pop". It looked like something was still missing so after some careful measuring I drilled a 70 gauge hole then cut the head off a shirt pin and glued it in place as a knob. At this point, I was ready to add a final clear gloss finish to the fake wood but.. I had been thinking about this since Neal had started his Torino build and mentioned wood grain. Maybe clear gloss wasn't the answer? I have some AK clear matte varnish and maybe that would look better? I tried a uniform first coat on the glove box door and it looked promising but maybe I could get it to look better? For the second coat I tried an experiment, I dabbed/stippled the varnish on with a brush and let it dry. Holy cow, it came out looking good! Its a subtle effect but unless you soak real wood grain in epoxy, it shouldn't look uniform. This worked well with my "rustic" look for the Mini and I did the entire wooden dash using this technique. I'm not 100% happy with it yet, but its 95% to 98% there. After that, I did some basic detail painting using various shades and textures of black and added a radio display using Tamiya X-32 Titanium Silver.For the rest of the interior and the head liner, I covered the metallic purple paint with Tamiya XF-57 Buff and let everything dry before screwing it all back together. I really like how the interior turned out. From a distance it looks the same as before but as you get in closer the Easter Eggs start to pop out. The only other thing I could add is a basic seat belt kit. For re-assembly, just screw everything back together in the opposite order you used to take it apart. Be careful and take your time getting the interior snapped back in to the body. Remember, this piece is fiddly for unknown reasons. If your Solido Mini seems to be happier with a three point stance instead of sitting flush on all four wheels, take about a quarter to a half a turn out of the two screws that attach the rear suspension to the under body. This turned out as a cheap and painless way to make a $30 dollar die-cast look like it cost $60-$80.
|
|
|
|
 |
|
|


 Linear Mode

