
|
|
SUBSIM: The Web's #1 resource for all submarine & naval simulations since 1997
|
SUBSIM: The Web's #1 resource for all submarine & naval simulations since 1997 |
 07-10-15, 04:23 PM
|
#856 |
|
Eternal Patrol

 Join Date: Nov 2002
Location: High in the mountains of Utah
Posts: 50,369
Downloads: 745
Uploads: 249


|
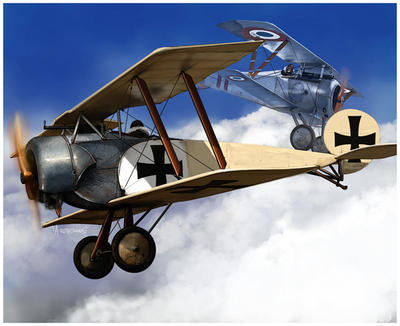
Next project is a companion piece to the last one - the Fokker D.II. I was going to build the Austrian B.II "Baby" out of the box, but I came across a particular plane I really want to do, and not having enough kits available to do everything I wanted I decided to use wings from another kit to make it into a D.II. The D.II kit I have is set aside for conversion to a D.III later on.
 The only photo of the plane is from this group shot:  'Dodo', the plane in question, is the middle of the back row. Here is an artist's rendering of 'Dodo' in combat.  What attracted me are the black-and-white stripes and the white cross on black tail. Actual colors are unknown. I'll get into that more later.
__________________
Never do anything you can't take back. Rocky Russo |

|

|
|
07-10-15, 05:03 PM
|
#857 |
|
Gefallen Engel U-666

 Join Date: Jul 2013
Location: On a tilted, overheated, overpopulated spinning mudball on Collision course with Andromeda Galaxy
Posts: 27,918
Downloads: 22
Uploads: 0


|
__________________
"Only two things are infinite; The Universe and human squirrelyness; and I'm not too sure about the Universe" |

|
|
|
07-10-15, 08:04 PM
|
#858 |
|
Eternal Patrol
Join Date: Nov 2002
Location: High in the mountains of Utah
Posts: 50,369
Downloads: 745
Uploads: 249
|
Make sense you'd post pictures of the "Baby".
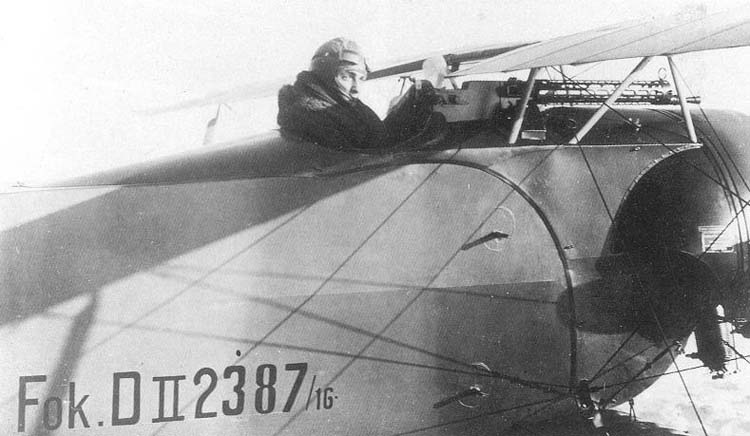
 Idflieg wanted a little more stability and ended up buying the double-bay version. The Austrians bought twenty-two of the single-bay plane, and most of them went to training schools. A couple of them were armed and saw combat. 
__________________
Never do anything you can't take back. Rocky Russo |
|
|
|
|
07-10-15, 09:01 PM
|
#859 |
|
Gefallen Engel U-666
Join Date: Jul 2013
Location: On a tilted, overheated, overpopulated spinning mudball on Collision course with Andromeda Galaxy
Posts: 27,918
Downloads: 22
Uploads: 0
|
well no problem with this two bay version
 Love the color scheme on this; Love the color scheme on this;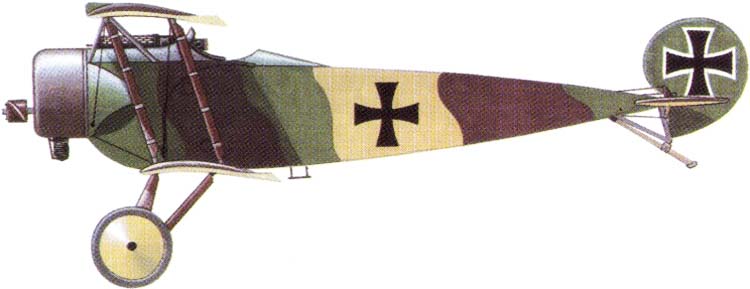 and the steady cam on this: and the steady cam on this: http://www.airwar.ru/enc/fww1/fokd2.html http://www.airwar.ru/enc/fww1/fokd2.html
__________________
"Only two things are infinite; The Universe and human squirrelyness; and I'm not too sure about the Universe" |
|
|
|
|
07-11-15, 08:48 PM
|
#860 |
|
Eternal Patrol
Join Date: Nov 2002
Location: High in the mountains of Utah
Posts: 50,369
Downloads: 745
Uploads: 249
|
The engine: 100 horsepower Oberursel U.I rotary. I've used kit engines and metal engines. This time I've ordered a small handful from Small Stuff Models. This is a resin kit, with 38 parts - the crankcase, the rear mount, 9 cylinders, 9 thin pushrods, 9 tiny valve rockers and 9 even tinier spark plugs. I was going to start it today, but I had to look up a lot of pictures of the original to make sure I get it right. We'll see how it goes.

__________________
Never do anything you can't take back. Rocky Russo |
|
|
|
|
07-12-15, 11:12 AM
|
#861 |
|
Eternal Patrol
Join Date: Nov 2002
Location: High in the mountains of Utah
Posts: 50,369
Downloads: 745
Uploads: 249
|
First step with this tiny engine was to do the one thing they don't provide for - make it so it spins. They recommend drilling a hole in the back and using a toothpick to hold the crankcase while installing the parts. I drilled a hole and glued in a piece of brass wire. A short piece of tubing is slipped into place and another short tube glued in after it. The free-spinning first tube will be glued into a hole in the forward fuselage. If all goes well it will allow engine and propeller to spin. I've done this many times before. I've also botched it up more than once.

__________________
Never do anything you can't take back. Rocky Russo |
|
|
|
|
07-12-15, 11:44 AM
|
#862 |
|
Gefallen Engel U-666
Join Date: Jul 2013
Location: On a tilted, overheated, overpopulated spinning mudball on Collision course with Andromeda Galaxy
Posts: 27,918
Downloads: 22
Uploads: 0
|
[QUOTE=Sailor Steve;2327984] but I had to look up a lot of pictures of the original to make sure I get it right. We'll see how it goes.
[/QUOTE]^Totally kool! Too bad you're not using the 110 Oberursel: the world's most famous one...perhaps. Saw it on my day's visit to the IWM in London  photo enlarges. photo enlarges.
__________________
"Only two things are infinite; The Universe and human squirrelyness; and I'm not too sure about the Universe" |
|
|
|
|
07-12-15, 01:50 PM
|
#863 |
|
Eternal Patrol
Join Date: Nov 2002
Location: High in the mountains of Utah
Posts: 50,369
Downloads: 745
Uploads: 249
|
Wrong plane. Small Stuff makes the UR.II, but it will have to wait for the Dr.I, and that's some way off at this point.
Next come the cylinders, and I need to slow down. It won't help with this one, as it's too late. The designers online instructions recommend tacking things in place with foil cement, which as its name implies is a glue for attaching aluminum foil to represent polished metal. It dries tacky and allows the part to be stuck in place and rotated to the proper position, after which a drop of superglue is applied. I don't have any and don't have time to make a special trip to the hobby shop just to get some, so I tried dipping the cylinders in a dot of superglue and putting them on directly. The first problem was that getting the spark plug holes to point in the right direction was pretty much impossible. The second problem was that I hadn't yet discovered the online instructions, and the ones that come with the model aren't clear enough. I tried breaking the crankcase loose from the sprue, and not knowing I was supposed to use the X-Acto Saw to cut it loose I bent it just a little, even with just the pressure from my fingers. Some of the holes for the cylinder bases were bent, just enough to let them not be round anymore. I ended up having to re-drill holes and force-fit some of the cylinders, which was scary because if they became deformed or marred there is no way to fix them. It also turned out the spark plug holes were nowhere near lined up properly, so I had to use a tiny drill bit to drill new ones. Anyway, the cylinders are in and don't look too bad. 
__________________
Never do anything you can't take back. Rocky Russo |
|
|
|
|
07-12-15, 04:02 PM
|
#864 |
|
Eternal Patrol
Join Date: Nov 2002
Location: High in the mountains of Utah
Posts: 50,369
Downloads: 745
Uploads: 249
|
The spark plugs are installed.
 And now I'm banging my head in frustration. They give you a special tool to remove the spark plugs from the tree and install them into the tiny holes in the cylinder heads. Unfortunately I seem to be too fumble-fingered to get it to work right. I finally resorted to drilling new holes and using some of my .008 guitar string to make the plugs. While doing that I managed to dislodge one of the cylinders and lose it on the floor somewhere. Their parts trees have five of everything, so I had a spare. Then I lost another one, and borrowed the spare from a second engine I have. Then I lost another one and borrowed a real cylinder from the same kit, which means it is now one short. I took the above picture and started working on the valves and connecting rods. The valves were also too small for me to deal with, and I wanted to use the .008 wire for the rods anyway, so I started drilling holes to mount them in, thinking that the top would glue to the front of the cylinder head and it would still look good. I mounted the first wire and it looked good. I was mounting the second wire when yet another cylinder popped loose and disappeared somewhere. Now I'm done. After a break I'm going to dig out an engine from one of my spare kits. If it looks good enough, fine. If not I'll drill and mount stuff on it. Since it will be one piece it should be safe from losing cylinders. 
__________________
Never do anything you can't take back. Rocky Russo |
|
|
|
|
07-13-15, 10:26 AM
|
#865 |
|
Eternal Patrol
Join Date: Nov 2002
Location: High in the mountains of Utah
Posts: 50,369
Downloads: 745
Uploads: 249
|
After all that it occurred to me to check the fit, and the Small Stuff engine won't fit inside the cowling anyway. I went through my parts box and found an engine that looks about right with only a little trimming. I added the connecting rods from guitar string to give a little extra flavor, and I think that's as far as I'm going to go.

__________________
Never do anything you can't take back. Rocky Russo |
|
|
|
|
07-13-15, 01:33 PM
|
#866 |
|
Eternal Patrol
Join Date: Nov 2002
Location: High in the mountains of Utah
Posts: 50,369
Downloads: 745
Uploads: 249
|
New engine painted, ready for installation.

__________________
Never do anything you can't take back. Rocky Russo |
|
|
|
|
07-13-15, 03:39 PM
|
#867 |
|
Gefallen Engel U-666
Join Date: Jul 2013
Location: On a tilted, overheated, overpopulated spinning mudball on Collision course with Andromeda Galaxy
Posts: 27,918
Downloads: 22
Uploads: 0
|
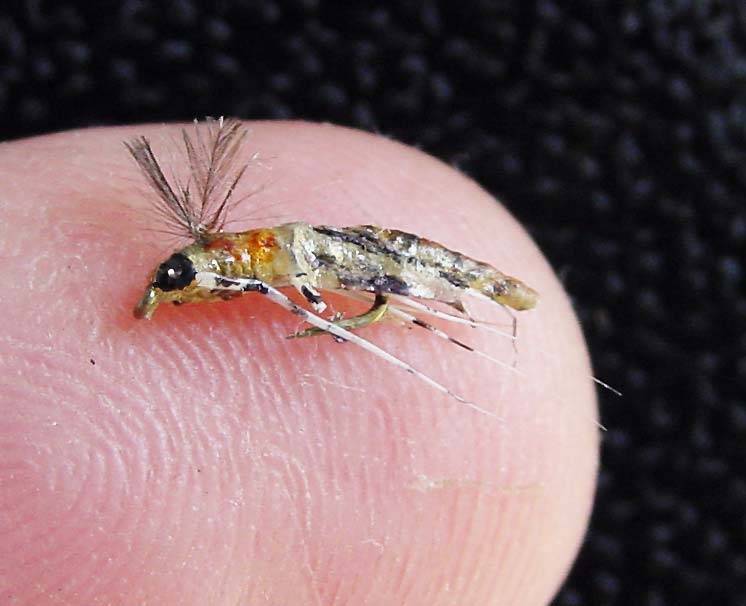
^Jeeze! that looks like(equally aggravating) practice for tying fishing flies
__________________
"Only two things are infinite; The Universe and human squirrelyness; and I'm not too sure about the Universe" |
|
|
|
|
07-13-15, 07:00 PM
|
#868 |
|
Eternal Patrol
Join Date: Nov 2002
Location: High in the mountains of Utah
Posts: 50,369
Downloads: 745
Uploads: 249
|
Oh yeah. Working with teensy tiny parts is rewarding, but only when you get it right.
Anyway, the interior (such as it is) is painted - instrument panel and floorboard. After test fitting with the pilot I'm leaving the seat out. He'll sit perfectly on the hump to which the seat attaches. 
__________________
Never do anything you can't take back. Rocky Russo |
|
|
|
|
07-14-15, 03:02 AM
|
#869 |
|
Starte das Auto

Join Date: Aug 2014
Location: The Fens
Posts: 15,767
Downloads: 5
Uploads: 0


|
Since you use your models for gaming I don't know whether or not you bother with this: do you use/consider the idea of "scale colour" when painting them? I was prompted to ask this when you mentioned using black paint in your airbrush (post #793).
__________________

Last edited by Eichhörnchen; 07-14-15 at 03:44 AM. |
|
|
|
|
07-14-15, 08:41 AM
|
#870 | |
|
Eternal Patrol
Join Date: Nov 2002
Location: High in the mountains of Utah
Posts: 50,369
Downloads: 745
Uploads: 249
|
Quote:

__________________
Never do anything you can't take back. Rocky Russo |
|
|
|
|
 |
| Tags |
| model |
|
|


 Linear Mode

