|
___________________________________________________________________________general
tips
While flight sims
offers fast-paced and straightforward action, naval sims tend to
lend themselves to more of a cat-and-mouse, hunt-and-be-hunted
kind of dynamic. You’ll need patience, spatial orientation, and
keen operational skills to successfully wage war on the open seas.
Destroyer Command places you in control of the greyhounds
of the seas. Fast and maneuverable, destroyers are equipped to
tackle all sorts of difficult situations.
BATTLE-FLEET DUTIES
|
Helpful Websites |
www.subsim.com
Subsim
Review has been around forever. Patches, mods, tactics,
tips, news, and busy forums will aid in your training.
www.battlebelow.com
Battle
Below is a terrific place to get information about Silent
Hunter, Silent Hunter II, and Destroyer
Command.
www.silenthunter.dk
The Danish center for
all things Silent Hunter II (the DC
companion).
www.sh2fleet.com
Eagle
League has 6,000 members and is the web’s No. 1 online
naval community.
|
 When
operating in conjunction with cruisers, battleships, and aircraft
carriers, remember to know your place. A destroyer is considered
expendable and is expected to protect capital ships. When your
battle fleet encounters an enemy force, you have one primary
decision to make: Which quarter should I attack? When
operating in conjunction with cruisers, battleships, and aircraft
carriers, remember to know your place. A destroyer is considered
expendable and is expected to protect capital ships. When your
battle fleet encounters an enemy force, you have one primary
decision to make: Which quarter should I attack?
<
A close-range torpedo attack is your most devastating tactic. Use
a narrow track when at short range.
Proceed
at flank speed. Check the engine-room screen to ensure all boilers
are online. When you’re within range, use the map screen to
select a target (go for the biggest ship in the opposing fleet),
then right-click your ship and “Attack Selected target.” Your
AI crew will commence firing your five-inch guns. If you prefer,
you can switch to the battery director and handle the targeting
chores yourself. Just remember that Ultimation built realistic
wave-motion into the game, so while you may appreciate the added
thrill of watching your ship pitch back and forth, it’ll make
hitting your target appreciably more challenging.
 Use
the rudder to make 10-degree course changes: it’s your only
defense against close-in fire. Try to veer in at an angle because
you don’t want to offer the enemy a full-length target. Close
range to 3,000 yards and then release a narrow-angle torpedo
attack — your most devastating weapon. Use
the rudder to make 10-degree course changes: it’s your only
defense against close-in fire. Try to veer in at an angle because
you don’t want to offer the enemy a full-length target. Close
range to 3,000 yards and then release a narrow-angle torpedo
attack — your most devastating weapon.
<
Planes
often attack in waves and pose a kamikaze threat. You’ll need
steady aim and generous leads to bring them down.
Once
you’ve taken out the heavy targets, it’s time to switch to the
lighter ships. Single out enemy destroyers that are within range
of several of your DDs and instruct them all to focus their
firepower on one vessel at a time. Remember, every enemy tin-can
you sink is one less ship that can fire back at you. Single out enemy destroyers that are within range
of several of your DDs and instruct them all to focus their
firepower on one vessel at a time. Remember, every enemy tin-can
you sink is one less ship that can fire back at you.
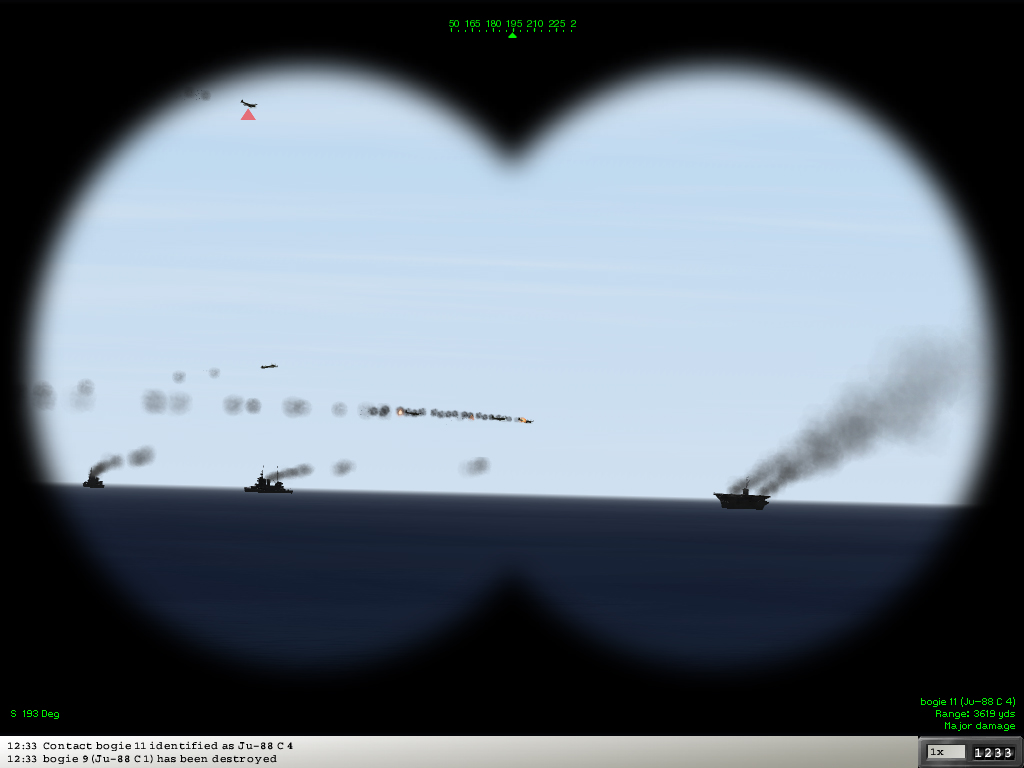
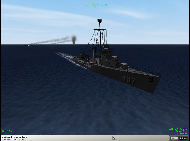
When
the battle requires binoculars, you haven’t done your job. This
carrier is about to catch a couple of well-placed
torpedoes. >
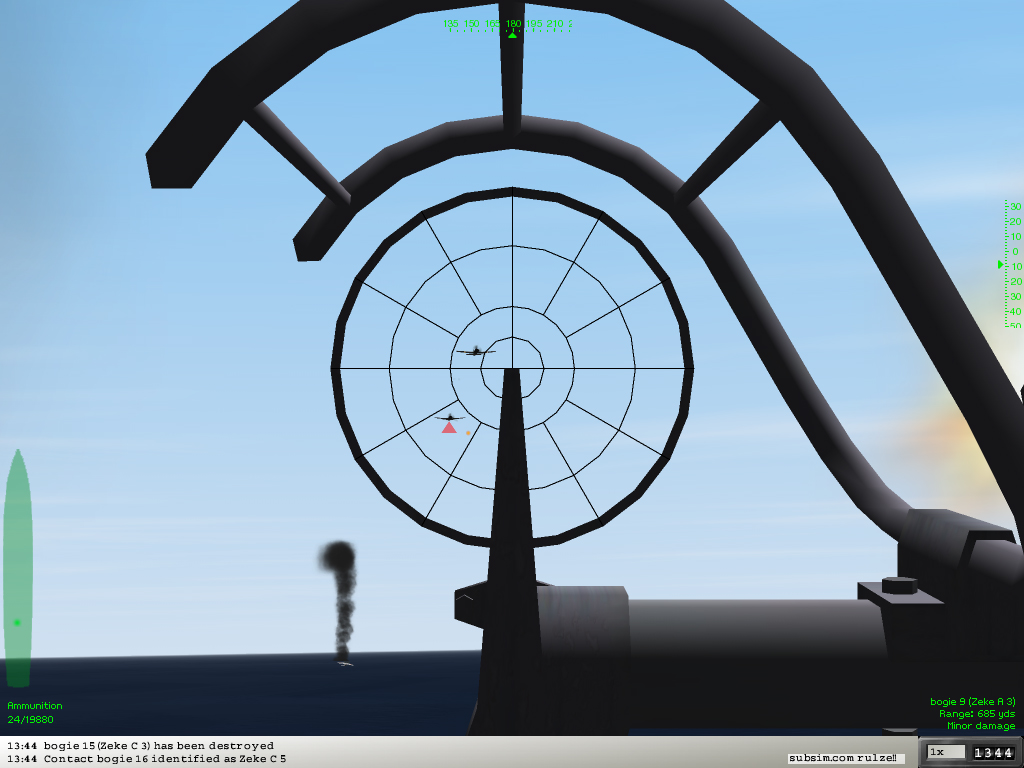
In
case of enemy aircraft attacks, a destroyer captain must not only
engage the planes at maximum range, but also position his ship to
block any torpedoes that might get launched at the capital ships
he’s protecting. If you decide to man the AA guns yourself, use
the (Z) key to zoom in, and keep a finger on the (.) key to switch
gun stations when reloading. A glance at the light green
“ownship” silhouette on the left should help keep you
oriented.
 At
times, you may be tempted to hang back and save your own hide, but
if you want to play a historically correct battle, you should keep
yourself in the thick of the action. It’ll likely give you an
appreciation for some of what the real sailors and tin-can
skippers had to deal with. At
times, you may be tempted to hang back and save your own hide, but
if you want to play a historically correct battle, you should keep
yourself in the thick of the action. It’ll likely give you an
appreciation for some of what the real sailors and tin-can
skippers had to deal with.
<
Careful coordination with the other DDs in your division can
produce searing results.
CONVOY
DUTY
Destroyers
were crucial to convoy protection in the famed Battle of the
Atlantic. Slow, unprotected freighters, passenger ships, and
tankers sustained the British war effort. So protecting your fleet
should always be your main priority.
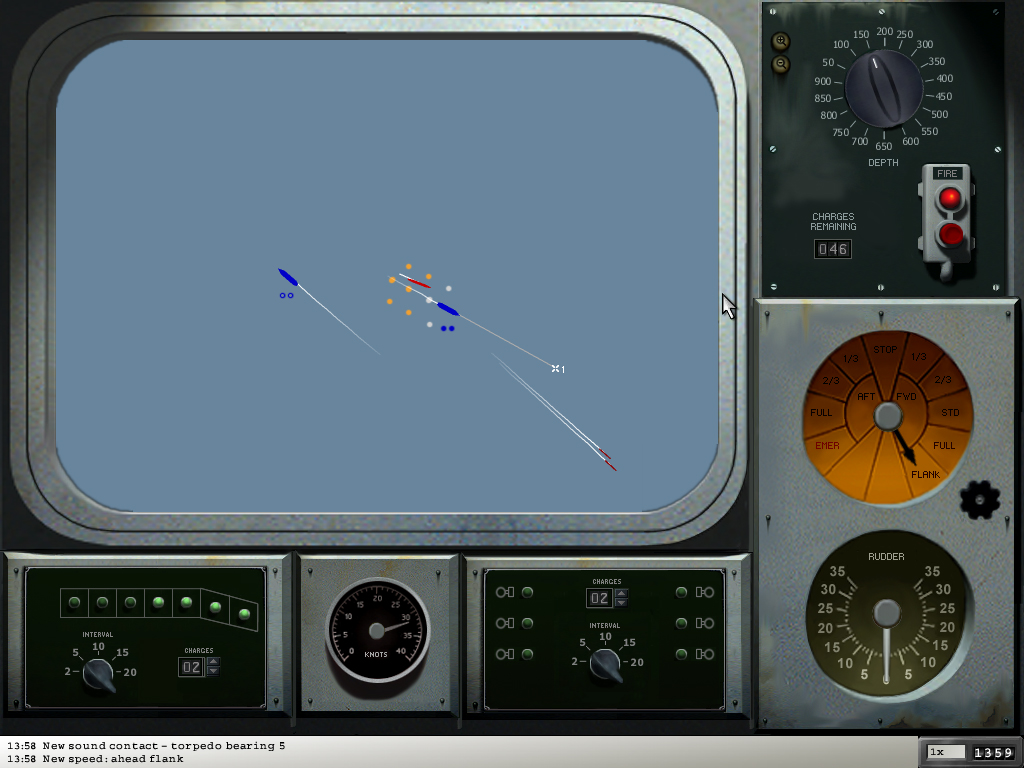
The
beleaguered U-boat (red) launched two torpedoes. Both missed. The
destroyers (blue) are ready for payback. >
In
single-player games, you’ll normally be one of several
destroyers escorting a convoy. Destroyer Command‘s AI
U-boats usually aren’t serious threats to the convoy. They’ll
appear from time to time, and your AI destroyers will engage,
often with no signal to you. You may choose to join such an
attack, but leaving the convoy unguarded can be dangerous. It’s
wise to resist the temptation. Some scenarios throw in surface
raiders, and they’re the real menace. Attack them on sight.
_______________________________________________________________multiplayer
tips
Convoy
duty in multiplayer games with players commanding Silent Hunter
II U-boats is where things get really interesting. People will
outperform the game AI in most situations. Your task is the same
— to protect the merchants — but your tactics will have to
improve dramatically if you want to win.
U-boat
players will first have to find you and your convoy. You have no
control over the course of the merchants: that’s coded in the
scenario. If it’s everyone’s first time playing a given
scenario, you may be able to slip by the human U-boat players. Silent
Hunter II players who don’t know where the convoy will pass
must run on the surface to maximize their visual-detection range.
 Running
on the surface enables the Silent Hunter II player to cover
more ground at higher speeds (16 to 18 knots) and allows them to
make up for being out of position. This tactic also makes them
susceptible to radar detection, however (if you’re playing in an
appropriate time period). Human Destroyer Command players
should stress heavy rear and side convoy protection on new
multiplayer scenarios. Running
on the surface enables the Silent Hunter II player to cover
more ground at higher speeds (16 to 18 knots) and allows them to
make up for being out of position. This tactic also makes them
susceptible to radar detection, however (if you’re playing in an
appropriate time period). Human Destroyer Command players
should stress heavy rear and side convoy protection on new
multiplayer scenarios.
<
Destroyers possess good speed and maneuverability. Use both
to your advantage at all times.
If
your human enemies know the scenario, they’ll position
themselves along the convoy track and lay in wait. Expect a savvy
U-boat player to be at periscope depth to avoid radar and visual
detection. In this situation, your job becomes more difficult. A
U-boat will always detect a surface ship before a surface ship
detects it. You’ll need to cover the leading edge of the convoy
and occasionally make a sprint down the sides. Try to look at the
CIC map and visualize what you’d do if you were a U-boat
captain laying in wait. Is there an opening? A weak spot in the
coverage? If you can see these things, expect the sub skipper to
see them, too. If you’re the gambling type, it may pay off to
leave a sector unguarded for a stretch and then sprint to it to
see if a Silent Hunter II player has taken the bait and
moved into the opening. U-boats can chat to ALL players only if
they are submerged. If they’re on the surface, they’re able to
chat to other U-boat players in TEAM mode — but at the risk of
giving the Destroyer Command players a HF/DF contact.
Once
you detect a human Silent Hunter II player, you must alert
your Destroyer Command mates and call for at least one of
them to assist. Drop a map note on the CIC chart to indicate the
target’s position.
During
depth-charge runs, expect to lose contact periodically. The game
code is designed to replicate the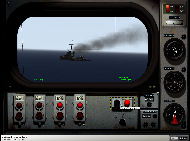 real-world combat conditions of the time. When you’ve closed the
range and your depth charges are exploding, don’t expect the map
contact to be accurate (when you’re playing with high levels of
realism enabled). It helps to have a buddy dump ash-cans on your
helpless foe. When estimating the enemy’s course, remember that
the U-boat player will try to keep his stern pointed at you to
minimize his sonar profile.
real-world combat conditions of the time. When you’ve closed the
range and your depth charges are exploding, don’t expect the map
contact to be accurate (when you’re playing with high levels of
realism enabled). It helps to have a buddy dump ash-cans on your
helpless foe. When estimating the enemy’s course, remember that
the U-boat player will try to keep his stern pointed at you to
minimize his sonar profile.
Manual
use of the battery director is challenging and fun. Time wave
action to increase accuracy. >
Expect
an aggressive U-boat player to take a shot at your destroyer as
soon as he gets a chance. This maneuver works to your advantage in
two significant ways. For one thing, he’s wasting torpedoes on
you instead of the lumbering merchants. And since you’re at the
helm of a narrow, shallow-draft, and highly maneuverable
destroyer, he’s not very likely to score a hit on you. That
said, never hold a steady course: change speeds frequently.
To
make your sonar effective, you’ll need to run at 20 knots or
less. To stay clear of the blast radius of your own depth charges,
speed up to full or flank.
Remember
to follow through and attack Silent Hunter II players until
you’ve destroyed them or run low on depth charges, or until your
convoy has opened up a good lead. In the latter case, you may
elect to suspend ASW activities and race back to the convoy to
intercept other possible attacks.
|