 An Easy Way Into Real Navigation > New Version
New Version Tutorial 24th July 2018
An Easy Way In to Real Navigation!
I have produced this Tutorial as a way of introducing Real Navigation to Players where previously it may not have been considered due to its presumed difficulty.
This Tutorial reduces many of the aspects as you will see from the pictures and dialogue.
Mega Mods are deliberately designed at higher levels of game play focusing on realism wherever possible with Real Navigation at their core.
This level of difficulty does not suit every player, but there is no doubt that Real Navigation does enhance the game and additional skills are needed and need to be learned.
TDW's Options File Editor Viewer (OFEV) contains all the Real Navigation patches and it is here in the first part of this Tutorial that I will show you how to use these patches to your advantage while you are learning.
Once you have established an understanding you can change any settings of the patches back to default or somewhere in between.
If you find Real Navigation is not for you then all you need to do is disable the Real Navigation Mod in JSGME and you are back to where you started.
You do not even need to change the OFEV settings again.
To make changes in the (OFEV) you will need to disable the mods in JSGME first.
No disabling needed if TWoS is used from version 2.2.6 onwards.
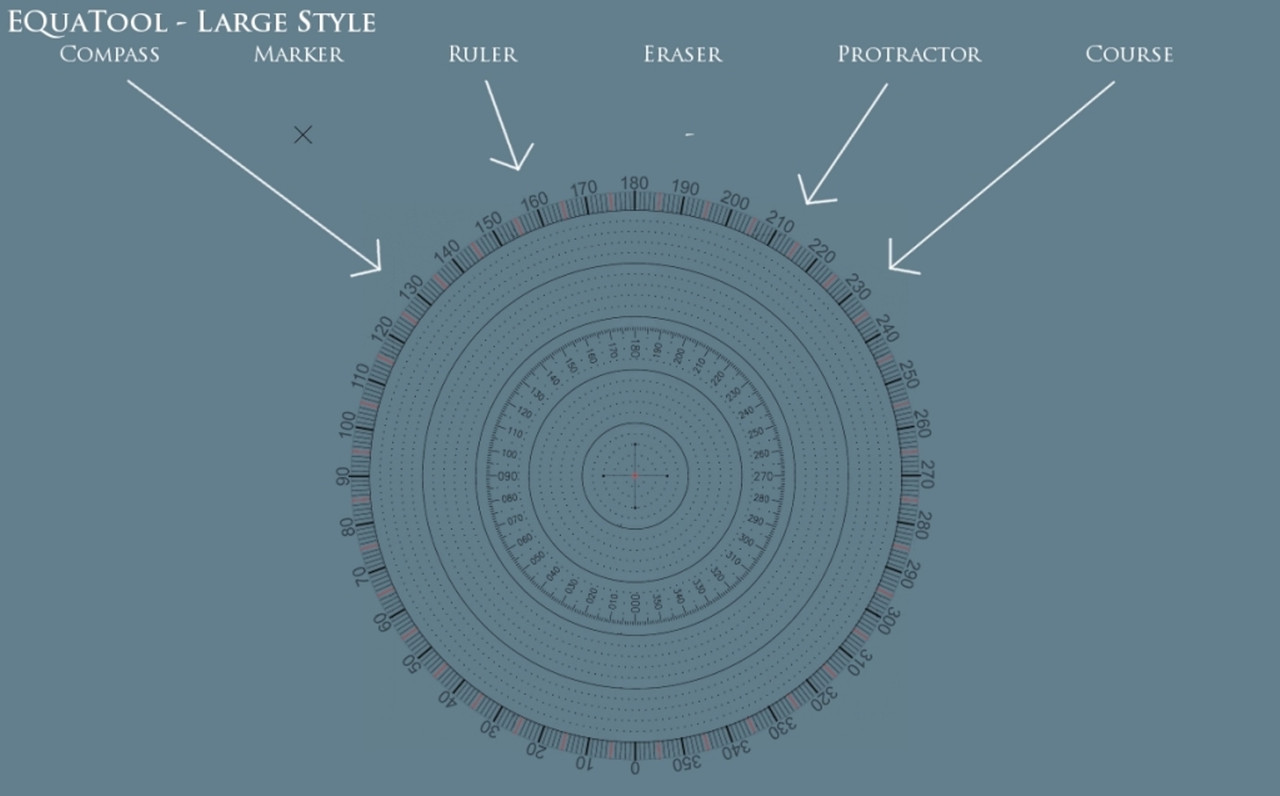
The only Tool you will need and essential for Real Navigation if you have not already got it is the multipurpose Equatool Large Style.
Download link.
Not needed if you are using one of the Mega Mods
EQuaTool Elite Quality Map Tools For SH5 v. 01.01 by AvM.
Picture 1 > Large Map Tool.
 For those Players using their own mod lists The Real Navigation Mod is included in both version of TDWs NewUI mods 7-5-0 and 7-4-2 downloads.
For correct installing see my SH5 Tutorial Posts 7 or 25.
Enabling the Real Navigation mod In JSGME adds Real Navigation to your game.
Picture 2 > The Navigation Officer has active icons relevant to Real Navigation.
 if you are using the 7-5-0 version when using your own mod list you will need to make a change in TDWs Generic File Patcher (GFP)..
Picture 3 > Enable Real nav menu.txt entries in the SH5.exe patch.
 So what are the differences that I am showing in my An Easy Way In to Real Navigation?
1. Timing > The time it takes to plot a position on the map.
So what are the differences that I am showing in my An Easy Way In to Real Navigation?
1. Timing > The time it takes to plot a position on the map.
The timings have been significantly reduced to give quicker map fixes.
2. Accuracy > The accuracy percentage is where the plot on the map shows to where the U-boat should be, but may not necessarily be.
The accuracy percentage has been significantly increased to show where the U-Boat is on the map at any time.
This allows you to press the Navigators Icon Report Fix (Lat & Long) via Dead Reckoning to update your Navigation Map position at any time with a high degree of accuracy.
The automated positional fixes are every 2 hours and your own map fixes can be shown by pressing the described icon at any time.
Dead Reckoning is shown by the letter D after the map fix.
Picture 4 > Dead Reckoning Icon.

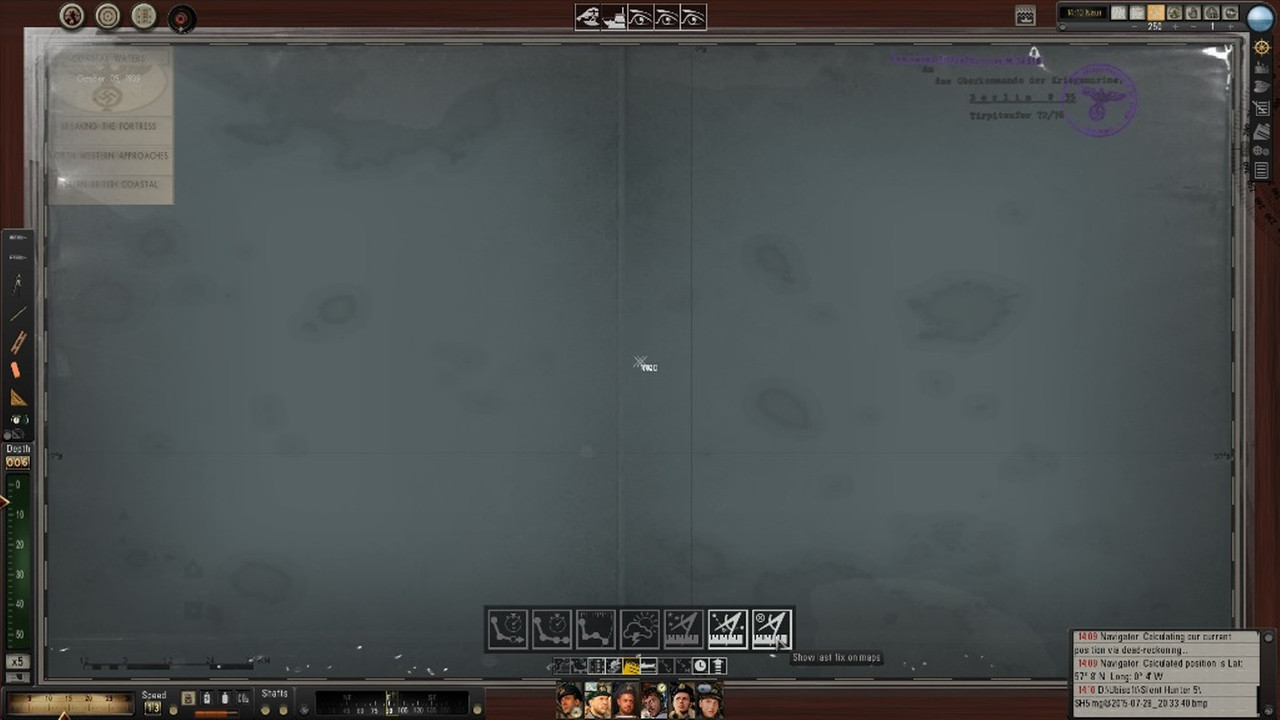
You also have the Navigators Icon Show last fix on maps which can also be pressed at any time.
This puts a circle around the last fix.
Very useful when using the TAI Map.
Picture 5 > Last Map Fix Icon.
 The TAI Map does not show any permanent fixes but places a temporary fix that lasts for a few seconds before disappearing.
To get around this you can use the Pause Key to lock the fix while you mark it.
The TAI Map does not show any permanent fixes but places a temporary fix that lasts for a few seconds before disappearing.
To get around this you can use the Pause Key to lock the fix while you mark it.
You still have the Automated Report Fix (Lat & Long) via Celestial Reckoning that updates your position at certain times of the day and night.
The 5 Celestial checks in the day occur every 4 hours and show the letter C after the map fix number:
1) Pre-dawn (Twilight)
2) Ante Meridian (AM) Sun.
3) Noon Sun
4) Post Meridian (PM) Sun
5) Post Sunset (Twilight)
These Automated map fixes depend on the prevailing weather conditions.
Picture 6 > Celestial Map Fix Icon.

When fully surfaced you can also get a Weather forecast at any time.
This will show in the Message Box.
Picture 7 > Weather Report Icon.
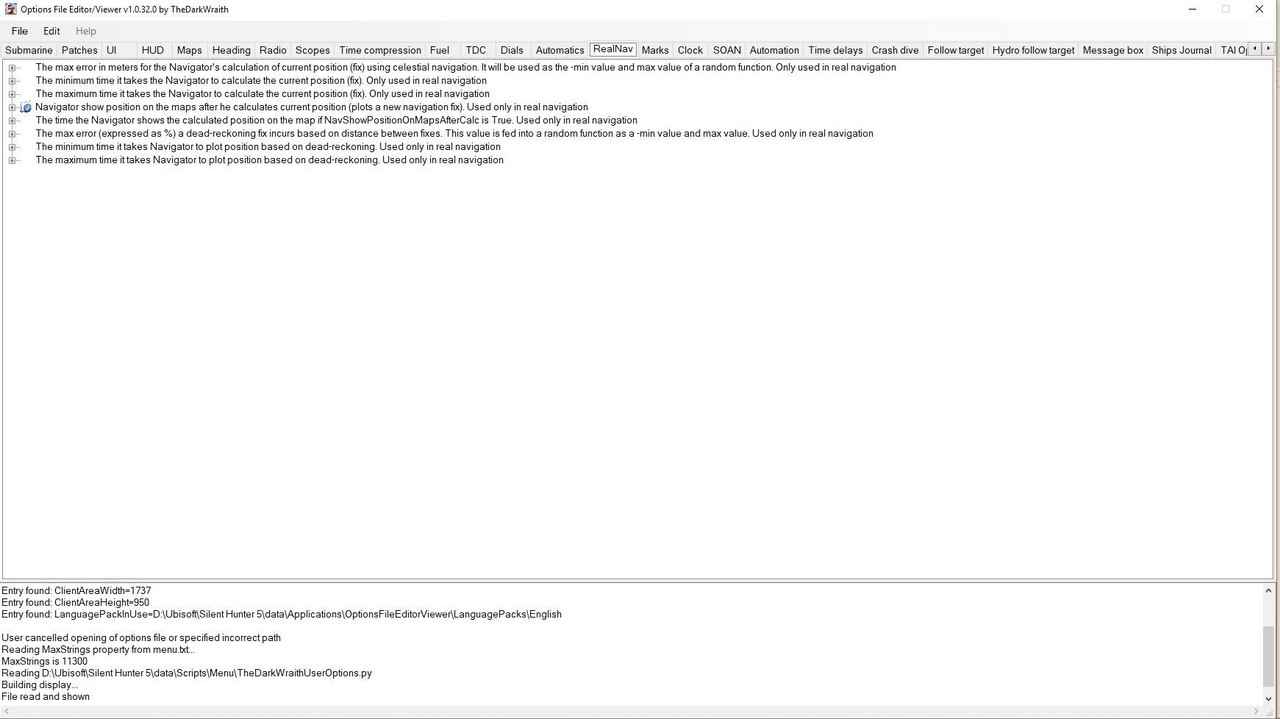
 TDWs Options File Editor Viewer (OFEV)
The changes needed for this Tutorial are made in the Real Navigation Tab by amending the patches showing there.
The Real Navigation patches picture shows there are a total of 8 patches.
Patch number 4 is automatically enabled Blue by default so you can see your boat on the map.
Picture 8 > Real Nav Tab Patches Menu.
 Each relevant patch change setting is illustrated with its own picture so you know exactly what to change.
To change a setting click on the first set of numbers.
This opens a box where you will see the existing setting.
Change the setting to the one showing in the picture.
Click on the Accept button.
Each patch is done the same way by replacing the existing data by those shown in the relevant picture.
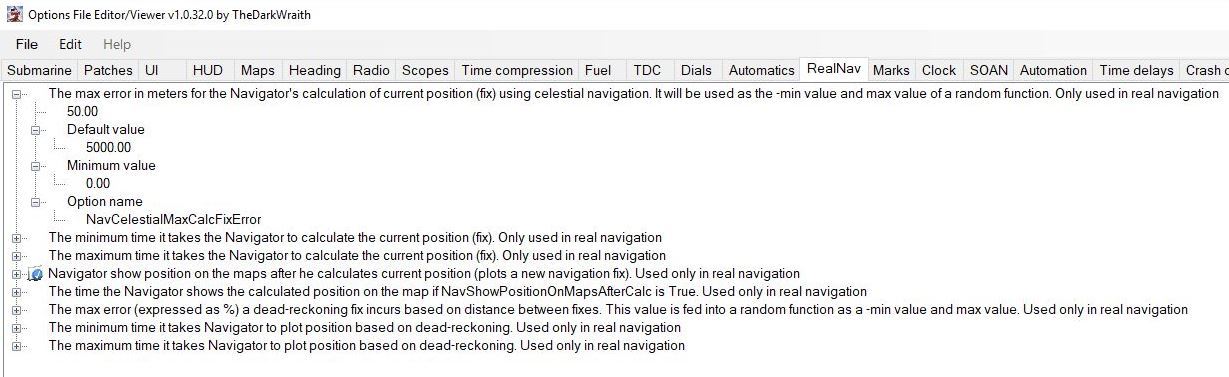
All calculations are randomly done so it is unlikely that the maximum will ever be used unless the circumstances due to injury to the Navigator if he is unfit at the time to make any calculations until he has recovered shown by his icon regaining its original color.
Picture 9 patch 1 > The maximum number of meters the Navigator can make could be up to 5,000 away from your actual position.
Set at > 50.00 Meters
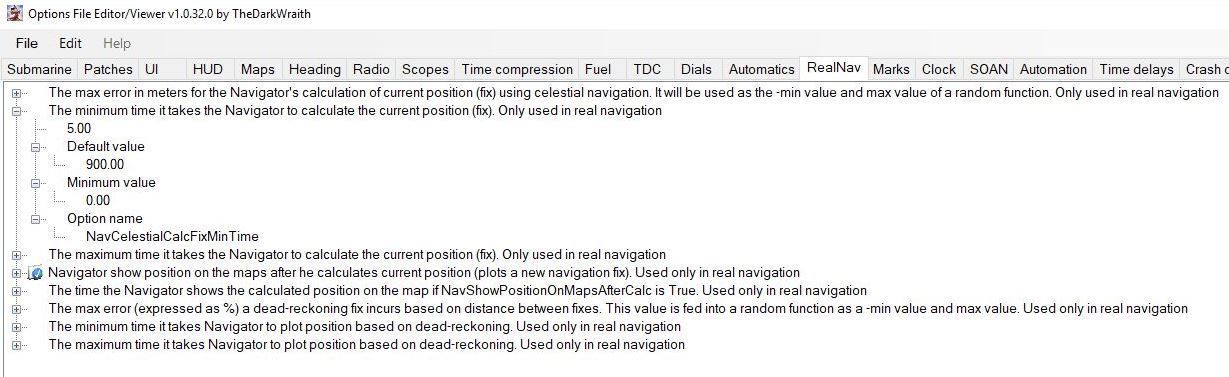
Picture 10 patch 2 > The minimum time it takes the Navigator to calculate the current position.
Float time set at > 5.00
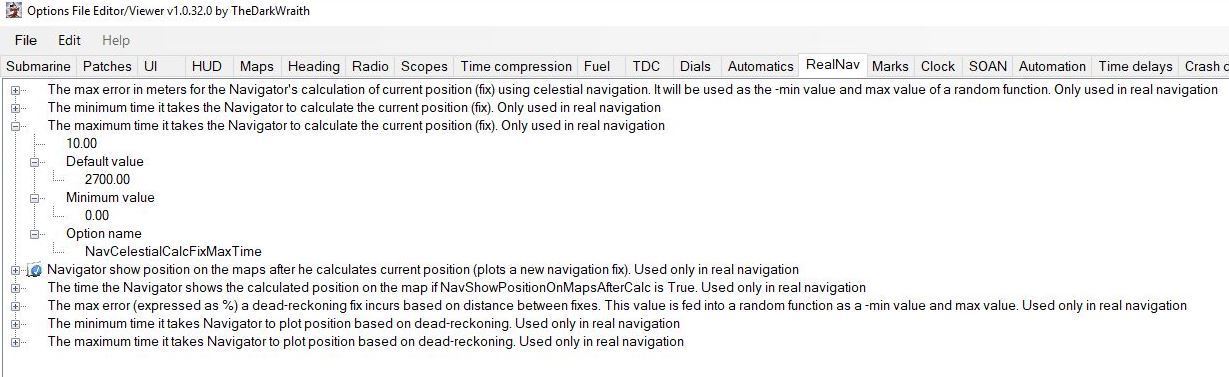
 Picture 11 patch 3 > The maximum time it takes the Navigator to calculate the current position.
Float time set at > 10.00
Picture 11 patch 3 > The maximum time it takes the Navigator to calculate the current position.
Float time set at > 10.00
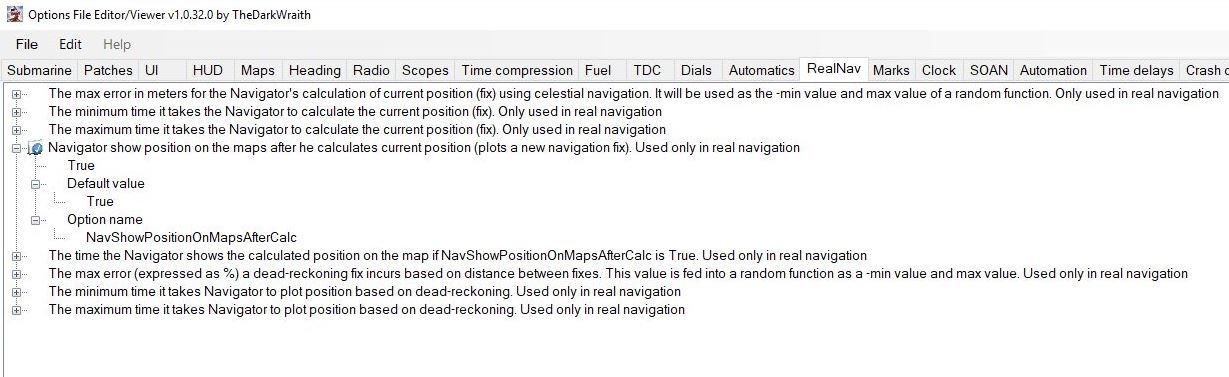
 Picture 12 patch 4 > The default enabled patch will automatically show your U-Boats position on the map after each calculation has been made or if you want to confirm your last position.
Disabling this patch will never show your position anywhere on the Maps.
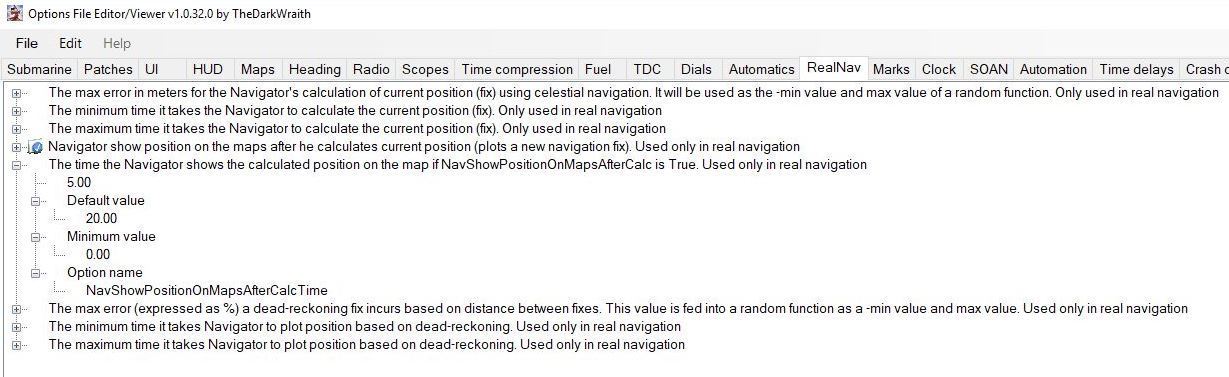
 Picture 13 patch 5 > The time it takes the Navigator to show the calculated position on the map.
Float time set at > 5.00
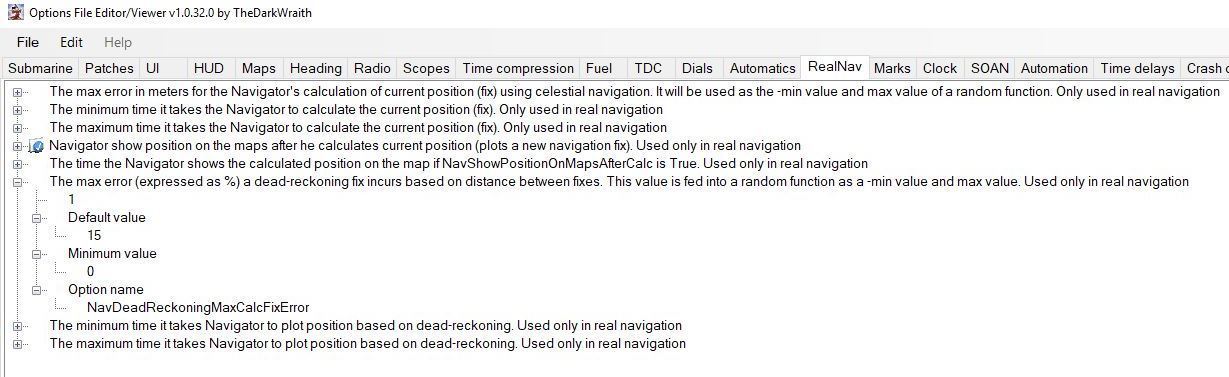
Picture 14 patch 6 > The maximum error shown as a % is used between the existing fix and where the new fix will be placed.
Set at 1%
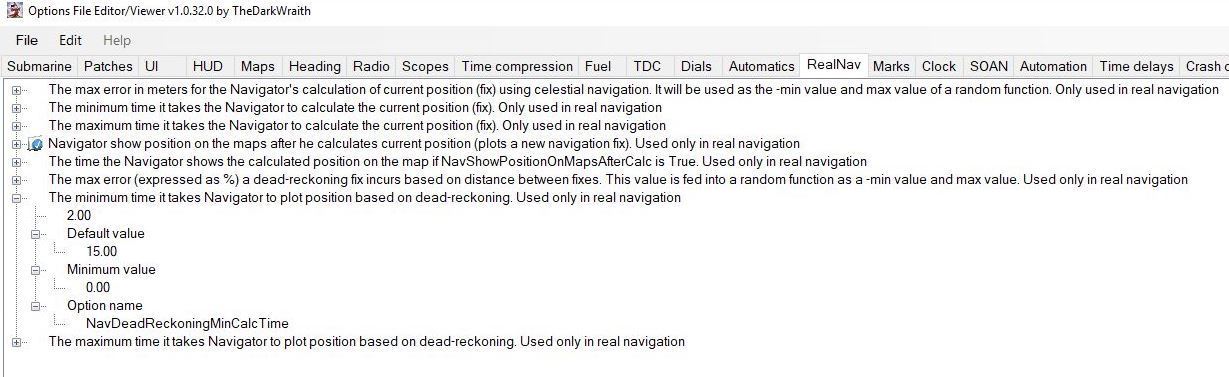
 Picture 15 patch 7 > The minimum time it takes Navigator to plot position bases on Dead reckoning.
Float time set at > 2
Picture 15 patch 7 > The minimum time it takes Navigator to plot position bases on Dead reckoning.
Float time set at > 2
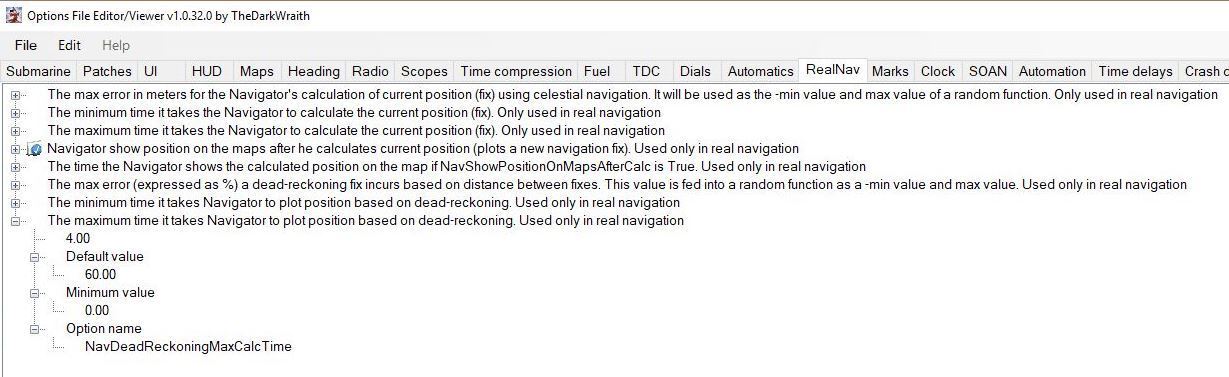
 Picture 16 patch 8 > The maximum time it takes Navigator to plot position bases on Dead reckoning.
Float time set at > 4
Picture 16 patch 8 > The maximum time it takes Navigator to plot position bases on Dead reckoning.
Float time set at > 4
 When you have finished making your changes in the OFEV:
Go to > Save
Select > File
Exit.
Enable the mods in JSGME if using your own mod list.
When your game loads you automatically get map fix number 1 which is a Celestial fix (C).
This is an accurate fix of where the U-boat is in Nautical Time.
This fix cannot be deleted.
Picture 17 > Default Map Fix .
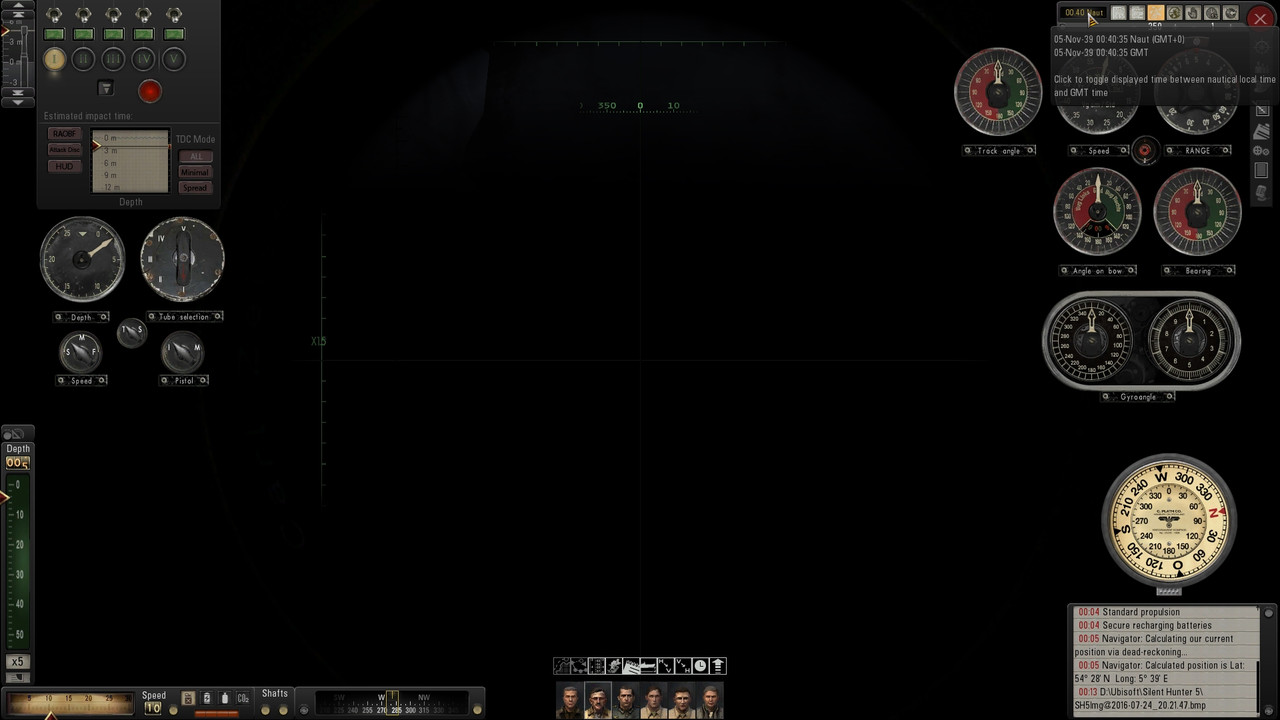
Picture 18 > You now need to set up the Real Navigation script time which is based on either Nautical or G.M.T. time as showing on the Time Clock.
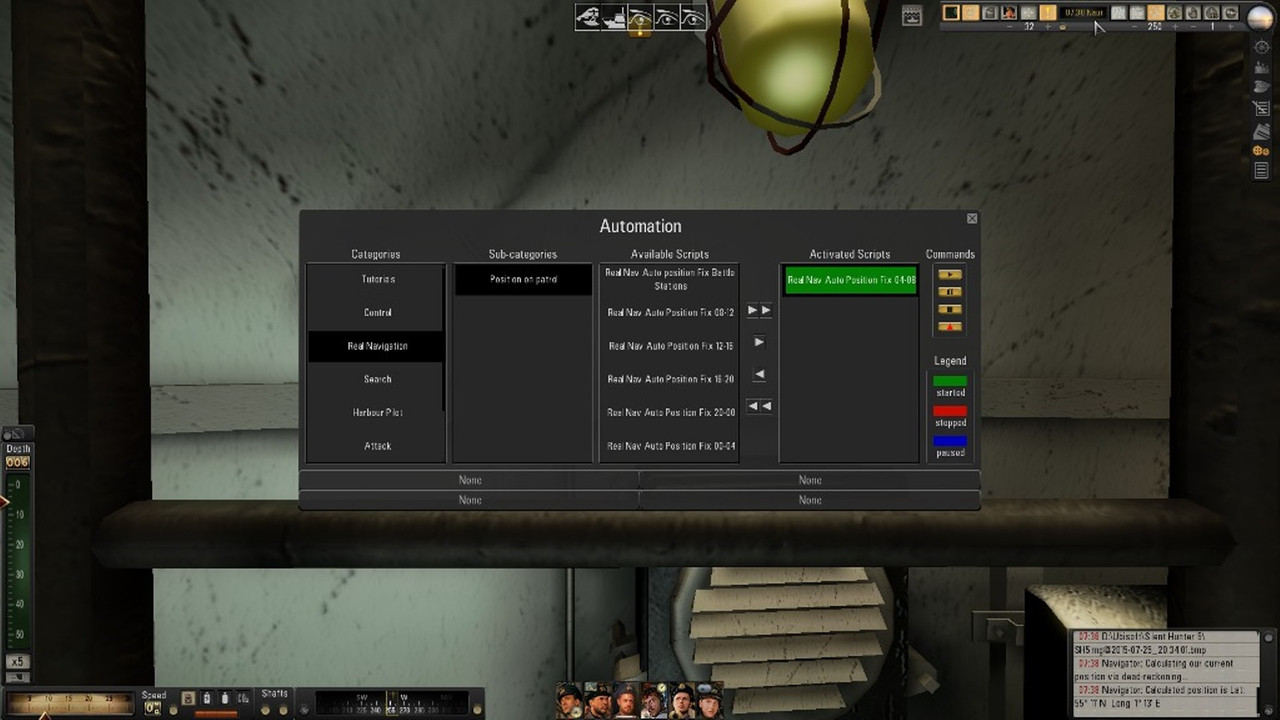
 Picture 19 > Click on the Automation Icon (2 wheels)
Click on Real Navigation from Categories.
Click on Position on Patrol.
In the Available Scripts column there are 6 Time Positions each lasting 4 hours = 24 hours.
You will only see 5 of them at any one time so you need to scroll down if you need to use the 6th one.
Click on the Script that is within the Nautical Time Clock.
Press the Right Arrow Button (Add) showing.
This will now show in Red in Activated Scripts.
Press the Red Activated Scripts and you will now see it has a black band round it.
Go to Commands and press the First Button > (Start)
You will notice that the Automated Scripts has turned green and has now been activated.
You do not need to make any changes during this gaming session.
Press the Automation Icon or X to Exit Automation.
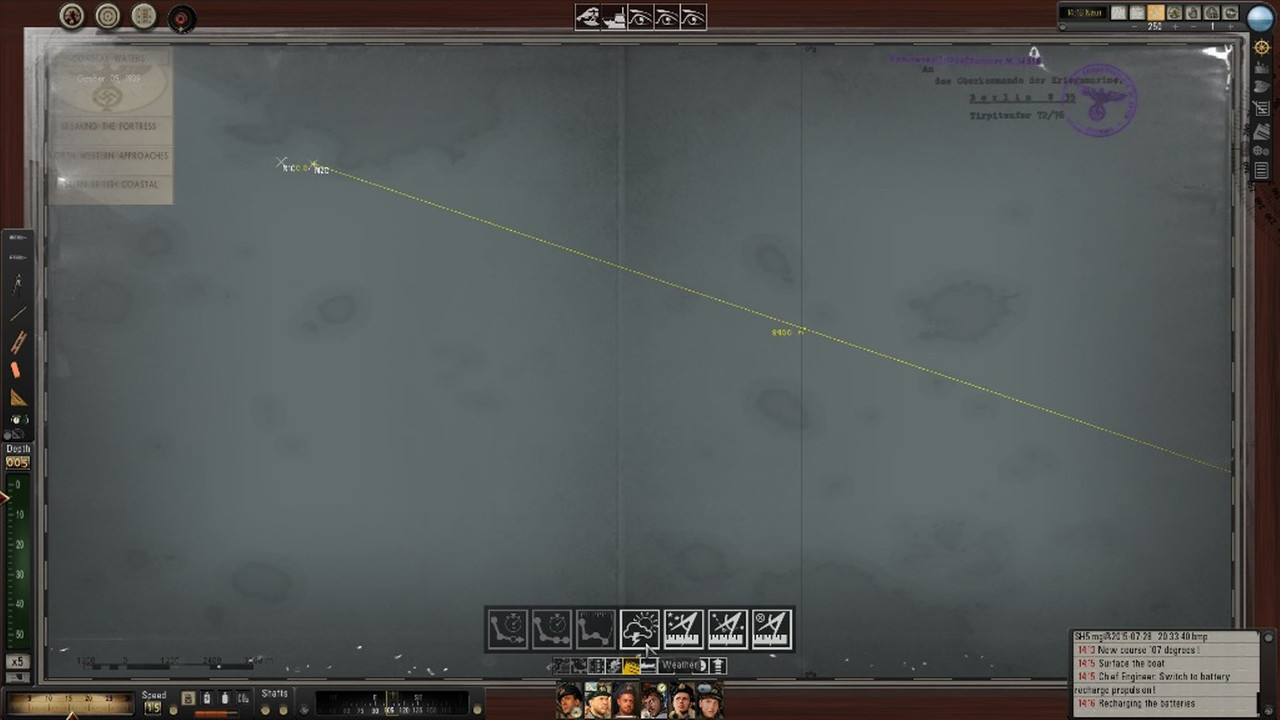
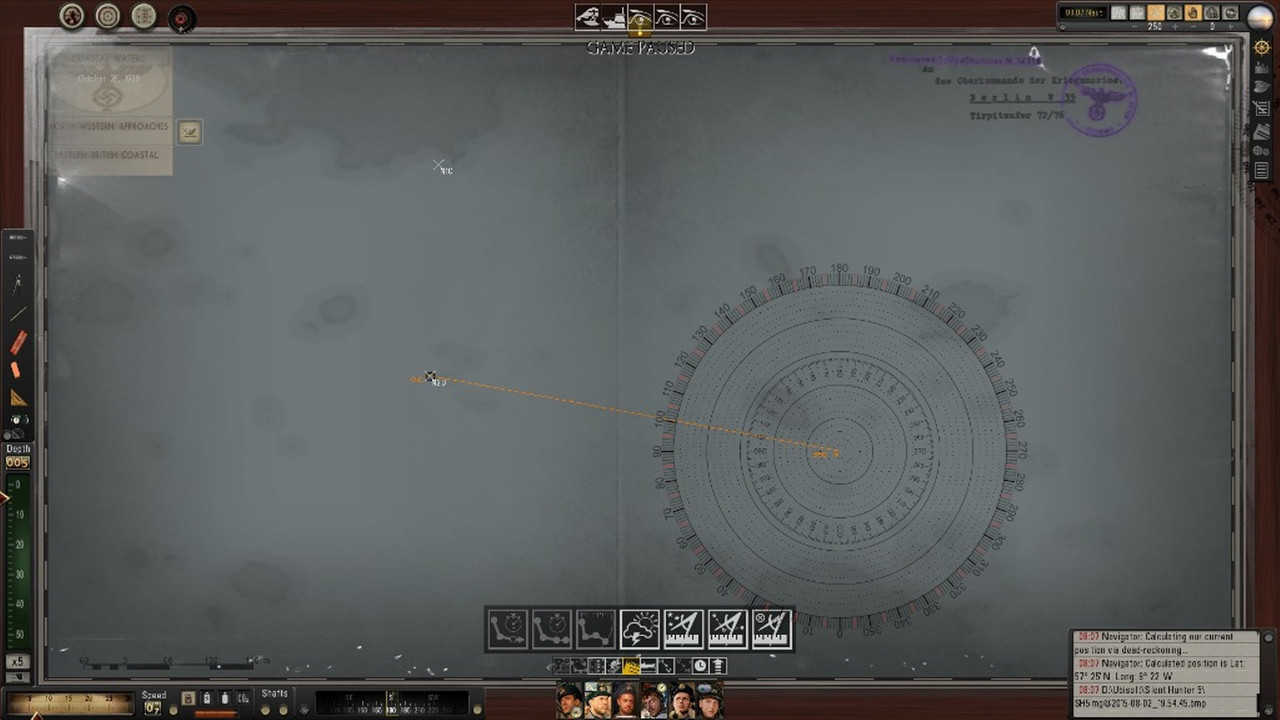
 Picture 20 > The Navigator will now make a new calculation on the Navigation Map as map fix number 2.
The distance between Map fix 1 and 2 if any is the distance you have travelled from Map fix 1.
You can delete Map fix 2 but not Map fix 1.
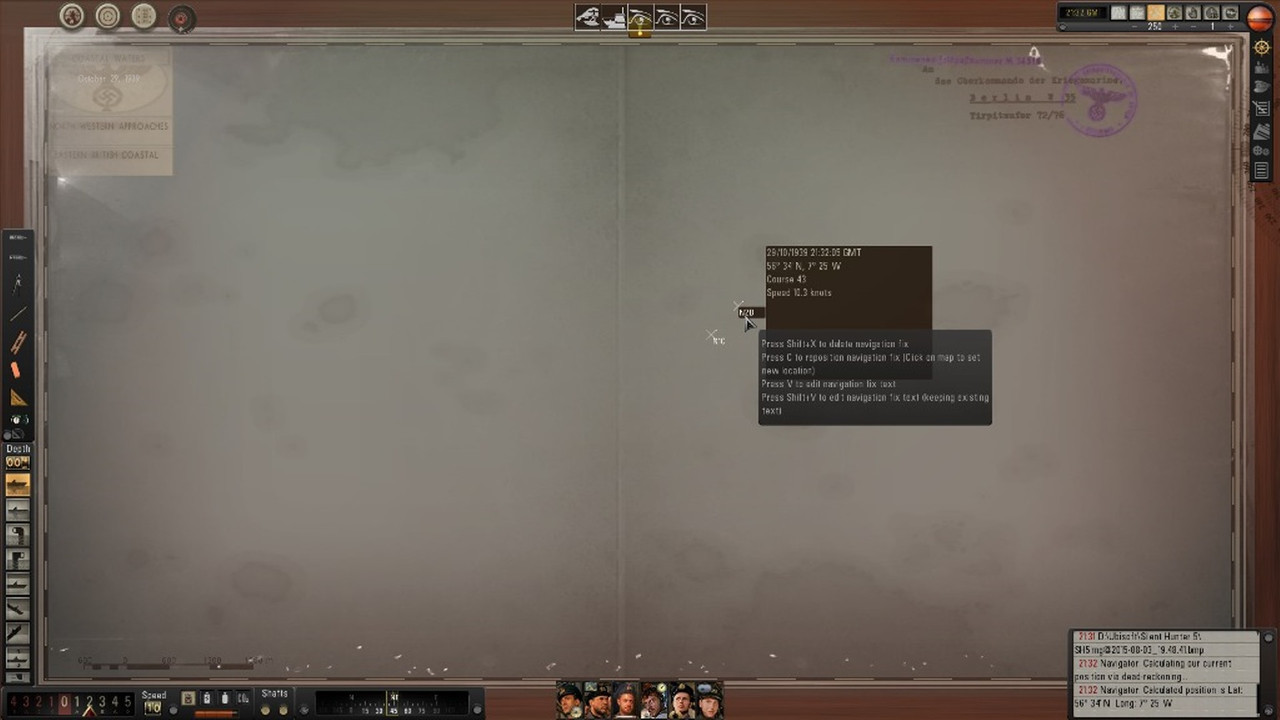
 Picture 21 > All Map plot fixes have details that can be seen by hovering the mouse over the map fix.
 To set a precise course always get a Positional Fix from the Navigator first unless you are in the Bunker.
Use your mouse wheel to expand the map over the fix you want to plot the course from.
Click on the Ruler Tool
Put the Ruler on the centre of the X.
Left click to lock it.
You can now draw a line out as far as you want.
Picture 22 > Set your course from the bearing the tool is showing.
 You can use the arrow keys to hold and draw out the Rulers Course Line.
Holding the left mouse button down you can move the Rulers Course Line from one map fix to another.
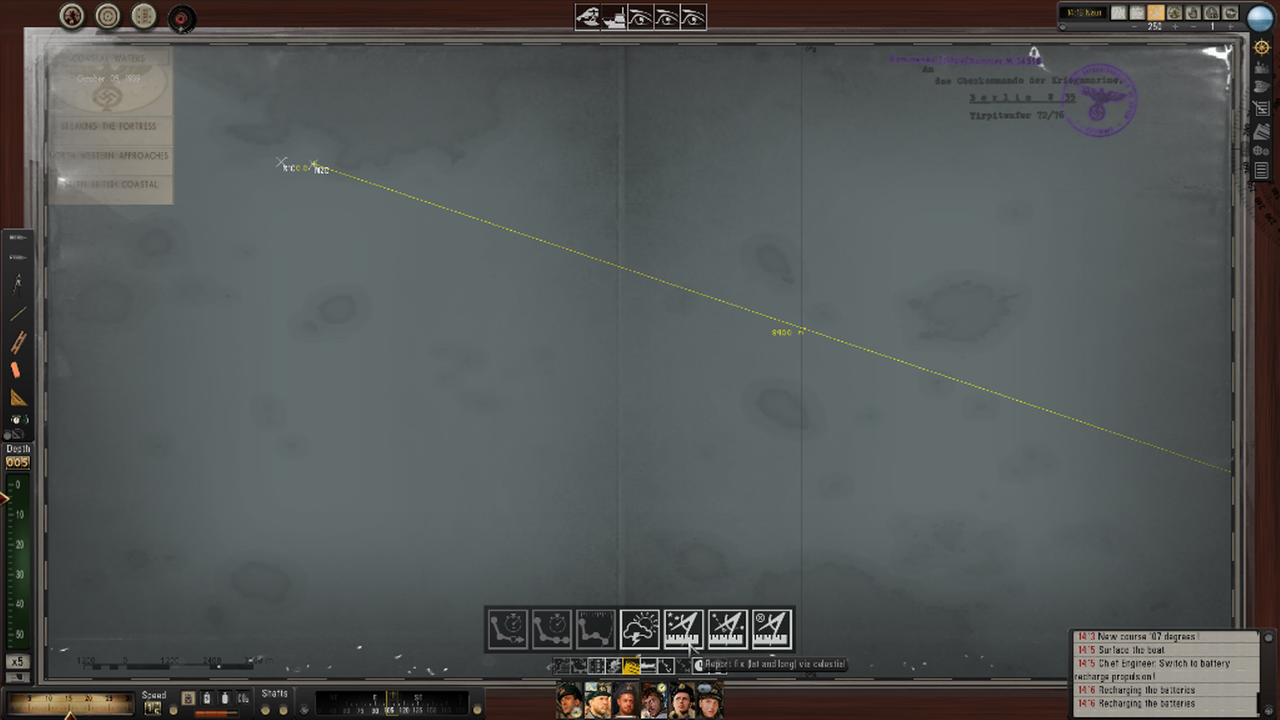
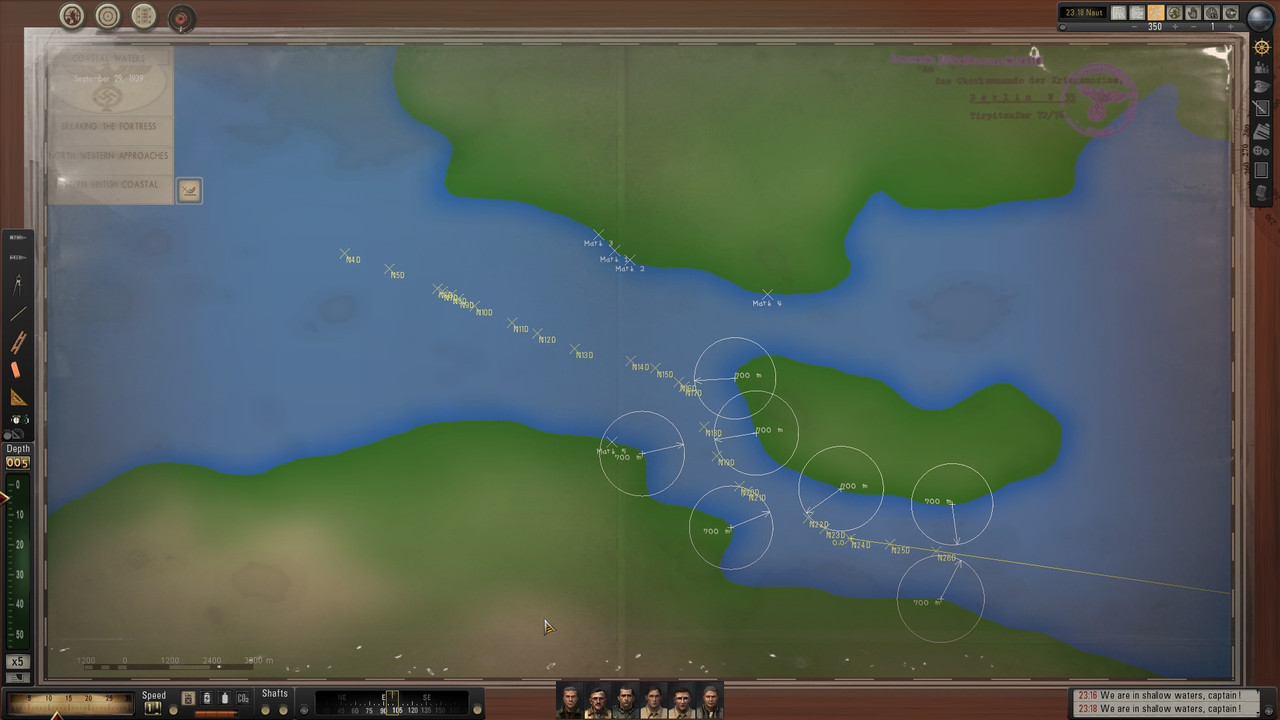
Picture 23 > Planning a long course with the Ruler.
The line of white X marks shows the different time fixes as the boat follows its course.
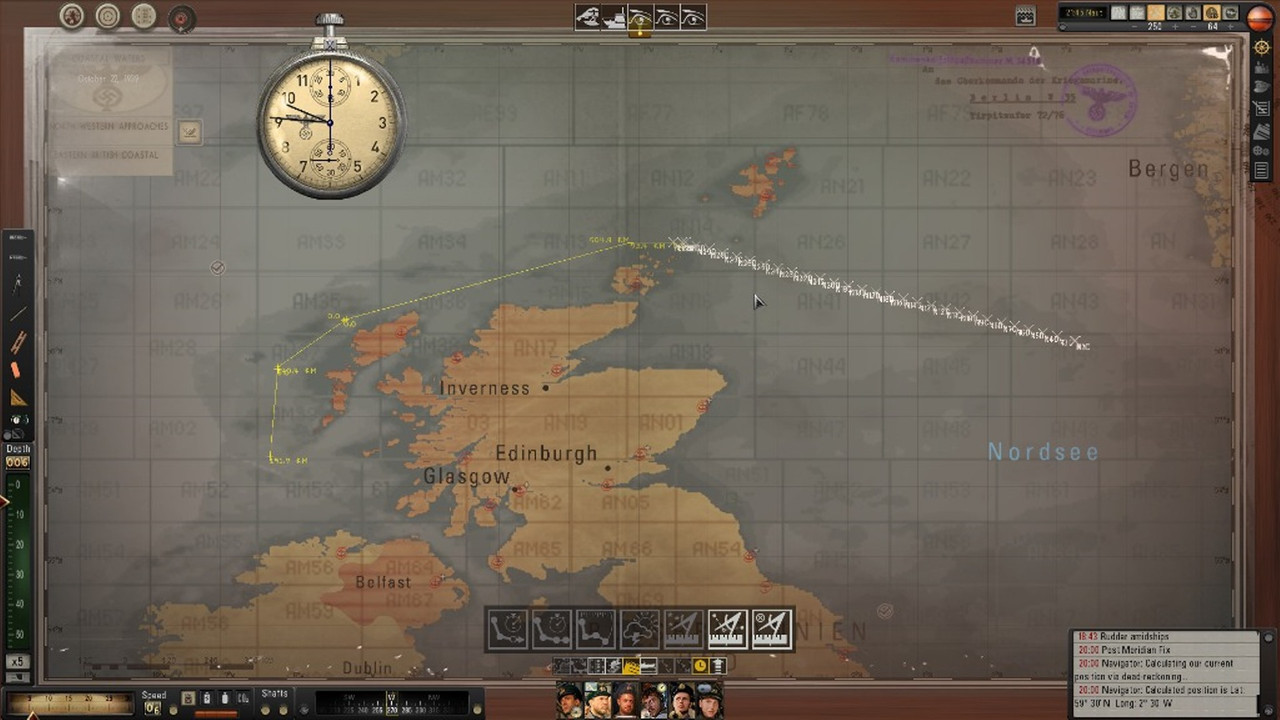 Picture 24 > Reaching the patrol area.
Navigating in Shallow Waters and Tight Situations
Pictures 25 > Setting the first course for the lead approach.
 Picture 26 > Plotting the shore distances with the Compass so the boat does not run aground..
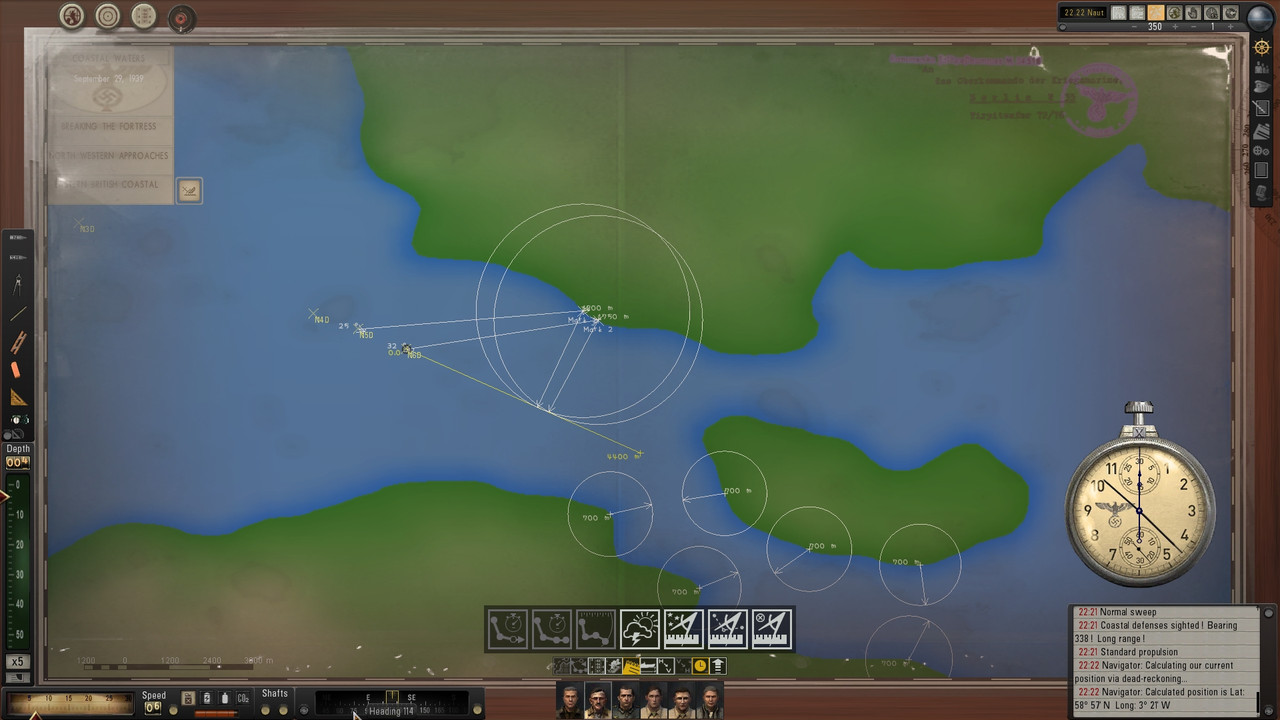 Picture 27 > Active Coastal Battery on the Port side.
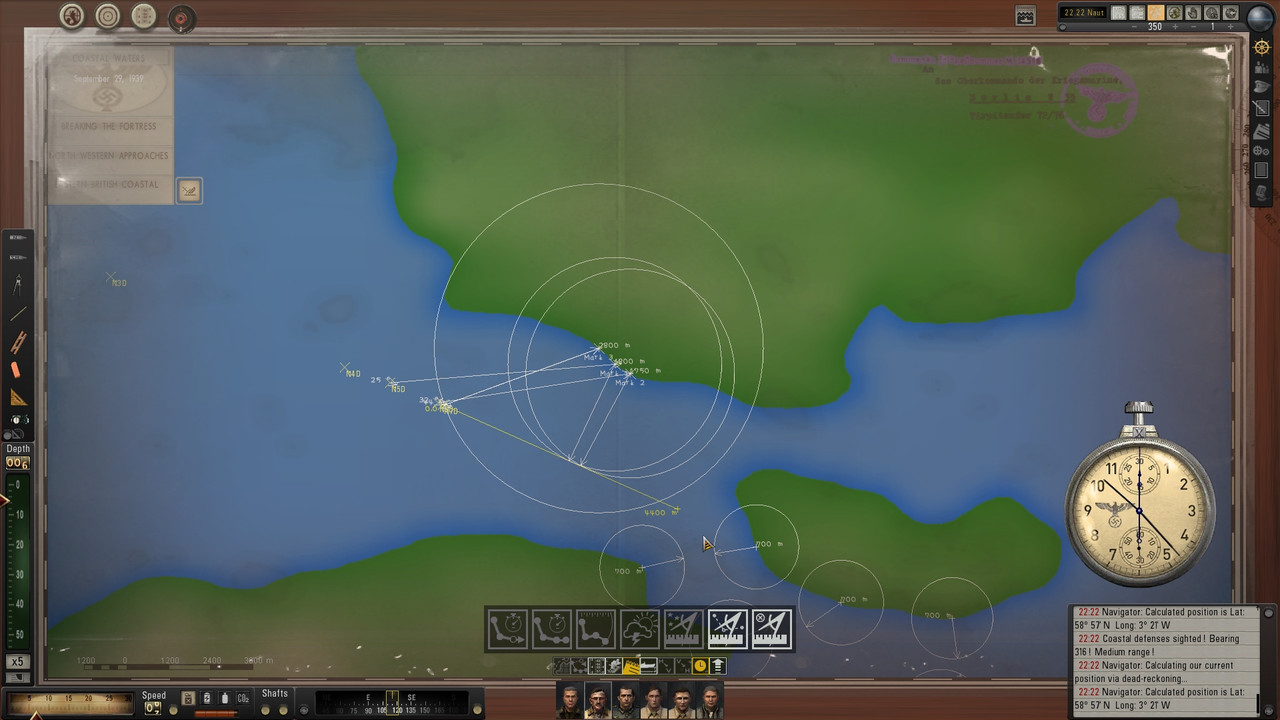 Picture 28 > Active Coastal Battery on the Starboard side.
 Picture 29 > Mine off the Port Bow, manually change course.
The UZO will give the number of degrees away from 0 degrees so you know how much Rudder to give.
You now have the option to use the Navigators Return to course icon to pick up your original course if you want to or plot an amende course..
 Picture 30 > Shows the plotted course between the two islands and new course ordered.
 Check out my SH5 signature for related tutorials.
Last edited by THEBERBSTER; 07-23-18 at 03:57 PM.
Reason: Text enlarged
|