 Installing TDW's Generic File Patcher Part 1
Last updated 14th November 2019
This Tutorial is for installing TDW's Generic File Patcher (GFP) anywhere on your system as a stand alone application.
If a complete uninstall is done the stand alone GFP application is unaffected by this.
When the re-install is done just reconnect the GFP Patches to the SH5 Folder again.
DO NOT INSTALL THIS STAND ALONE VERSION FOR:
The Wolves of Steel (TWoS)
Sobers Mega Mod
Link to the (GFP).
http://www.subsim.com/radioroom/showthread.php?t=181433
Do Not put the GFP in JSGME or in any Silent Hunter 5 folder.
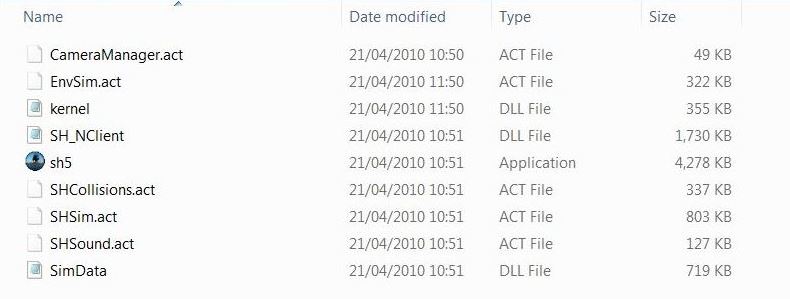
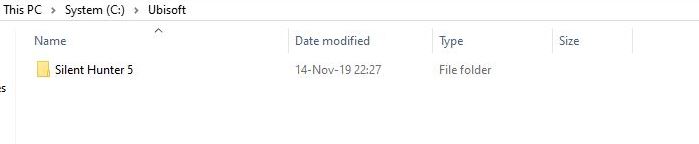
It is recommended that you backup the 9 original files below that are in your Silent Hunter 5 Main Folder by Copying and Pasting them to a New Folder in the Ubisoft folder. (Picture 2)
Likely looking Main Folder Path. C:\Ubisoft\Silent Hunter 5
1. Cameramanager.act
2. EnvSim.act
3. SimData.dll
4. Kernel.dll
5. Sh5.exe
6. SHCollisions.act
7. SHSim.act
8. SHSound.act
9. SH_NClient.dll
Picture 1 > Shows original files when backed up in a folder.
Picture 2 > Ubisoft folder behind the main game folder.
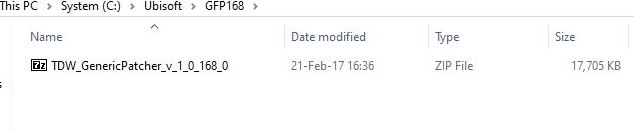
Picture 3 > GFP168 folder.
 Picture 4 >Download the (GFP) in to the GFP168 Folder.
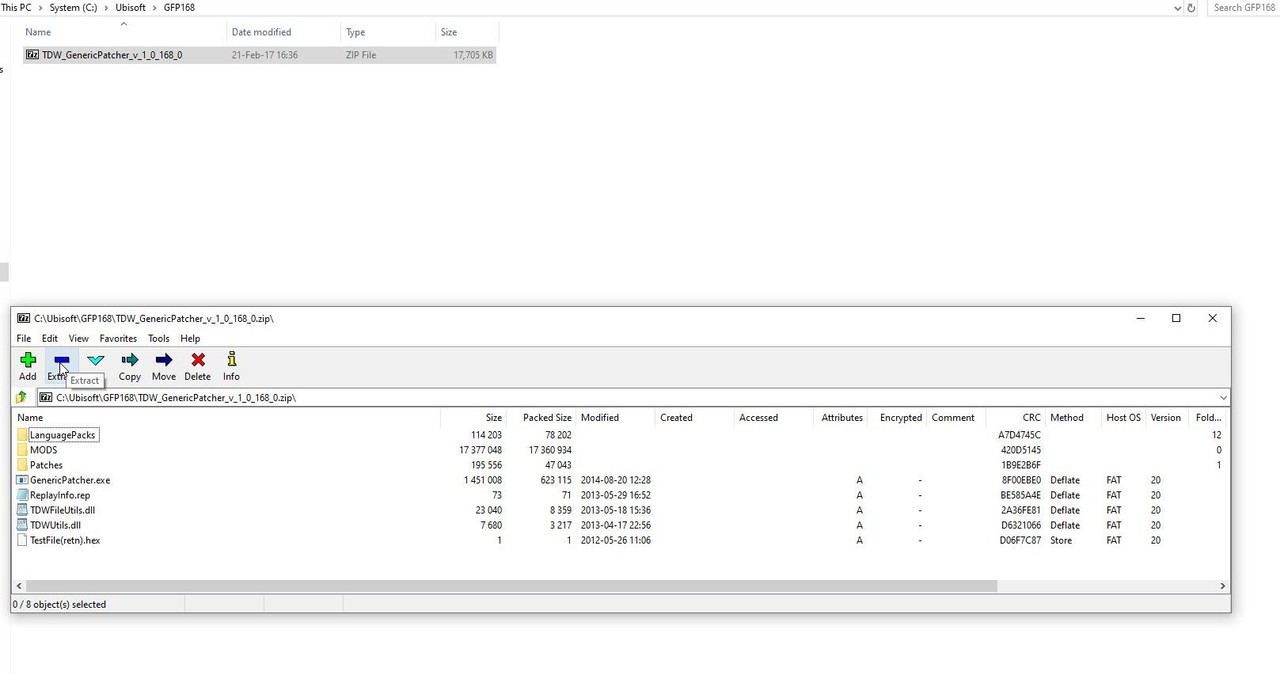
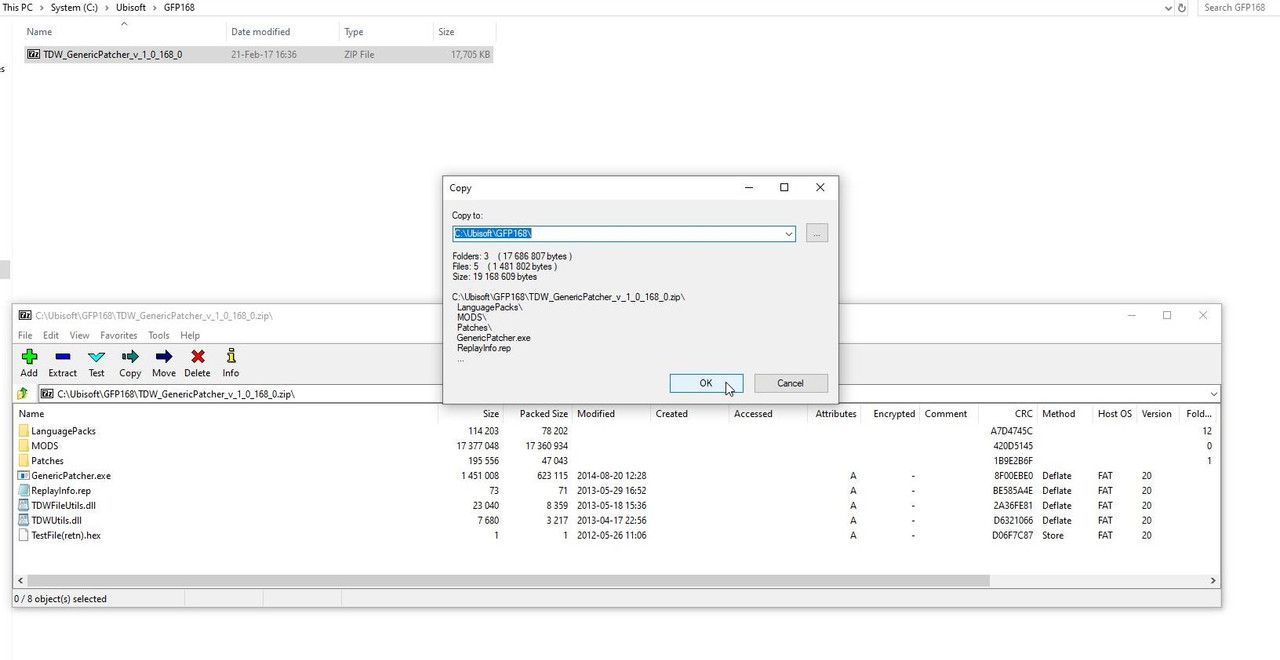
Picture 5 > Open the Zip File and click on the Extract Tab.
Picture 6 > Click Ok to confirm.
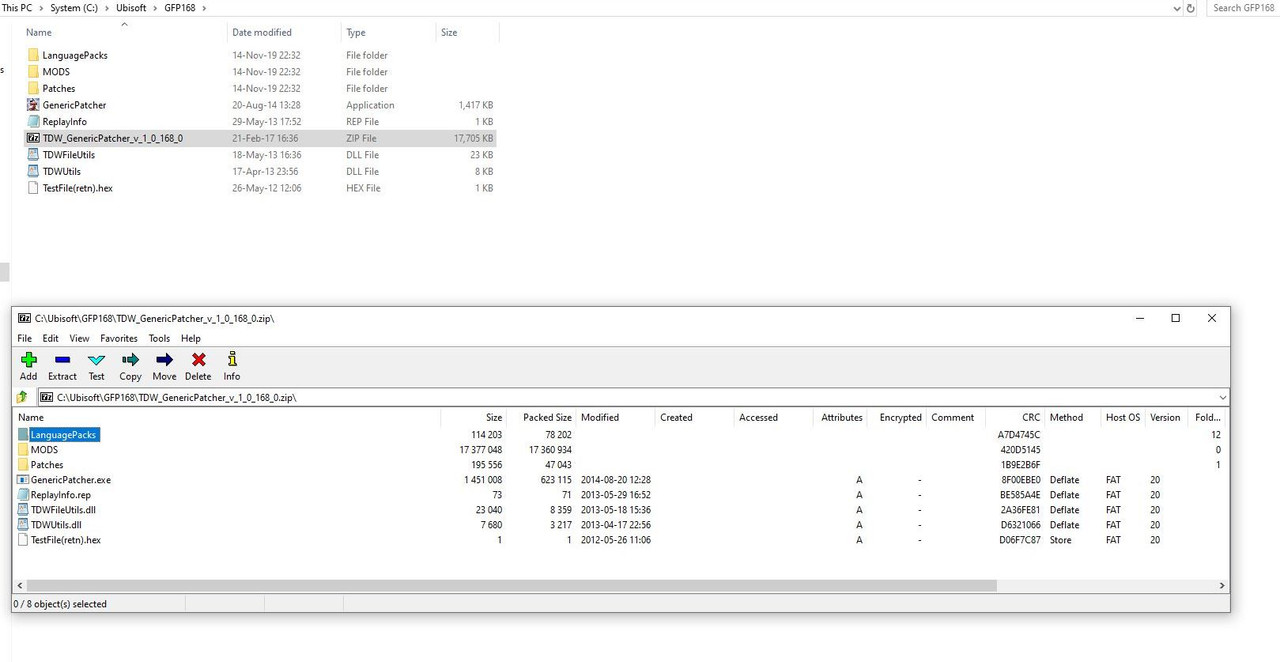
Picture 7 > Shows the 8 files extracted to the GFP168 folder.
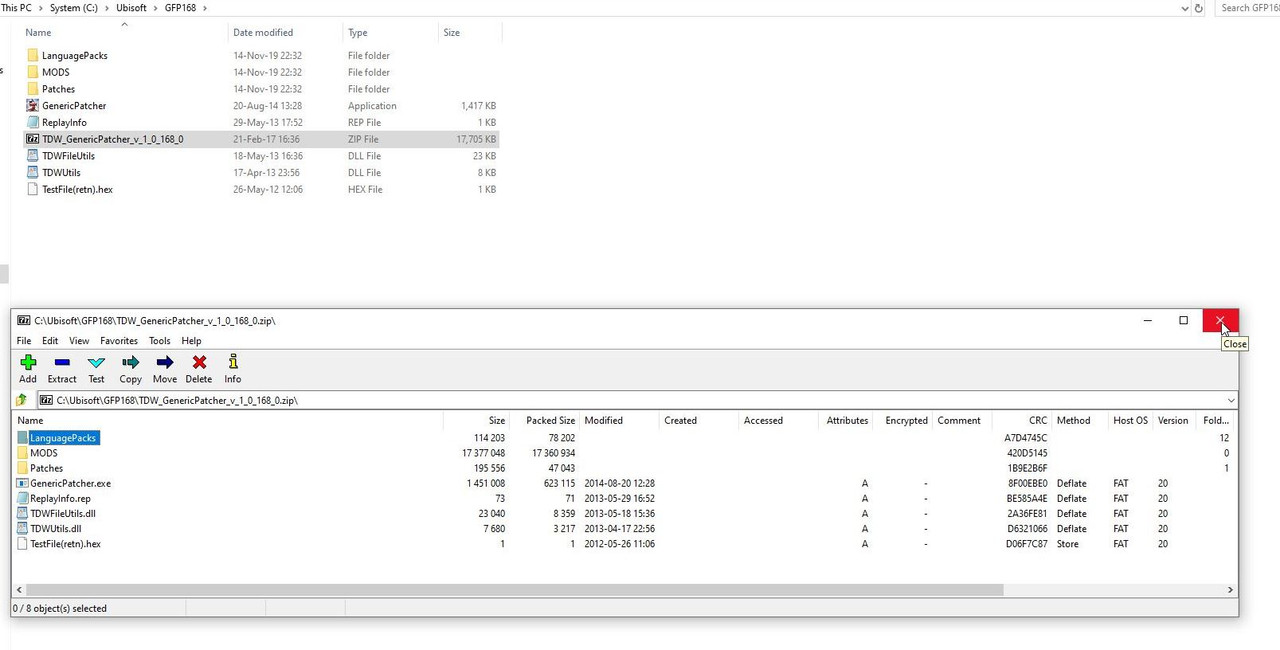
Picture 8 > X to exit.
Picture 9 > Start the application by double clicking on the Mickey Mouse icon.

Picture 10 > Select your language and double click on it. Selecting the Language takes you to this next screen.
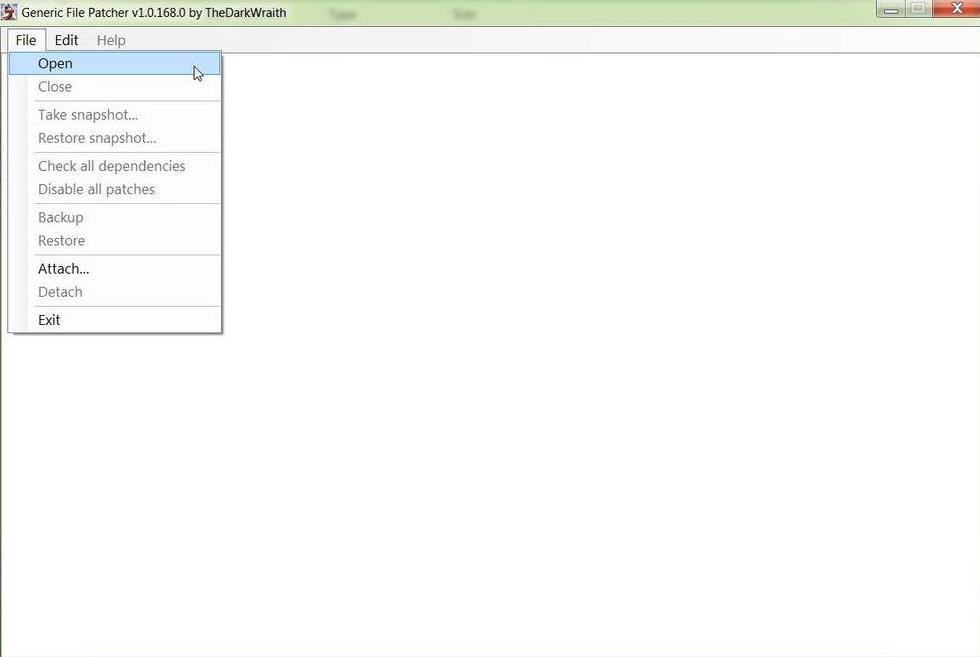
 Picture 11 > Opens to this screen.
Click on File.
Picture 11 > Opens to this screen.
Click on File.

Picture 12 > Open.
Picture 13 > Select the file path to your Silent Hunter 5 game folder.
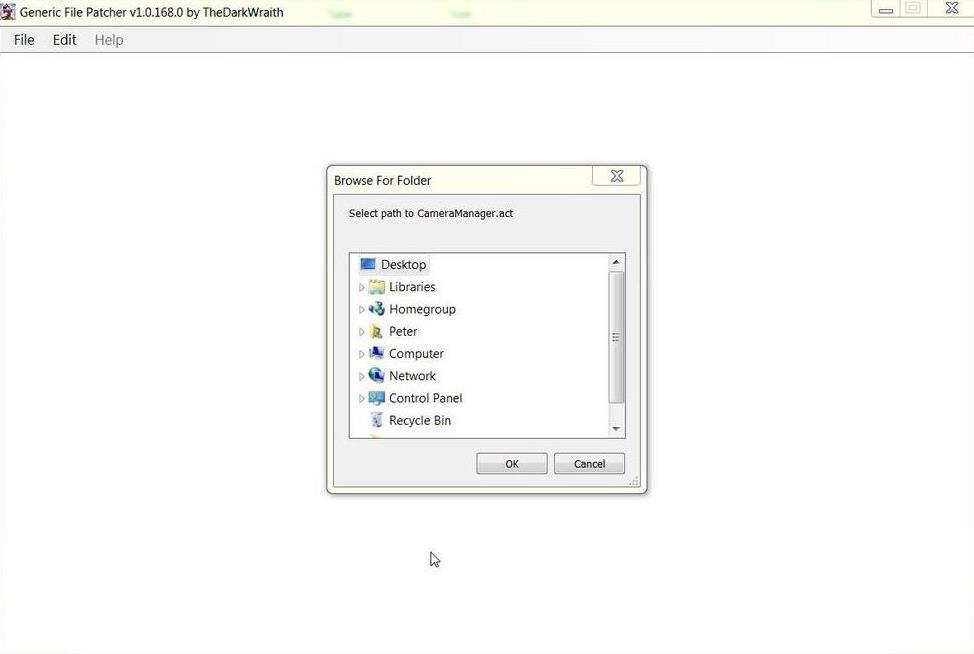
Select Path to CameraManager.act. < First Patch.
Computer.
Drive C:
Ubisoft folder
Picture 14 > Silent Hunter 5 (Highlight folder only DO NOT OPEN).

Click on OK.
Repeat the instructions from 21 to 30 for each of the remaining 8 Patches as they appear.
Select Path to EnvSim.act
Select the Path to kernel.dll.
Select Path to SH5.exe
Select Path to SHCollisions.act
Select Path to SHSim.act
Select Path to SHSound.act
Select Path to SH_NClient.dll
Set Path to SimData.dll
There are 43 actions to install all Patches you should then see all 9 Patcher Files.
Picture 15 > Shows all 9 patches correctly installed.

If you do not see 9 patches then you have not installed to the right path.
Follow the instructions in Picture 16,
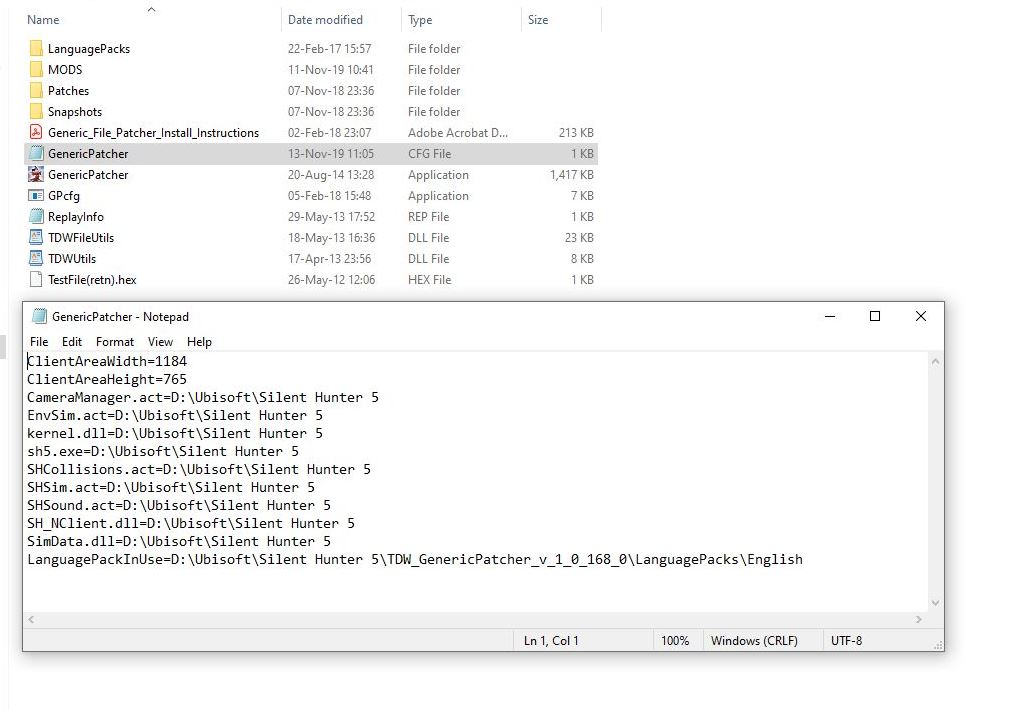
Picture 16 > Open the Generic Patcher CFG file.
Look for the patch with the wrong path and change it manually to the same path as the others.
Exit and Save.
Picture 17 > Go to File and open.
Picture 18 > Shows Patches are installed disabled.
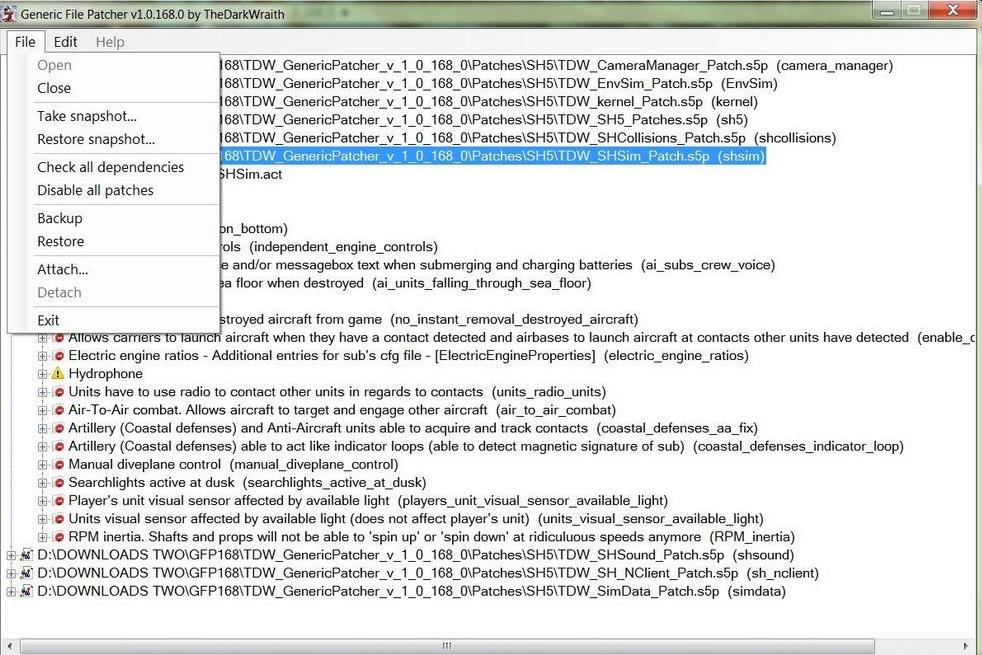
Patches can be opened by Double clicking with your mouse.
Closes the (GFP) and completes the installation.
Other Generic File Patcher Posts maybe of interest
Post #3 How To Make Changes In TDW's Generic File Patcher And Run Administrator
Post #39 TDW Generic File Patcher Replacing My Old One With A New One!
Post #41 TDW's Generic File Patcher Changing The Map Colours
Post #56 TDW’s Generic File Patcher Illustrated Settings You Can Use in Yours
Post #62 TDW’s Generic File Patcher > Taking A Snapshot > Disabling Patches > Restoring A Snapshot
Courtesy acknowledgement to TheDarkWraith
Last edited by THEBERBSTER; 11-14-19 at 08:14 PM.
Reason: Replaced missing pictures
|