 Auto TDC Targeting Without Using The 3 Circles
Last updated 27th April 2018
Auto TDC Targeting Without Using The 3 Circles
If you already have a Career you do not need to start a new one.
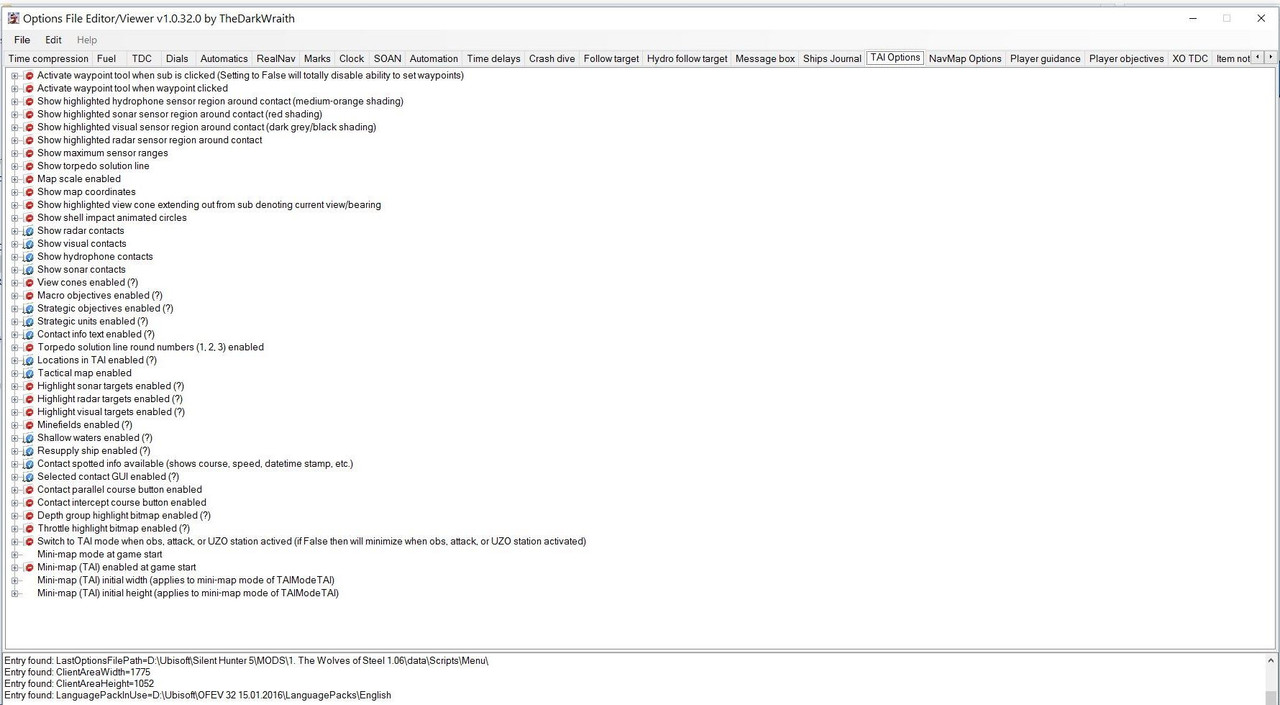
I recommend using TDWs Options File Editor Viewer to setup your TAI and Navigation Map patches first.
This will save you having to make unnecessary changes every time you load a saved game.
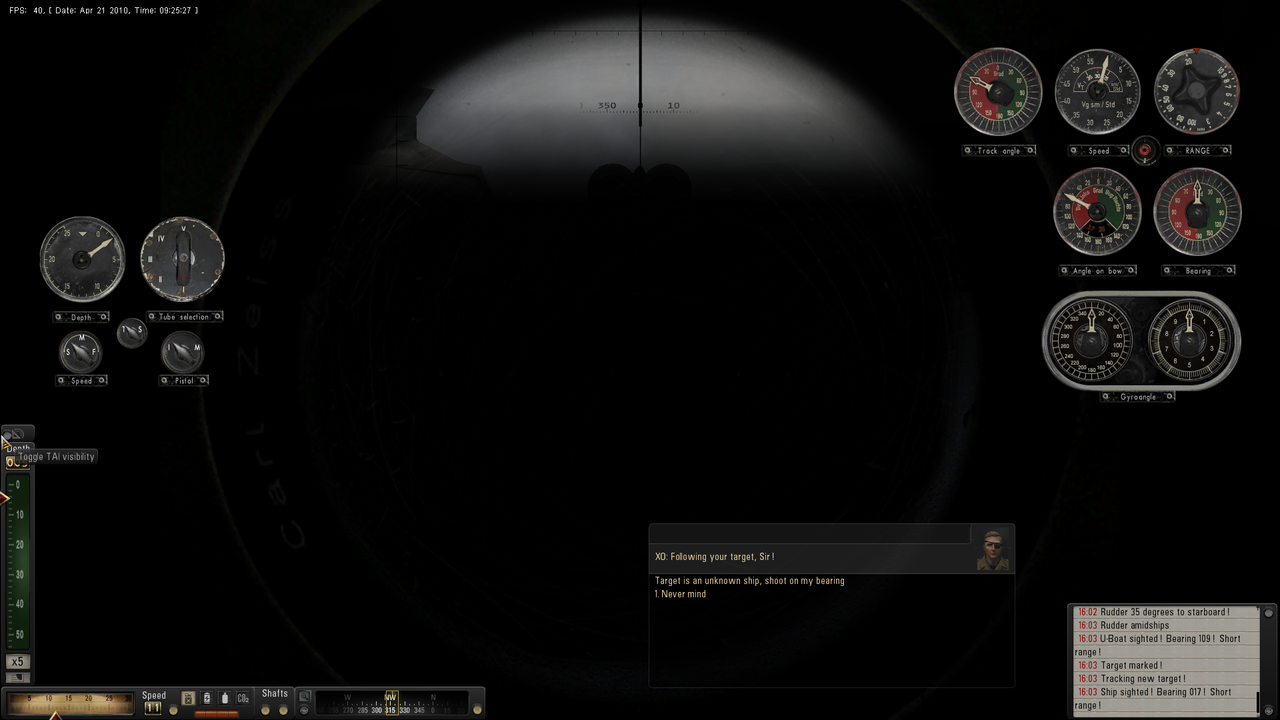
Picture 1 > TAI Options in TDWs Options File Editor Viewer.
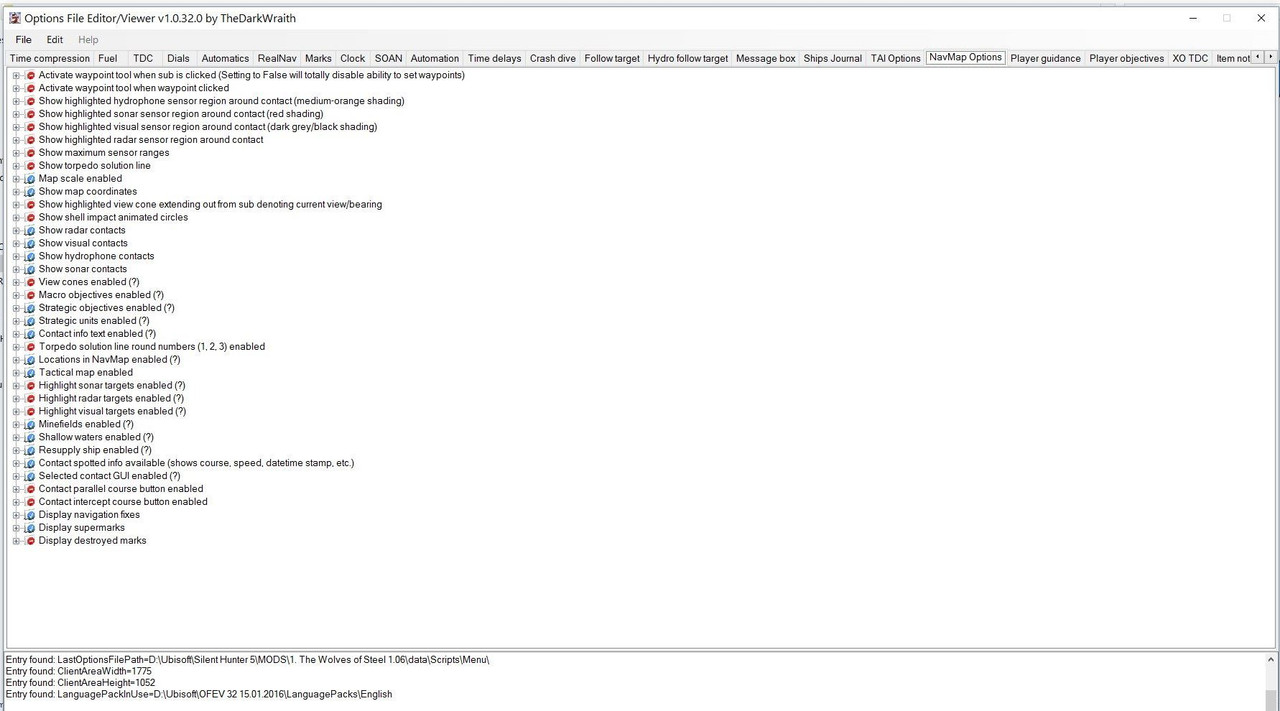
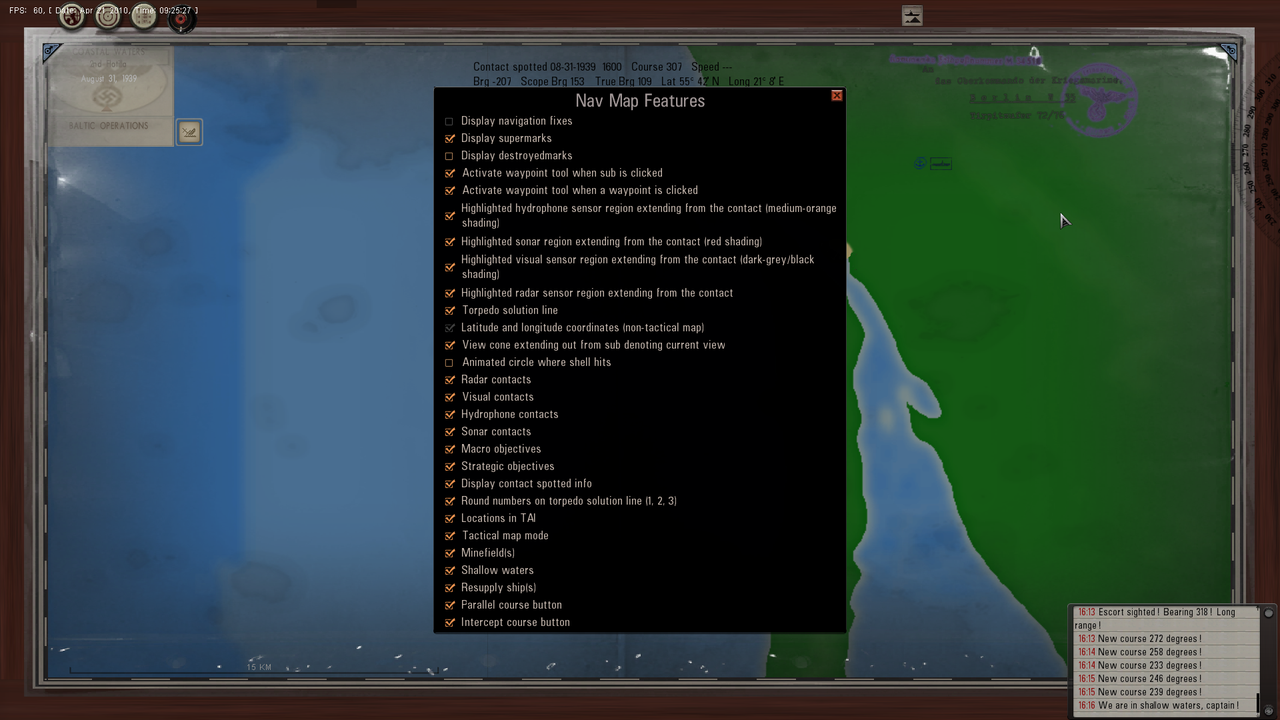
Picture 2 > NAV Options in TDWs Options File Editor Viewer.
These tools can be further customized depending on your in game circumstances in both the TAI and Navigation Maps but these settings are only good for the current gaming session.
Picture 3 > Got to the XO Tab and make sure the Manual Targeting Enforced patch is disabled (False = Red)
The big advantage with Auto TDC without the 3 Circles in the method I will show you is the extended range you can shoot at.
Auto TDC can be recommended using The Wolves Of Steel Mega Mod as I am showing in this tutorial.
You will soon see how easy it is to use this system and be able to use it in your own game play.

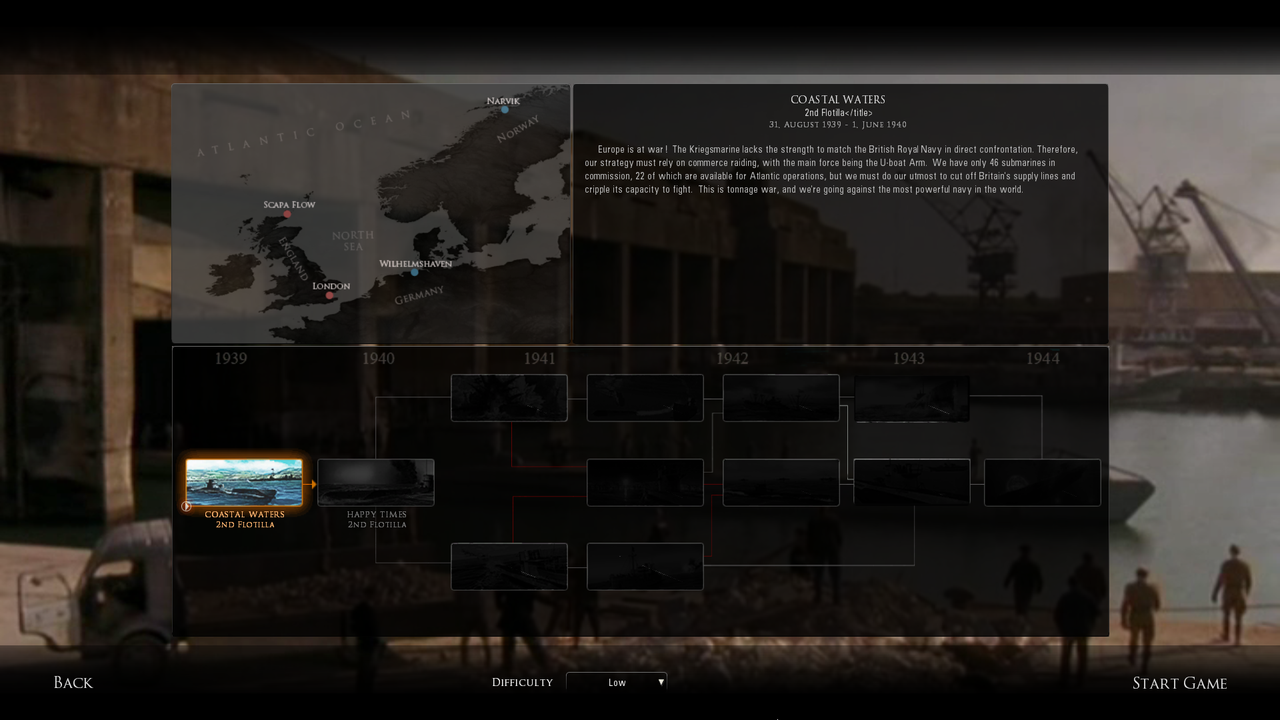
Picture 4 > Start a New Campaign and select the Low setting.
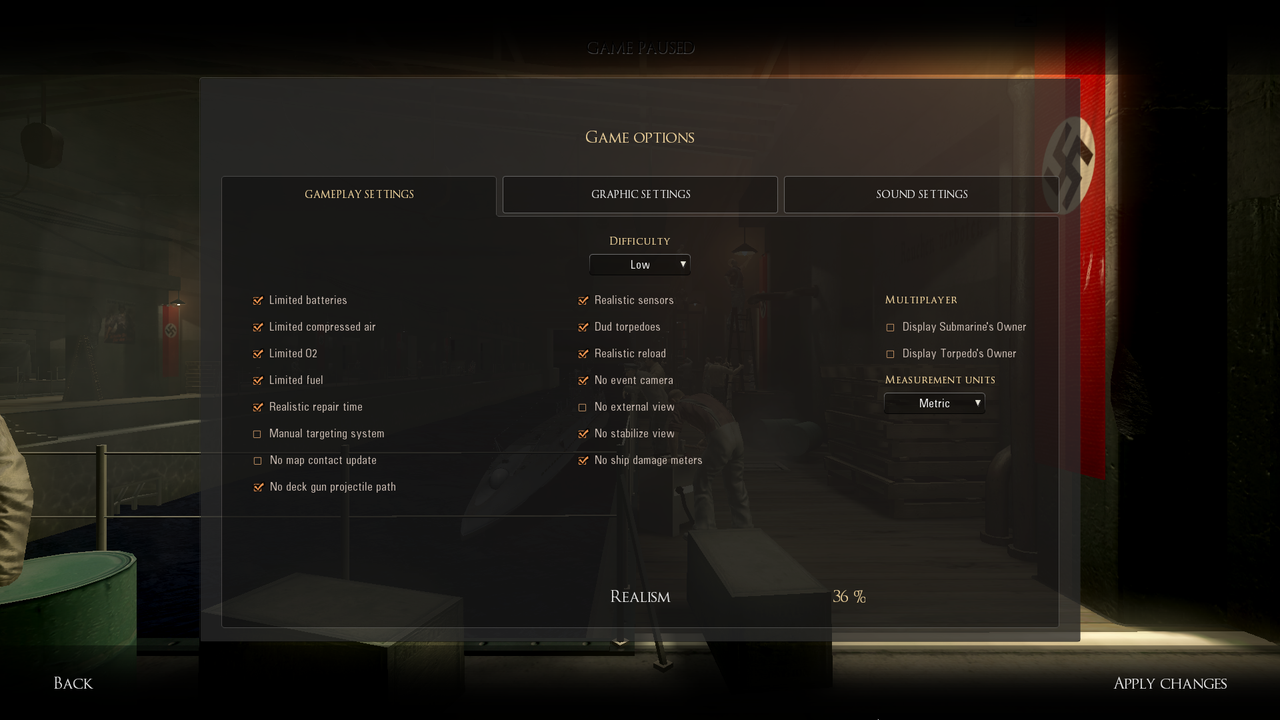
Picture 5 > Shows the Game Play Settings when the Low New Campaign setting is selected.
These settings can be changed at any time you are in the Bunker to suit your game play.
A Bunker save must be made to keep any changed Game Play Settings and then used to load the Game and Start the Mission.
Picture 6 > Shows the TAI Map button.
Click on it to show the map.
Use the Alt Tab key to Minimize Map > Open Map Full > Close Map
You will see how easy it is use when you have a target marked and using the Space Bar.
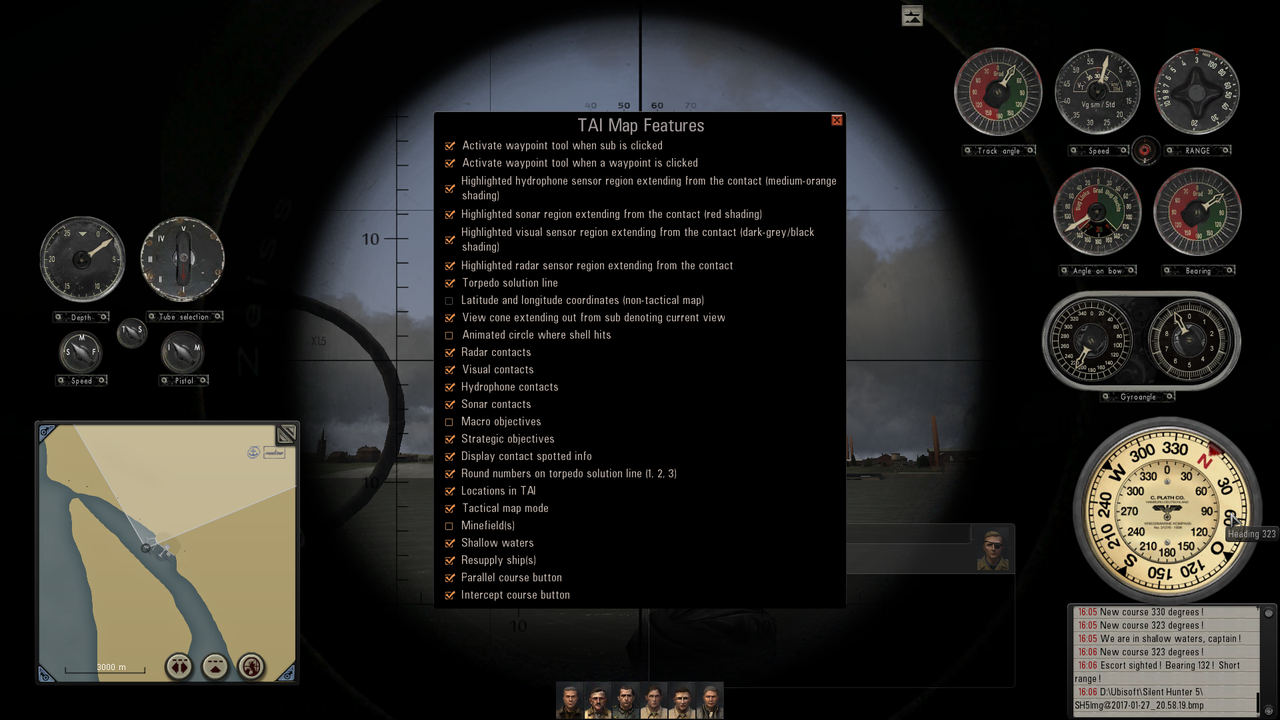
Picture 7 > Shows the TAI Map in the Minimized position and shows the customizing button.
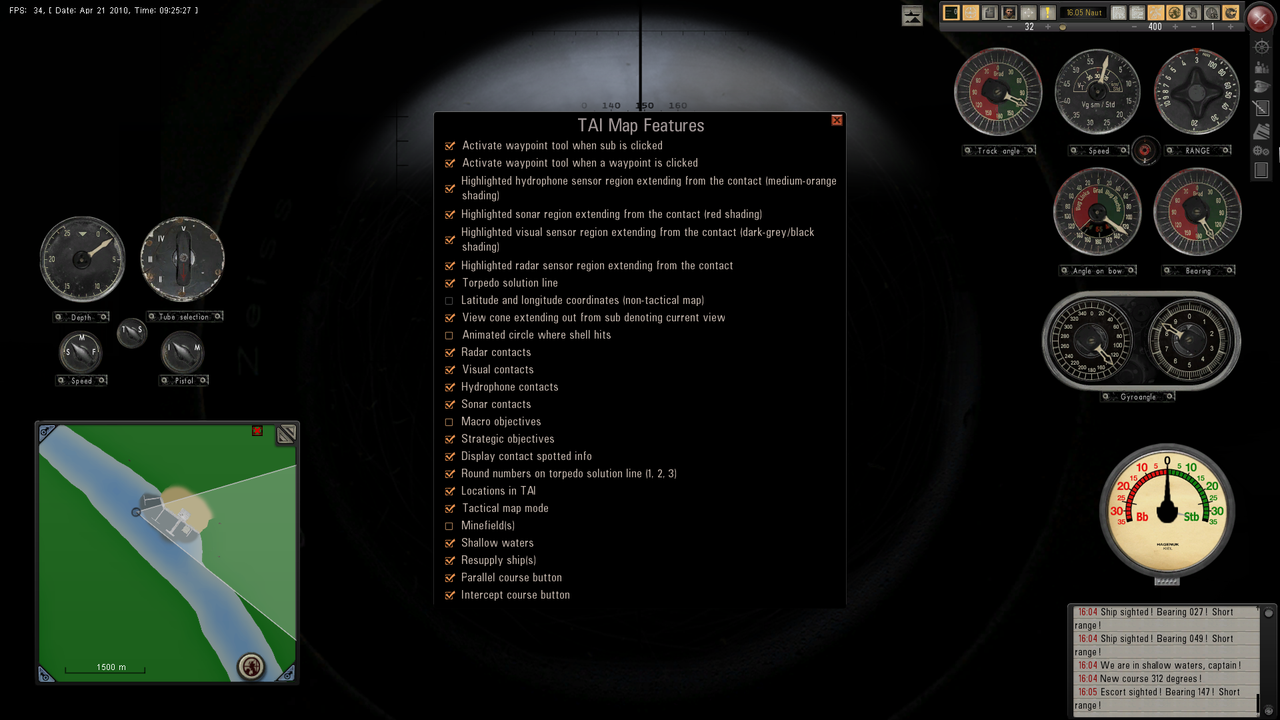
Picture 8 > Shows the patches that can be changed.
There are now 2 addition buttons showing.
Parallel course button
Intercept course button.
The picture shows the view cone extending from the U-Boat.
This is the visual current view.
Picture 9 > The Navigation Map button works exactly the same as the TAI button does.
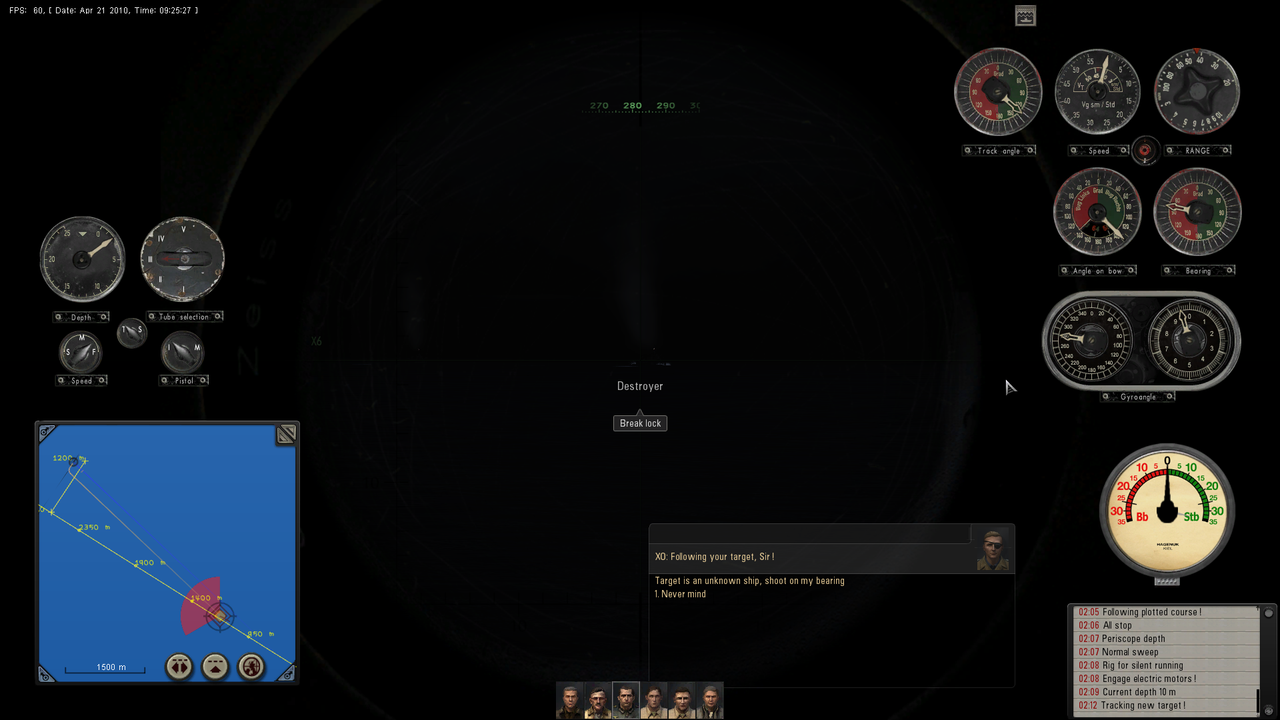
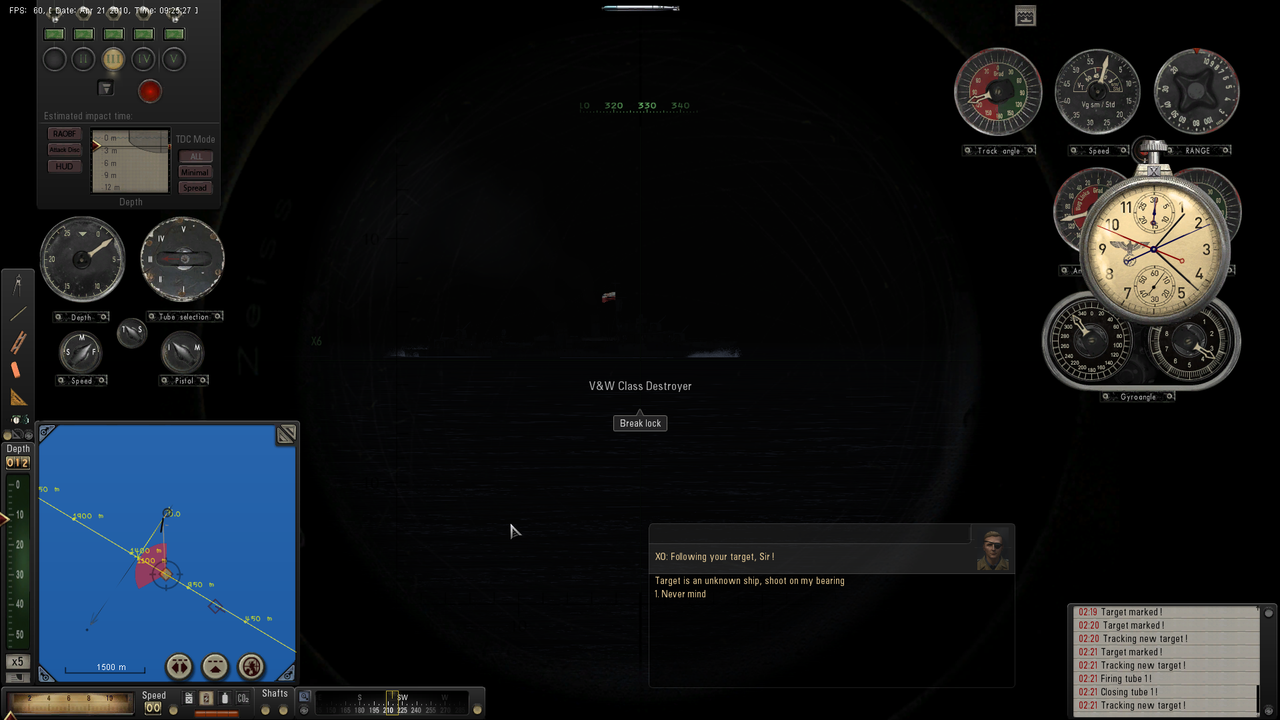
Picture 10 > Do not take any notice of the Dials as they are not needed in Auto TDC
The picture shows Break Lock which means the Space Bar has been used to lock the target.
I have drawn out the targets course on the TAI Map and positioned the U-Boat at 90ᴼ by using the protractor.
This is only a guide to show you the best shooting position but does not need to be drawn out for Auto TDC unless you wsnt to.
Notice the curved line extending from the U-Boat.
This is the Torpedo Solution Line (TSL)
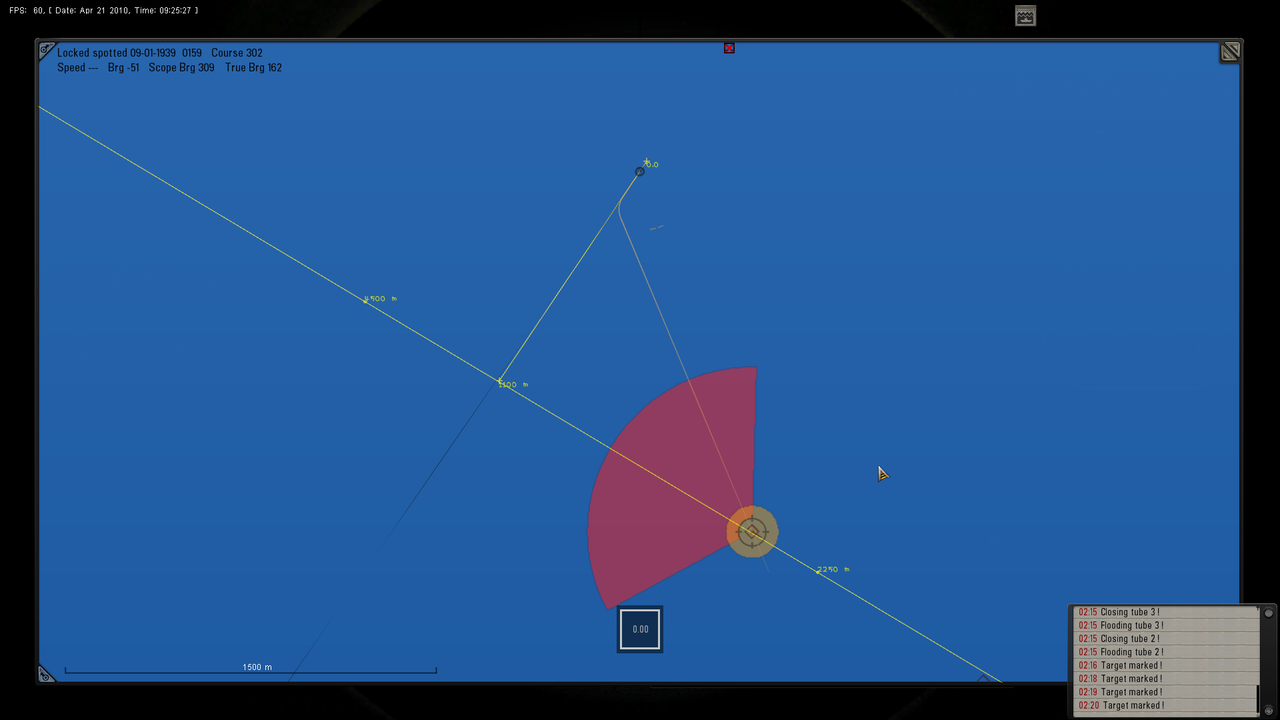
Picture 11 > Shows the TAI Map fully extended with the TSL positioned on the Target.
Use the mouse scroll wheel to zoom in and out.
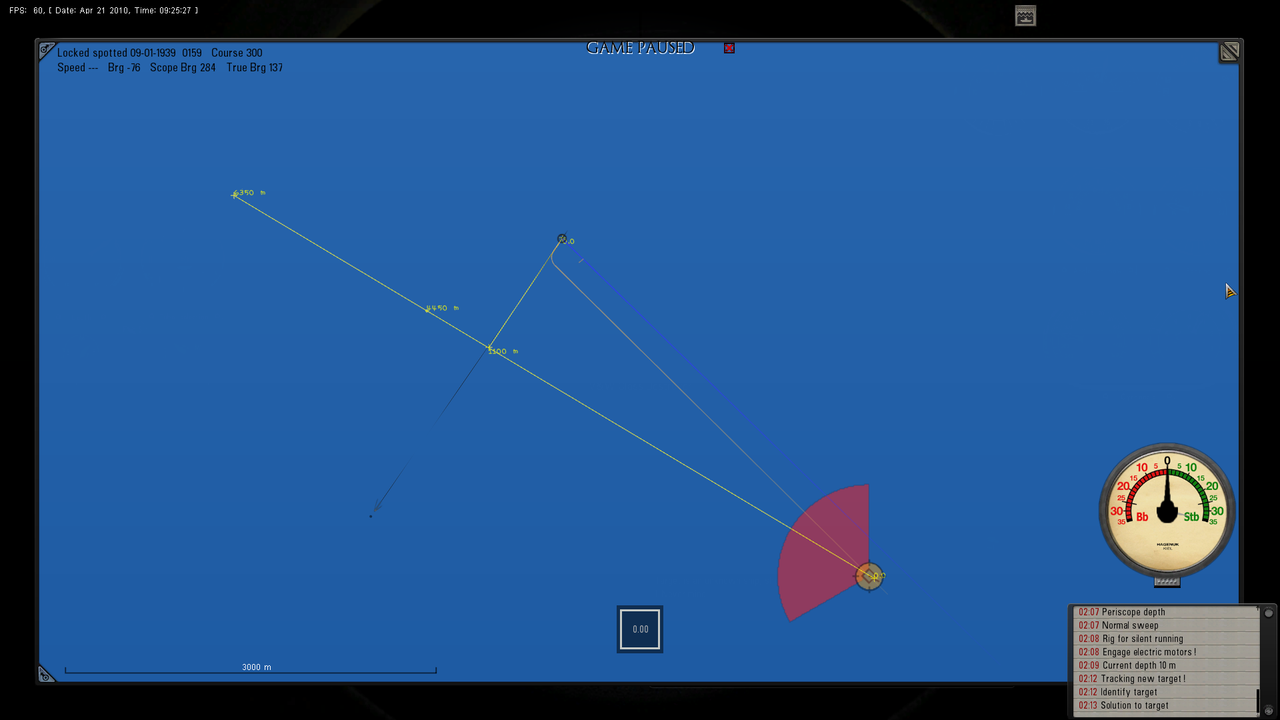
Picture 12 > Target locked with the Space Bar and showing the TSL (The line the Torpedo follows).
If the torpedo was fired now it would miss because obviously the Target will have moved a further distance along its course.

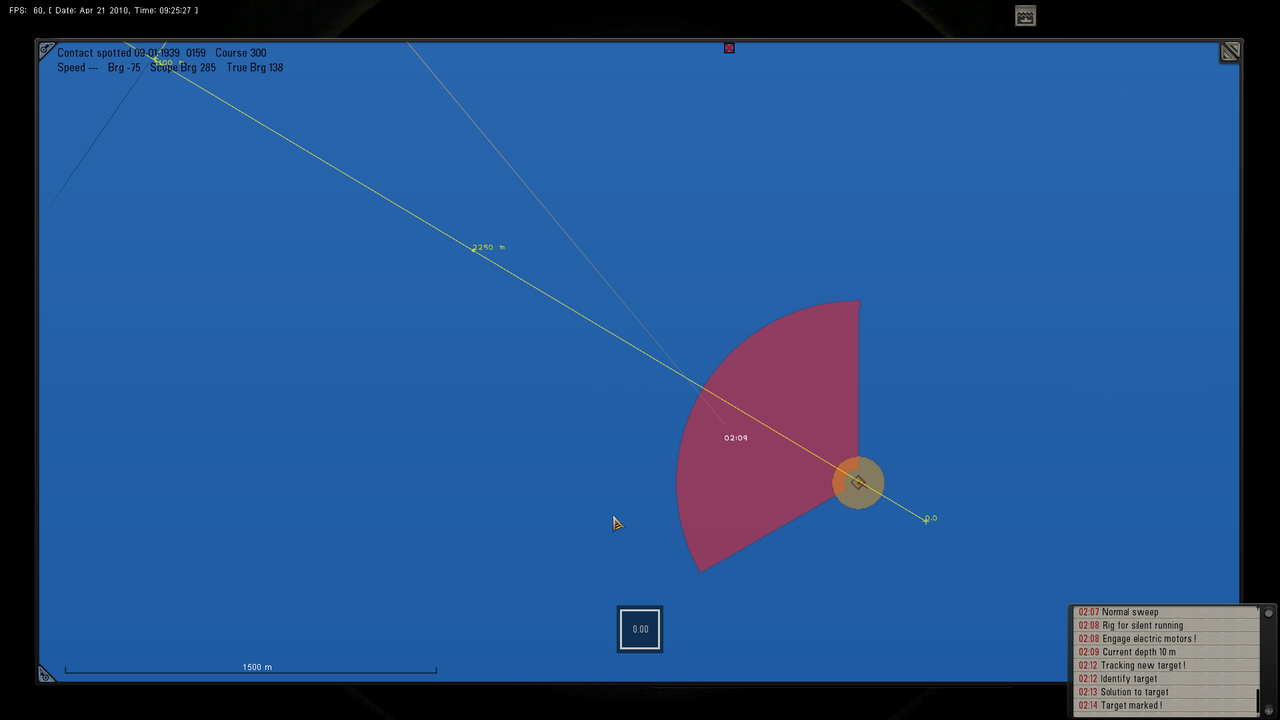
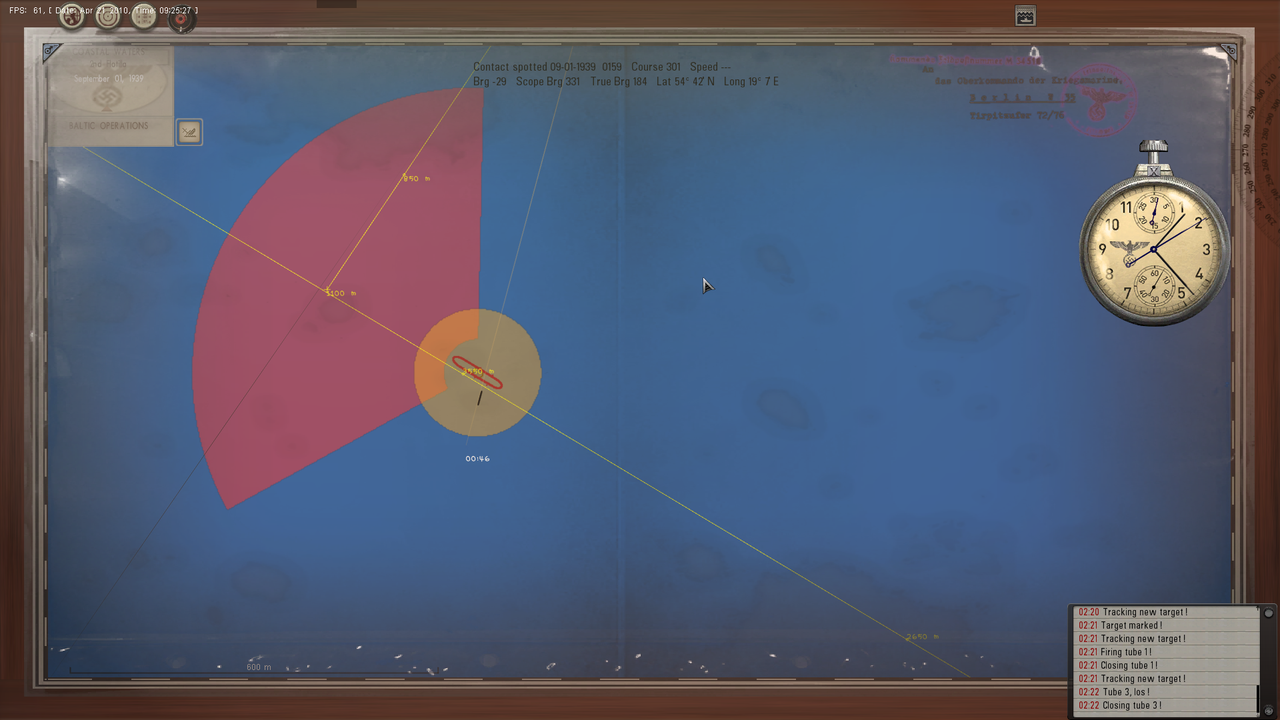
Picture 13 > Pressing the Space Bar has unlocked the Target.
Notice the new position of the TSL (The line the Torpedo follows).
The TDC has automatically calculated where the Targets position will be when the Torpedo reaches it.
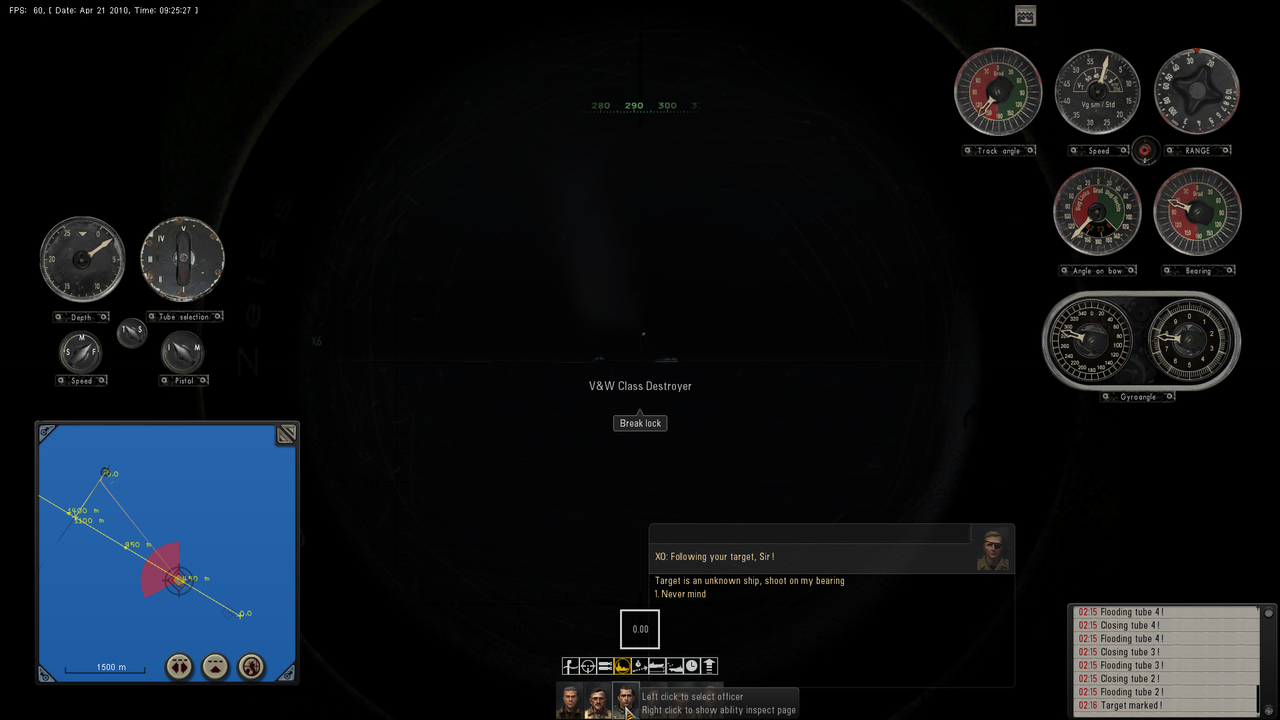
Picture 14 > Shows how you can keep the Target constantly locked by using the Torpedo Man to lock the Target.
Using the TAI Map and locking and unlocking the Target to show the TSL is not be affected by the Torpedo Man by keeping the Target locked.
Picture 15 > Final check with the Space Bar locked.
Picture 16 > Final check with the Space Bar unlocked.

Picture 17 > First Torpedo fired and on its way to the Target was a Deep runner.
Picture 18 > 3 Torpedoes were on Target and all were deep runners going under the Destroyer.
Notice the Torpedo has followed the TSL even though it ran deep.
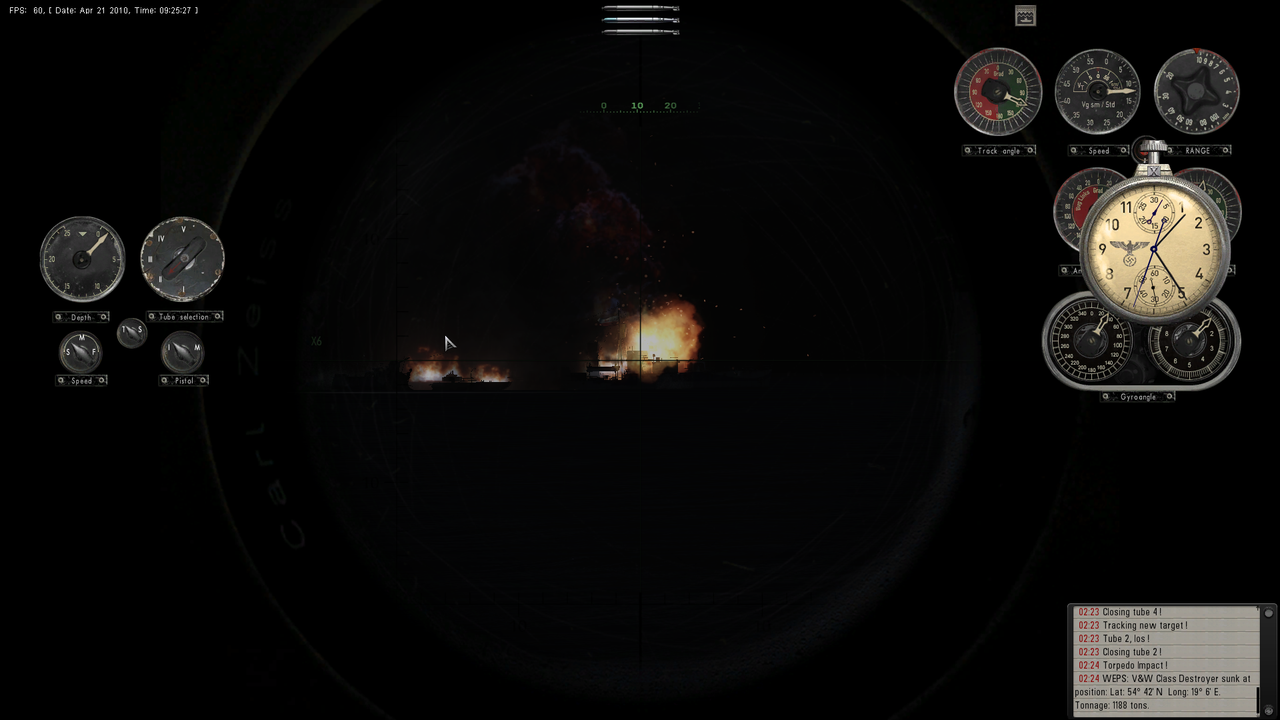
Picture 19 > Torpedo 4 hits the Target.
I still had time to re-lock the Target with the Space Bar and then un-lock and Fire Torpedo 4 at a different draft
Torpedo 4 hit.
3 Torpedoes still running.
This is a very flexible system and you will always have the opportunity to re-lock, un-lock the Spacebar and fire more torpedoes at ranges over 5,000 meters.
Last edited by THEBERBSTER; 04-27-18 at 02:52 PM.
Reason: Replaced missing pictures
|