A parting gift!
PDF Version of this -
http://files.filefront.com/SH4+Bump+.../fileinfo.html
This is primarily for Imported items.
For the purpose of this write up:
The Colour Map/Base Texture will be referred to as the Normal,
The Bump/Height map will be called Bump and then,
The Light/Shadow Map will be referred to as the Occlusion.
Primarily this document will tackle the creation & editing of SH4s Bump maps with a view of allowing porting of SH3 vessels.
Firstly, anyone creating Ships, Aircraft & Subs from scratch will benefit from creating their respective maps from within their 3D modelling suite, if you are proficient enough to create models then you should be able to render a full set of maps.
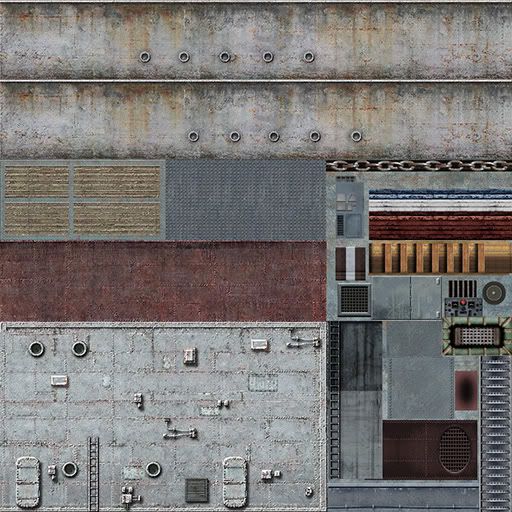
So we know what were all talking about, the Normal map is the .dds file that holds all the colour texture. An example of this is NBB_Yamato_T01.dds:
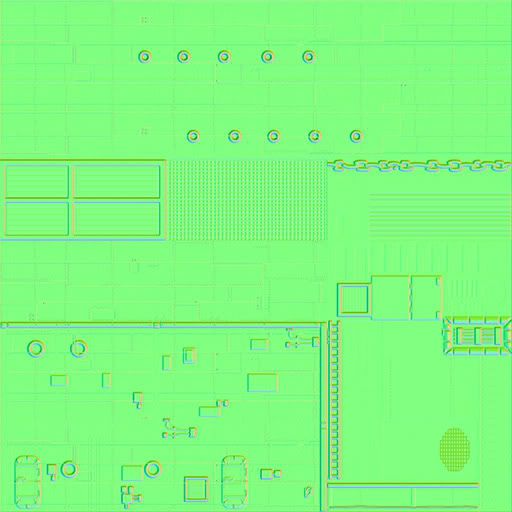
The Bump map for this vessel is NBB_Yamato_N01.dds:
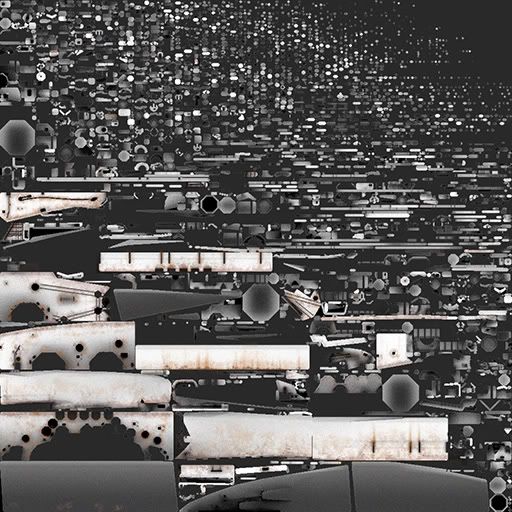
The Occlusion Map for this vessel is NBB_Yamato_O01.dds
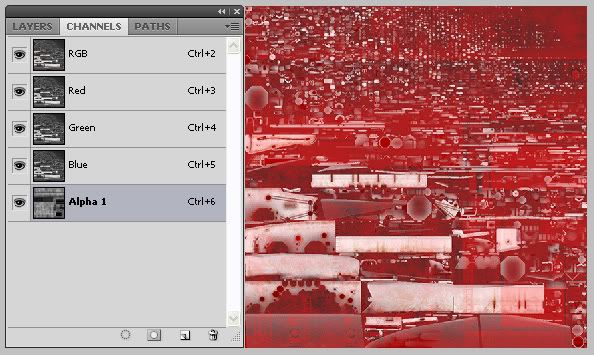
While we have the Occlusion Map in our minds, it is worth noting that it holds an Alpha Channel. This Alpha Channel is a duplication of the Normal Map. As shown below:
Well talk about how to add this detail in later. Although, currently I am unsure how SH4 uses this. Well add it for completeness.
To generate Bump maps for imported SH3 models, well need a Photoshop Plugin from Nvidia. There are various tools available from other software developers but I work & prefer Photoshop, also dang it, I paid for CS4, I want to use it.
You will need to install this plugin from the Nvidia website
: http://developer.nvidia.com/object/photoshop_dds_plugins.html
Once you have done this we can begin.
Ill continue to work with the file set from the Yamato as we will have SH4 Dev created version to compare our to.
Generating the Bump map from the Normal Map:
Open the NBB_Yamato_T01.dds in Photoshop, using Load Default Sizes when the popup prompts you.
With the Normal Map at full resolution you can see that its actually very dirty. This presents us a small problem as the method we are about to use will generate a Bump map from the virtual High & Low points on the Normal Map. These High/Low points are decided by their virtual colour depth.
If you compare the Normal Map with the Dev version of the Bump Map, you can see huge differences. Heres the Dev Bump Map with the Red & Blue Channel highlighted:
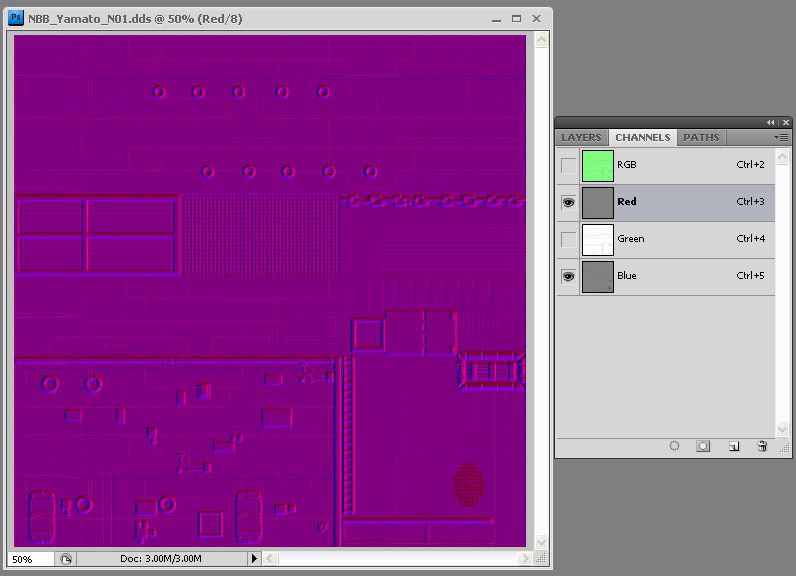
You can clearly see that the Normal Maps have been retouched after the generation of the Bump map.
The easiest way to accomplish this clean generation of a Bump map is to recreate your Normal map using only Black & White to allow the generation of High & Low points for the Nvidia plugin to use.
Remember, SH4 uses White as the Low Point and black as the High point. Grey can be used for a Neutral height.
For the purpose of this tutorial, Im not gong to mess about recreating the Normals in Black & White levels but rather demonstrate a way to muddle though using Channel Mixers and Negative Filters. It wont be perfect but if you want perfection, you need to go the long way and start from scratch.
Ok, using the Yamato Normal Map, we need to edit this texture so that the High/Low points are accented so that the Nvidia Plugin can use that information. Remember we are trying to get Low points as White and High points as Black.
Step 1) Either use the Black/White filter adjustment or use the Channel Mixer in the Layers palette. I assume you know how to do this.

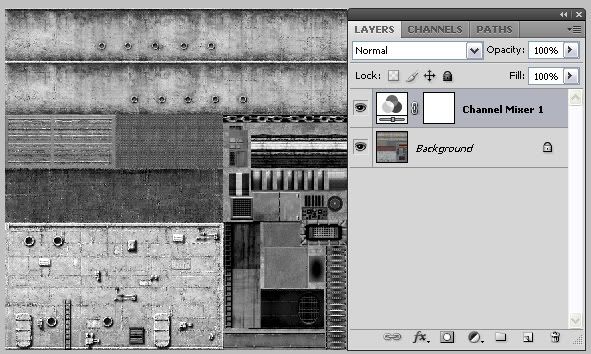
With the Channel Mixer active:
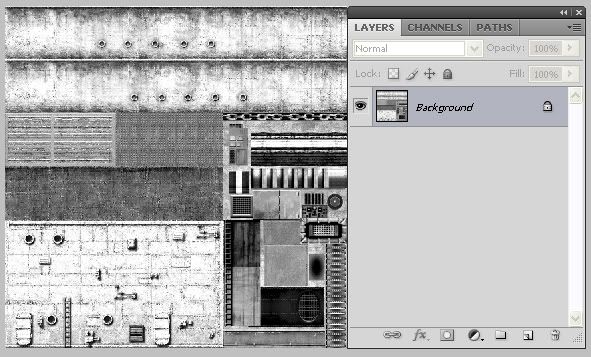
Step 2) Now Merge the Visible Layers. We do this because the Bump Map generation will only work with flat images.
Step 3) (Optional) Use the Contrast or Exposure adjustments to further accent your Black & White levels. I did:
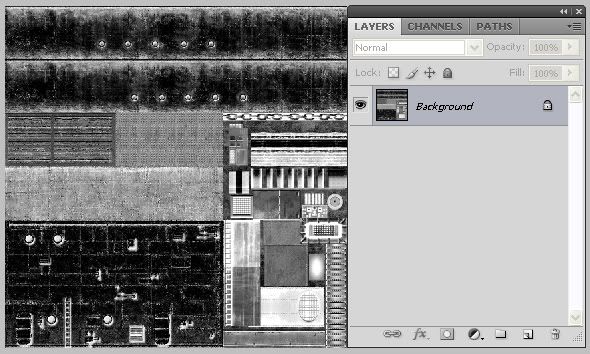
Now, if we generated a Bump Map from this image, our High/Low point will be reversed. We need to invert our image, I find using the Negative adjustment to accomplish this works best as it allows more control by using the Curves option:
Step 4) Use the Nvidia Filter to generate the Bump map. Filter > Nvidia Tools > NormalMapFilter.
Use these settings:
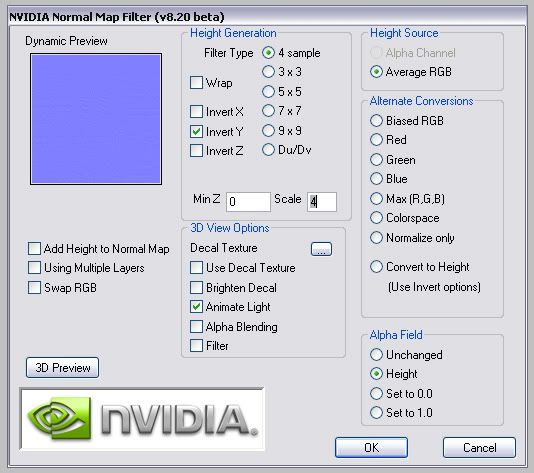
If memory serves, you must Invert the Y axis during creation otherwise some very strange lighting/shadows will occur when viewing at angles.
Click OK!
Now, you should notice two things.
Firstly, how dirty and undefined the Bump map looks. This is where a clean Normal Map comes into its own. If you take the time to create one you will get much better results.
Secondly, the more observant of you may have noticed that it looks nothing like a SH4 Dev Normal. Ah you say, mines Bluish Purple but theirs is Green, whys that? Well, Im unsure as to the reason but the Sh4 Devs swapped the Blue & Green Channels. You must do this as other wise your in game model will display some very strange colour traits.
For completeness, heres the method to swap the Channels over.
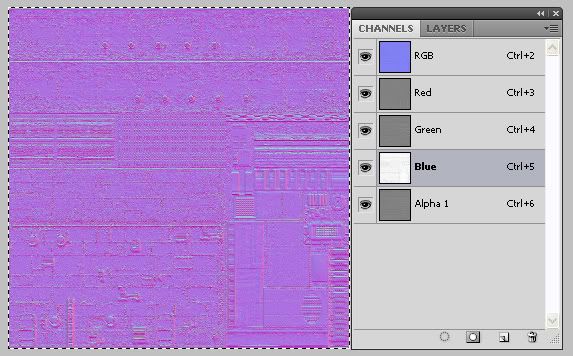
Arrange your workspace so that you can see the Bump Map and the Channels Palette, like so:

Click on the New Channel button at the base of the Palette. This will create a layer called Alpha Channel.
Now click on the Green Channel, the go Select > All. This creates a selection around the Green Channel. Now go to Edit > Copy. The Green Channel is now copied.
Click on the Alpha Channel to make it the active layer and then go Edit > Paste.
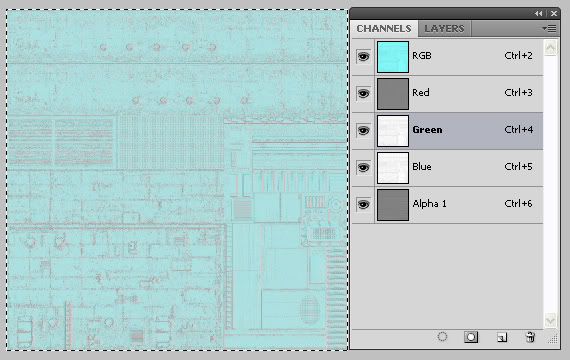
Your Bump Map & Channel Palette should now look like this:
Now click on the Blue Channel to make it the Active Layer.
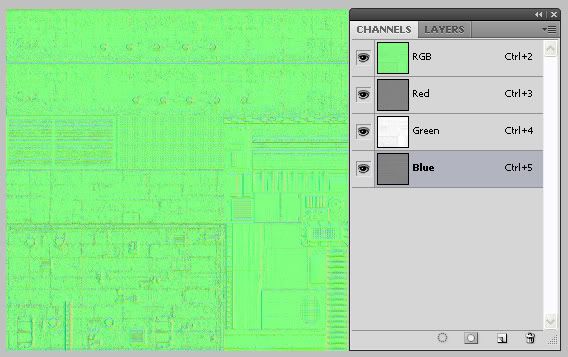
Go Edit > Copy. Then Click the Green Channel and go Edit > Paste.
Your workspace should now look like this:
Now, click on the Alpha Channel to make it the Active layer. Go Edit > Copy.
Click on the Blue Channel and go Edit > Paste.
Now, drag and drop the Alpha Channel to the Bin at the bottom of the Palette.
Your Bump map now resembles the Sh4 Dev version. Well Done! (You may notice that Port Holes are reversed in relation to the Dev versions but this makes little difference ingame. You can achieve the same result if making your Normal Map for Bump generation by hand.
To save your new Bump Map, use these settings:
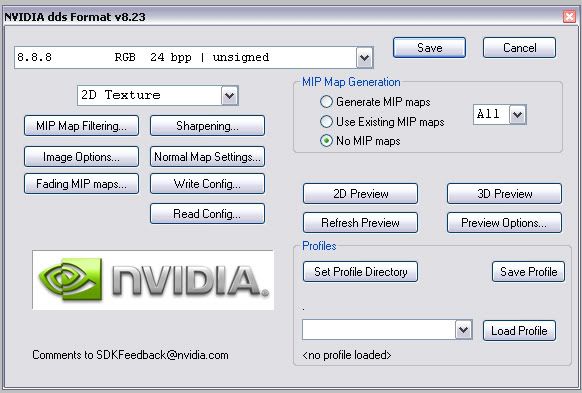
Using the shown format will result in a more accurate and better defined .dds file after the tool has compressed your finished file.
This ends the Bump Map creation tutorial. You may have to enable the vessels dat & roster cfg files to accept the additional files but Ill leave that to your or others.
Finally, do you remember that at the beginning of this tutorial I mentioned the Alpha Channel that was embedded within the Occlusion Map. Well now discuss how to achieve those results. Its rather easy as you have already done the basics by doing the Bump Creations.
Open NBB_Yamato_O01.dds & NBB_Yamato_T01.dds in Photoshop. For the purpose of this tutorial I have deleted the Alpha Channel in the Occlusion Map already.
Step 1) On the Yamato Normal map ensure that you have the Channels Palette open.
Step 2) Hold down CTRL and click on the Blue Channel. This creates a selection on the blue channel as so:

Step 3) Go Edit > Copy
Step 4) Make the Occlusion Map the active workspace. If you deleted the existing Alpha Channel as I did, create a new Channel, make it the active channel by clicking on it and then go Edit Paste. Enable all the Channels by clicking on the RGB channel. You should see this:
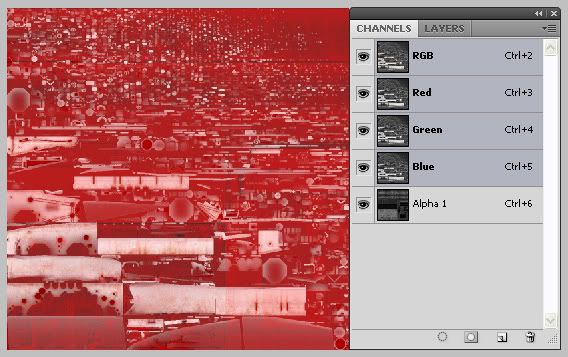
The same as the one first shown at the beginning of this document.
Step 5) Saving! As this .dds has an Alpha Channel we need to use a different format to save this and retain the information we just added to the Occlusion Map.
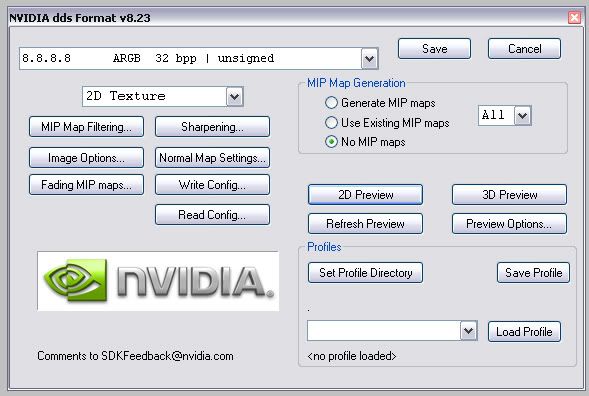
Using this format allows for both greater clarity/detail while retaining the Alpha information. Please note that you could use any of the Channels from the Normal map within the Occlusion map, I have noticed no difference ingame.
I hope this helps.
This is a quick and dirty way to generate these files for imported vessels. I dont propose that this is the best way but it works.
The terminology I have used may not be industry correct but I hope it was easy to understand for everyone.
This document was produced for the betterment of the Sub Sim community. Take it as it was meant.
Goodbye.