Ok... I know a lot of you allready know how to do this and talk about it in your posts, but I've yet to find an ilustrated example of how to do it (maybe there is, but I haven't found it).
Paul wasserman has, of course, an excellent tutorial available for doing this, but I thought I'd post something here, localy, instead of having to reference "outside" information. Besides, there are slight differences in the way that Paul and I do it, so... the more techniques you guys have at your disposal, the better

In order to not repeat myself too much, some previous knowledge is assumed. To learn more about stuff like the "3:15" rule, manualy inputing data to your boat's targeting computer, doing AoB the easy way and a whole of other stuff more, visit the following links:
http://www.communitymanuals.com/shiii
http://www.paulwasserman.net/SHIII/
http://subsim.com/phpBB/viewtopic.ph...larens+revised
http://www.subsim.com/phpBB/viewtopic.php?t=48026
Anyway, here we go.
The scenario is the following: You already have succesfuly intercepted an enemy contact, or managed to stumble into visual range of an enemy ship... whatever; the thing is, your watch crew have sighted the enemy vessel. There are two posibilities; either the ship is coming towards you, or heading away. The most dificult case is when they're moving away from you, as in this example, because you have to do an out-flaking maneuver in order to get a good ambush position (a run-around maneuver). What to do?
Start by ordering flank speed (yeah, that's what it's for... for out-flanking), staying on the surface for the whole excersice (until told otherwise), follow the next steps:
Step 1:
Click on the stop watch to start it (reset it to 0 beforehand if necesary).
Step 2 (Maneuvering the boat is now prohibited):
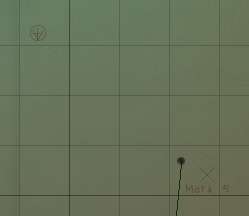
Very quickly, ask the watch officer for range and bearing to the nearest enemy ship (the only one in sight), and immediatly mark YOUR position on the nav map. These two actions must be done in one swift moment, before the stop watch advances from the 0 seconds mark significantly. If your a little slow to react, compensate by marking a spot a little bit behind your boat, instead of exactly on it, like so:
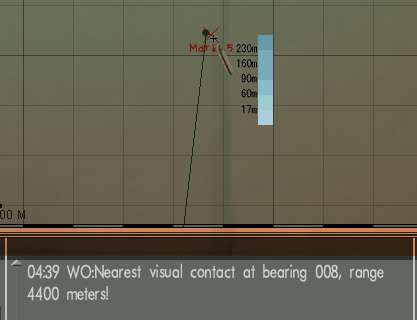
(the picture was taken several seconds after the mark was done, and hence the sub is quite a distance from it by now, I don't want to lead you into over compensating)
Step 3:
While the clock is running, draw the contact's bearing relative to your boat with a protractor tool. The protractor's vertex should NOT be centered on your boat's present position, but rather at the mark that you made when the watch officer called range and bearing to target. Your nav-map should look somtehing like this:
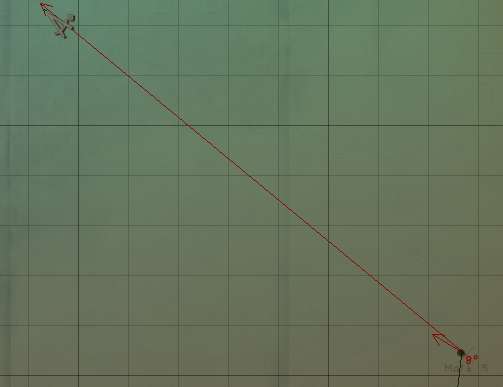
(ignore the navigation-plot-line in the picture, the u-boat wasn't following it).
Step 4 (You may now maneuver the boat if necessary):
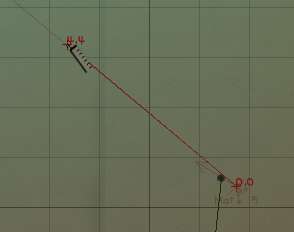
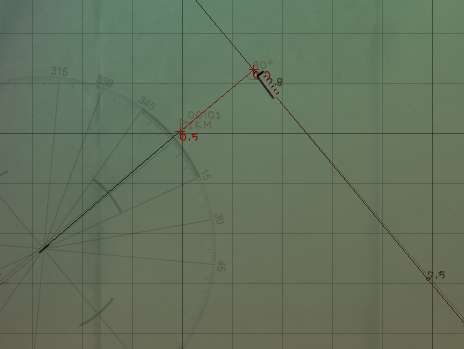
From the protractor's vertex (the marked spot), draw a ruler line equal to the target's range, following the protractor's direction (target's bearing), like so:
Step 5:
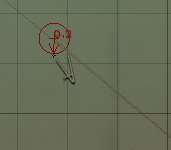
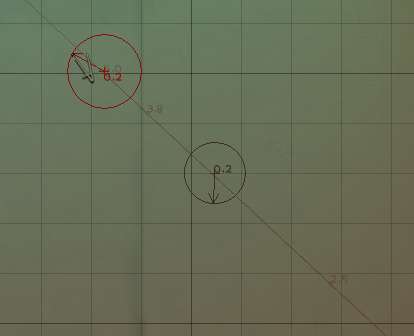
At the end of the ruler, draw a small circle (I like 0.2 radius) that represents the contact's whereabouts. We use a circle and not a dot, because the method is good, but not pin-point acurate. Limited drawing skills, not bothering to zoom in for precision, the game's use of simmetrical rounding when measuring distances on the nav-map, and the fact that the watch offcier rounds off distances to multiples of 100 meters, all contribute to a small margin of error, so be honest and use a circle to say "the enemy is somewhere inside the circle's area", instead of using a mark for a "precise" spot. Anyway, your circle should look something like this:
Step 6:
Clean up your plot. Only your boat's mark and the target's circle are what we want, so erase the protractor and the ruler. Keep in mind, that the circle is not exactly where the enemy is located at the present moment, but rather where he WAS when your boat was at the marked spot. Since then your boat has moved and so has he, but the info isn't too old, so it's OK. Anyway, your plot should now look like this:
Step 7:
Now, go back to the UZO or the attack periscope and stare at the stop watch. We're waiting for the 3:15 mark. In the meantime, make sure that you don't get too close to the enemy, or you'll be detected. Maneuver around the enemy contact if necesary to avoid detection, but always stay within visual range so that you don't lose him. If at this point you have no idea of exactly how you should be maneuvering, keep on reading, it gets clearer on steps 9 and 16. When you finaly reach the 3:15 mark, repeat steps 2 thru 6 to draw another plot, like so:
Step 8:
Now we wait until the 6:30 mark, and repeat steps 2 thru 6 to do another plot, like this:

Note that by now you can get a pretty good idea of the target's heading, so you can start realigning the circle's arrows to reflect this.
Step 9:
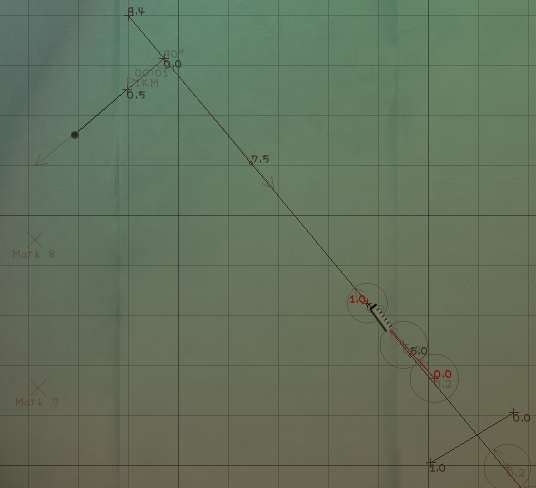
You repeat this pattern until you complete a total of 5 plots, representing the following times: 0, 3:15, 6:30, 9:45 and 13:00 (i.e.: every 3 minutes and 15 seconds). You can do only 4 plots if you want to avoid the 13:00 min. one (the stop watch only goes up to 12mins.), but it's really not hard to do (just let the stop watch go up to 12mins and then let it go around for one minute more). The nav map should now look something like this:
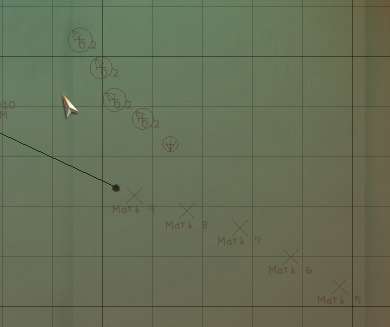
Notice how i've started to overtake the contact by starting an out-flanking maneuver on it's left side. Sort of like passing a car on the freeway. Remember not to get to close or you'll be detected. Because of how the protractor works, measuring the target's bearing is easier if it's at your right hand side, but it can be done on both sides.
Step 10:
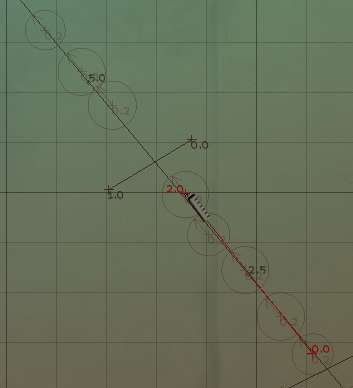
Connect the circles with a line to draw the target's proyected track. Also, reset the stop watch to zero, pause for a while (yourself, not the game) and then start ploting another set of five plots by repeating steps 1 thru 9. As a matter of personal preference, I like to draw a little line between sets of plots to separate them, like this:

Note on the picture that my third plot is kind of funky, so I only use from plot 4 and on to draw the target's "track". Also note the short line that separates plots 5 and 6 to indicate that they belong to different sets. Another line separates my boat's marks in the same fashion.
Step 11:
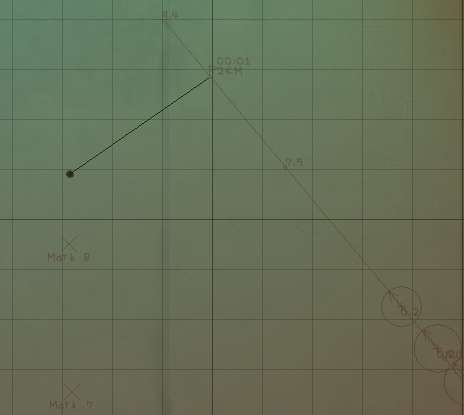
Several plots later, it becomes quite obvious that the enemy has been outflanked. At this moment you turn your boat directly toward's the target's track, SUBMERGING TO PERISCOPE DEPTH, like this:
Step 12:
For best results, use a protractor to ensure that your approaching the target's track at a 90 degree angle.

Step 13:
One sure way of not missing when firing your torpedoes is to do it while at extremely close range, so set up a nav point to stop your boat at about 500 meters from the enemy's track:
Step 14:
While the boat is on "auto-pilot", positioning itself at the ambush point, use the 3:15 rule to measure the target's speed from the plot's that you've done (in this example it reads 5knts):
Step 15 (optional):
Double check the target's speed by reading reading it from a different plot group:
(this is where the short separator lines come in handy, so as to not mix the diferent plot groups)
Step 16:
The end result should look like this:
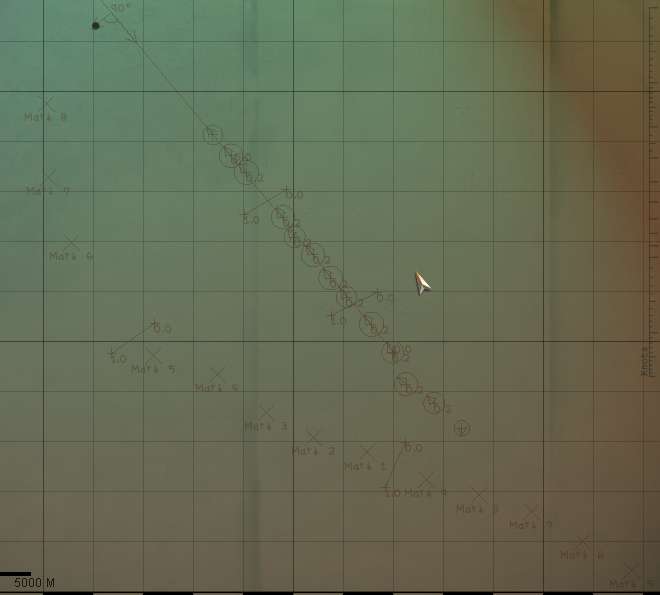
Notice how I maneuvered around the target and have now positioned myself in perfect ambush position along it's proyected track? Not only that, but from the plot I can determine the target's speed (already done) range and AoB, and can all be entered in the targeting computer to obtain a firing solution. That's all there is to it
